


Lovely Christmas Tree
Get into the Christmas spirit with this festive DIY project! Just follow six easy steps to create your own Christmas tree from a Styrofoam cone. Decorate your little tree with paint, rhinestones, and glitter drops for an extra festive touch. Give your decorated tree pride of place and enjoy your handmade Christmas tree.

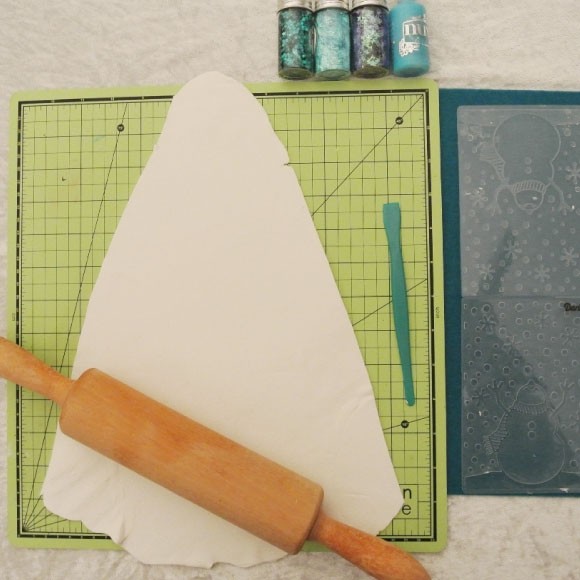
Roll out the clay so that it is big enough to cover the Styrofoam cone.
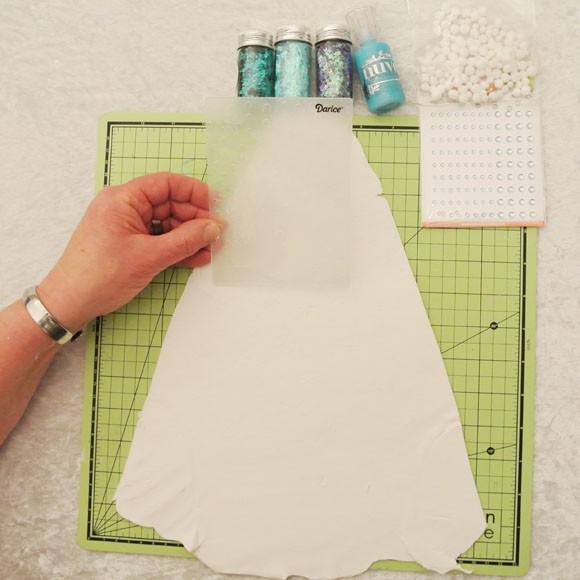
Place the snowman mold approximately 10 cm from the bottom edge of the clay and press firmly. Repeat this for the mold with snowflakes. Brush the cone with glue and drape the clay around the cone.
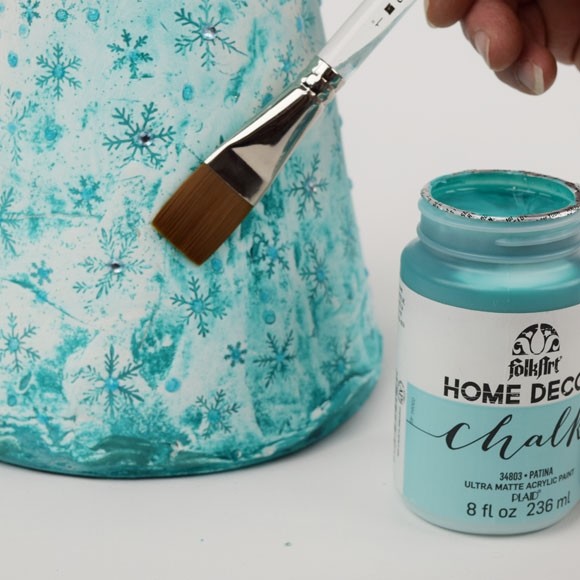
Use a small knife to smooth out any imperfections. Paint the clay, using a damp cloth to wipe away any excess paint while the paint is still wet. This is how you rub paint into the snowflakes.
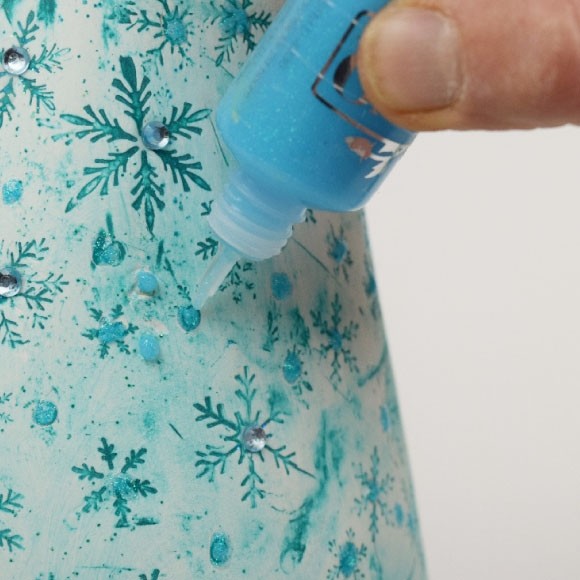
Apply rhinestones and Tonic Studios Nuvo glitter drops here and there in the snowflakes.
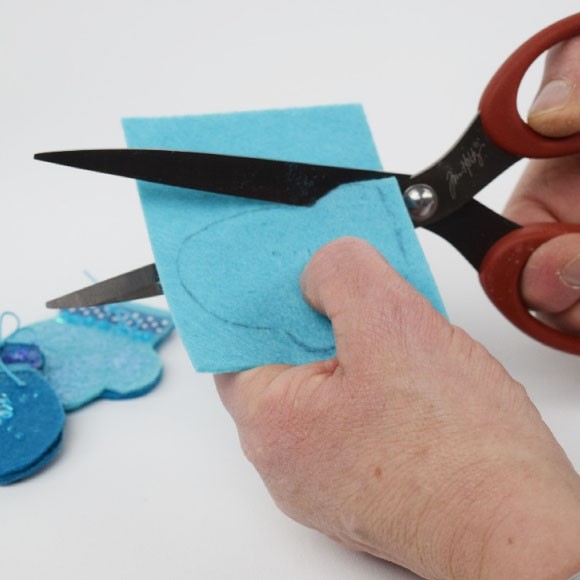
Cut a pair of gloves from felt and decorate them with glitter and cords.
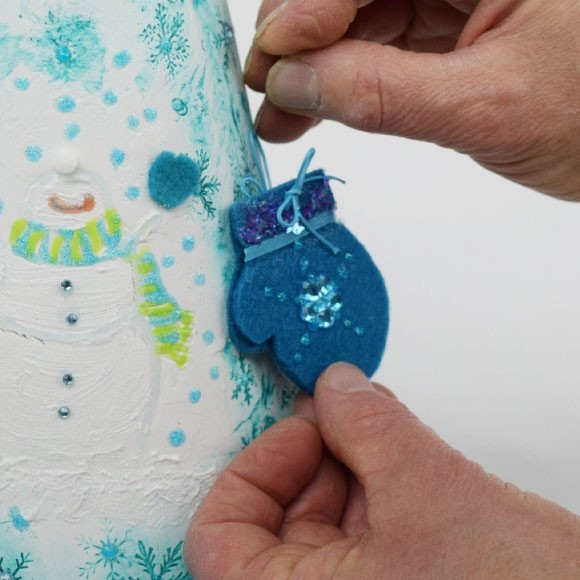
Color in the snowman with Nuvo drops. When everything has dried nicely, attach the gloves to the cone using pins.


Frequently asked questions
Have a question about this project?