


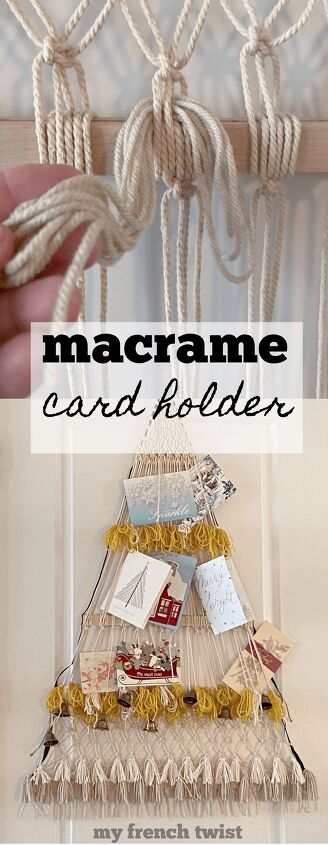
Macramé Christmas Card Holder
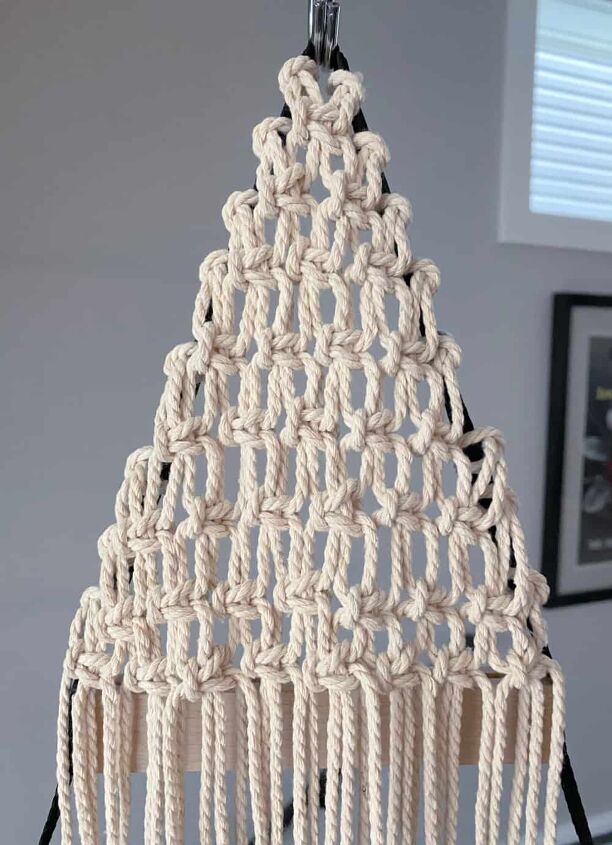
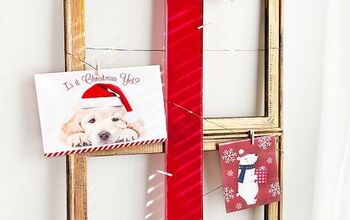
Browsing through Ikea recently, I spotted a wooden tree-shaped wall decoration used for displaying Christmas cards. I didn’t even realize it was a card holder at first but tossed it in my cart anyway. I thought I could embellish it somehow for the holidays. Three days and 220 feet of rope later, here’s what I came up with – a bohemian inspired macramé Christmas card holder.
(This post may contain affiliate links; as an Amazon associate I earn from qualifying purchases. See disclosure here.)
supplies needed:
- Ikea card holder ( Target also carries one)
- 3mm rope – 220 ft.
- gold, cream & taupe yarn
preparation
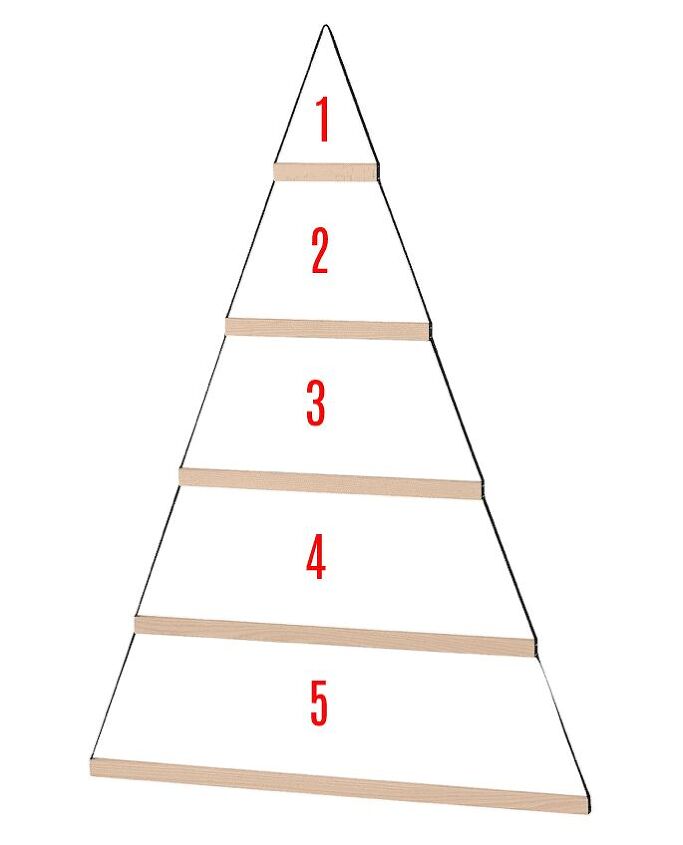
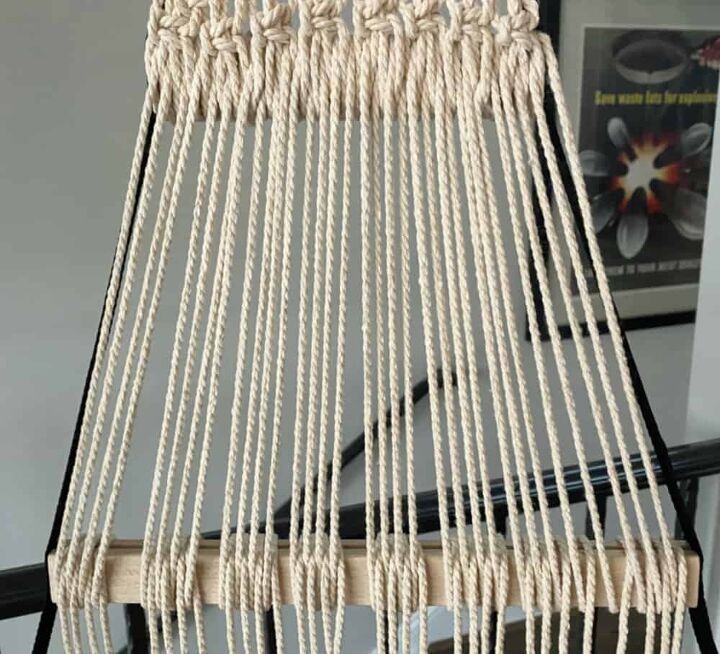
Cut 24 pieces of rope, each measuring approximately 100″. Cut 4 more pieces, each measuring 60″. Wrap all ends of the rope pieces with masking tape to prevent fraying while working. When following this tutorial, keep in mind that it is divided into 5 sections, as shown below. Begin with section one (top) and work to bottom.
section 1
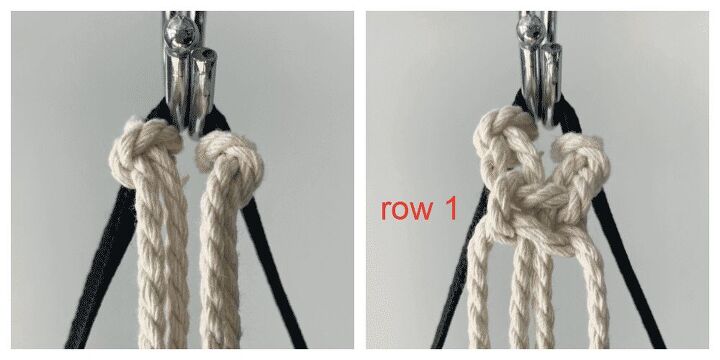
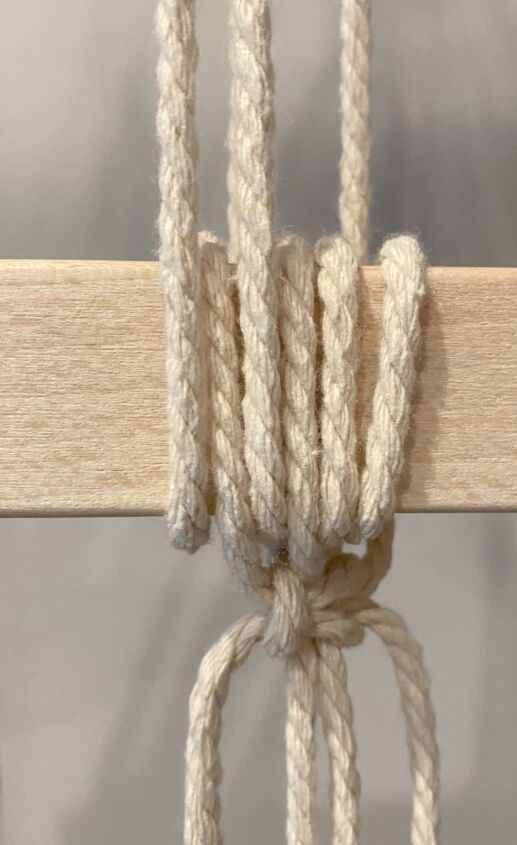
First, tie 2 pieces of rope (100″ in length) onto the top of the handle, using Lark’s Head Knots. Then tie those 4 individual strands into one Square Knot. (Shown below.)
Next, tie two more pieces of rope (100″ in length), one on each side, using a Lark’s Head Knot.
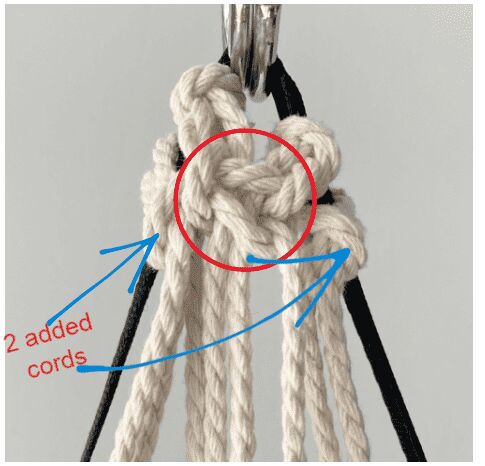
You now have 8 individual cords hanging. Starting with the first cord on the left, make a horizontal row of 2 Square Knots.
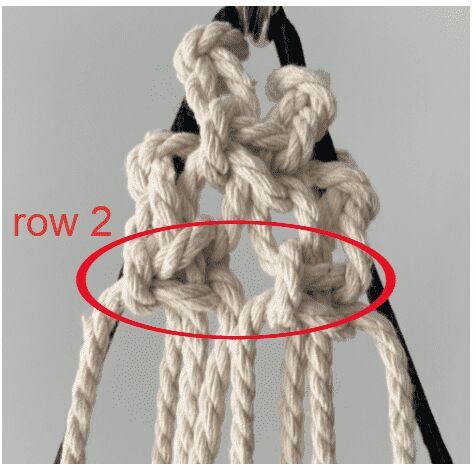
Continue this process of adding a rope (100″ in length) to each side then making a row of Alternating Square Knots. Continue until you have 8 horizontal rows.
To complete Section 1, secure each rope to the wooden bar by wrapping it around the bar then pulling tightly, as shown in photos below.
section 2
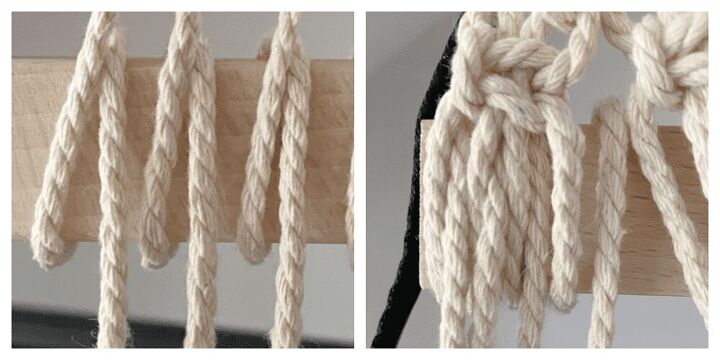
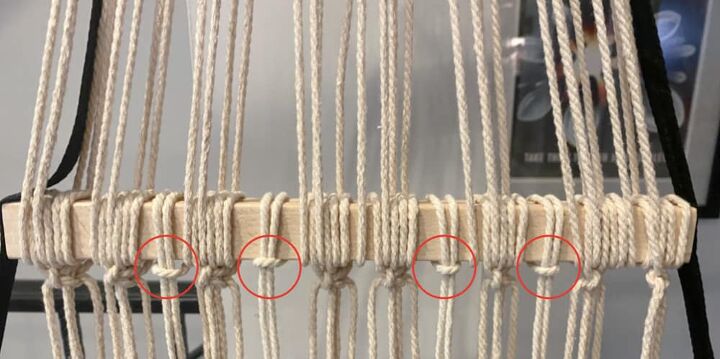
For Section 2, pull the ropes tightly then wrap around the second wooden bar in the same fashion as the first bar.
Then add 4 more 100″ long ropes (tied in Lark’s Head Knots) to the spaces on that same bar, as indicated by the red arrows below.

section 3
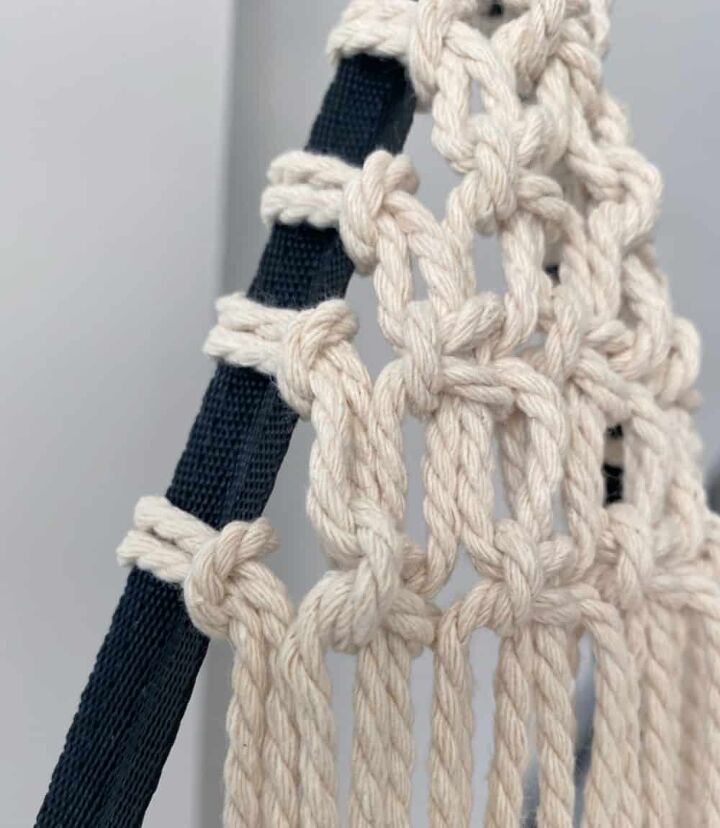
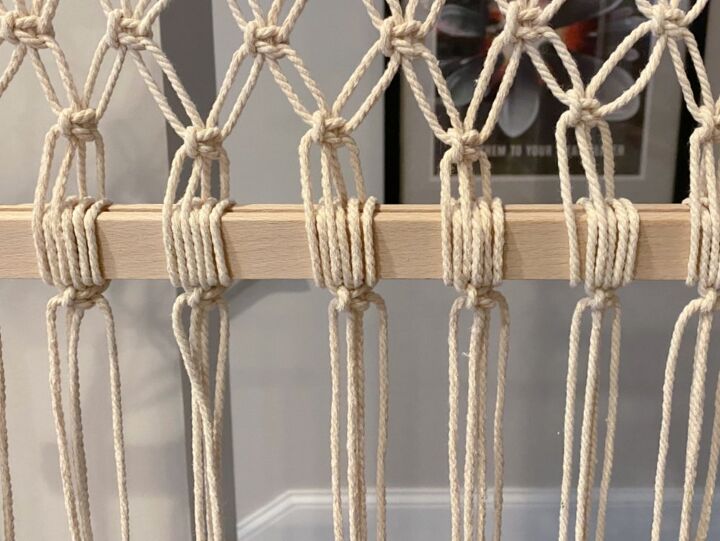
For this section, pull the rope tightly and wrap the ends around the third wooden bar. However, this time, alternate the direction the cord is wrapped for every two cords. Pull first cord down over the front of the bar, then under, back up and over. Repeat for the second cord. For the third cord, pull it down behind the bar, then under, back up and over. Repeat for the fourth cord. Pull all cords tightly then tie the four strands into a Square Knot. Continue this process for all of the cords.
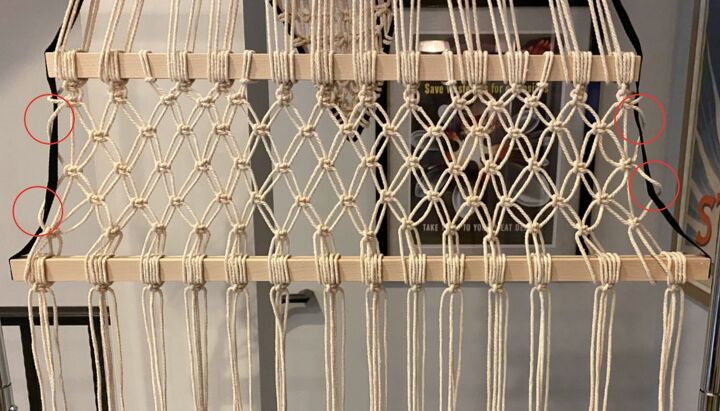
Once this is done, go back and tie 4 more cords (100″ each), using the Lark’s Head Knot into the spaces as shown below.
section 4
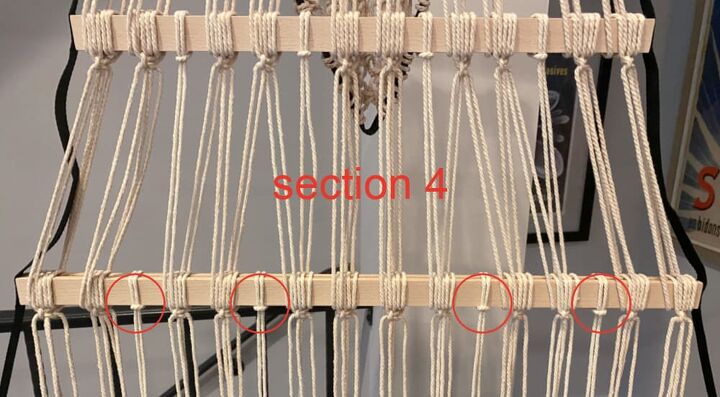
Repeat Section 3. Notice that you once again add 4 more cords tied with Lark’s Head Knots to the bar (circled in photo below.) However, these 4 cords are each cut only 60″ in length.
section 5
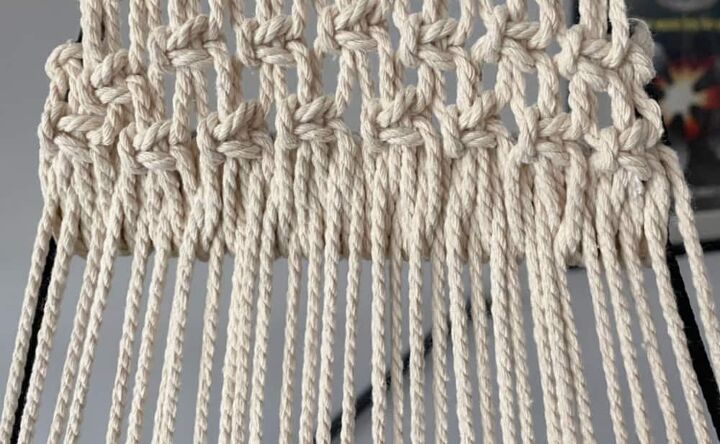
Starting with the first 4 individual strands on the left, make a horizontal row of Square Knots. Notice how I looped the Square Knots on each end around the black canvas strip to help keep the body in place.
Next, starting with the thirds individual cord from the left, make another horizontal row of Alternating Square Knots.
Continue this process until you have 5 horizontal rows of Square Knots, as shown below. Notice how I looped some of the outside cords around the canvas side strips to keep body in place. Finally, tie the cords to the bottom wooden bar using the same process as shown in Section 3.

embellishments
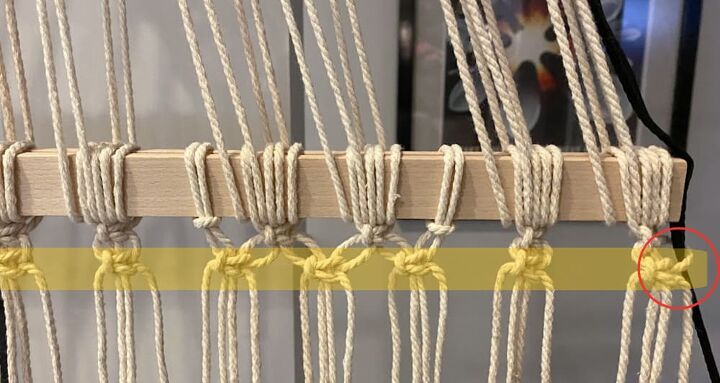
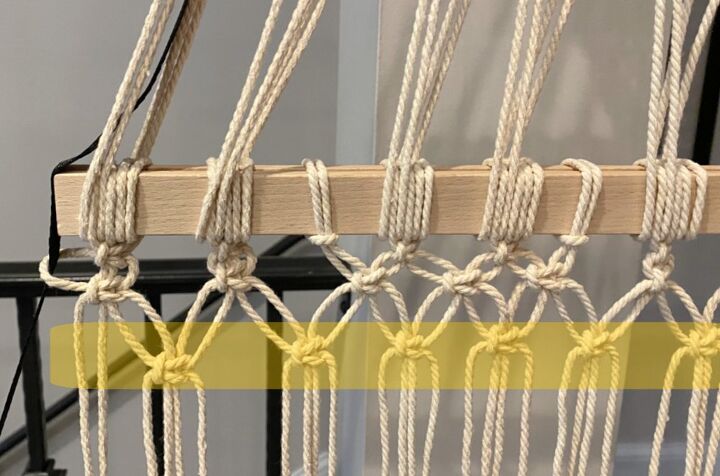
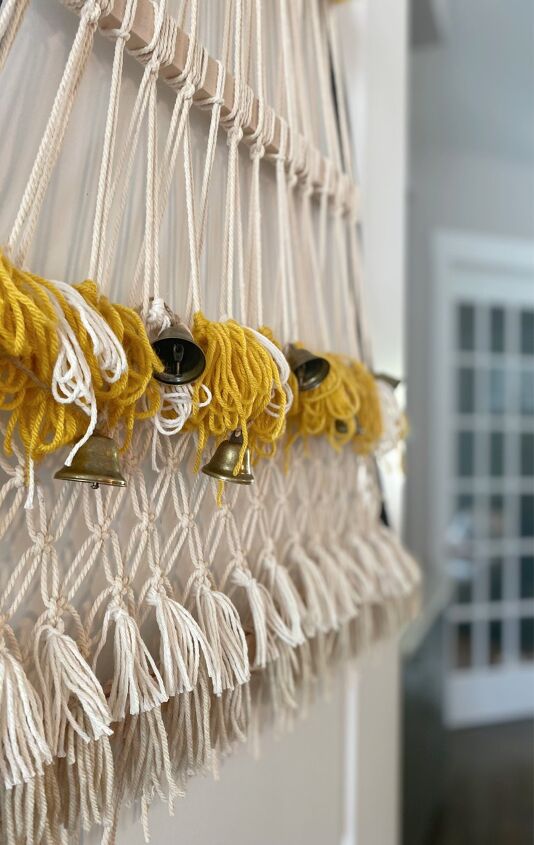
Tie clusters of yarn onto the strands of rope just above the second and fourth wooden bars. I used gold and white yarn in a random fashion.
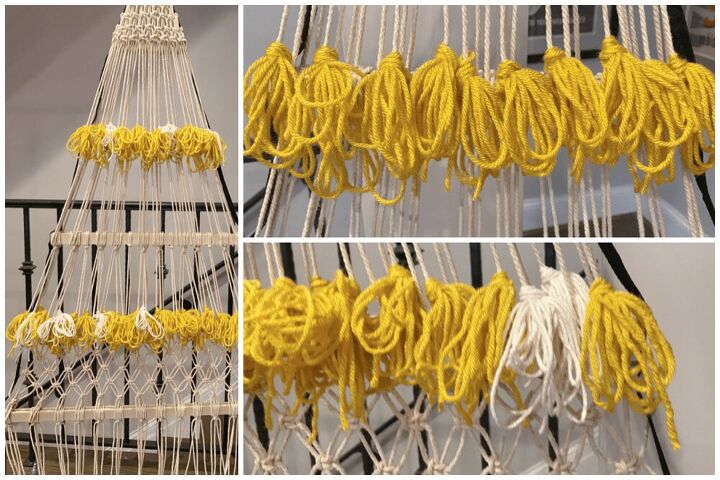
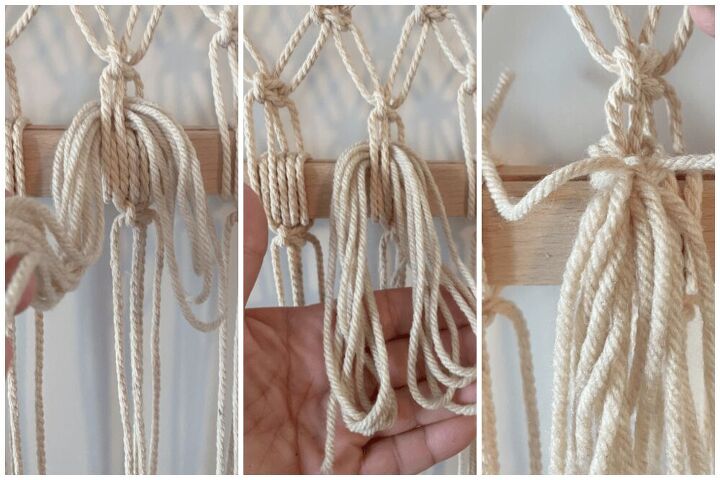
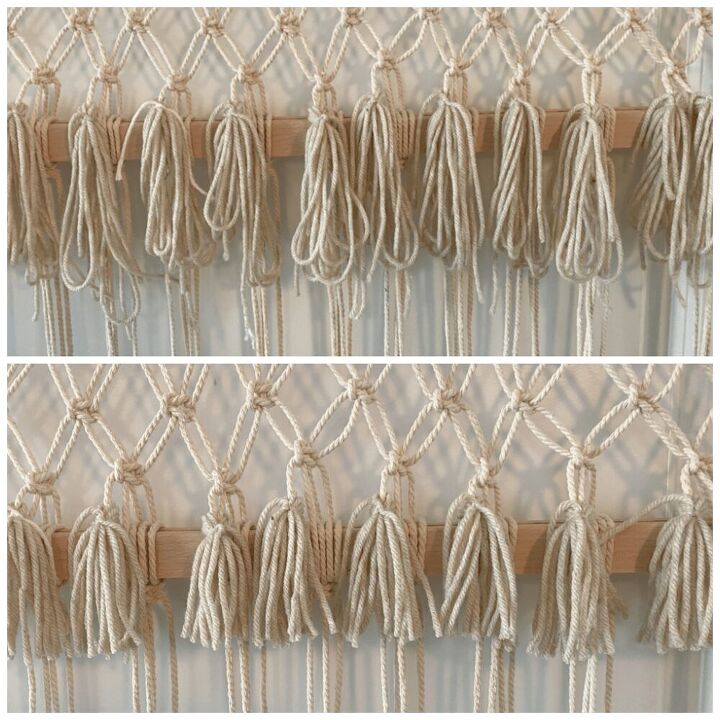
Across the bottom wooden bar, create tassels with taupe yarn, following the process shown in photos below.
Once the tassels are tied, trim the bottoms evenly across.
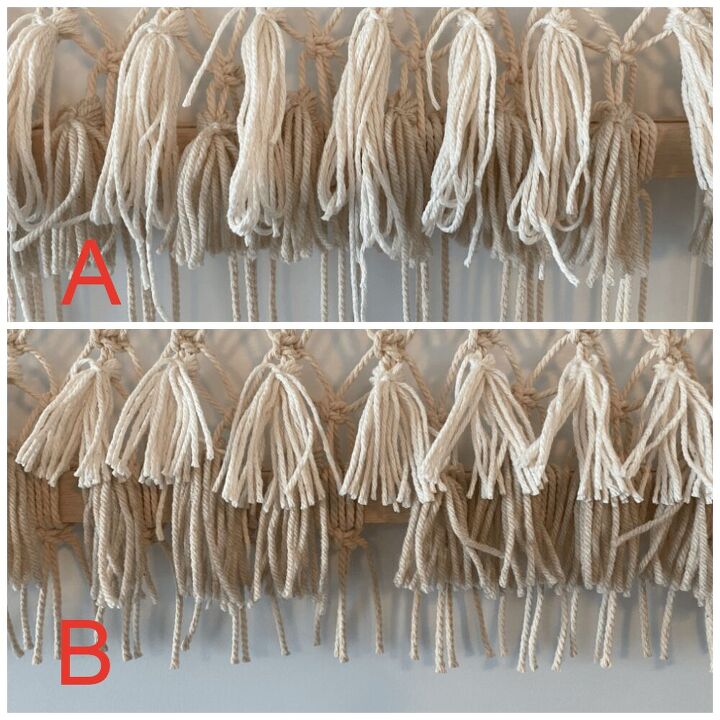
Now tie a row of tassels using white yarn just above the row of taupe tassels (photo A below). Then trim the ends of the white tassels as well as the bottom layer of loose macramé ropes (photo B below).
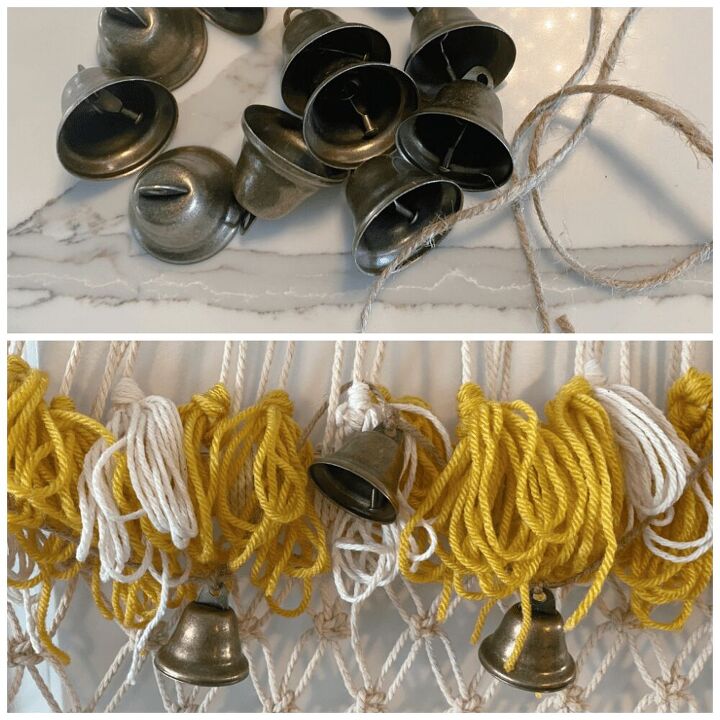
Lastly, I tied some small metal bells onto a piece of twine then laced it through the white & gold row of tassels.
Feel free to embellish the card holder with any trims and yarns you prefer. Once done, hang it over a door and begin displaying your holiday cards! You’re certain to get compliments on this unique macramé Christmas card holder.
The biggest compliment is a little share – pin the photo below!


Comments
Join the conversation
-
I agree with Linda! I like it without the cards! SO pretty! Thanx for sharing!
-
I like the tree form. Finally a macrame I enjoy. Adding cards great idea. Thanks for sharing


Frequently asked questions
Have a question about this project?
So what exactly was purchased from IKEA? The frame?