


Mini Wood Stacked Books DIY
I have seen all the adorable stamped books stacks and wanted to give mine a twist.
I love making things for tiered trays and I thought why not make stacked books for tiered trays. Only problem, where to find small size books with a larger spine. (To be truthful I hate the idea of painting a book.) So I decided to use some scrap wood which was 3/4" wide to create my version of the book stacks.
I took the scrap wood and used my miter saw to cut the wood. The size I used was 5.25" long x 3.25" wide.
The scrap wood I used had some small holes and imperfections (cracks in the wood) in it. If I painted it with the imperfections the wood wouldn't have looked smooth enough for the books. I usually leave imperfection but not this time.
I used some sheetrock mud and rubbed it into all the holes and cracks. I let the sheet rock mud dry overnight.
Then next morning I sanded the books to remove the excess sheetrock mud and that left a pretty smooth surface.

I used red chalk paint and painted both the books with 2 coats. Making sure I painted the top and all 4 sides.
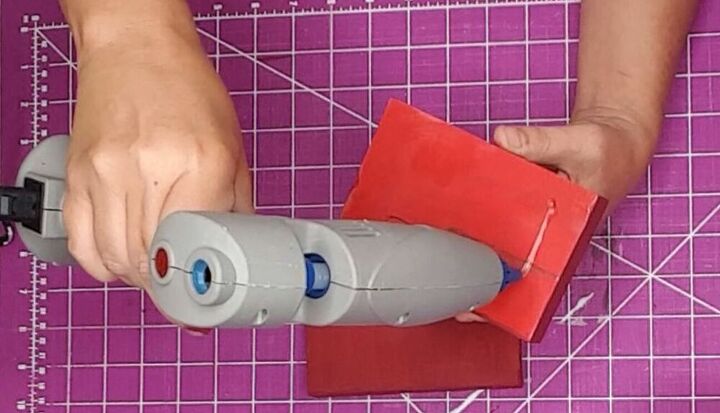
After the paint dried I used my hot glue gun to glue the 2 books together. I held them together to make sure the glue had a secure bond.
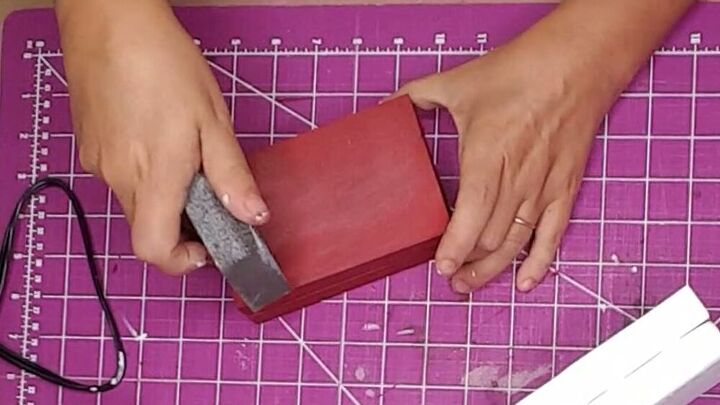
I used a sanding block to distress the "books".
*HINT - After sanding I spray rubbing alcohol onto the wood and wipe it with a paper towel. This helps to remove the dust from the wood and the alcohol dries quicker than water.
Next, I used the hint above.

I used my Cricut to cut out Merry Christmas in a Rae Dunn inspired font. If you don't have a cutting machine you can use a white chalk marker and simply write the saying you want on your books.
I added the vinyl cut outs to each of the books.
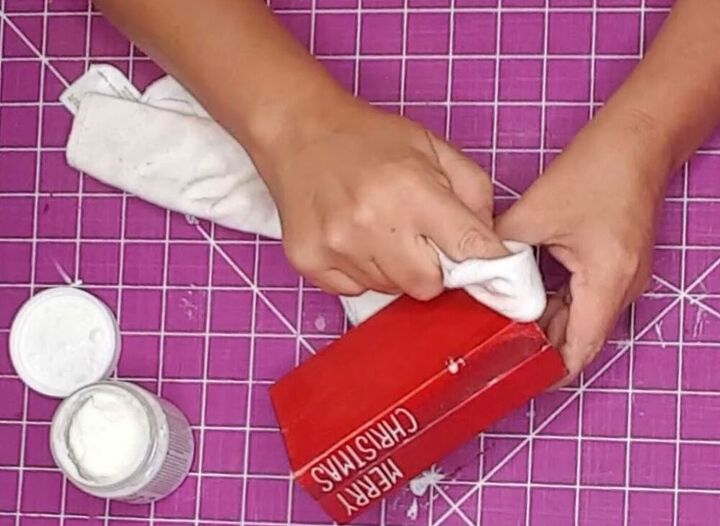
I usually apply mod podge to my products. You can do that here but I had picked up some Americana Decor Creme Wax and wanted to give it a try.
I took a soft cloth and rubbed the wax onto the wood book and then buffed the wax using the same cloth.
The wax gave the look a little bit of a shine but not too much.
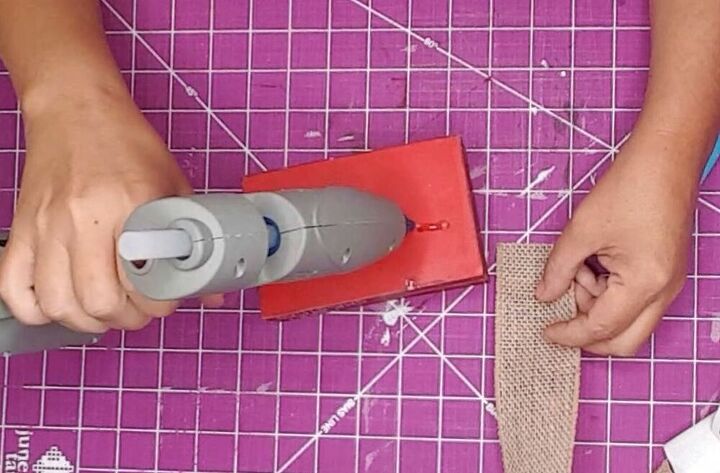
I added a piece of wired burlap ribbon to the book stack. I used my hot glue gun and attached the end of the ribbon to the center back of the book.
I wrapped the ribbon around the book and hot glued the other end.
To make the bow on top I took another piece of the wired burlap ribbon and folded it onto itself 3 times. I held that in place and white a piece of white lace ribbon around the burlap. I then hot glued the ribbon stack on the back.
I placed the ribbon on the burlap on the "books" and hot glued it into place.
I felt like it still needed something so I took a sprig of greenery off of a Dollar Tree ornament and added it to the bow.
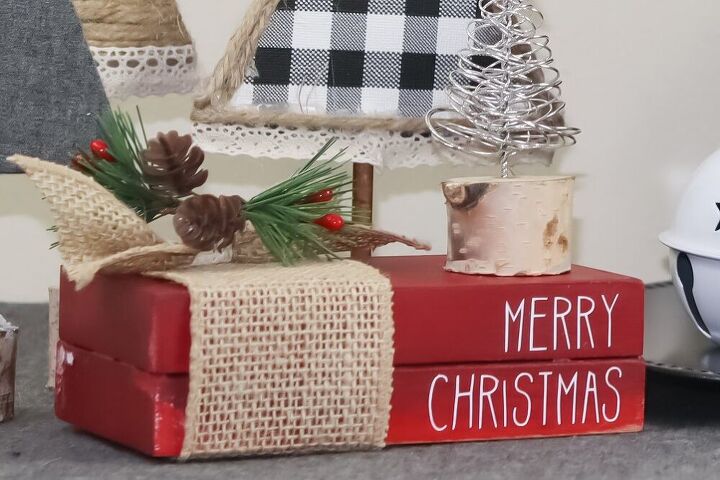
These little books can be used for any occasion depending on the words you add. I wanted this one for Christmas.
I love the way this set turned out and can't wait to do another one!


Frequently asked questions
Have a question about this project?