


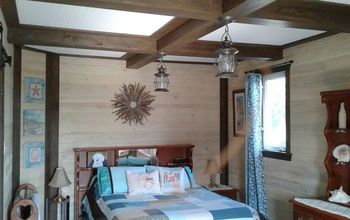
How to Install a DIY Wood Beam Ceiling, Step by Step

If you've ever dreamt of transforming your living space with a touch of rustic charm, a DIY wood beam ceiling is an excellent project to embark on. Not only does it add warmth and character to your home, but it's also a manageable task for those with basic carpentry skills.
I'll guide you through the process of creating a stunning wood beam ceiling. So, roll up your sleeves, gather your supplies, and let's get started!
How to install a wood beam ceiling
Tools and materials
- 2x4 lumber
- Furring strips
- Wood planks for beams
- Screws
- Drill
- Level
- Saw (circular or miter)
- Measuring tape
- Wood stain or paint (optional)
- Paintbrush or rag (if staining or painting)
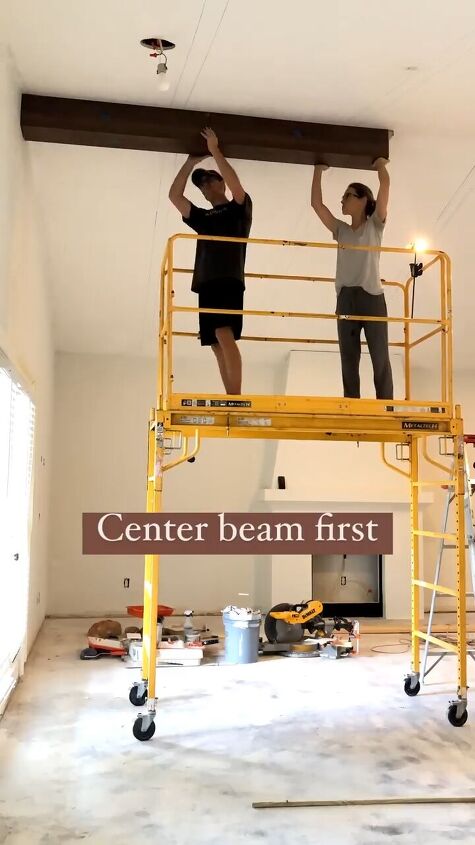
Step 1: Install the Center Beam
Begin by locating the center point of your ceiling and installing the main beam. Use a level to ensure it's straight, and secure it in place with screws.
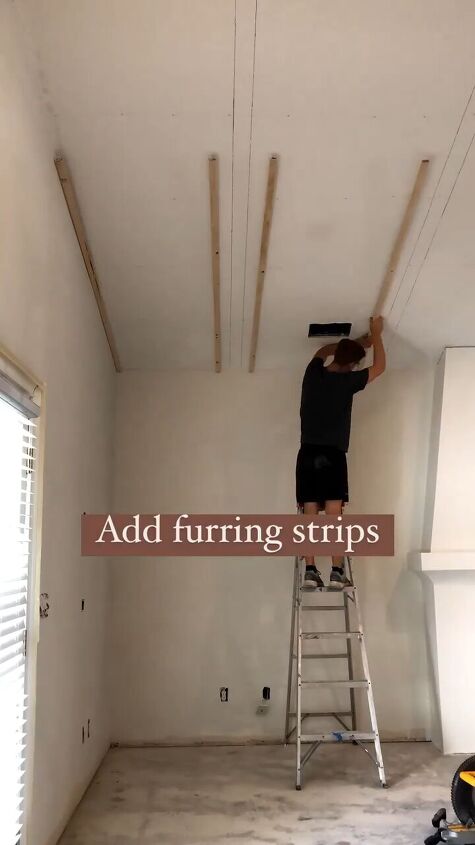
Step 2: Add Furring Strips
Attach furring strips perpendicular to the center beam, spaced evenly across the ceiling. These strips create a surface for attaching the 2x4s.
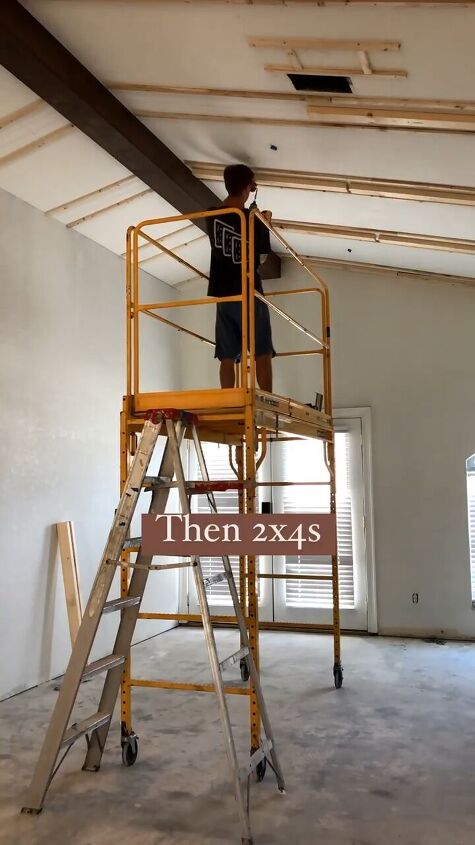
Step 3: Add 2x4s to the Sides of the Furring Strips
Attach 2x4s on either side of the furring strips. These will act as the framework for your wood planks and provide additional depth to your beams.
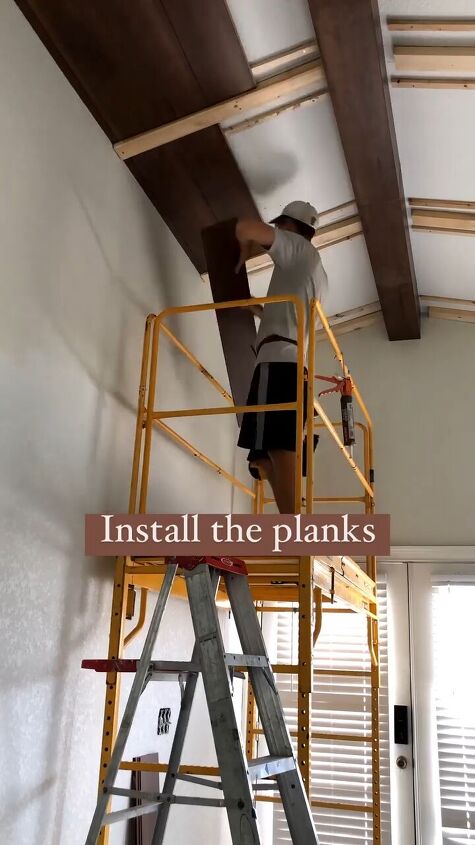
Step 4: Install the Planks Horizontally
Place wood planks horizontally between the 2x4s, ensuring a snug fit. Secure them with screws. This step creates the base layer of your wood beam ceiling.
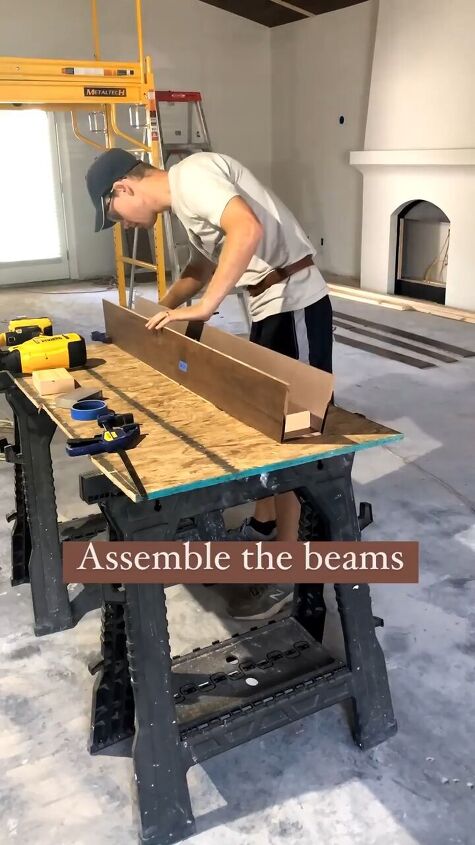
Step 5: Assemble the Beams
Cut additional 2x4s to create the framework for your beams. Attach them perpendicular to the installed planks, forming the structure of your beams. This step adds depth and dimension to the ceiling.
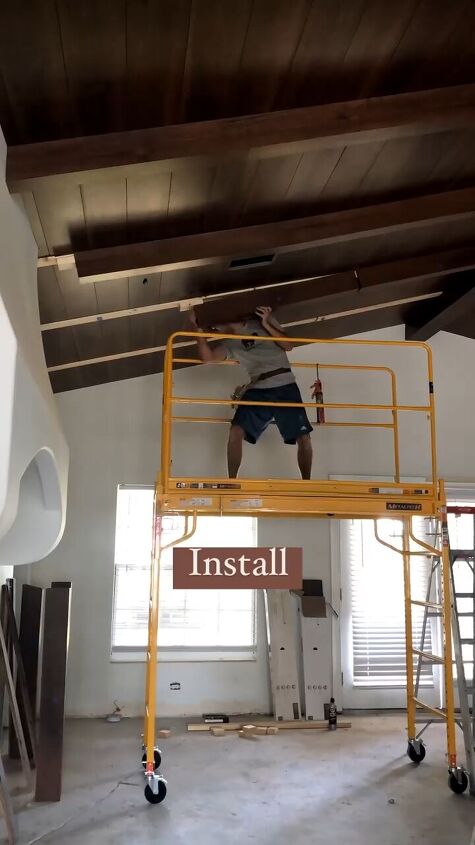
Step 6: Install the Beams
Carefully lift and install the assembled beams onto the 2x4 framework. Secure them with screws, making sure they align properly with the existing planks. Use a level to ensure they are straight and evenly spaced.
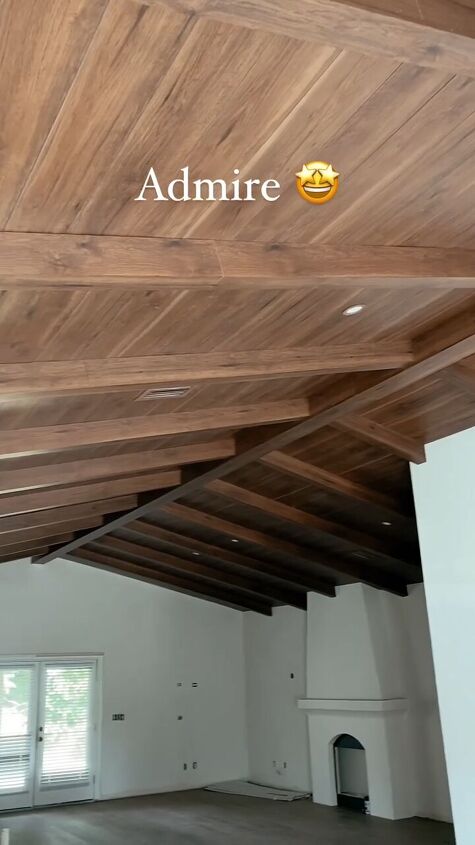
DIY wood beam ceiling
And there you have it – now you know how to install wood beams on your ceiling! This project not only enhances the aesthetic appeal of your space but also provides a sense of accomplishment.
Feel free to customize your DIY wood ceiling beams with paint or stain to match your interior design. Leave me a comment and let me know if you tried this project at home. I want to hear how yours came out.
Follow @jennasuedesign on Instagram for more DIY ideas.


Frequently asked questions
Have a question about this project?