


DIY Bathtub Caddy Under $20 (Turn Your Bathroom Into Spa!) – Spruce'
DIY Bathtub Caddy under $20 (Turn your bathroom into Spa!)
By on December 8, 2021
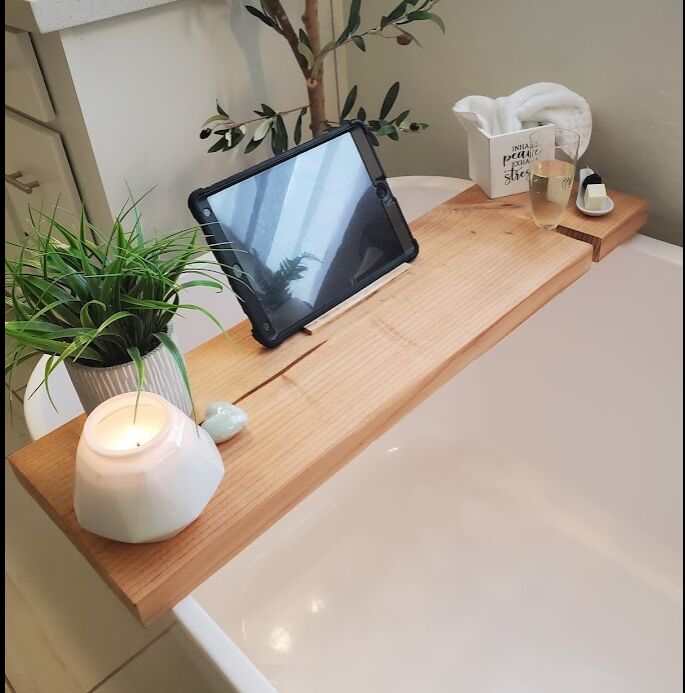
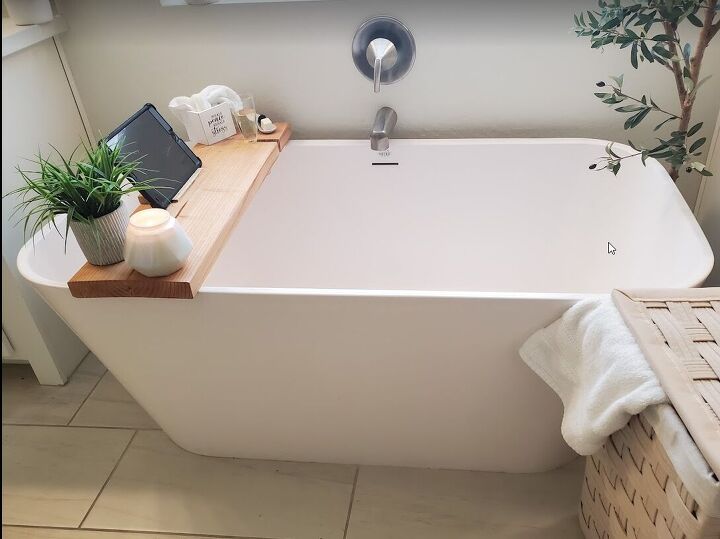
What’s that one thing you enjoy after a stressful, hectic day. For me, it’s a nice warm bath with some amazing smelling candles, Netflix and some good drink! We had no such place in our house until I decided to change it!! This DIY Bath caddy is a quick and simple project that immediately updates your bathroom making it looking modern and classy! Blending all the features was an perfect way to go! It is also very simple and beginner friendly DIY, I got it ready in a few hours.
Things you need.
1- 2×12 board (cut to the width of your tub)
Wood glue
Jigsaw
Nail gun + Nail ( I use this Brad Nailer, you can totally use a drill if you don’t have a nail gun)
Sander or Sandpaper (you can totally sand it with hand)
Wood Pre-conditioner
Wood Stain – I used shade Early American
Optional – Mitre saw
Instructions:
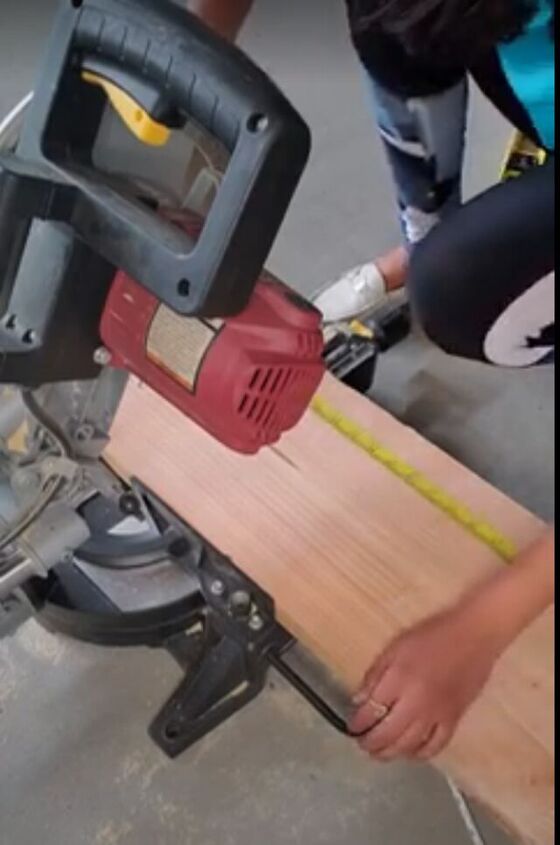
- Start by measuring the tub width. You will want to go from outer edge of one side to the outer edge of the other allowing an over hang of 1.5-2inches. You could also leave it flush to the tub if you prefer.
- Next, measure from the inside edge of the tub on both sides. You’re looking for where to put the supports on the bottom so the tray doesn’t slide around – basically, you want to know how wide the sides of your tub are.
- Once you’ve measured, cut your board down to the appropriate size. If you don’t own a mitre saw you can easily have it cut at your local home improvement store, – it’s usually free!
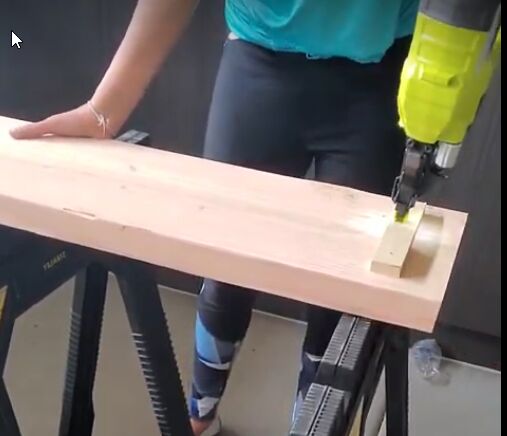
- Now cut some scrap piece of wood to attach at the bottom of the caddy. It doesn’t have to be pretty!
- Using your brad nailer, nail these on the back side of the caddy. I used 2in nails.
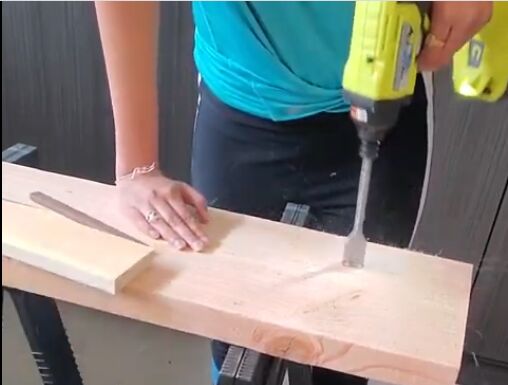
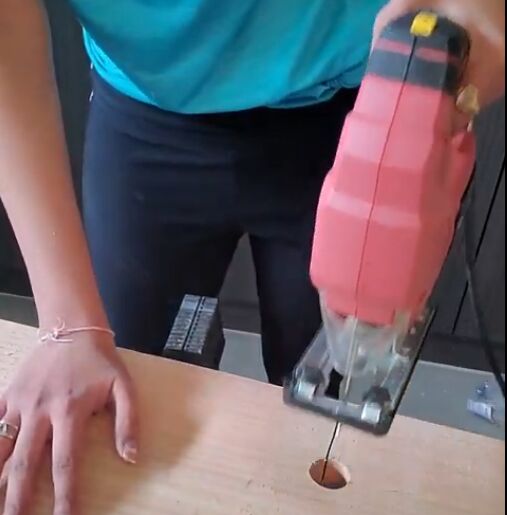
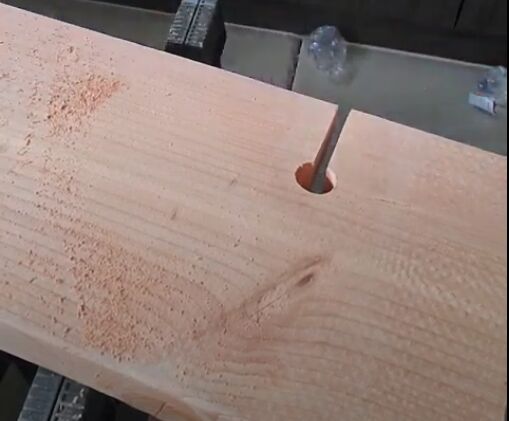
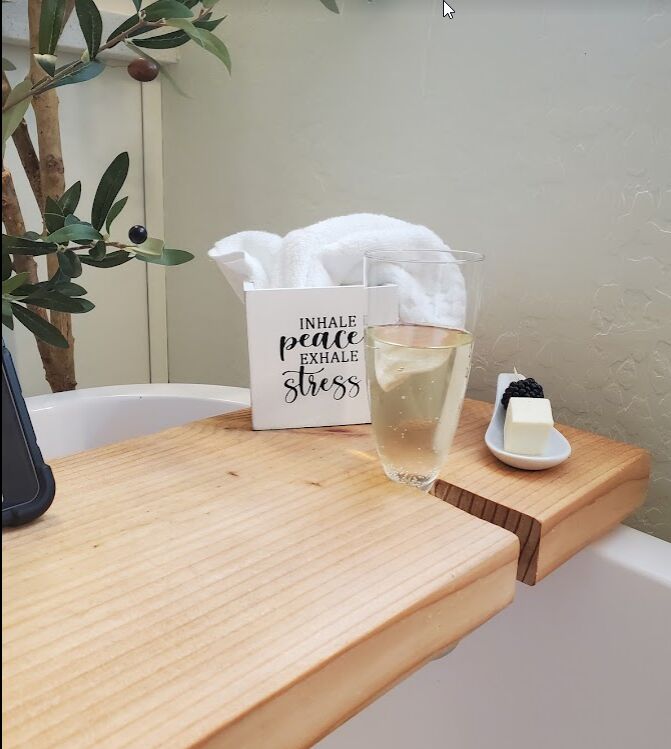
- Next, using a spade bit drill a hole on around 2-3 inch inside from the support. This will be your drink holder. I used 1inch bit but you could totally use according to your glass holder size.
- Next from the center of this hole, draw two lines on either side. Basically we are creating a path to slide the glass in. Using your jigsaw cut this section down. Your glass holder should look something like below.
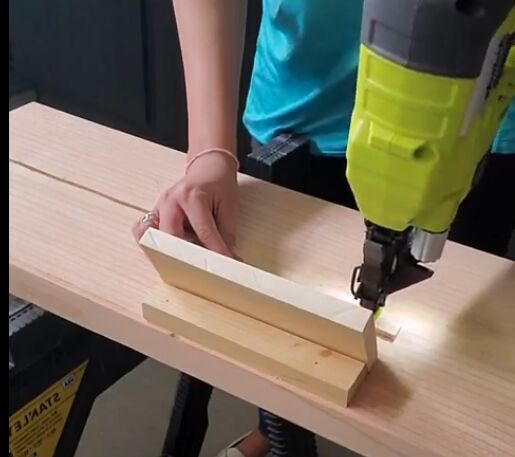
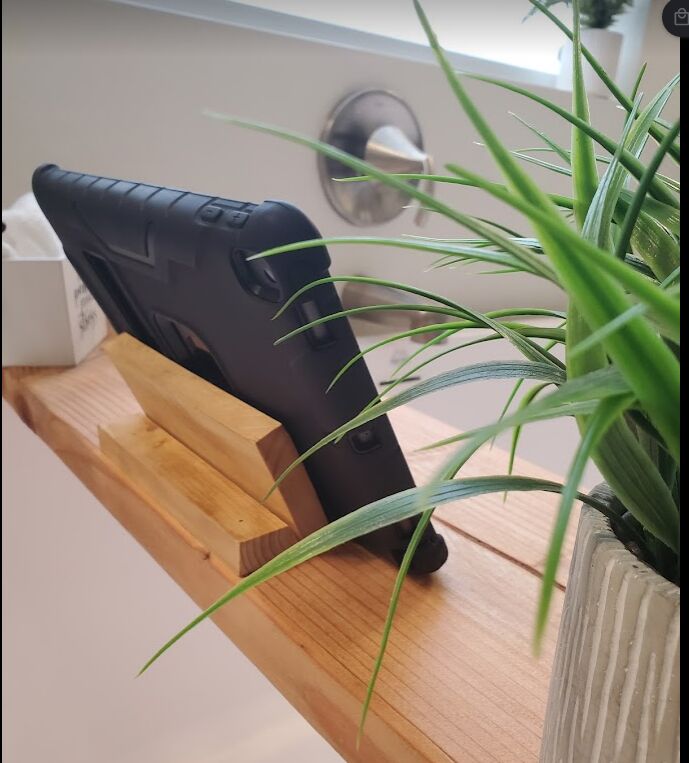
- Now for the Ipad holder, I applied wood glue to some scrap wood and nailed it down to the base. The front side of this base was mitered at a 45deg angle. Then I cut another piece where the Ipad would rest at a 45deg angle and nailed these pieces together.
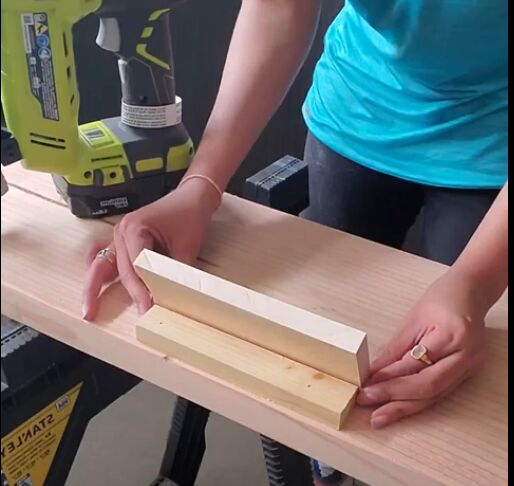
- Then added another small piece of wood in the front to prevent the Ipad/Book from sliding.
- Once done, I sanded everything with a 120 grit sandpaper followed by a 240 grit.
- Now to the fun part, I applied some pre conditioner to the caddy. Then used a rag cloth and stained it with my favorite stain color Early American.
- Finally finished it with few coats of polyacrylic, since this will be used in wet zone. And that’s it!!!
Add some pretty flowers/candles and a glass of wine.. you are set!
Just try not to get addicted. It’s tempting. I would know!!!!
If you are on Instagram, do check my detailed highlights for all the videos.
Categories: Bathroom, Beginner Friendly, DIY
Tagged as: Bathroom, bathrub, build, caddy, DIY, easy, spa, tray
Resources for this project:
See all materials


Comments
Join the conversation
-
I love this!!! Thank you for the instructions!!
-
This is great!! I LOVE the wine glass holder...a bath isn't quite the same w/o it! ;)


Frequently asked questions
Have a question about this project?
how do you make over a gas stove