


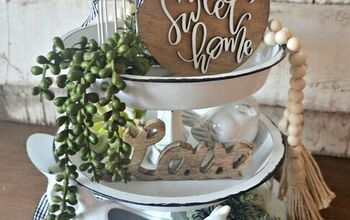
DIY Tiered Tray Jewelry Stand
Decor, DIY, How-Tos
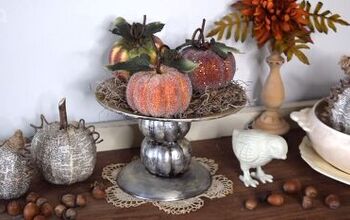
Making a DIY tiered tray jewelry stand is easier than you think! With just a few pieces from the Dollar Tree, thrift store, or unused pieces that can be found in your own home, you can make one too. It’s a beautiful, easy, and wonderfully accessible way to store your jewelry at home.
This post contains some affiliate links for your convenience. Click here to read my full disclosure policy. As always, thank you for supporting my blog.
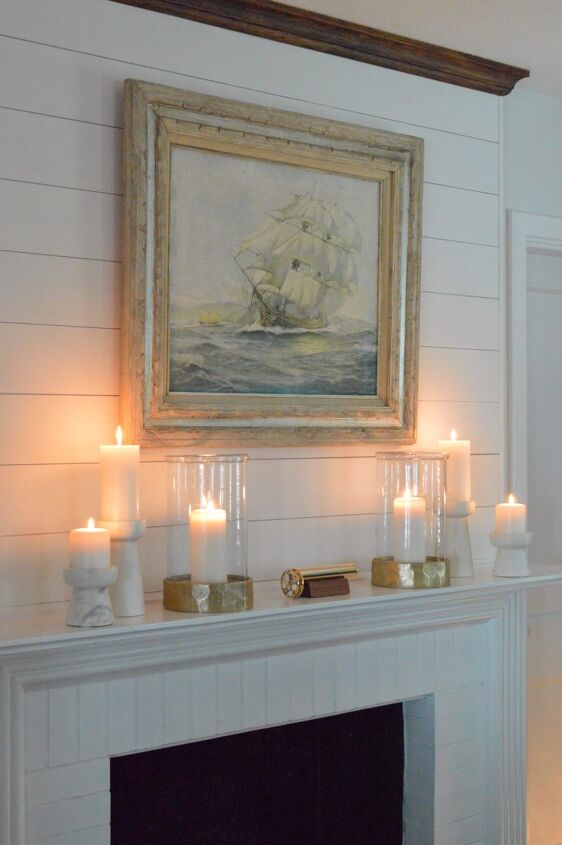
Welcome to this month’s DIY Inspire Collective. I am so excited to be joining an incredibly talented group of ladies sharing easy, beautiful, and fun DIYs every month. This month’s projects include DIY board and batten wainscoting, how to add beautiful DIY wall treatments to your home, how to make bubble gum jars, snack tray hacks, and my DIY tiered tray jewelry stand. All of the wonderful projects for this month are linked at the end of this post. I promise you don’t want to miss them!
If you are a first-time reader, welcome! I’m so happy you’ve joined me here. At Cali Girl In A Southern World, my goal is to inspire you through beautiful home decor, easy DIYs, crafts, recipes, and more. To stay most up to date with me, I invite you to subscribe to my blog here.
Jewelry Storage
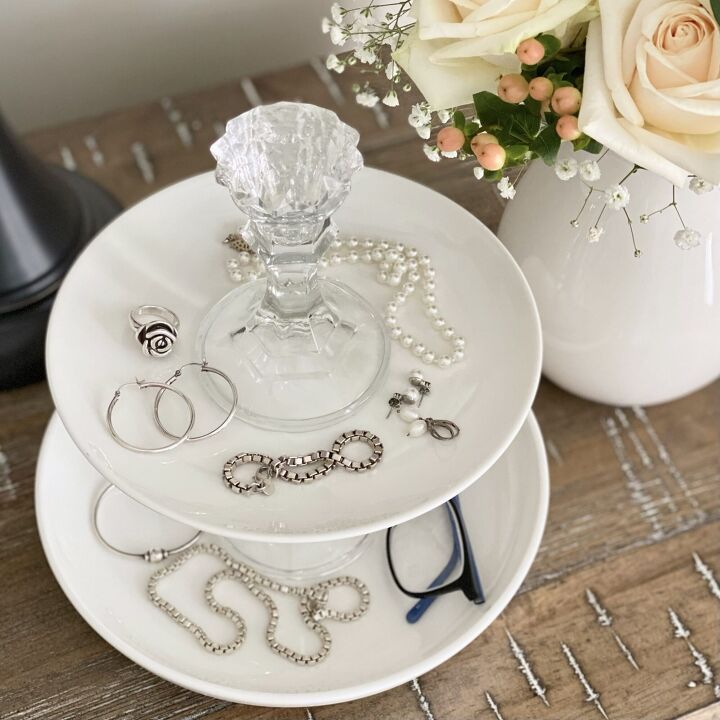
When it comes to storing jewelry, there are many different methods available. It can be stored in a jewelry box, in a drawer, on a display stand, or hung from hooks. However, my favorite way to store jewelry is on a tray. Although I have a jewelry box, I keep my everyday jewelry on a tray on the nightstand by the bed. This makes it a piece of cake to store and find at the beginning and end of each day.
What I love about a jewelry tray is that it makes accessing your favorite pieces very easy. Whether it’s kept on a nightstand, a dresser, or a bathroom vanity, it’s easy to take jewelry off and put it on quickly. A tray also helps prevent pieces from getting tangled.
Challenging Charms
Although I don’t have a lot of jewelry, the tray I was using to store it was becoming a bit too small. It was clear after my most recent “throwdown” with a tangled necklace, that it was time to come up with a new way to store my jewelry.
The new storage piece needed to be able to hold a little more jewelry than my current little tray, while at the same time still making it easy for me to access the jewelry I wear daily. Of course, I wanted it to be pretty too! That’s when it hit me. I needed a tiered jewelry tray! After seeing how much they cost online, I thought to myself, “I think I can make my own for much less.”
After all, I have made plenty of trays before including a wood farmhouse tray and a wood riser. Why not try my hand at making a tiered jewelry tray?! Guess what? I’m proud to say I was right. I could and I did make my own.
What You Need to Make a DIY Tiered Tray Jewelry Stand
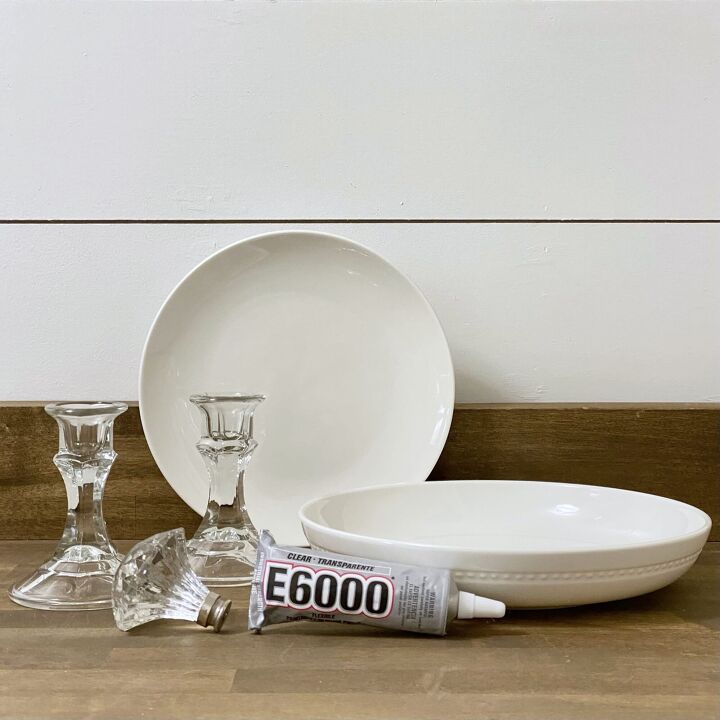
- 2-3 plates or shallow bowls in varying sizes
- 1-2 candlestick holders
- Industrial strength adhesive
- A tape measure (optional)
- Dry erase marker (optional)
- Decorative knob (optional)
After perusing Pinterest for some inspiration, I saw something that I loved! A three-tiered tray jewelry stand that was made from mismatched dishes and candlestick holders. “Genius!” I thought to myself.
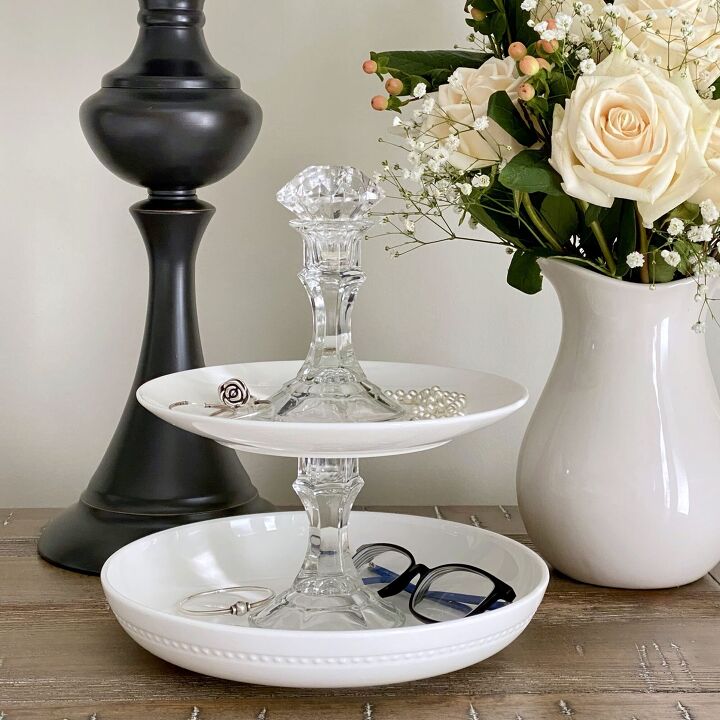
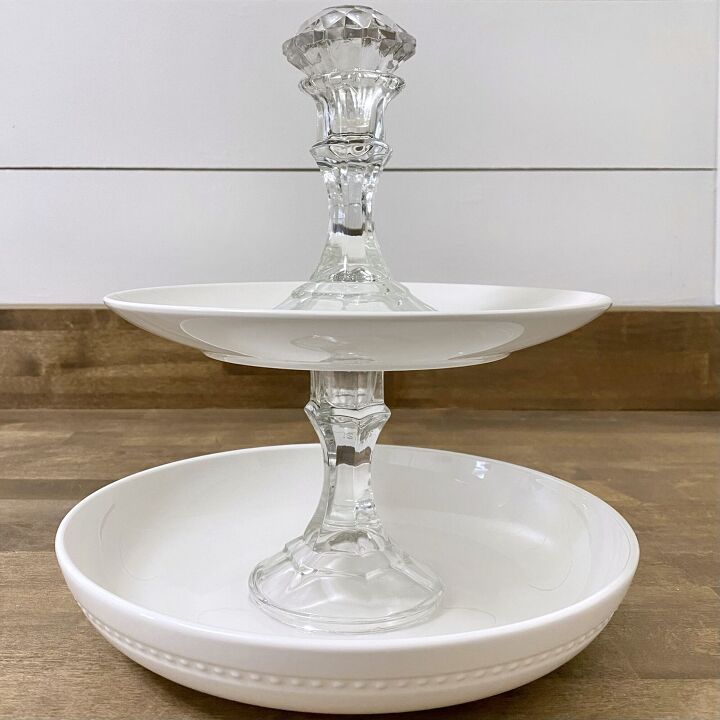
Heaven knows I have plenty of mismatched dishes I could use for this project. I decided that because I don’t have a lot of jewelry a two-tiered tray was going to be perfect for me. Therefore, I found two perfect dishes to use. One is an old pasta bowl and the other was a smaller plain white plate.
The candlestick holders were trickier to come by because I didn’t have any that I wanted to use for this project. However, after a quick trip to the Dollar Tree, my candlestick problem was solved. I found two of them for a dollar each. Perfect! With all my materials gathered, it was time to start the DIY.
How to Make a DIY Tiered Tray Jewelry Stand
Glue the First Candlestick Holder to the Base Dish:
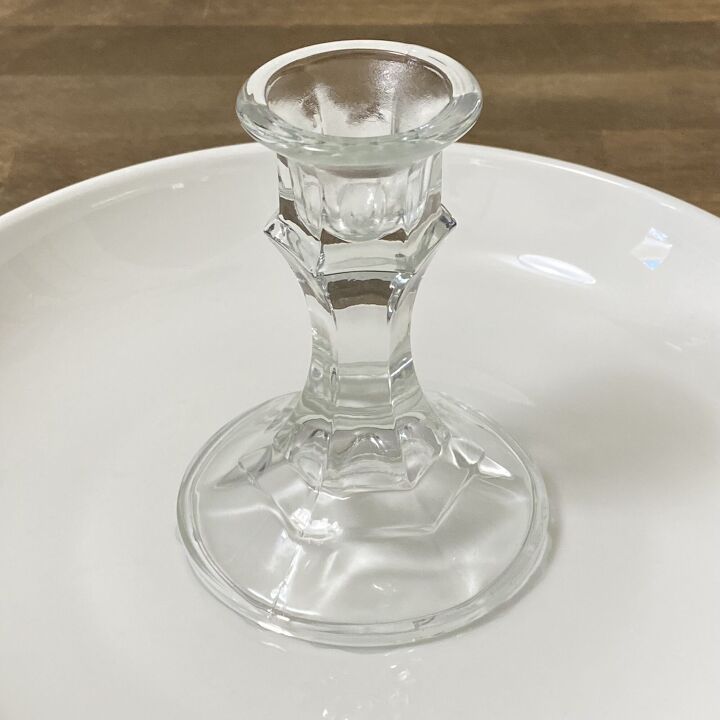
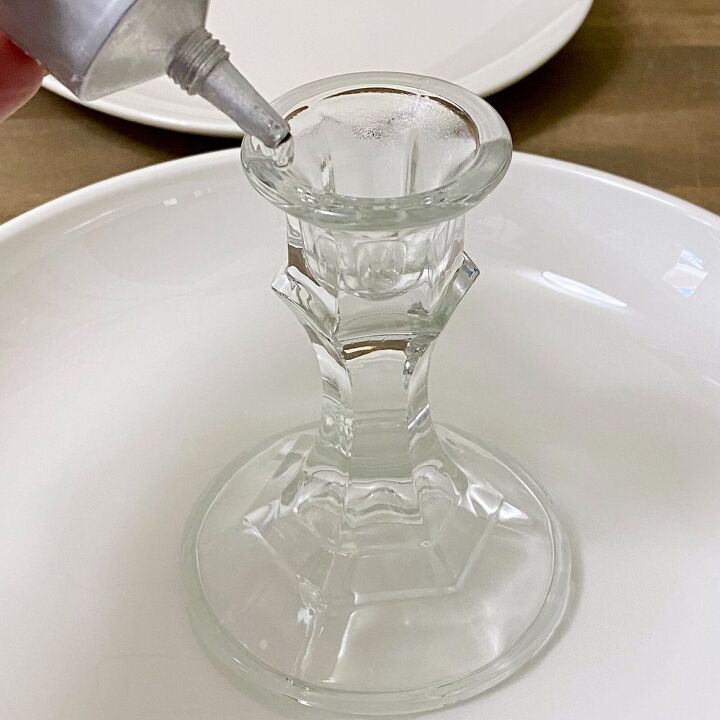
First, find the center of each plate or bowl. You can eyeball it as I did, or use a tape measure and find the center of each dish measuring from two opposite sides (like an “X”). Mark where the center converges from both sides with a dry erase marker. For the bottom (or base) dish, you will mark the center on the top of the dish. The dish above that will be measured on the bottom of the dish because they are stacked.
Next, carefully apply the industrial-strength glue to the bottom rim of the candlestick. Center the candlestick holder over the spot on the dish that marks the center and gently place it down. Allow the glue to dry for about an hour before continuing to the next tier.

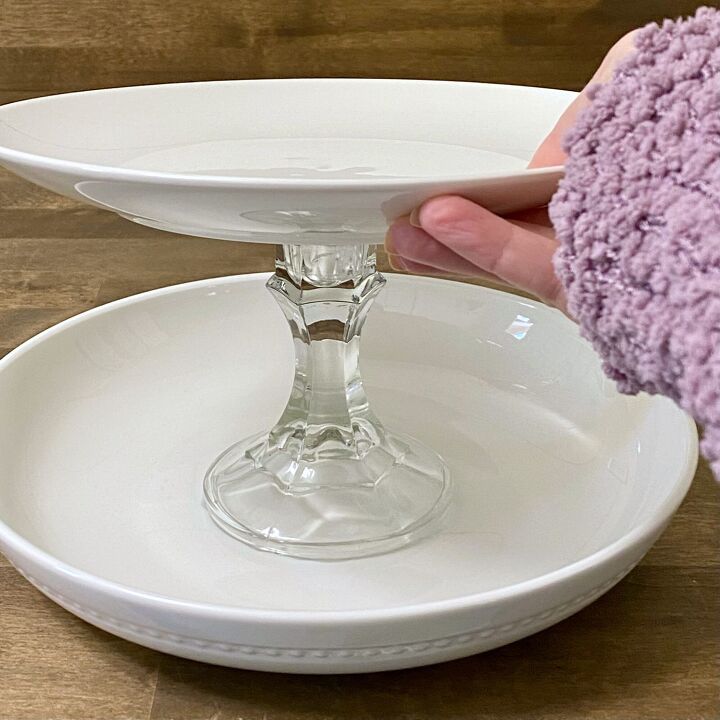
Attach the Second Dish to Make the Second Tier:
Then, once the glue between the base dish and the bottom of the candlestick has set, apply the industrial-strength glue to the top rim of the candlestick.
Carefully, place the second, smaller dish on top of the candlestick holder. Again, allow the glue to set for about an hour.
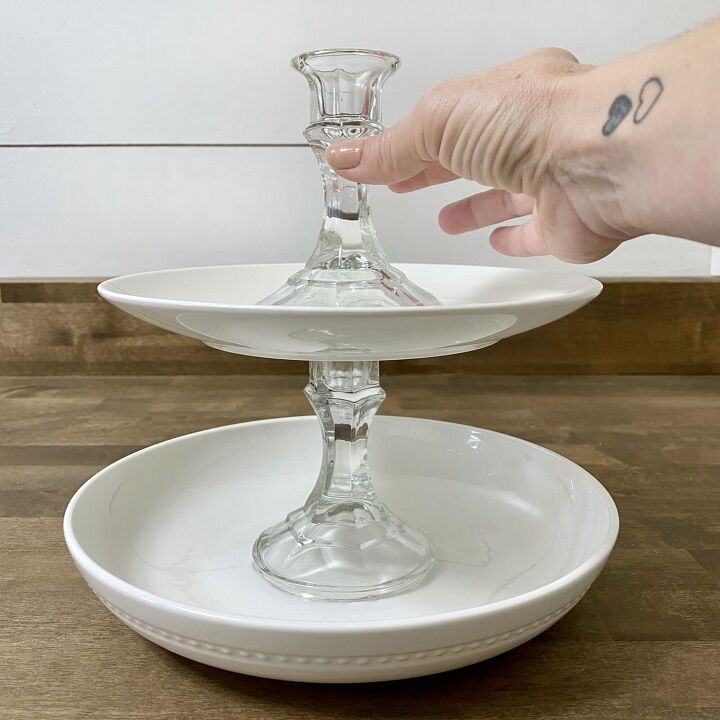
At this point, you can add a third smaller dish making this a three-tiered jewelry tray by repeating the last couple of steps above. However, I decided to keep my jewelry stand two-tiers. (I don’t have a lot of jewelry.)
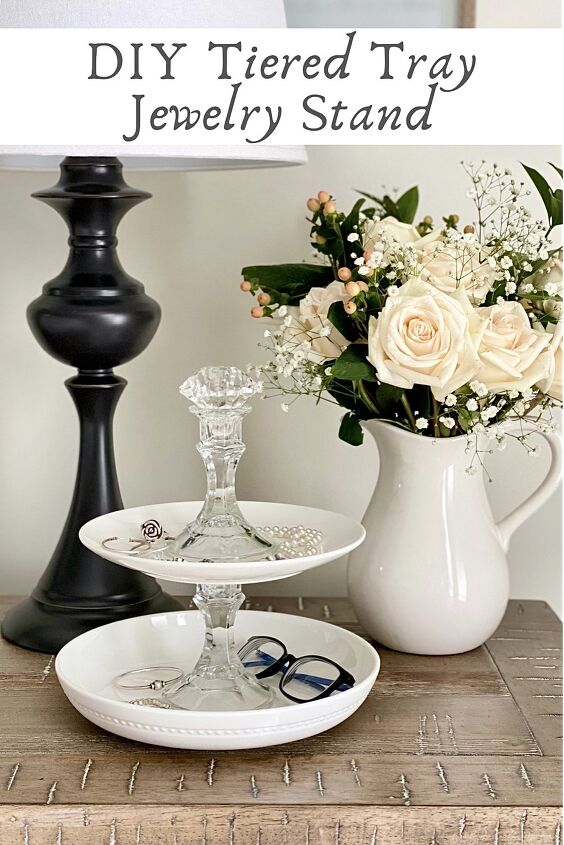
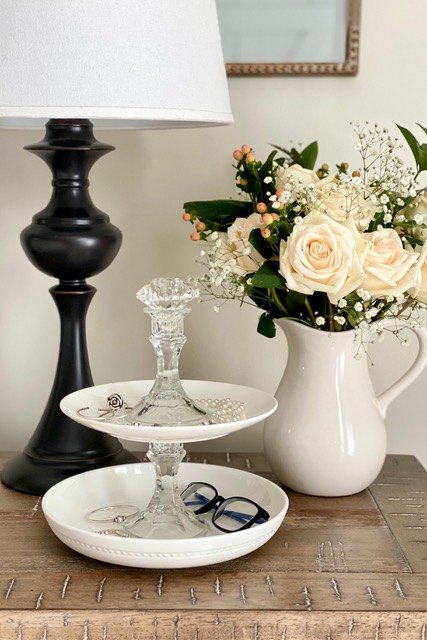
Add the Finishing Touches:
Finally, there are a couple of ways to finish off the DIY tiered tray jewelry stand. First, you can leave it as is with a dish on top. However, for my design, I decided to attach another candlestick.
Once the candlestick was attached, I wanted to top it off with something special. I found a beautiful faux glass knob at Hobby Lobby (for 50% off, making it only $3).
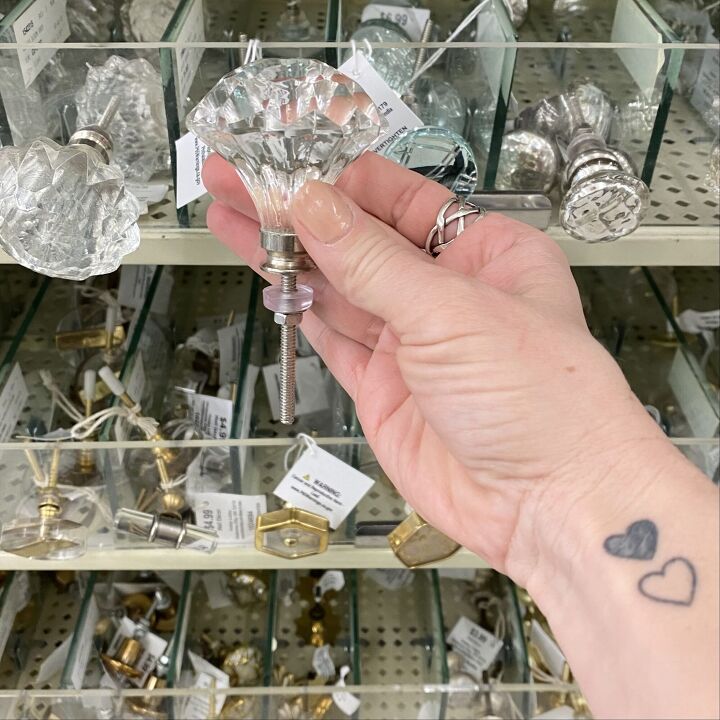
My handy husband sawed off the threaded piece used to attach it to a drawer or cabinet. Then, I glued it onto the top rim of the top candlestick. It made the perfect finishing touch to my DIY tiered tray jewelry stand!
Reuse, Renew, Upcycle
It’s no secret that I love easy DIYs, especially ones that give us the opportunity to upcycle. Giving new life to items we already have in our home, but don’t use anymore is not only fulfilling independently, but I also feel good about how it helps reduce waste for our planet. If you are looking for more upcycled DIYs, you may enjoy these:
DIY Frosted Glass Bottle Winter Decor
DIY Mercury Glass Candle Holders
Frosted Glass Heart Candle Holders
I had so much fun sharing my “new” DIY tiered tray jewelry stand with you. Thank you for joining me! Be sure to check out the other fabulous DIYs that my incredibly talented friends are sharing too. Until next time!…

Just click on the links below the photos, and pop around to visit the girls and check out their projects!
DIY TIERED TRAY JEWELRY STAND [click here]
HOW TO DIY BOARD AND BATTEN WAINSCOTTING [click here]
HOW TO ADD BEAUTIFUL DIY WALL TREATMENTS [click here]
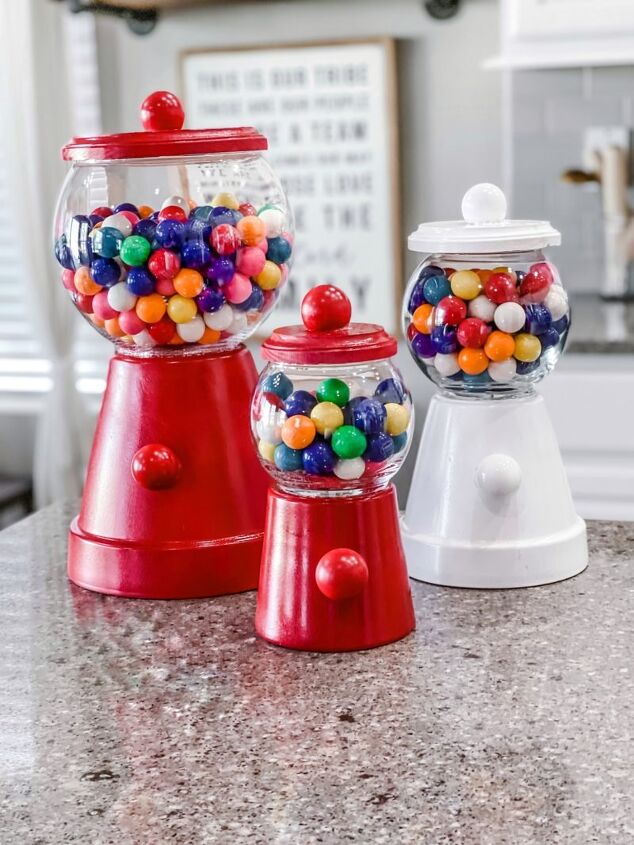
HOW TO MAKE BUBBLE GUM JARS [click here]
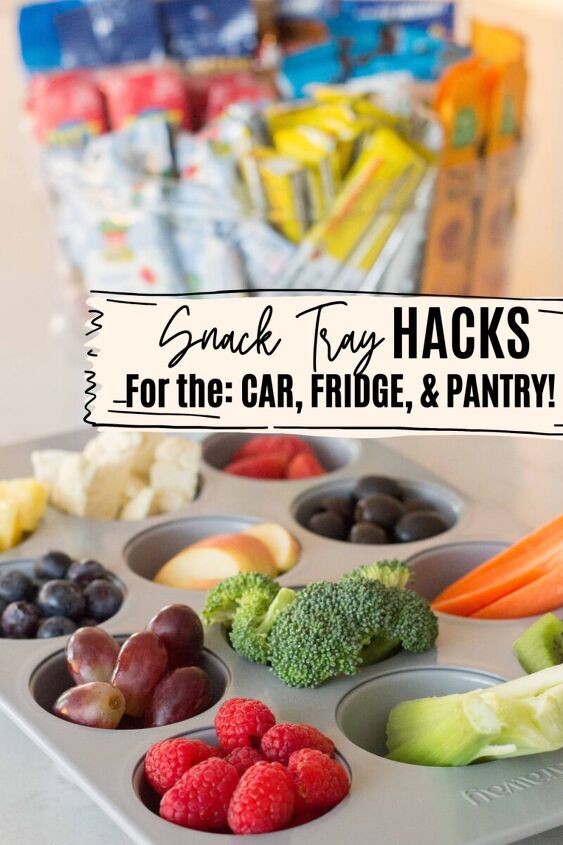
SNACK TRAY HACKS YOU’LL LOVE [click here]


Comments
Join the conversation
-
Great inspirational idea.
I will do this but use a painted candle holder and likely paint the dish the same color....then use the door knob as is.
Thanks for the idea!!!


Frequently asked questions
Have a question about this project?