


How to Use a Kreg Jig
2 Materials
$100
30 Minutes
Easy
Hi, I'm Christene from the blog Keys to Inspiration. My blog is all about helping you discover creative, simple, and affordable ways to design a home you love!
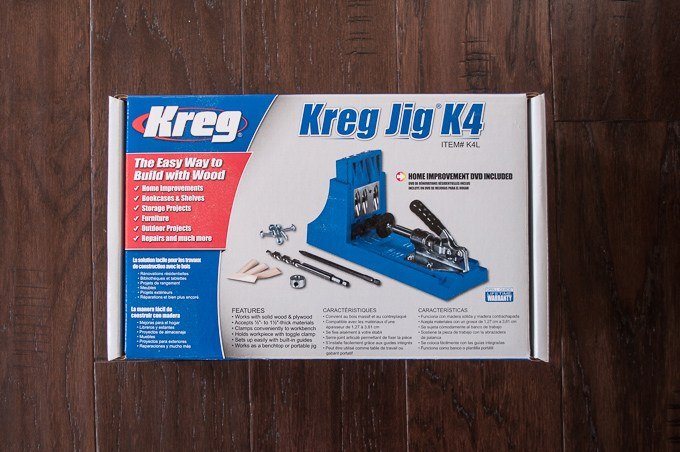
Today I want to show you how to use one of our favorite DIY tools - {affiliate} the Kreg Jig.
The Kreg Jig is a tool that helps you use your drill to create pocket holes in your project materials. When I first saw that the Kreg Jig was being used in so many projects, I knew I wanted to buy one and have it in our toolbox.
One quick search on Amazon and I realized that the Kreg Jig was JUST a little out of our price range. My first thought was “$100 for a little piece of plastic that helps you drill a hole, there’s no way we are buying that!” But let me tell you, I was totally wrong.
Let me explain why -- and how to actually use this crazy contraption!
WHAT IS A POCKET HOLE? – WHY SHOULD I USE A POCKET HOLE?
The basic concept of a pocket hole is that it allows you to hide your screws on the inside of your project so that no fasteners are visible at the end. Additionally, a pocket hole joint is stronger because the screw threads are holding onto the side of a board, not the end of a board.
The grain inside of wood is actually made up of long strands running the length of the board. To visualize this, imagine a box of spaghetti packed full. If you were to put a screw into the side of this box, the threads of the screw would hold onto the strands of spaghetti, and would have to break the spaghetti pieces for you to pull the screw out. Now, imagine putting a screw into the end of the box. Instead of the threads having a secure connection, they would simply push most of the strands aside and sit between them.
This is the strength benefit of a pocket hole, and it is why we decided to use them on the back screws of our floating shelves because that was where most of the weight would be concentrated.
Now that we understand the basic idea of a pocket hole, I’ll show you how to use it and you’ll see why the Kreg K4 Jig is so great!
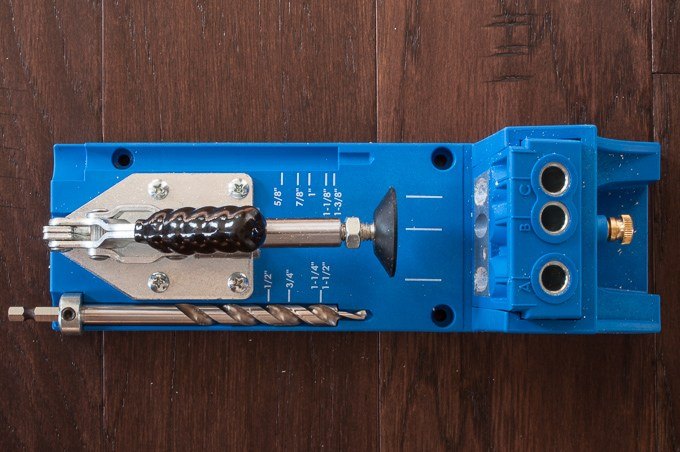
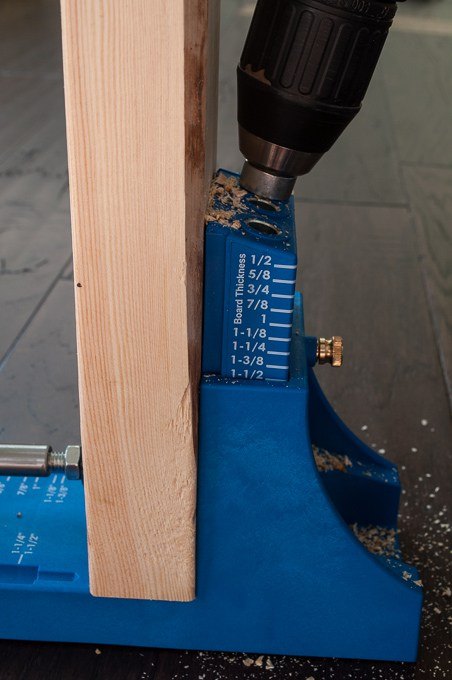
STEP 1: SET YOUR DRILL BIT COLLAR.
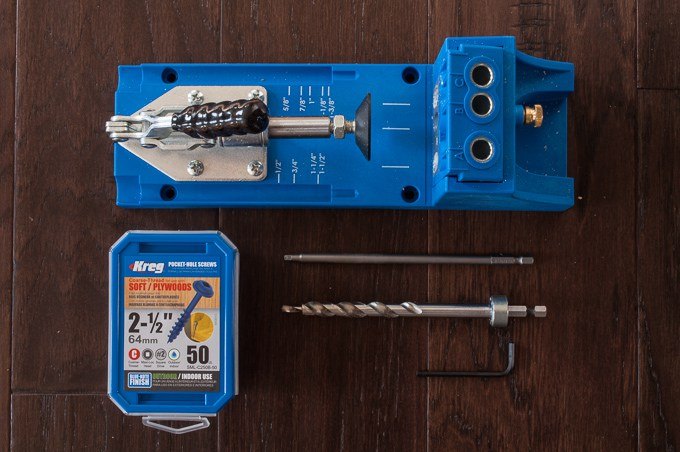
The Kreg system ships with a special drill bit and collar to use with the jig. This drill bit is actually two diameters in one. The small section is for drilling a pilot hole for the screw and the larger section is for drilling out enough clearance so that the head of the screw can be hidden inside the wood.
The Kreg drill bit has a collar that slides onto the back of the bit. This collar stops the drill at just the right depth so that you don’t end up drilling too far.
Take the collar and slide it onto the back of the drill bit shaft. The jig has two channels on either side of the clamp with measurement markings that correspond to different board thicknesses. Place your drill bit into the channel with the measurement markings for your specific board thickness.
Slide the drill bit forward until the large section of the drill bit lines up with the measurement mark that you need. For example, a 1.5” thick board would be lined up like the picture below, which is all the way into the channel.
Finally, slide the collar up until it sits properly in the body of the jig and tighten the set screw on the side of the collar using the Allen wrench.
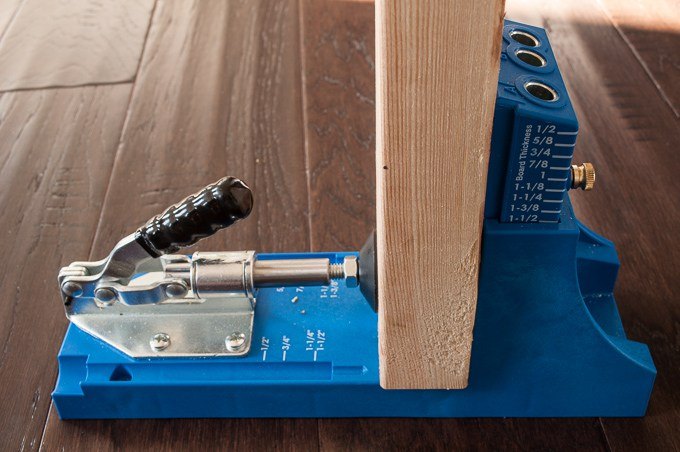
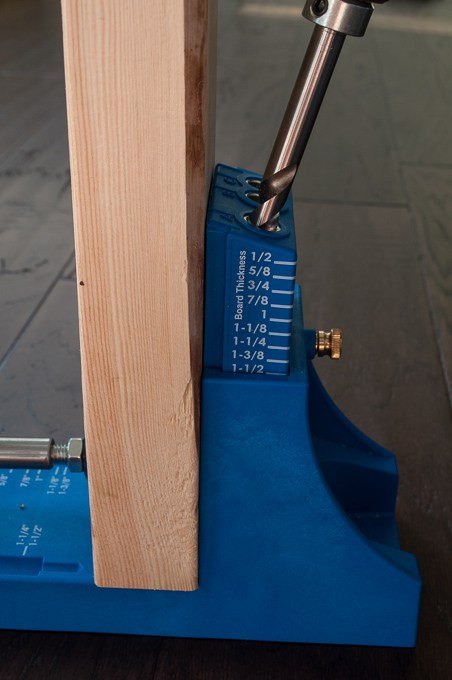
STEP 2: SET YOUR HOLE HEIGHT.
Now that your drill bit is set to the correct depth, you need to move the angled guide holes up or down. This adjusts where the drill bit will actually enter the wood. The goal here is to have the screw come out right in the center of the board for the strongest joint.
The K4 makes this adjustment really easy because it has markings on the side of the tower piece that correspond to the board thickness. Undo the thumb screw and slide the tower up or down until you find the marking that corresponds to your board thickness. Once you have the measuring mark lined up with the side of the jig, lock the thumb screw into place.

STEP 3: SET YOUR CLAMP DISTANCE.
The final step to set up the K4 is to adjust the clamp foot so that it holds onto the board securely. Insert your board into the jig and twist the clamp foot until it comes in contact with the face of the board.
Now, push the lever on the clamp forward to clamp the board in place. If it still feels a bit loose, you can adjust the foot a little to increase the clamping pressure.
STEP 4: YOU ARE READY TO DRILL!
See the “A”, “B”, and “C” holes on the top of the jig? You will need to use different combinations of these holes depending on the width of your board.
For 1”-2” wide material, use “B” and “C”
For 2”-3” wide material, use “A” and “B”
For 3”-4” wide material, use “A” and “C”
As you can see in this mock-up, when the jig is set correctly the drill bit goes almost completely through the board and stops close to the end.
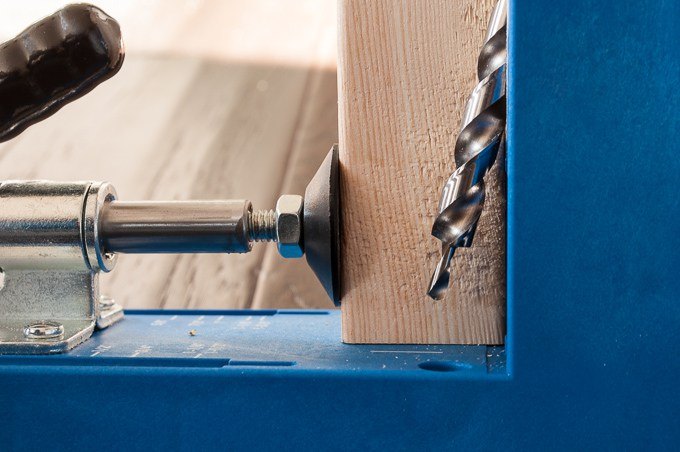
The angle is also set so that the screw will come out in the center of the board when making the joint connection.
Center and clamp your board across the two holes that you are going to use and insert the drill bit into your drill.
You don’t want to turn the drill on until the drill bit is inside the guide hole because it might jump around a little. With the drill off, insert the bit until it is almost touching the board and then turn the drill on at full speed.
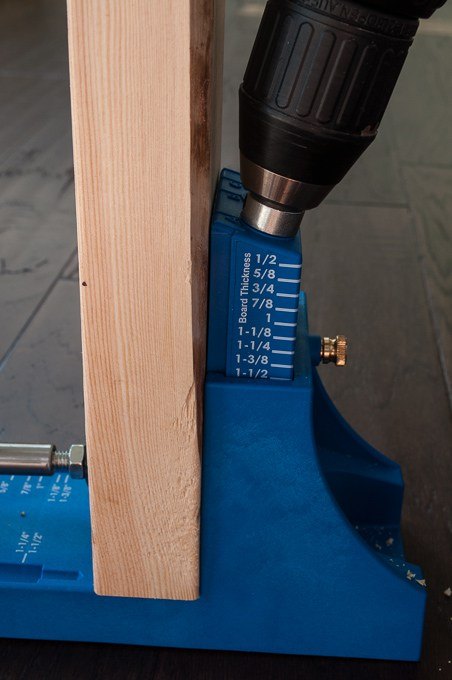
The guide holes will keep everything lined up perfectly and you can drill down into the board until the collar on the drill bit stops you from going any further. If you feel some resistance, you can pull the drill bit out part of the way to release some of the wood chips, and then continue down the full depth.
Now, turn the drill off and remove the drill bit from the guide. Repeat this process for your second hole, and unclamp your board.
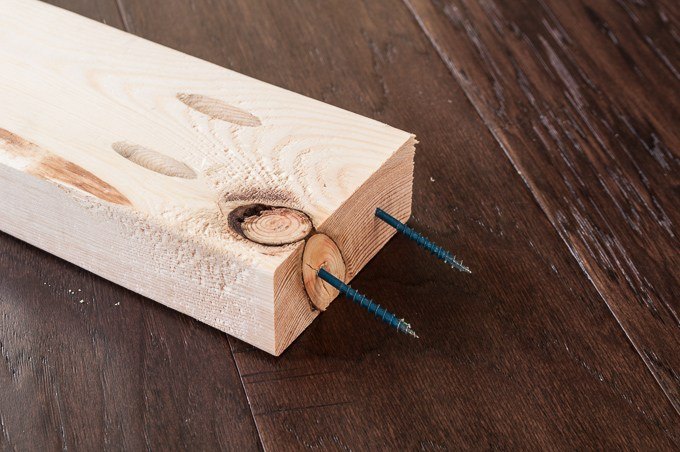
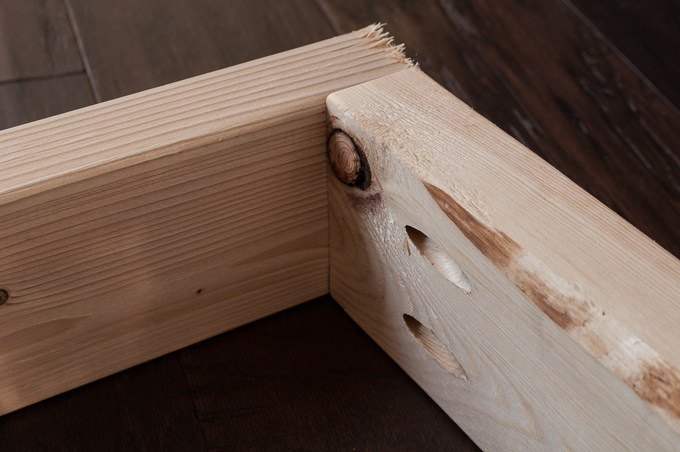
STEP 5: BUILD YOUR JOINT.
To assemble your pocket hole joint, you will need the correct length Kreg screws. The Kreg screws are recommended because they include a small drill bit at the tip of each screw that helps the screw secure itself properly.
When purchasing your Kreg screws, look carefully at the recommendations on the back of the screws. The board thickness you are using dictates the length of your screw. When we built our floating shelves we were using 2x4s. The Kreg screw box recommended 2.5” long screws for that type of application. If you plan on using pocket holes a lot in your DIY projects, I would recommend this {affiliate} Kreg screw kit, which includes 675 of the 5 most used screw lengths.
Remove the drill bit from the drill and insert the included square drive bit. The square drive holds onto the screws really well and keeps them from stripping. Insert one screw into each pocket hole.
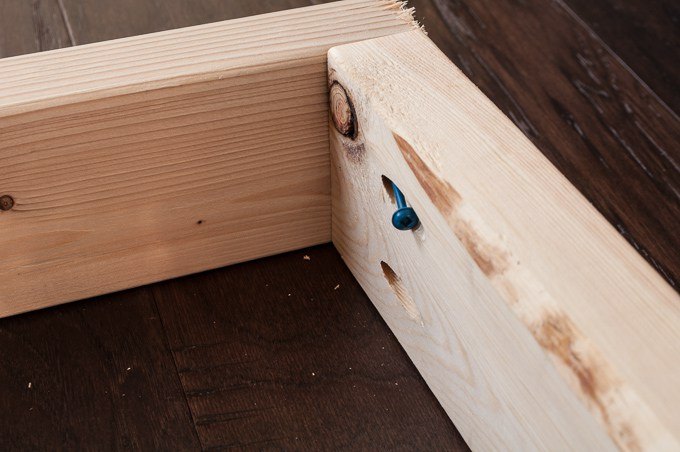
Clamp or firmly hold the boards together where the joint will be so that they do not move. Then, drive the screw into the pocket hole. Set the torque setting on your drill to around half so that it does not put too much pressure on the joint.
Now you are done! Admire your finished work and new skill!
There you have it – 5 easy steps to creating all the pocket holes you will ever need! I hope you were able to follow that quick explanation and see that the Kreg Jig really isn’t that difficult to use. It’s actually an extremely useful thing to have in our toolbox.
Without the K4, there is no way we would be able to line up or drill that type of joint. The Kreg Jig takes all of the measuring guesswork away. All you need to do is line up the pieces with the measurement guidelines and you are good to go.
Do you have a Kreg Jig? If not, what’s holding you back from getting one? You can see the full how-to article on the blog. Just click on the link at the end of this post.
>> Christene
Connect with me on Facebook -- [facebook.com/keystoinspiration]
I also love Instagram! -- @keystoinspiration

Want more details about this and other DIY projects? Check out my blog post!
Comments
Join the conversation
5 of 7 comments
-
Awesome. I've never worked with wood but I've been wanting this for awhile. Nice to have if I finally dive into building projects. Thanks for sharing
-
I have been wanting to get this for a long time. I was looking for an all-purpose one, since the ones I found in the stores were for specific projects, ie: cabinets. I am not a cabinet maker. I just want to be able to build boxes, and do some simple framing. The sales associates said there was no such thing.
Would you say that this one the K4, could be used for many different projects?


Frequently asked questions
Have a question about this project?