


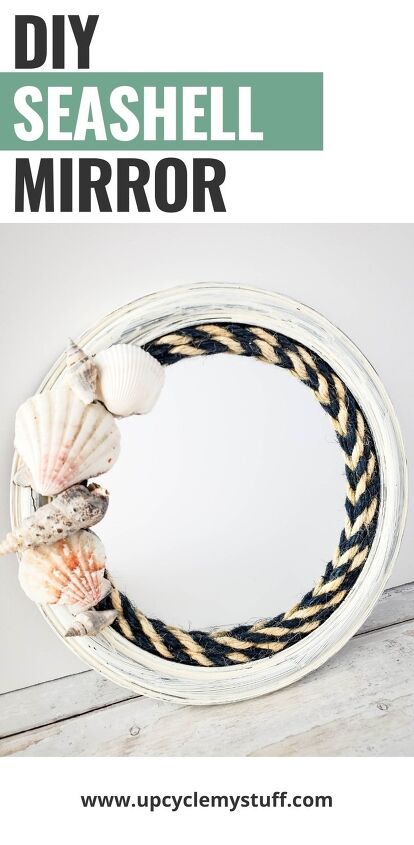
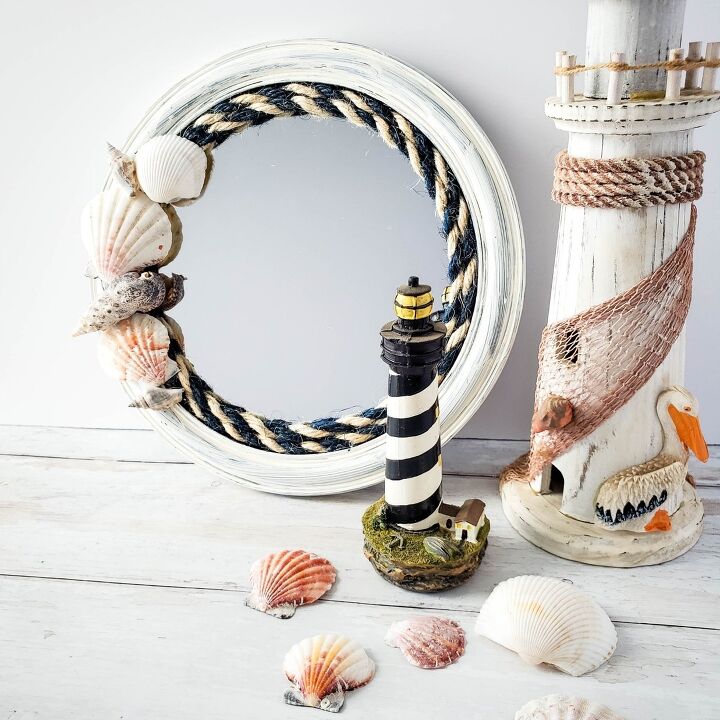
DIY Seashell Mirror
If you like coastal beach-themed decor then you will love this easy seashell mirror project.
You can use found objects and upcycled items to make this a virtually no-cost project (if you have some basic craft supplies to hand already that is!) or you can source the items you need from the dollar store or a local thrift store.
This is also a fun project to do with kids – help them make a beautiful creation for their own room or as a gift for someone!
Materials Needed: Nautical Seashell Mirror
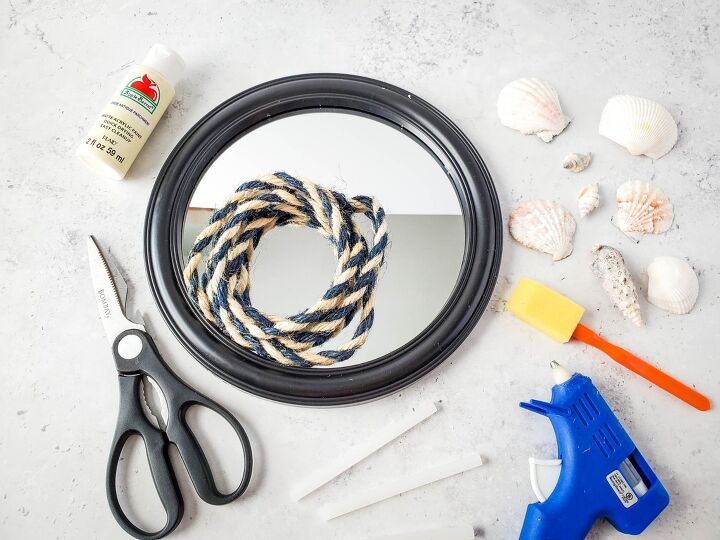
- Round plastic or wooden mirror (with a frame large enough to glue your shells to)
- Rope ( length depends on the size of your mirror – make sure you have enough to wrap around at least once, twice if desired)
- Seashells (I used 6 in different sizes but you can use as many or as few as you like)
- Off white paint ( antique parchment is the color that I used)
- Foam paintbrush
- Hot glue gun
- Hot glue sticks
- Scissors
Note: If you don’t have access to cute shells on a beach near you you can purchase decorative shells from some craft stores and online on Etsy – you can often buy bags of shells that will have a variety of shells to pick from.
Also, see the end of the post for some fun alternative decoration ideas for this mirror!
- 47 Upcycled Planter Ideas that are Easy to Make
- 65+ Upcycling Projects for Kids (Super Fun Craft Ideas!)
Time needed: 3 hours.
Follow the instructions below to make this easy DIY Seashell Mirror Craft from easy-to-find objects.
- Paint Mirror Use a soft brush to paint your mirror sparingly with a light-colored paint. This is to give it a slightly distressed nautical look.
I started with a black plastic mirror and I used a foam brush to paint the mirror white using an antique white ( antique parchment to be exact!) shade of acrylic paint.
I didn’t do it this time, but normally I would advise using some painter’s tape to protect the mirror from getting paint on it.
I painted the whole frame with two light coats, covering the mirror frame but letting slight steaks of the original frame color show through – that is where the aged distressed look comes from.
Leave the paint to dry for an hour or two until it is dry to the touch.

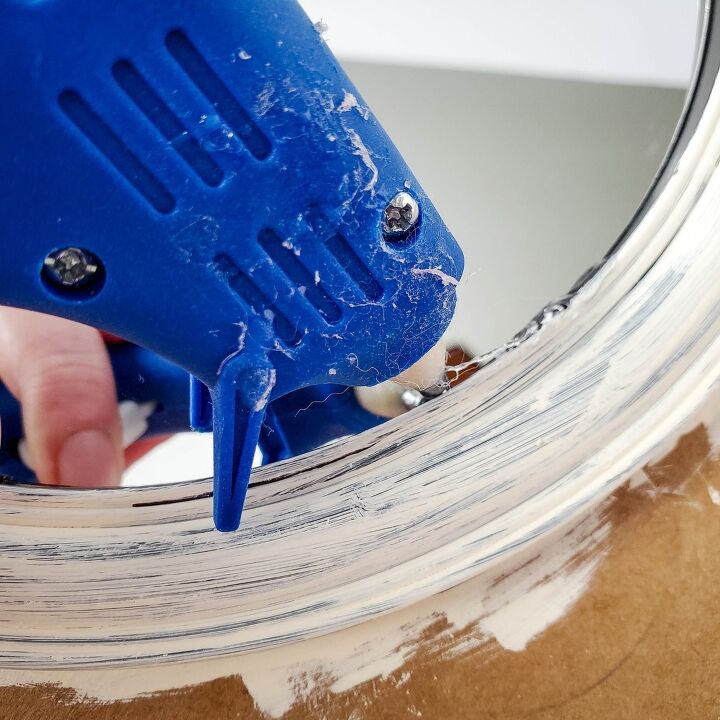
Apply Hot Glue
Once the paint has dried it’s time to apply the rope detail.
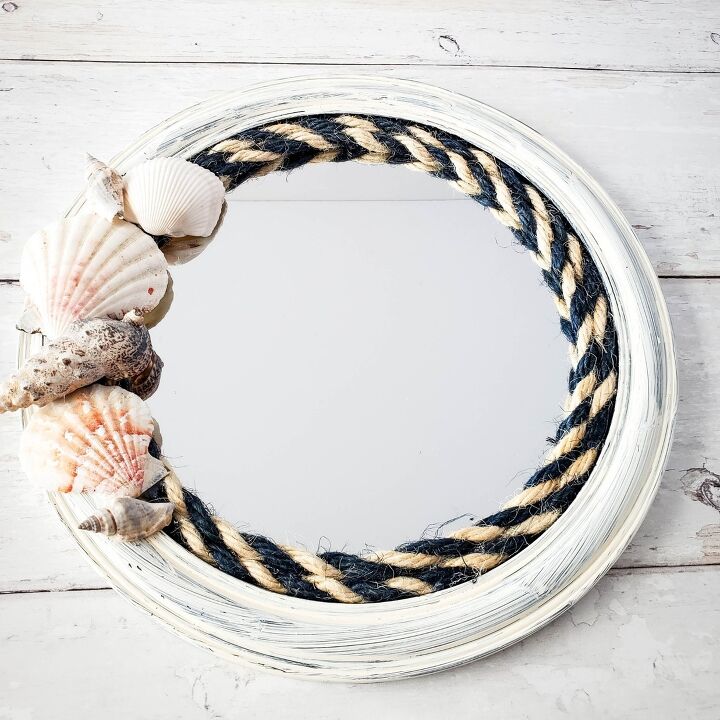
I used a blue and tan twisty rope but you can use any color you like. Make sure the length of your rope is at least long enough to wrap around your mirror once and ideally twice.
Apply hot glue to a 6-inch outer edge section of the mirror (basically as close to the inner edge of the painted frame as you can get!), and gently set one end of the rope over it, pushing it against the outer edge.
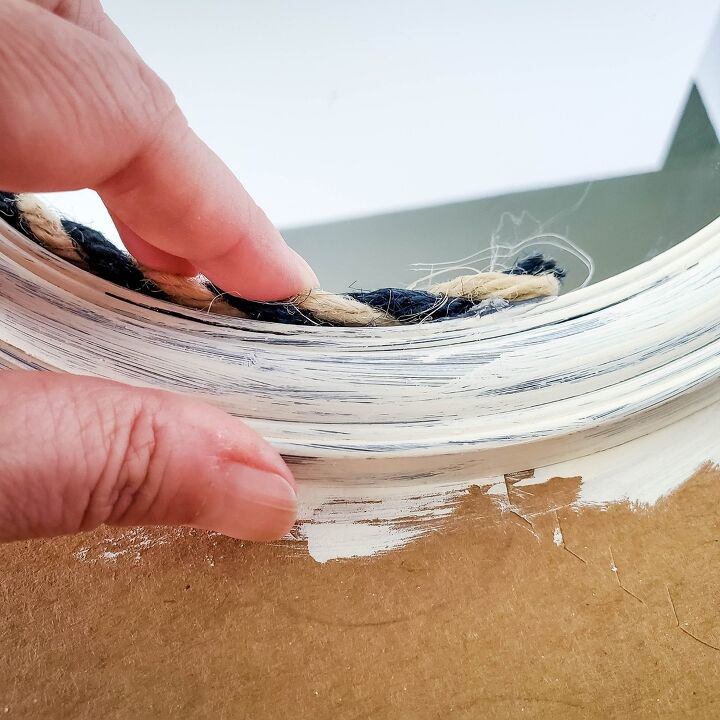
Press Rope in place in Sections
Make sure to have a wet cloth or another implement that you can use as you go around for scraping glue that might seep out from under the rope onto the mirror as you press down.
You don’t want to see little dried bits of hot glue when your project is finished so it’s best to wipe them or scrape them off as soon as you see them when you are still applying the rope.
Continue applying glue to 6-inch sections at a time, wrapping the rope around the mirror, until you have completely wrapped the rope twice around the mirror.
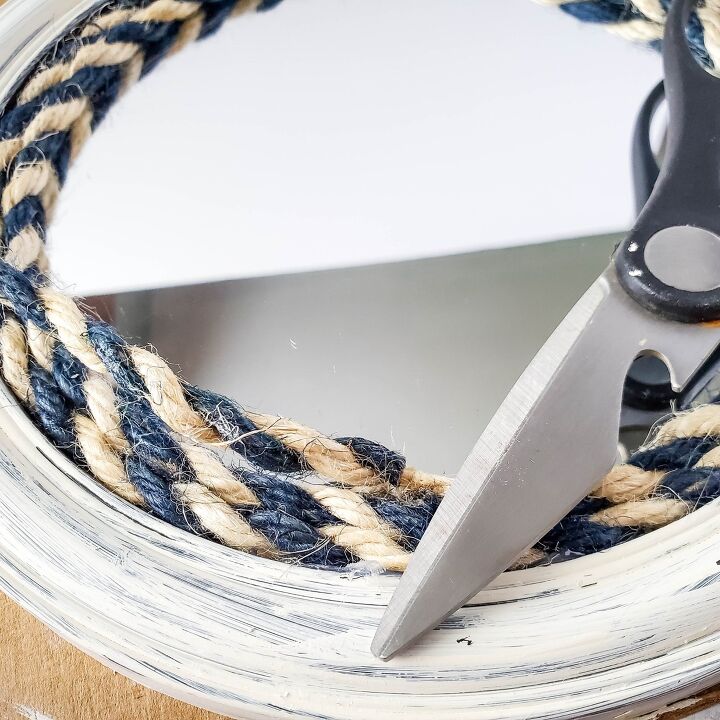
Cut Rope
Use the scissors to cut the rope where it meets with the other end where you started wrapping.
Pick the Orientation for your Mirror
Before you go any further you need to flip the mirror over to have a look at the back of the mirror.
You’ll want to check where the mirror hanger is and if there is more than one pick which way will be ‘up’ for your mirror.
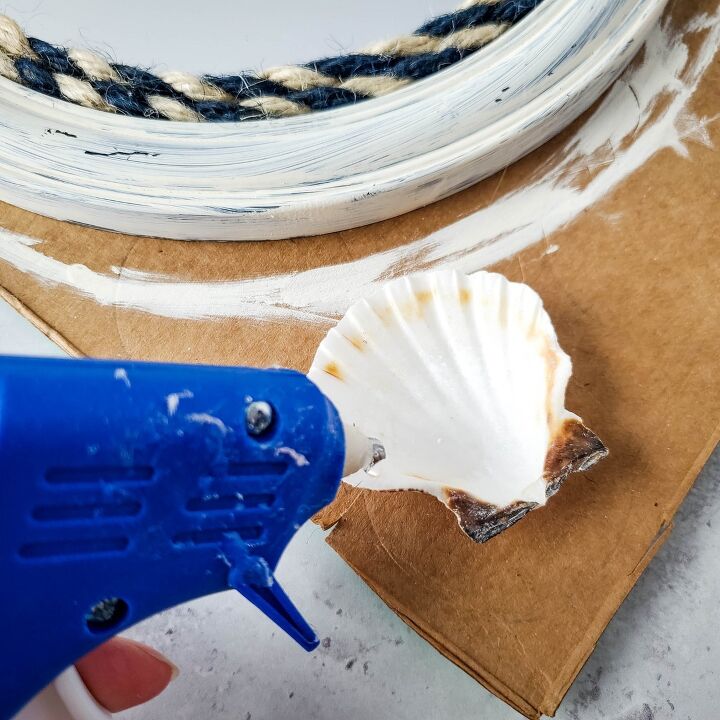
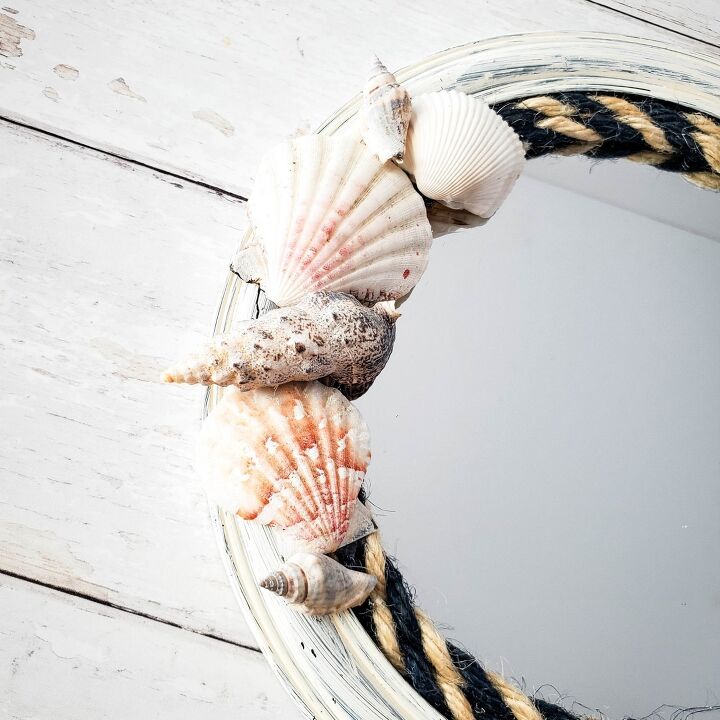
Add Seashells
Now is the fun bit – adding the seashells.
I used a found collection of 6 shells in different sizes and used the hot glue gun to attach it to the upper left-hand side of the mirror in a grouping.
This usually looks best if you use small shells and medium shells to give it some variety. The smaller shells can be useful for filling gaps in between some of the larger shells.
Place your shells down first without glue to get an idea of the placement and then remove and press shells in place with a dab of hot glue one at a time to make sure you put them back in the right spot.
Make sure to place the hot glue on a part of the shell that will make contact with either the rope or frame.
Alternative Coastal Mirror Decoration Ideas
Here are some other ideas for decorating your own seashell mirror:
- Leave off the rope and cover the entire frame with seashells.
- Use small starfish to add an extra seaside touch.
- Use sea glass instead of (or as well as) the shells.
- Use small pebbles if you don’t have shells.
- Use oyster shells or mussel shells (you can save them from a fancy dinner!)
Finished Seashell Mirror
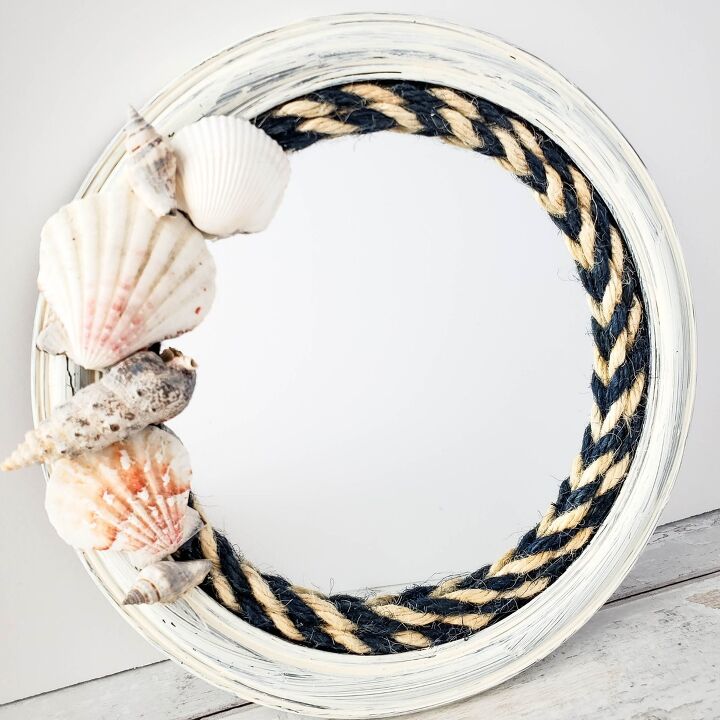
The great thing about this project is you can be sure of making a one-of-a-kind unique seashell mirror as no one will have picked exactly the same shells as you and have put them in exactly the same place. Add any of your favorite things found on your beach walks to add your own special touch to your mirror.
I hope you like this sea shell mirror project and that it helps wherever you are feel like your own private beach house!
Visit the Home Decor section of Upcycle My Stuff for more fun DIY Decor Projects.
Resources for this project:
See all materials


Frequently asked questions
Have a question about this project?