


NO SEWING- Tufted Cushion for Under $50

8 Materials
$50
2 Days
Easy
Make a Tufted cushion bench with no sewing required.
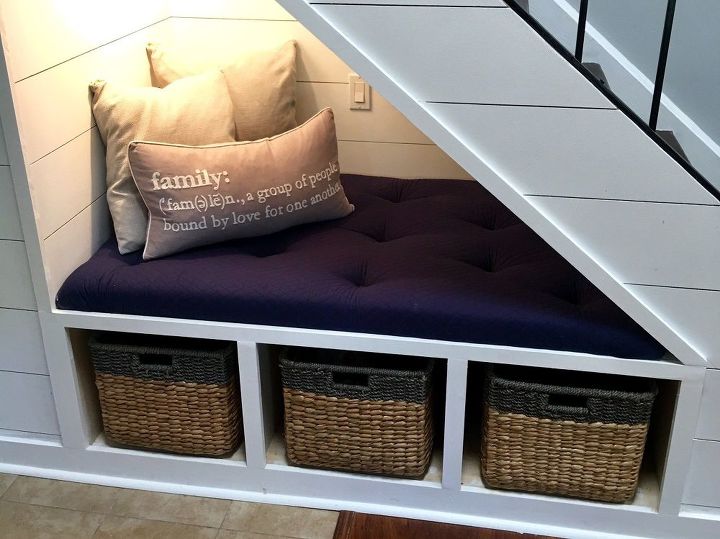
Learn to make this Tufted Cushion Bench for under $50, and the best part NO SEWING at all!
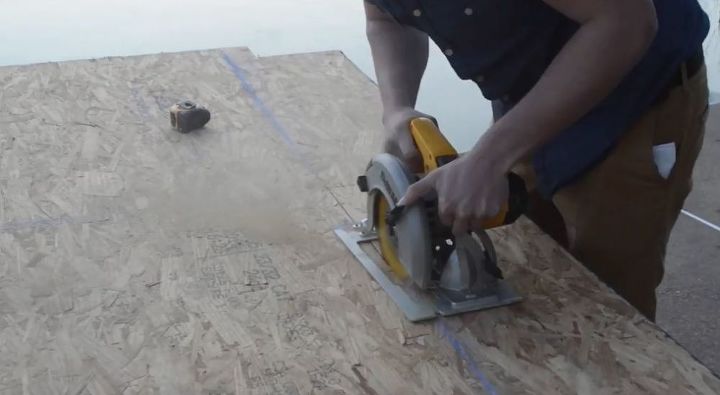
Use a piece of 3/4" ply wood (or any thickness for that matter). This is where the cushion mat will sit and be stapled to. I used some left over ply I had in the shed.
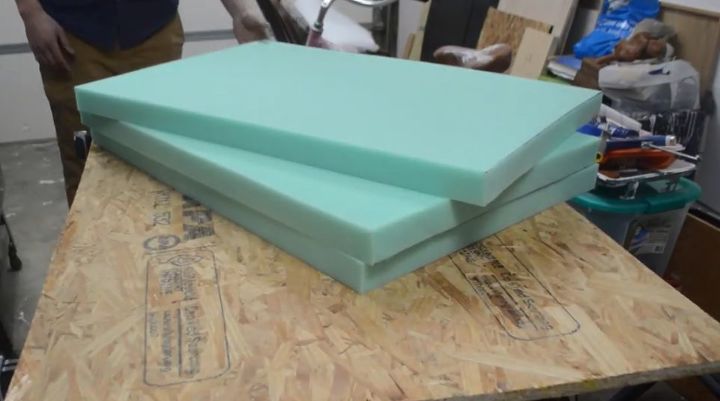
Use 3" foam you can pick up at your local fabric store. Hack: this cost me $100 for this foam, I wish I would have taken it back to buy a mattress foam pad for less than $20 on amazon. GO THIS ROUTE! Same quality for a 1/5 of the price
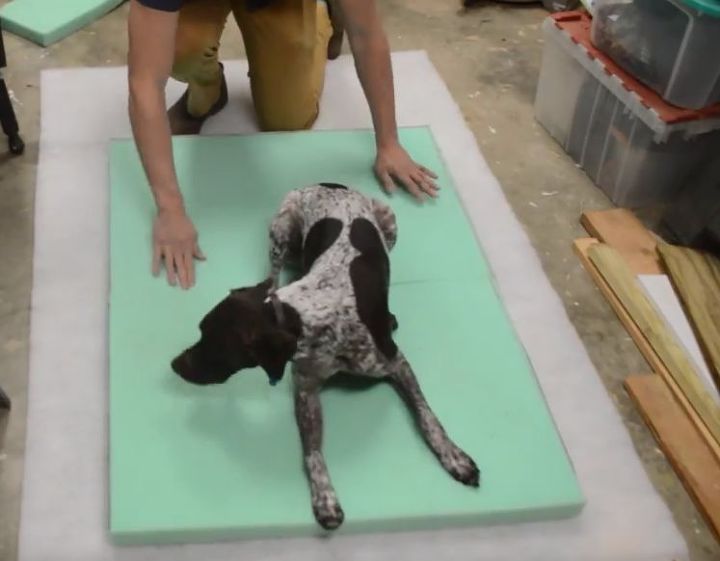
Lay your foam out after you cut it to size, this matting will cover up any and all seams so don't worry too much if it isn't a solid chunk of foam. Tip: make sure your dog doesn't claim it as his own. This could be problematic later on when its done.
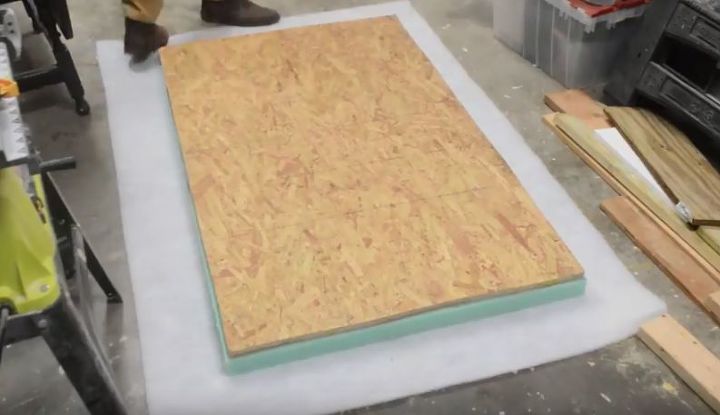
Drop your ply wood on top of the foam making sure you square it up as best as you can
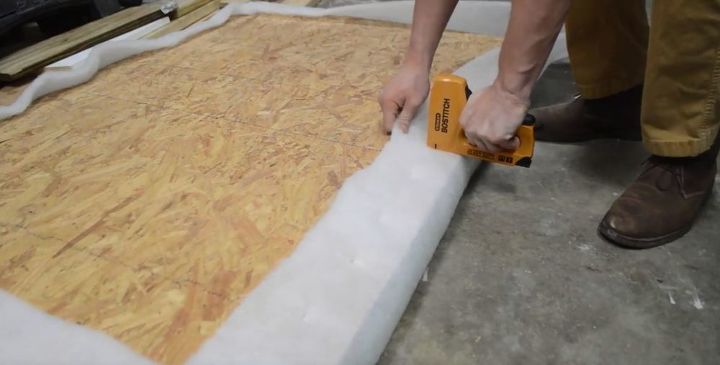
Use a staple gun to keep the matting in place, I suggest stapling every 1-3" pulling the matting as tight as possible
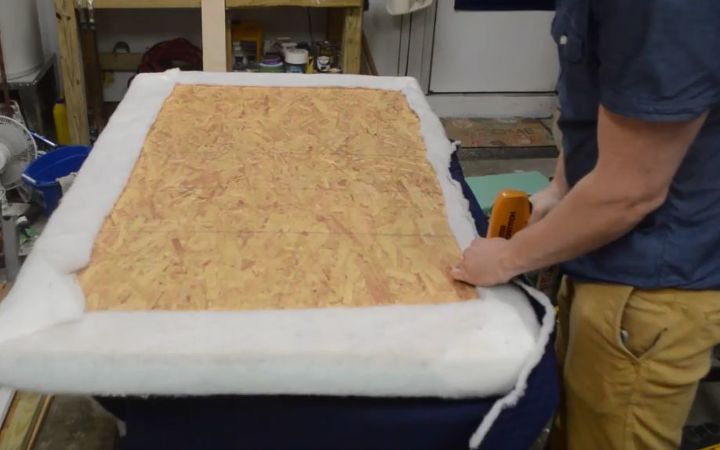
Add the final fabric under the matting and repeat the same process as above. Make sure you are pulling as tight as you can on the fabric, making sure there are no creases or folds. Space the staples every 1"-3".
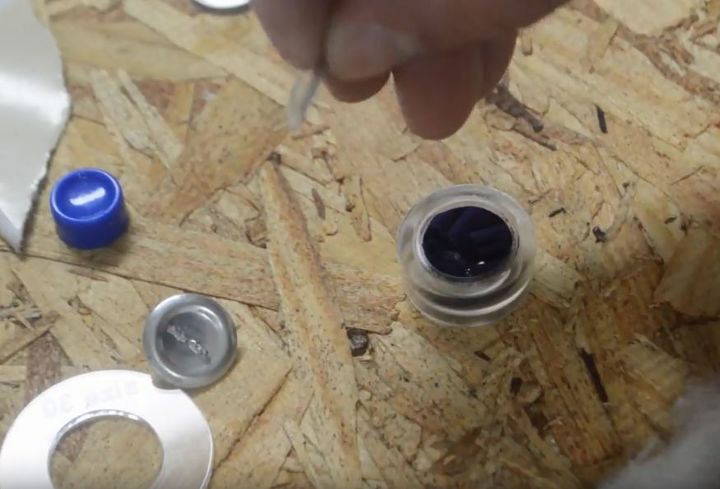
I bought this button maker off of amazon, use the left over fabric you cut off. Put the button in on top of the fabric push the cap in and you have a button in seconds!
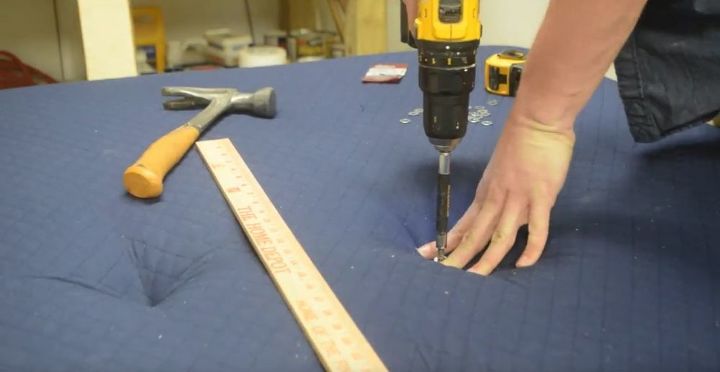
To get the tufted look, I took some screws and came up with a pattern. Make sure you push the fabric and foam down and screw slowly. The screw has a washer by the head which can pop through the fabric if you aren't careful... Take it from me I learned the hard way.
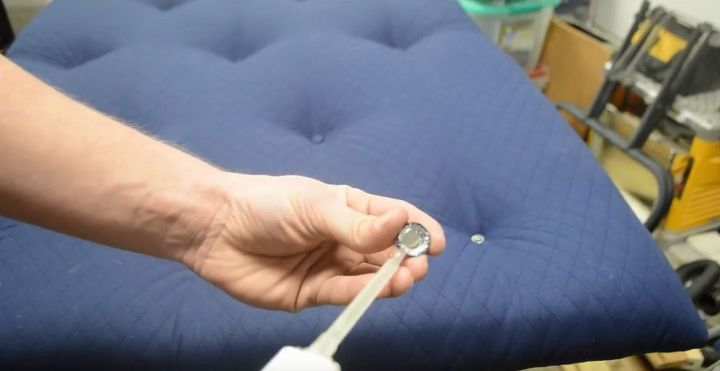
Use a 2-part epoxy and glue your buttons on to the washer/ screw assembly.
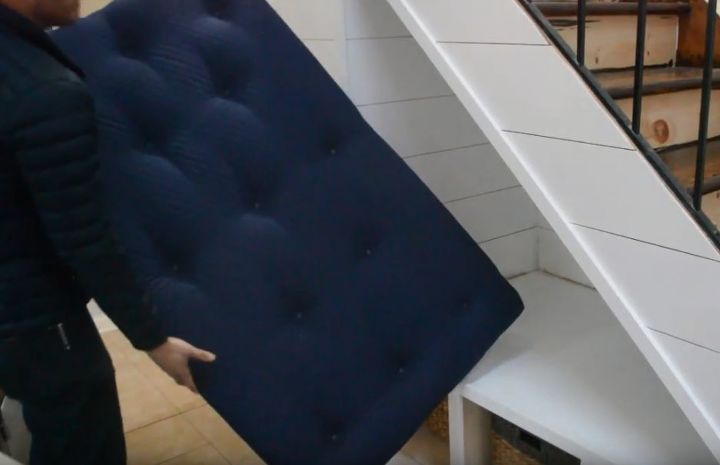
Bring your cushion inside and lay it out where you want it, looks super elegant for super cheap in my opinion
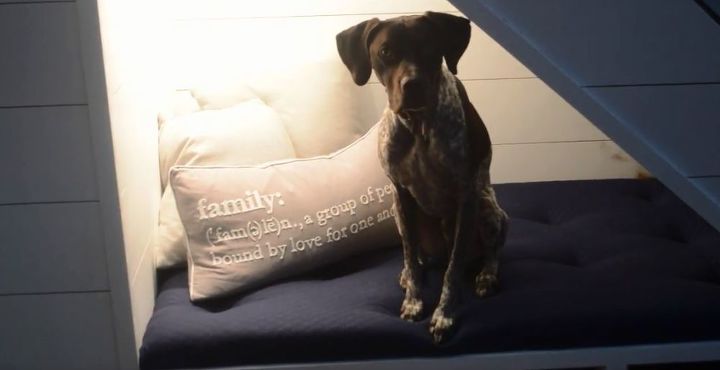
Remember what I said about making sure your dog doesn't lay on the cushion... This is why. He has claimed this area as his own. Tucker and I thank you for stopping by! Check out our YouTube Channel and subscribe for some pretty interesting projects!
{
"id": "4845164",
"alt": "",
"title": "",
"video_link": "https://www.youtube.com/embed/rpAjQMHi5hY",
"youtube_video_id": "rpAjQMHi5hY"
}
{
"width": 634,
"height": 357,
"showRelated": true
}
Resources for this project:
See all materials


Any price and availability information displayed on [relevant Amazon Site(s), as applicable] at the time of purchase will apply to the purchase of this product.
Hometalk may collect a small share of sales from the links on this page.More info
Comments
Join the conversation
2 of 132 comments
-
Tucker is so cute and he’s smart to find a nice cozy place to relax. Nice project. You can also draw your grid for your buttons on the back of plywood and pre-drill your button holes through the wood Before you cover it with padding batting and fabric. You can then run a long tufting needle with heavy duty thread through the back of the wood, catch the back of the button, push needle back through the wood and tie off the thread.
-
Very clever with the buttons! I'll have to try that next time I make a cushion.


Frequently asked questions
Have a question about this project?
Has your gshp taken over the house like mine do?
Actually planning to make a padded top for a foot stool. This is the perfect step-by-step for that. How much over hang did you have for the matting?
What is the white stuff between the green foam and I assume the final fabric?