


Pink Pumpkins Galore!
I was asked to make a fall/pumpkin display for a Breast Cancer Awareness project in my area. I was honored to come up with these pink pumpkins and think that this was one of the most fun displays I have ever made! And for an honorable cause!
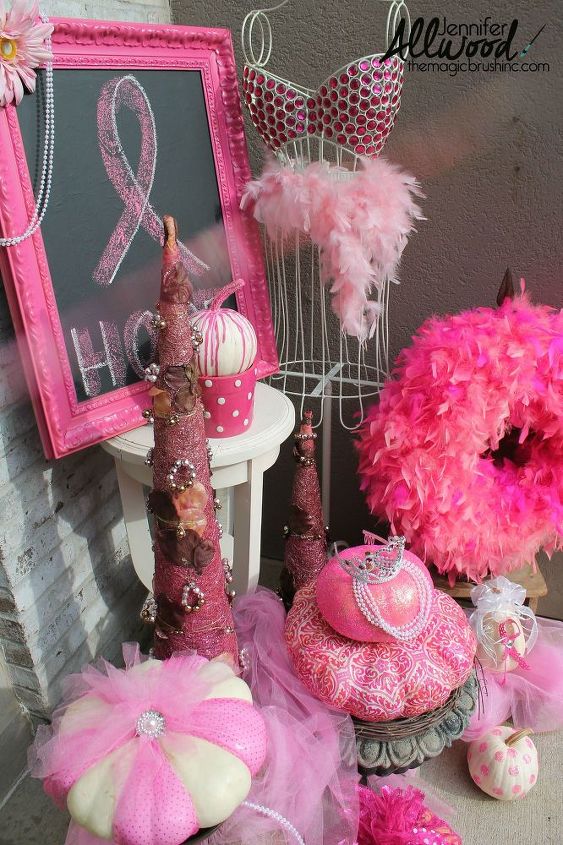
For all of my pumpkin displays, I always use real pumpkins. They are cheaper and this way I can do new colors and techniques each year. They will not last forever, but an exterior clear coat in spray form will help them last longer! Keep in mind that you can duplicate any of these pumpkin paint finishes in colors other than pink!
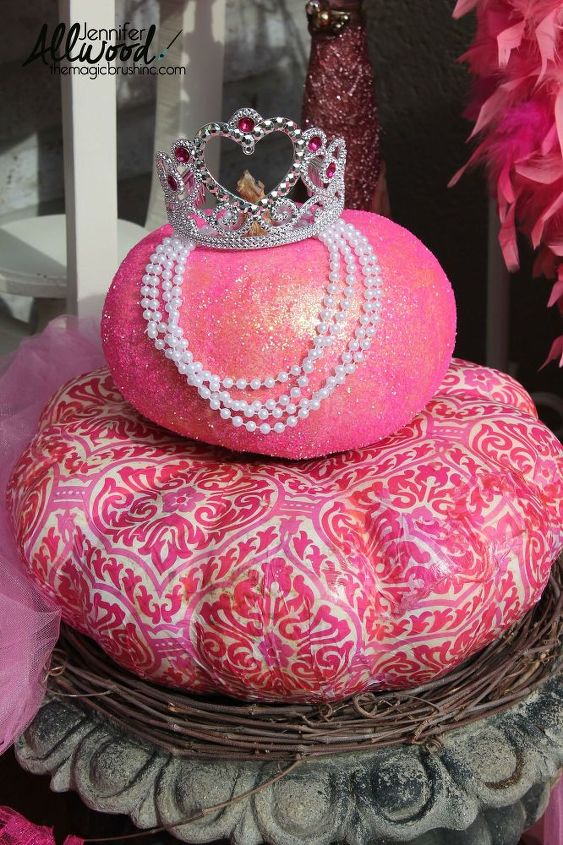
The top pumpkin in this photo was covered in Mod Podge for an adhesive and then I used pink glitter from Hobby Lobby to cover the pumpkin. This is messy.... but so, so easy to do! Just set the pumpkin inside a box lid and sprinkle away!
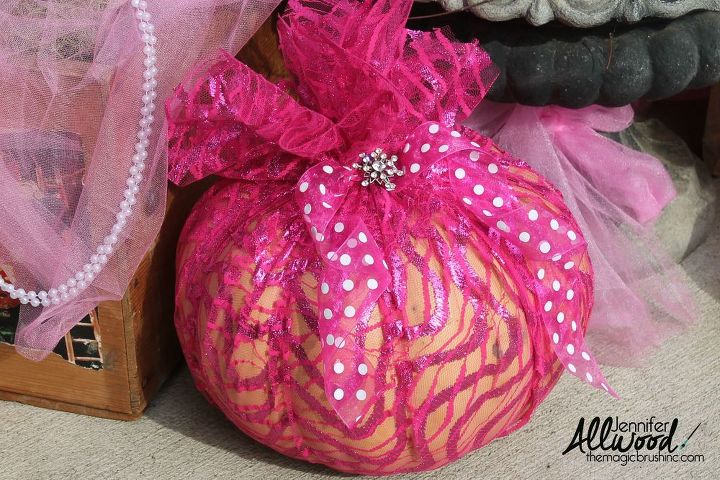
This pumpkin was literally just set down on a square piece of tulle from the fabric store. I used a rubber band to gather the fabric around the pumpkin stem at the top and then tied a bow on it for decoration. The bling in the center is a woman's broach that you can find a garage sales, antique stores, etc.
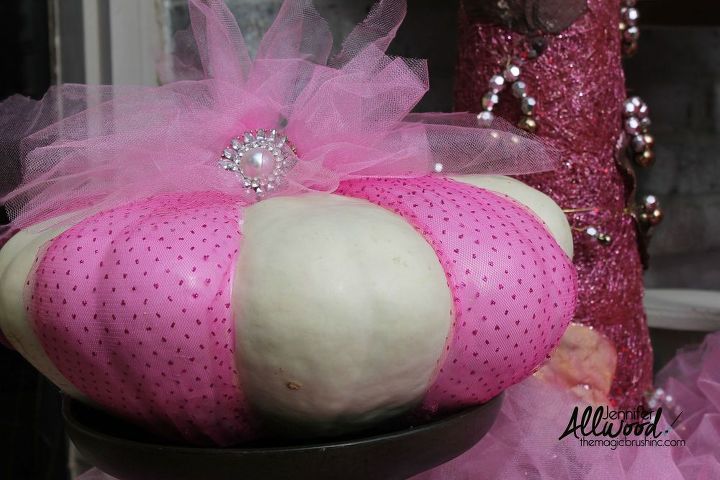
On this white pumpkin, I used a roll of tulle that you can buy precut into 6 inch wide strips. Any craft or fabric store has it. So easy and the same concept as the last pumpkin. I just cut 2 pieces of tulle and stretched them around the "humps" on every other hump. I used a rubber band at the top to gather the tulle and another broach was pinned to the rubber band to make it fancy!
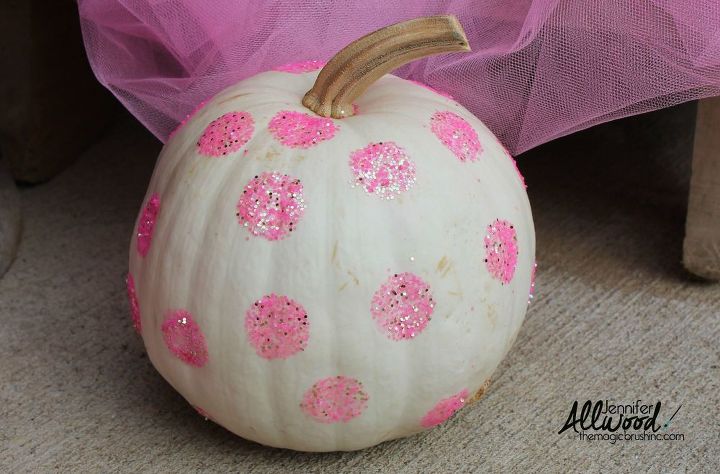
This white pumpkin was super easy to polka dot. I used a pink craft paint and a "dobber" tool from Hobby Lobby (they are also called "spouncers"). These tools make polka dots for you. Dip in the paint, press onto the pumpkin and WHILE THE PAINT IS WET, sprinkle glitter on it! So quick and easy!
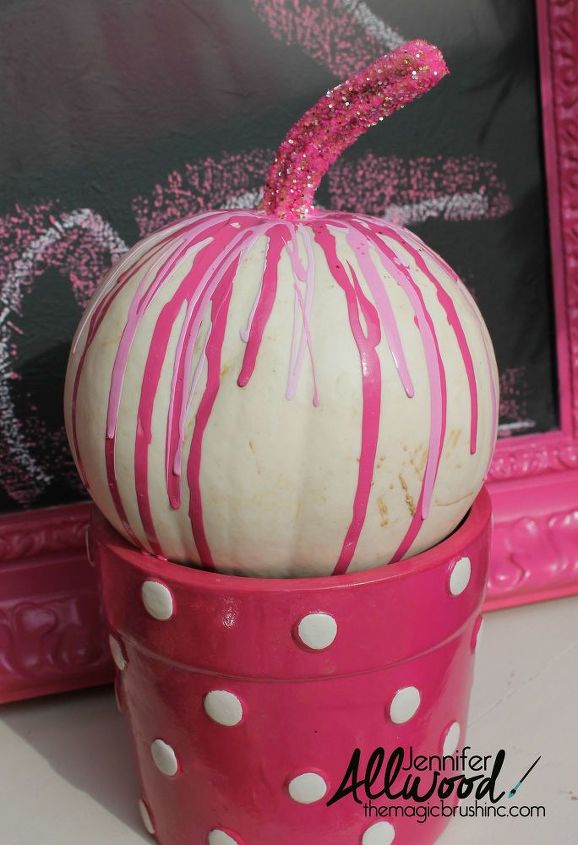
My kids loved this pumpkin. We bought a white pumpkin and dipped paint brushes in 3 different shades of pink wall paint (because it's thinner and easy to drip) and let it drip down the pumpkin. Super easy. Then I brushed the pumpkin stem with Mod Podge and sprinkled pink glitter over it.

I tried to display the pumpkins on varying heights and with some other pink items of interest. When it was placed all together, it was a huge eye catcher! And, I won the display contest!

Want more details about this and other DIY projects? Check out my blog post!


Frequently asked questions
Have a question about this project?