


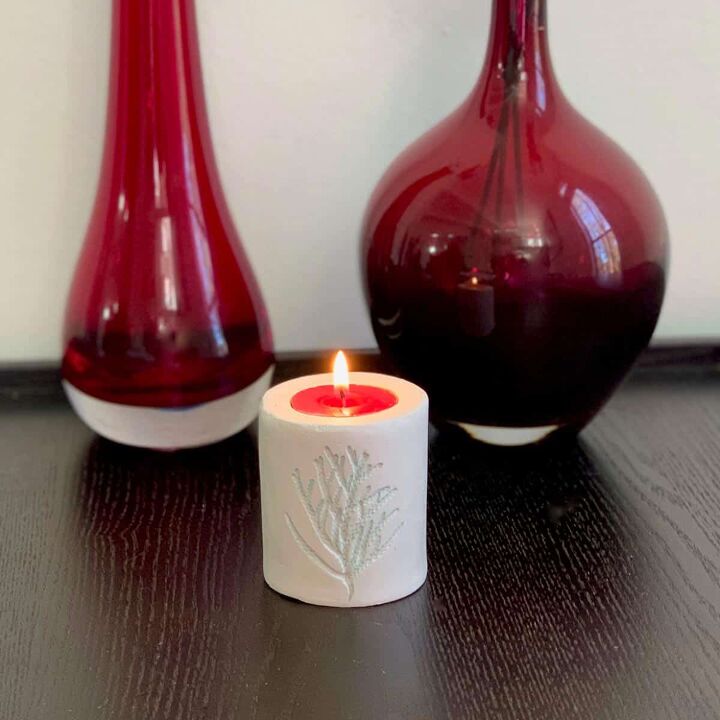
Air Dry Clay Candle Holder For Christmas
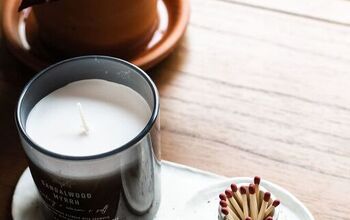
A unique air dry clay Christmas candle holder with a charming cedar leaf imprint.This was my first time making diy clay candle holders. I was surprised at how simple it actually was to make one of these.
I really liked the idea of adding the cedar leaf imprint to make it a more unique home decor piece.
And of course, with air hardening clay, you can make an imprint of just about anything to change up the design.
With the flexibility in design, you can customize them, so they make really nice gifts. Recently I did make some clay candlestick holders with copper, you may want to take a look!
What else can you make with air dry clay? Well, here’s a list of 55 unique air dry clay ideas.
FAQ for Making Air Dry Clay Candle Holders
Can you use air dry clay for candles?
Yes, it is safe to use air dry clay as candle holders as long as you have an insert to protect the clay.
Besides, the candle wax is messy and will soak into the clay.
The heat from the flame could cause cracking so just make a simple aluminum insert with flashing. You can even paint it with acrylic paint, if you’d like.
How do you make a clay tealight holder?
You make a clay tea light holder using air dry clay. The tealight holder is broken down into steps by making the outside and base of the candle first.
Then you mold the top of the clay candle holder separately.
What other materials can I use as a candle holder?
Some of the best materials to use for candle holders are cement and clay. This way you can make the DIY candle holder into any size or shape you’d like.
You can also use copper plumbing pipes to make your own candle holders, like I did for these. 😉
Tutorial Steps For An Air Dry Clay Christmas Candle Holder
STEP 1 | Choose The Cedar Leaf For The Clay Imprint
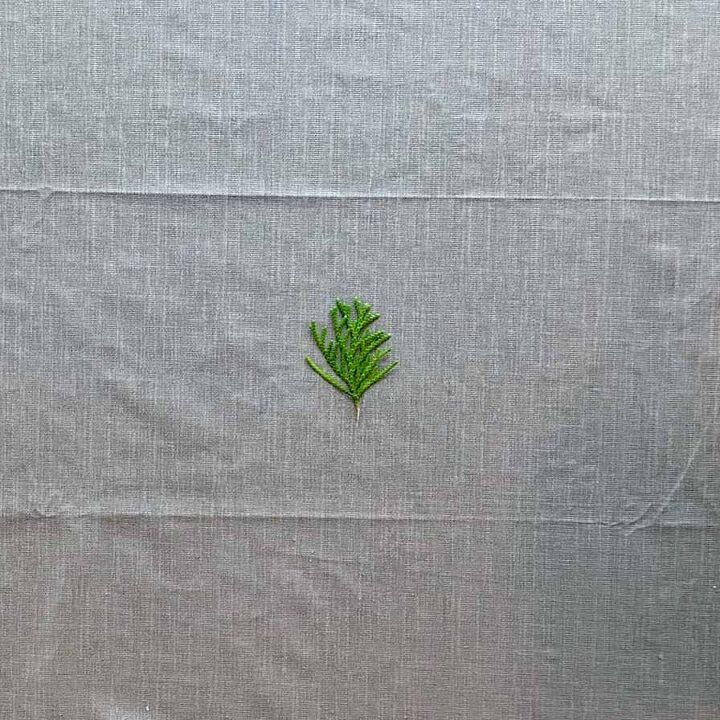
Think about the shape and size leaf you need and what height the clay candle holder will need to be to fit it.
I liked the proportions of the fall candlestick holders I made, which were 2 ¾”. So I looked for a piece of cedar that would proportionally fit a 2 ¾” tall candle holder.
STEP 2 | Make A Homemade Straightedge Tool
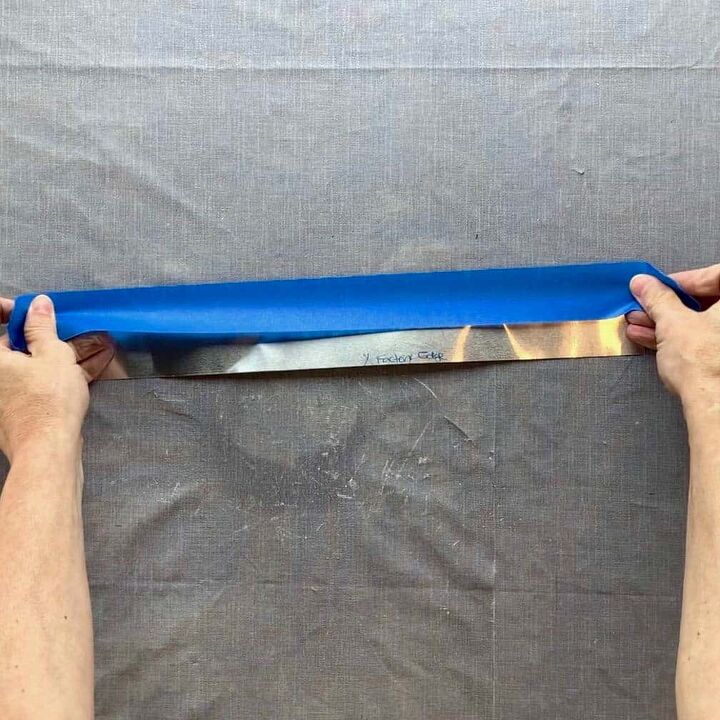
Make a straight edge that you can wrap around the bottle- a straight cut will make the clay candle look much nicer.
To make straightedge for a cylinder shape, just get a piece of aluminum flashing that is at least 14” long.
Cut it to 1’ x 14” and make sure one of the long edges is a factory cut edge.
With a factory edge, you can be sure the piece is square.
Now take a piece of blue painter’s tape and run it along the non-factory cut edge so that it overlaps each end by a couple of inches.
STEP 3 | Prep The Clay Tealight Candle Mold
Decide what height you want to make the candle holder. I made my 2 ¾”.
Assuming you go with 2 ¾”, then first cut the bottom off of the water bottle.
You want to avoid the bottom where it rounds under, so start at about 1” from the bottom.

Measure 1” from the table and mark this in 3 locations around the bottle.
Now wrap the homemade straightedge around the bottle, ensuring you have lined it up with your marks.
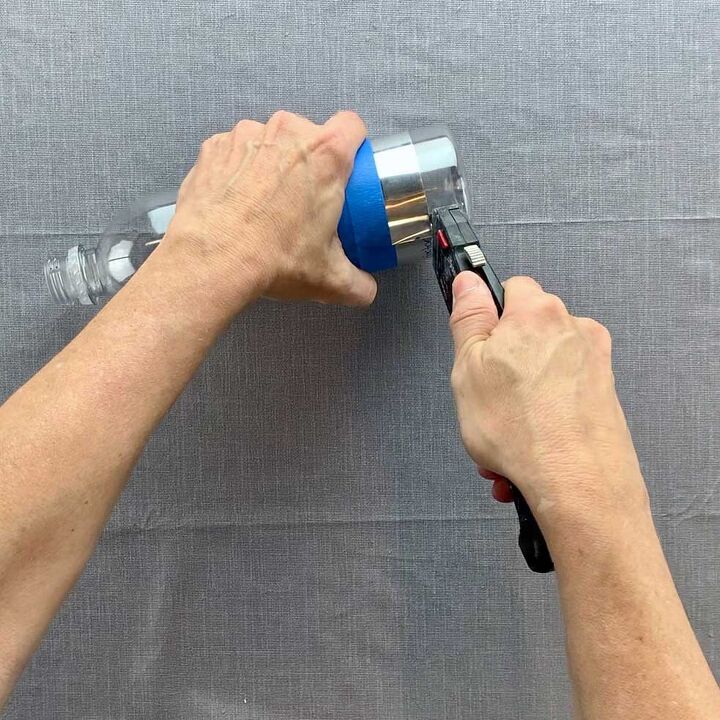
Take a utility knife- with a fresh blade and cut off the bottom of the bottle. Be sure to hold the knife straight (don’t angle it inward or outward).
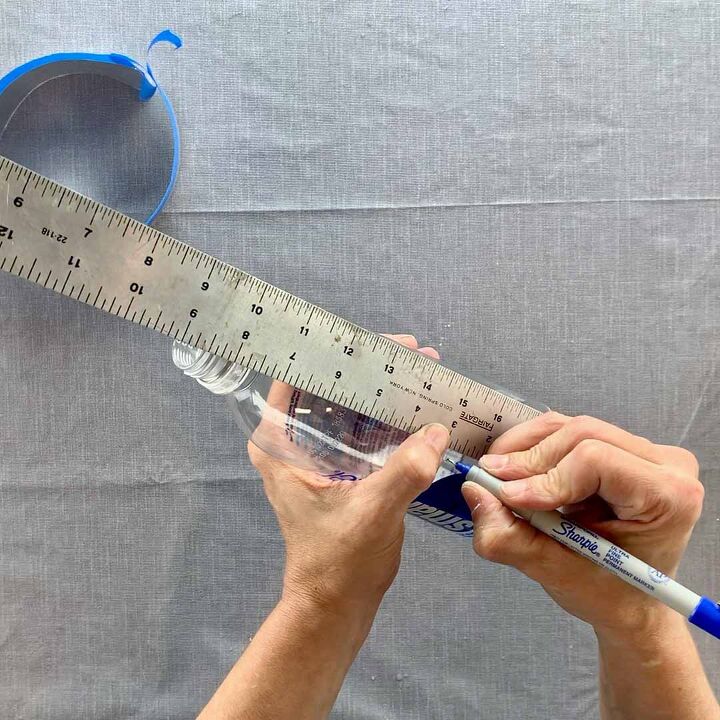

Next, remove the straightedge and measure again from the table, up 2 ¾” and mark this in three locations. Repeat the same steps as above.
Note: Make sure when you wrap the bottle, that you wrap it so that it is covering the part of the bottle being used as the mold.
That way, if you make a mistake, it will be on the part you aren’t using.
Peel off the plastic wrapper from the bottle, this will help you be able to see the clay better while working on it.
STEP 4 | Roll Out The Air Dry Clay
**By the way, if you love clay projects, then here are 55 great air dry clay ideas for you to check out, after this tutorial. 😉
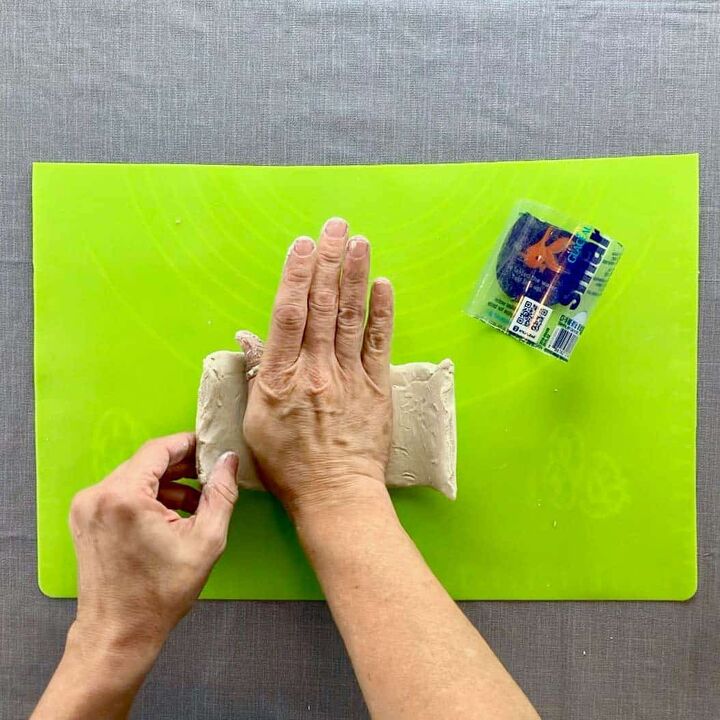
Break off a piece of clay about the size of an orange. It’s better to have too much, than too little.
Now divide it into two pieces. It’s a good idea to warm up air dry clay before trying to roll it out, so go ahead and individually knead these pieces.
With the clay warmed up, it will be much softer and easier to work with.
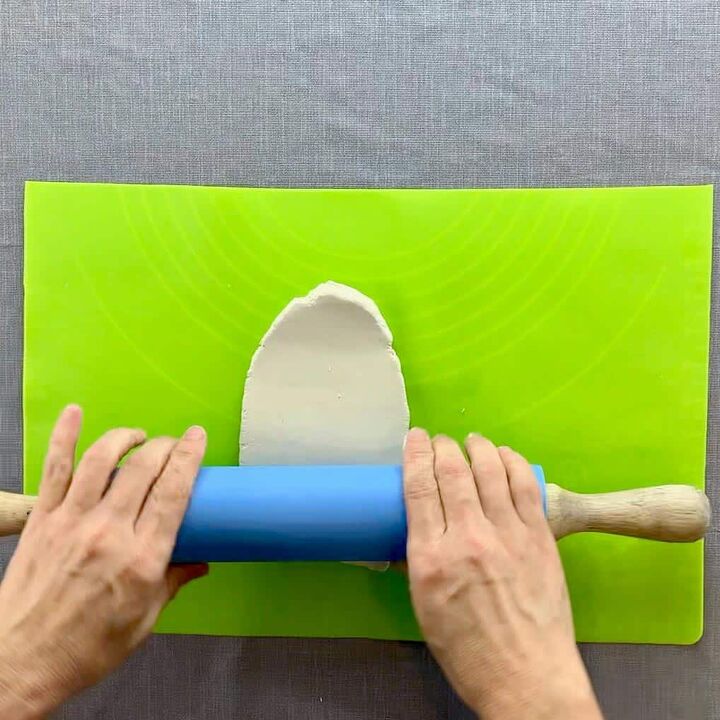
Once it feels softer, go ahead and combine the two and roll them into a ball shape. Place the ball on the table and flatten it a bit with your hand.
Now take the roller and roll the clay. You will have better results if you roll the air dry clay either forward or backward, but not both.
Do this from different angles until you have a round pie dough shape.
STEP 5 | Trim The Air Dry Clay
You’ll need to know how long of a piece you need to cut from this, so take a piece of string, or paper and wrap it around the bottle.
This will be the length and the width will be the 2 ¾” for the height of the candle holder.

I didn’t actually trim mine which was a mistake.
I figured I would trim it once the clay was inside the bottle, but it would have come out nicer if I had a nicely rolled out piece of clay that was trimmed to size.
Cut a rectangle into the rolled out clay that is the length and width you need to fit the bottle mold.
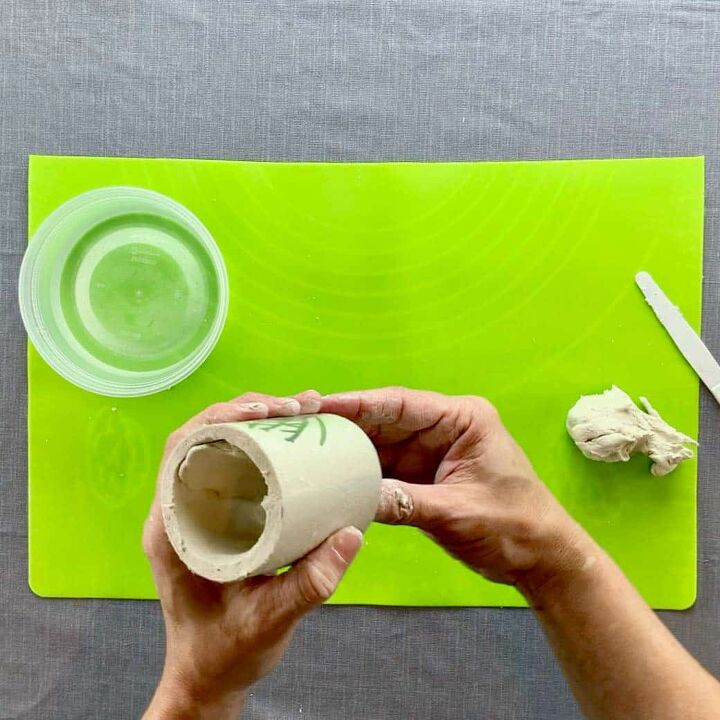
Next, check to make sure the fit is correct by lifting the clay and gently roll it together like you would a newspaper and insert it into the bottle.
Again, mine wasn’t trimmed to size, so you shouldn’t have much of any overlap here. If you do, you can trim it with a knife.
Now trim off the overlapping piece and place it back onto the table.
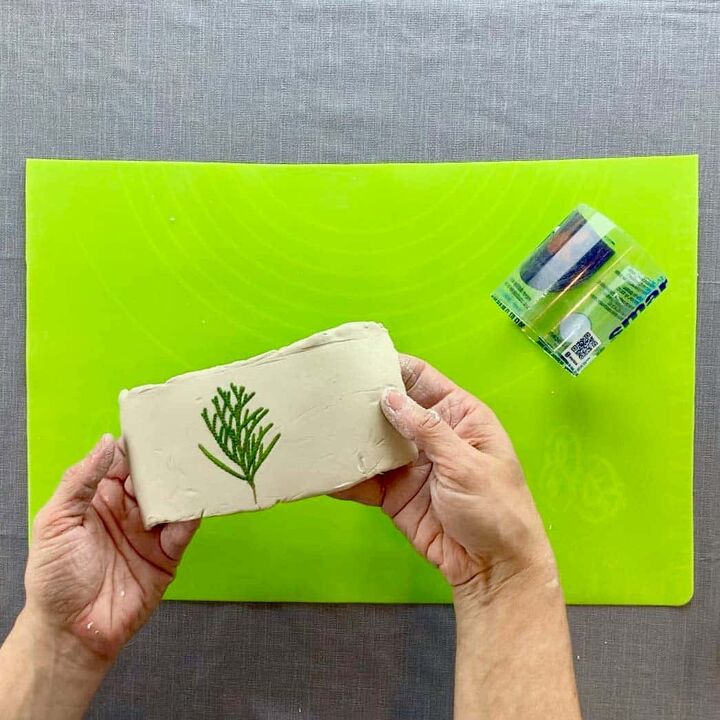
STEP 6 | Create The Cedar Leaf Imprint
Next, take the cedar leaf and lay it on the table and then take the clay and place it on top of the leaf.
Make sure you have it lined up the way you want it to be placed within the clay -before pressing the clay down onto it.
Once it’s lined up, just gently apply pressure onto the clay. You only need it to stick well enough to get it into the bottle.
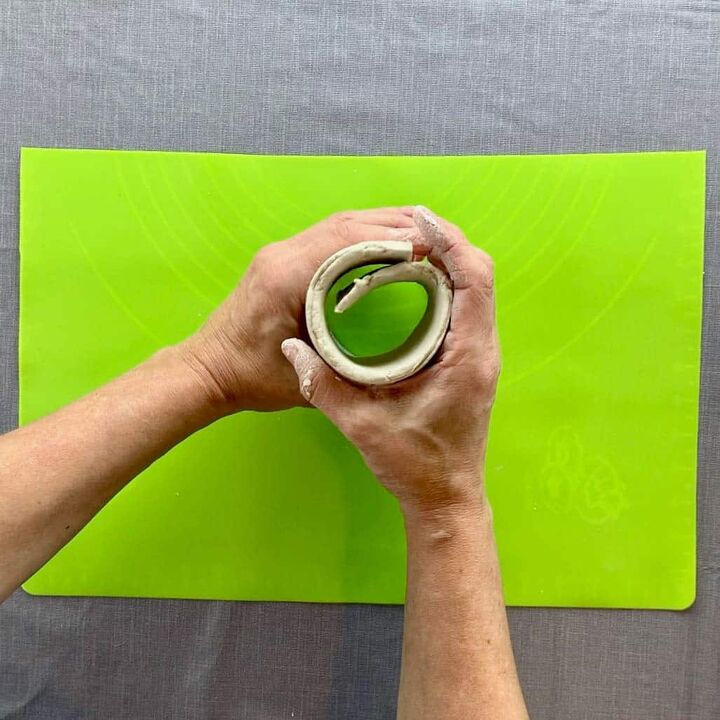
Now roll up the clay again, like newspaper and re-insert it into the bottle.
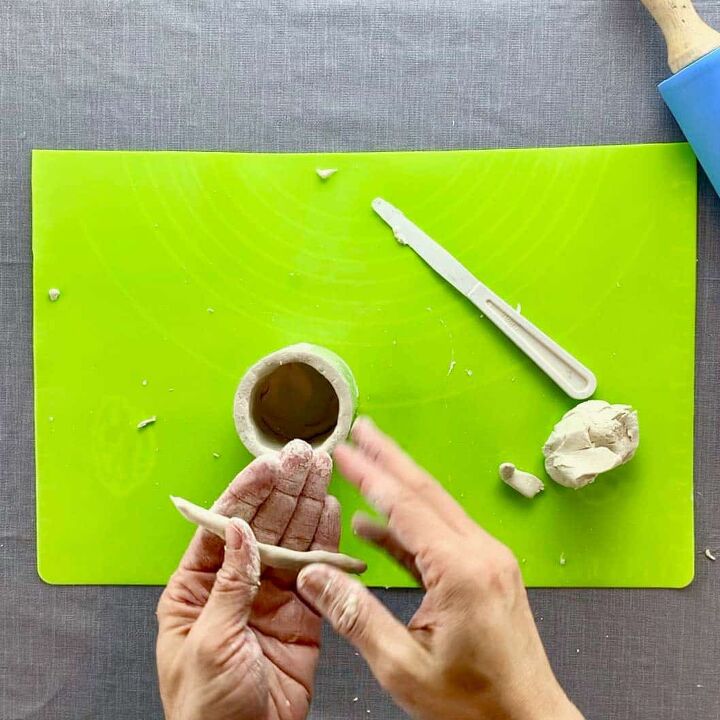
STEP 7 | Start Molding The Clay For the Tealight Candle Holder
Roll a piece of clay in your hands to form a long skinny piece, and only needs to be about ⅛” wide.
This piece of clay that is used for joining seams is called a slip and will be used to join the ends of the clay together inside.
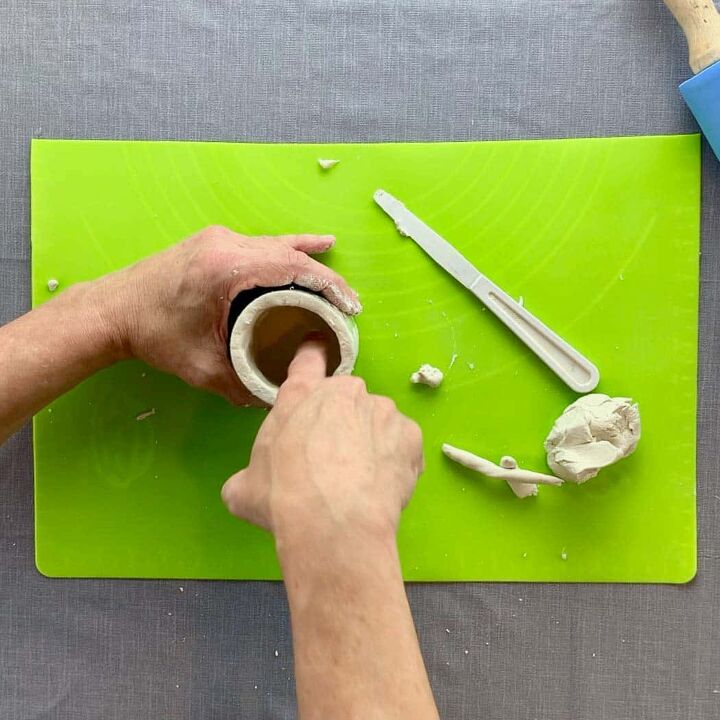
Place the piece at the seam and blend it to join the ends. My piece in the photo was much bigger than needed.
Use your fingers to blend it in and dip your fingers in water to get a fine blend.
Remember to check from the outside of the bottle as well, to see whether the seam is visible. Keep blending until both seams disappear.
Though the inside seam needs to be joined, it won’t be seen, so you don’t need to perfect it.
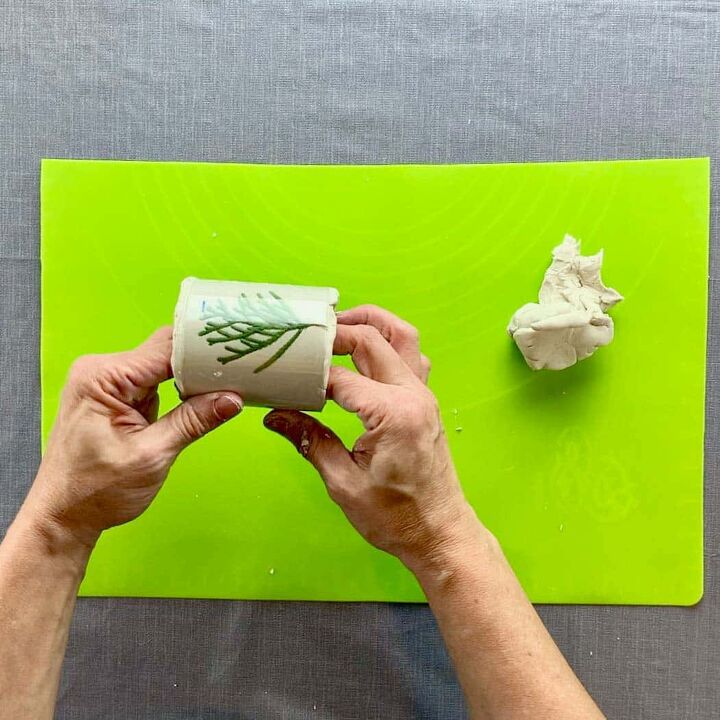
Now place a little pressure on the area where the cedar leaf is so you can get a nice imprint.
You will be able to see this from the outside, if it’s deep enough- be gentle though, because it will take the print easily.
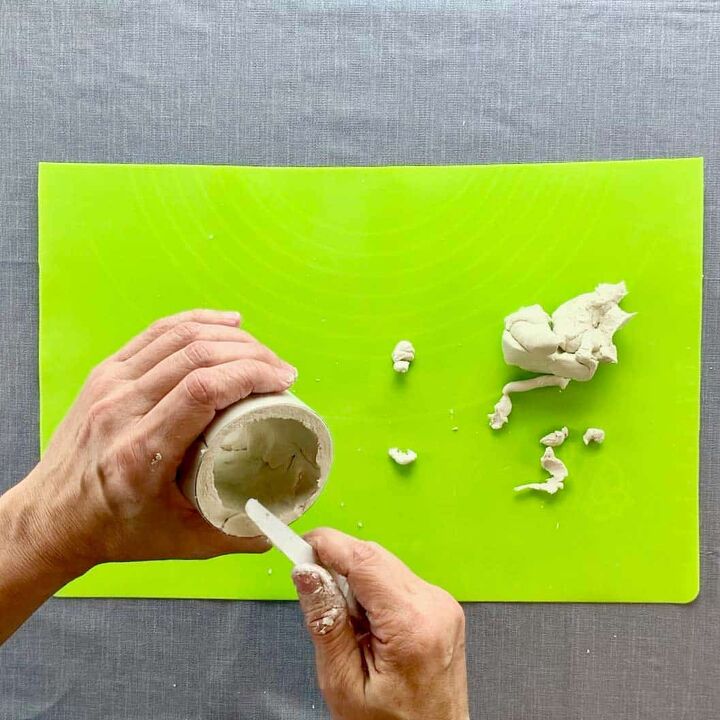
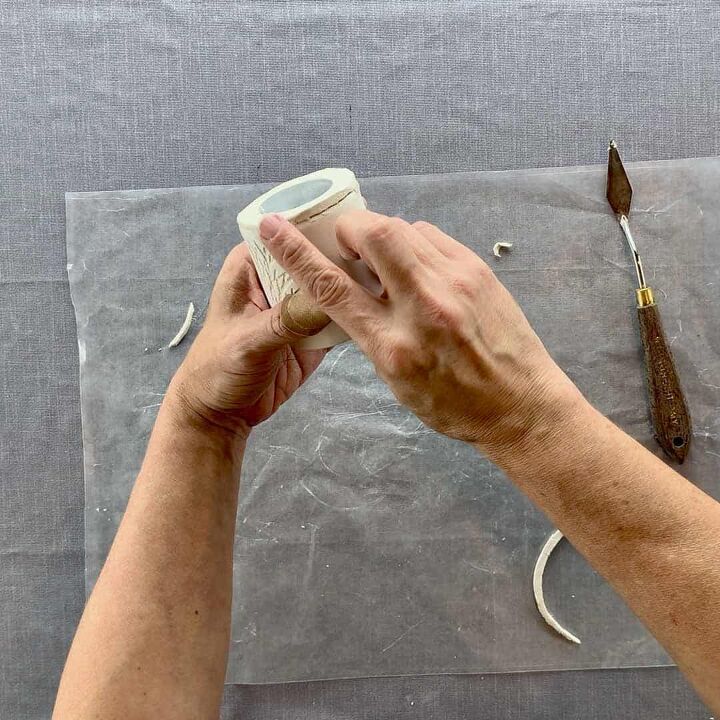
If your top or bottom edges of the clay collar didn’t line up evenly, then just trim them with a knife.
Keep your blade flat/perpendicular to the bottle to get a nice even cut.
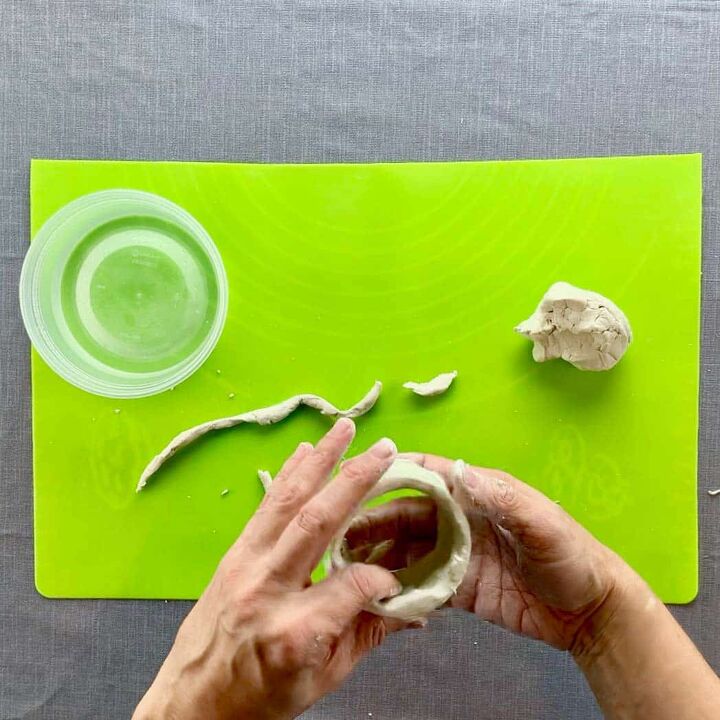
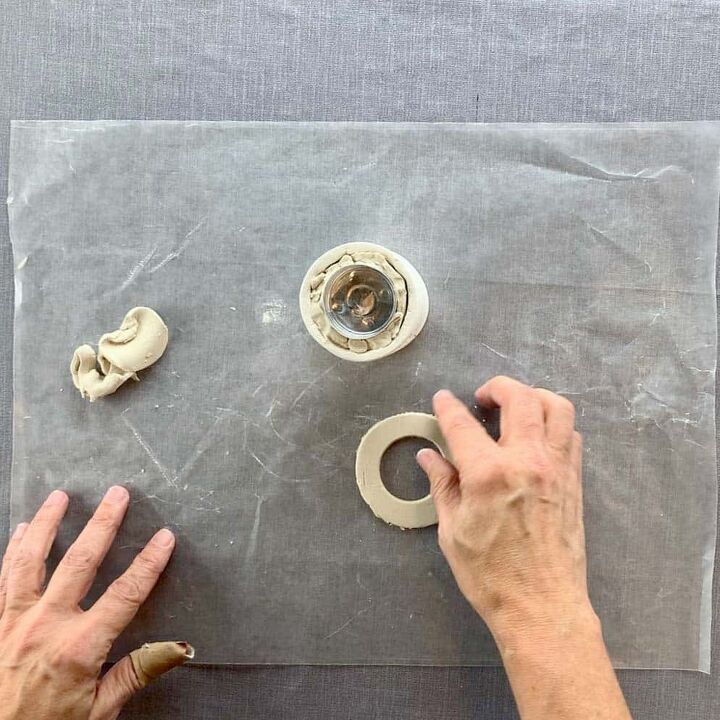
STEP 8 | Make The Bottom For the Clay Tealight Holder
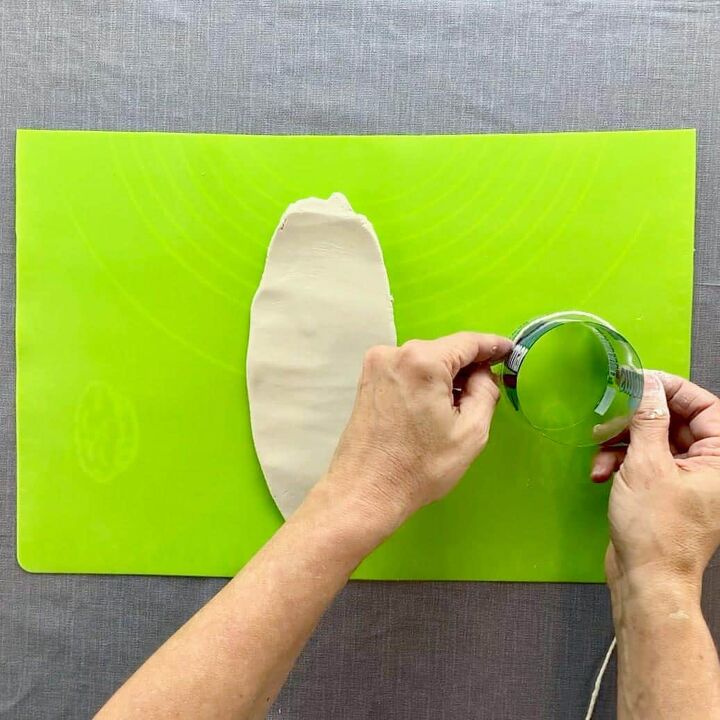
Roll out more clay, flatten it and use the unused end of the plastic bottle to cut out the bottom- use it like a cookiecutter.
Trim it a bit so that it fits the inside opening, rather than covering the bottom.
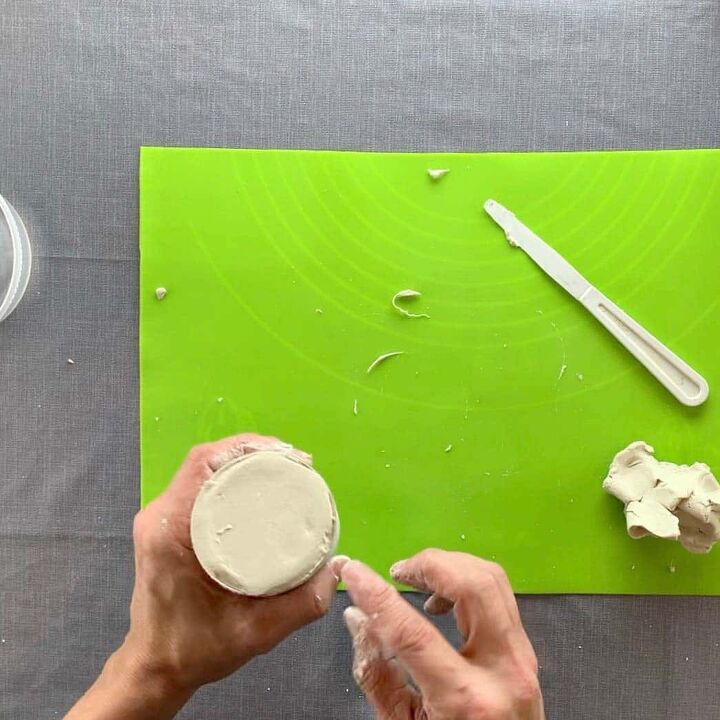
Place the circle onto the bottom of the clay candle holder.
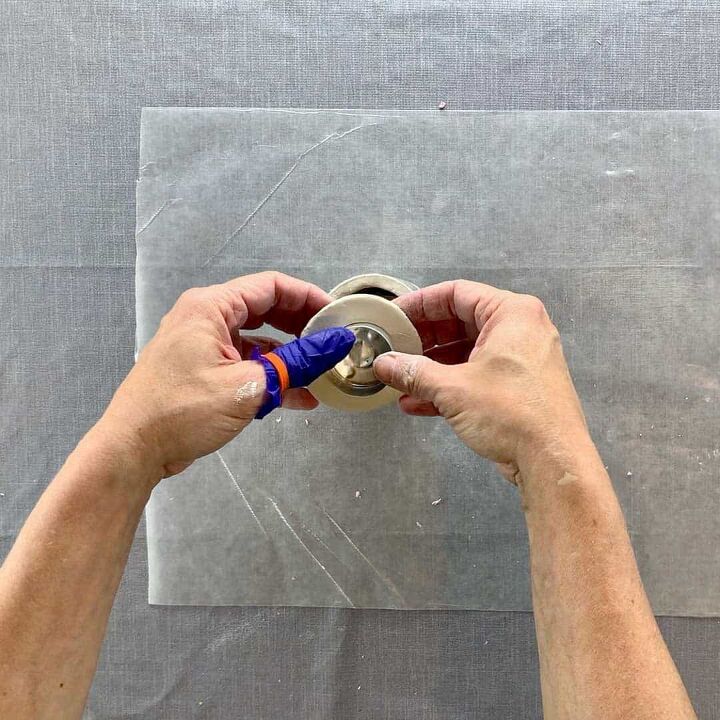
Roll up another piece of long skinny clay- about ⅛” and press it into the corners where the two pieces meet.
If you can’t reach this with your fingers, then use a wood joining thumb tool or the eraser end of a pencil.
Use wet fingers to blend the seam in.
STEP 9 | Let The Air Dry Clay Cure
Let the air dry clay harden. This will take probably at least a couple of days because the outside of the holder will be against the plastic.
I recommend keeping the clay inside the bottle, even as it starts to harden.
It can be tempting to remove it a bit early so it can dry faster, but you do risk it getting saggy since it will no longer have the support of the bottle.
If you want to speed up the process, you can use a space heater. Place the candle holder about 6-10” away from the heater.
Check back to make sure this isn’t too hot or too close that it is affecting the plastic. If it is, then either turn down the heat or pull it further back.
Keep an eye on this and every so often, turn the bottle to get airflow to different areas.
STEP 10 | Make The Top For The Candle to Sit In
Since the candle is hollow inside, we need to fill it in and give it something substantial for the tealight holder to sit on. Foam insulation board is perfect for this.
For a clay candle holder that is 2 ¾” tall, two pieces of the nearly 1” thick foam board were just right.
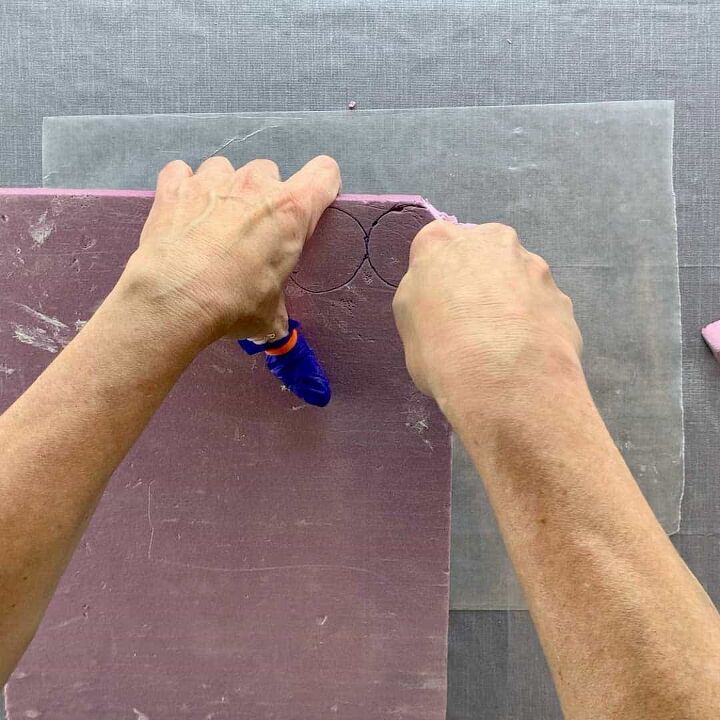
I traced two circles onto the board, using a bottle I had that fit inside the opening.
Assuming yours is the same size, then do the same and use a bottle to trace the two pieces. Now cut the pieces out using a craft knife.
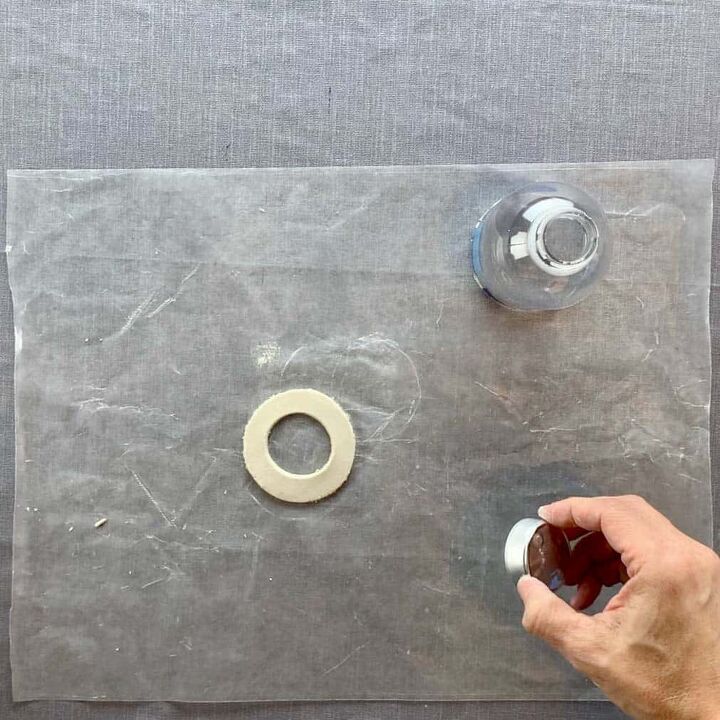
Now roll out a piece of air dry clay to ¼” thick and use the cut end of the bottle to cut out the top piece.
Then take the aluminum holder for the tealight, and place it open side down and use that as a cookie cutter to cut out the center hole.
Now you will need to fill in the empty space between the aluminum holder and the sides of the candle. I used pieces of extra clay that had hardened on me.
Now place the aluminum holder into the hole you cut out and place the top onto the filled in candle.
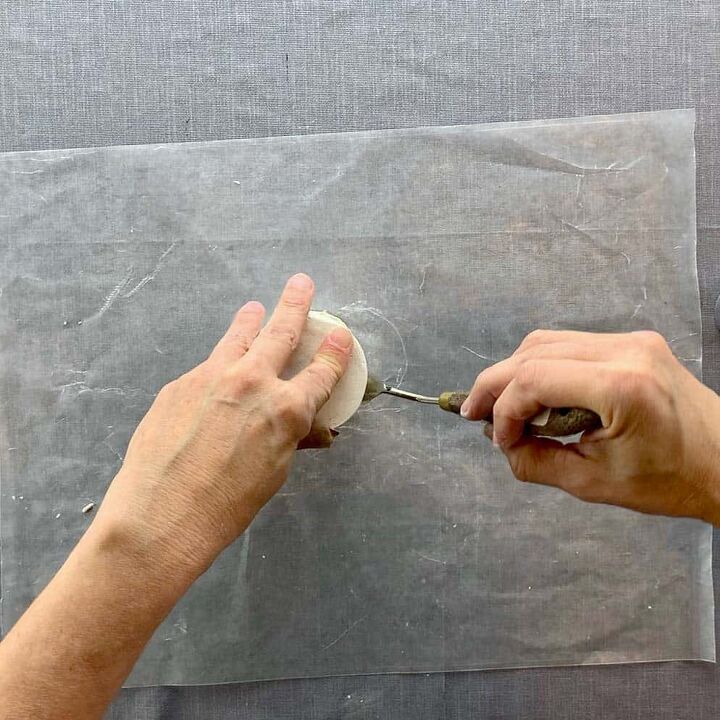
Flip this over so that you can see the overhang on your work surface and trim this with a knife.
Be sure to hold the knife parallel with the sides of the holder, you just want a straight cut, not beveled.
Now you should have a nice fitting top. So now it’s time to join the top and sides together.
Place a small bit of clay on the wax paper and add some water to it. You are creating a paste.
Once it has a paste-like texture, use your finger to blend this paste into the seams.
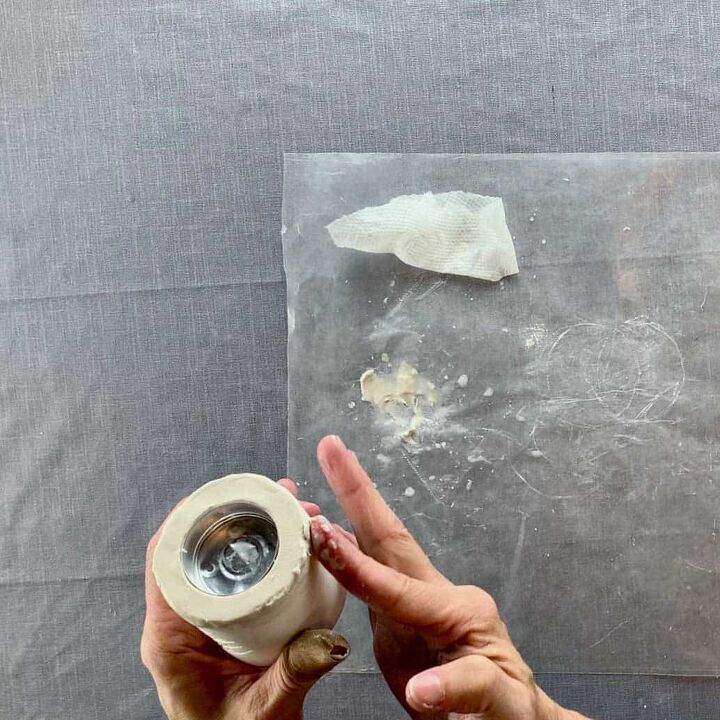
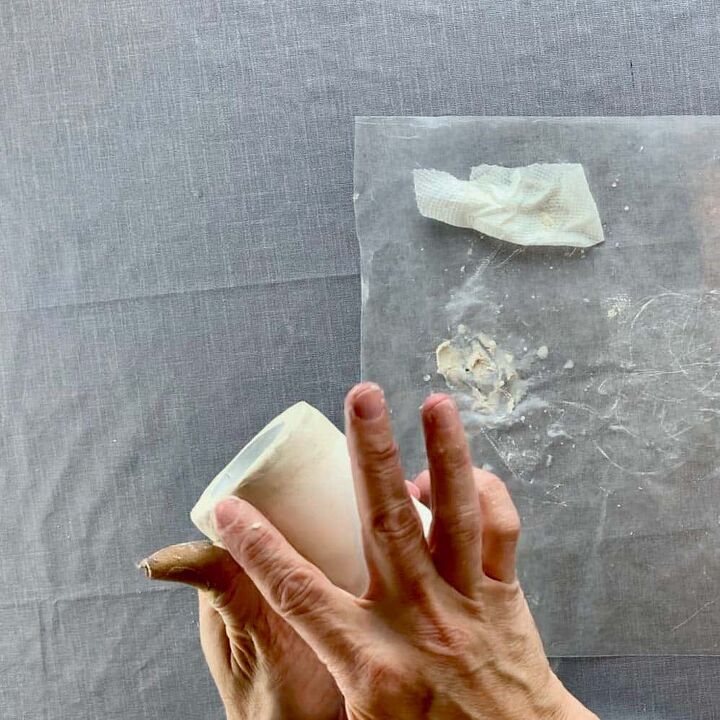
Continue blending and smoothing and wet your fingers as needed.
If you have any unwanted deeper marks on the candle holder, you can fill those in with this paste and smooth them over.
You will be able to perfect this with sanding after the clay has cured.
Set this aside to cure for a day or two, or use the space heater option mentioned above to speed the process up.
The air dry clay must be fully dry before you sand and seal it.
Make sure you let this dry with the aluminum holder both inserted and out of the clay.
The clay shrinks so you want to make sure the holder prevents it from shrinking too much so that it doesn’t fit.
You also need to get air to that part, so do it both ways.
If for some reason the hole does shrink too much, you can easily widen it by sanding.
STEP 11 | Sand The Air Dry Clay Christmas Candle Holder
Now, if you have ever sanded a cured cement piece, then you know how difficult it can be. It takes a bit of elbow grease.
Well, you will take delight in knowing that sanding air dry clay takes no elbow grease at all. It’s as easy as can be.
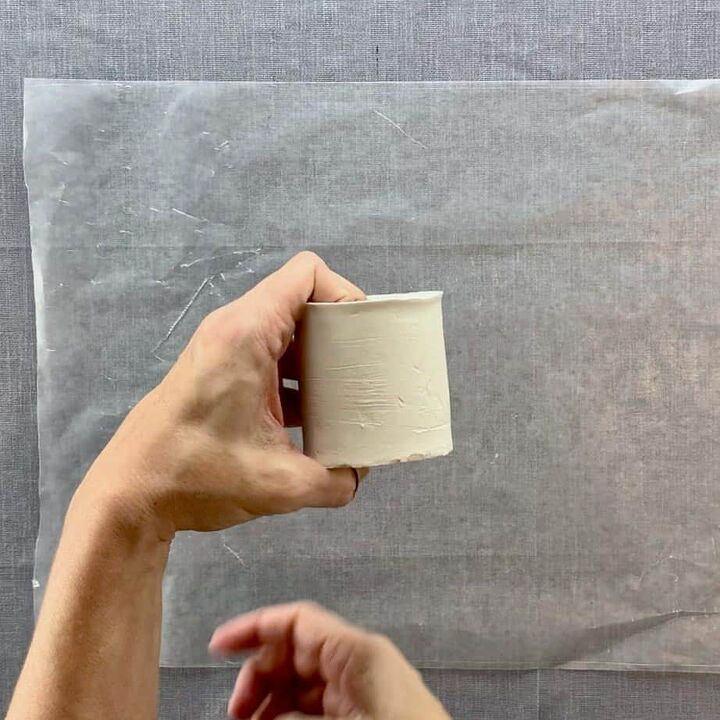
If you look at the photo above, you can see two issues. One is light abrasions from the plastic bottle.
The other is that my top and bottom are slightly flared because I removed the clay from the bottle too early.
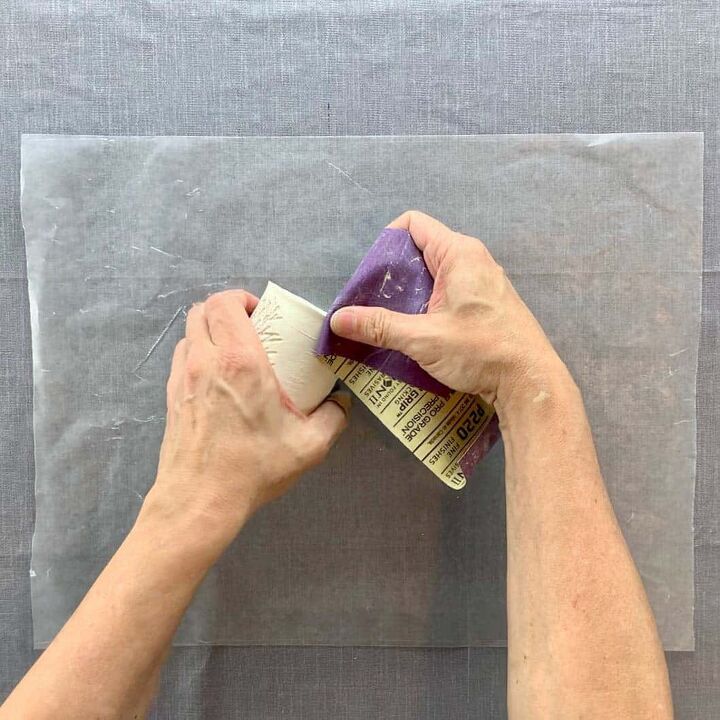
Well, both of these issues are easily dealt with, using sandpaper.
To remove larger/thicker areas of clay, the grit paper will do the trick and quite quickly.
Take it easy using this low of a grit, because it’s kind of aggressive. I probably spent less than two minutes filing down those flares.
For the minor scratches, just use grit and sand the clay in a circular motion.
I spent a little more than 5 minutes in order to get most of those marks to disappear.
FINAL STEP | Seal The Air Dry Clay Candle Holder
After sanding the clay Christmas candle holder, it can be sealed. First, use a soft cloth to wipe off all the clay dust from sanding. Use a mask when doing this.
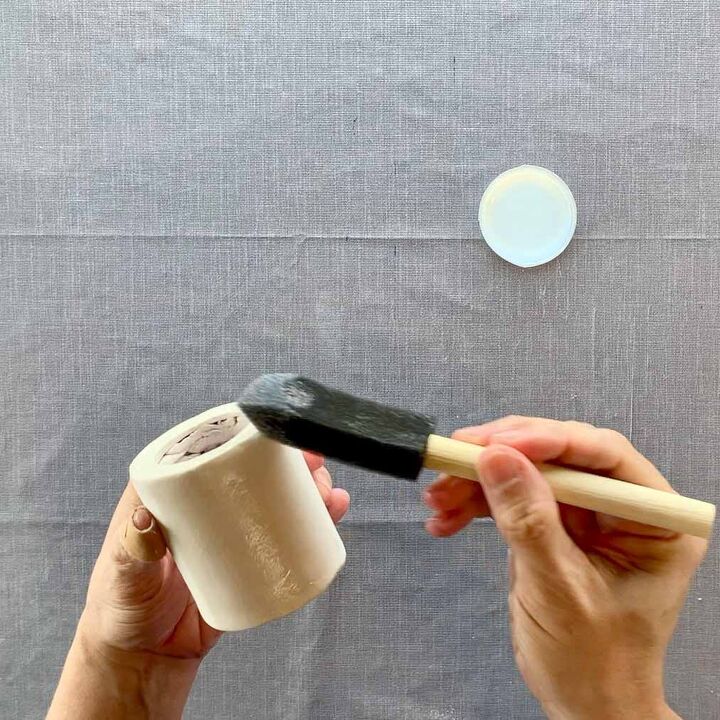
Now pour a little bit of sealer into a cup and use a foam brush to brush on the sealer. Be sure to remove the aluminum holder so you can seal in, and around that area.
I went ahead and gave it two coats. The clay is so dry that it will take in the sealer quickly and dry quickly.
Once the sealer is dry, go ahead and reinsert the tealight candle holder.
And remember, air drying clay can dry up easily, so keep it tightly sealed in a ziplock bag when storing it.
If your clay is already feeling a bit dry, add a little bit of water to the ball of clay to help keep it moist, before sealing it.
If you’re looking for more Christmas crafts ideas, here are 99 of them –all using Dollar Tree items for the materials!


Frequently asked questions
Have a question about this project?
Was the tea light holder hard to get out of the plastic mold" and did you leave the cedar leaf in it or does it fall off? Thx