


Chandelier Remake: Mackenzie-Childs Meets Tim Burton

by
Megan
6 Materials
$50
2 Weeks
Medium
I hated the light fixture in my dining room. It didn't fit the space and it shined all the light UP so there was never enough light on the table. I had a chandelier hanging in one of the kids rooms that used to be my office, and it was time to get a ceiling fan in there for summer, so I figured I would try to fancy up the chandelier I already had instead of spending big bucks to buy one new.
I started looking online and stumbled across a Mackenzie-Childs chandelier that was so quirky and funky that I loved it immediately. Its all I could think about. Well, that and the $1200 price tag. So with my inspiration piece in mind, I jumped in head first...
I started looking online and stumbled across a Mackenzie-Childs chandelier that was so quirky and funky that I loved it immediately. Its all I could think about. Well, that and the $1200 price tag. So with my inspiration piece in mind, I jumped in head first...
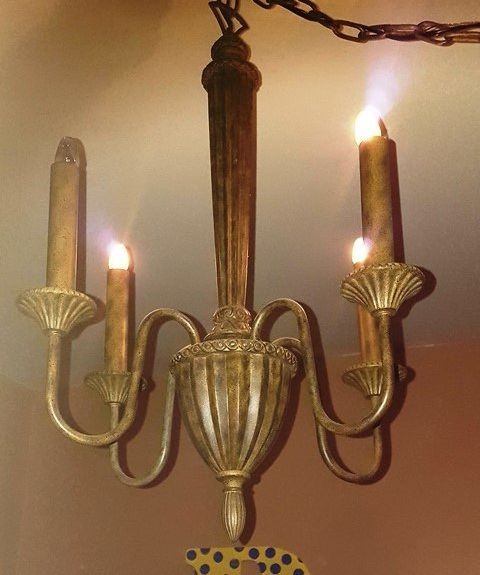
This is what the chandelier looked like hanging in my son's room... Not exactly cool for a 6 yr old boy's room. And he hated the shades so we ditched them. But I loved all the different lines and shapes in the body of the chandelier.

First order of business was to spray paint the chandelier body and miscellaneous parts in high gloss black. I also purchased a ceiling medallion and painted it black (not shown) because I suspected a bit of a mess around the hole where the current light was. That light was there since we moved in. And I was correct. There was a mess that needed covering.
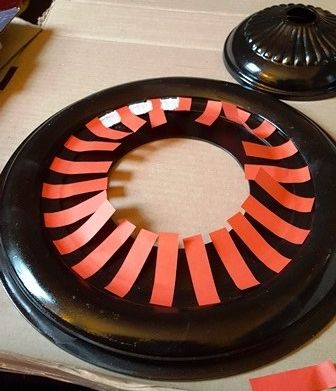
I started out with the classic Mackenzie Childs checks on the ceiling medallion. I didn't have the right size tape, but I had these little post-its that were perfect. I knew it wouldn't give me a perfect line, but I was going for the handpainted look anyway.
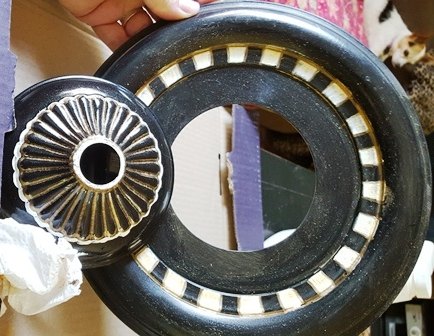
I finished the gold and white accents on the medallion and the canopy. I then mixed together a glaze (Pearl glazing medium & mustard and tan colored paint) to give the white checks that "aged" look. Here is where I made my mistake (EVERY project has one, right?) I antiqued the whole piece. I hated the way the glaze looked over the black, so I ended up repainting that with gloss black paint. So then just the white parts were antiqued. I stuck with that through the rest of the project.
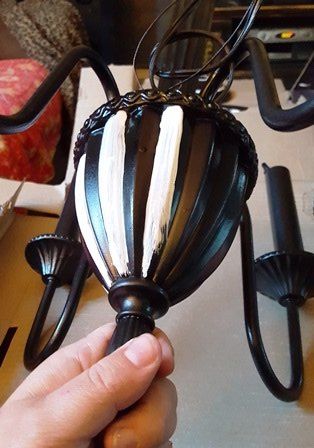
I used to shape of the body to dictate what decorative painting I used. The grooves in the body of the fixture lent themselves perfectly to stripes. I trimed all my checks and stripes out with a gold paint pen to make them look a little cleaner.

I purchased red chandelier shades at Lowes (which were surprisingly inexpensive) and striped them using tape and gold paint. Striping on a curved surface is tough. Had I known, I would have chosen a different element for the shades. But they turned out. I was a little concerned how the light would look coming through the painted shades, but as you will see at the end, it gives a pretty cool effect.

I used tape to do horizontal stripes on the candlesticks and the chandelier arms. And I did polkadots on the ridges going up the chandelier.
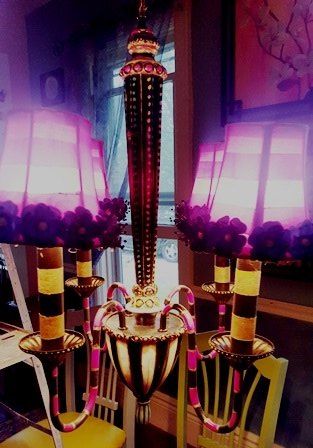
Here is how the shades look when the light comes through them. You can't really tell the stripes are gold or painted, it just looks like various shades of red light.
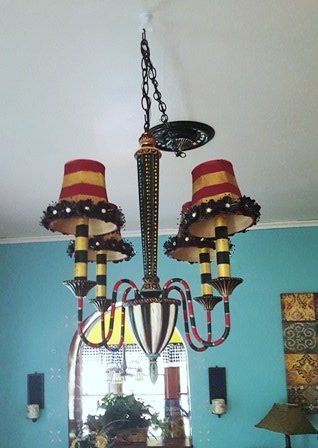
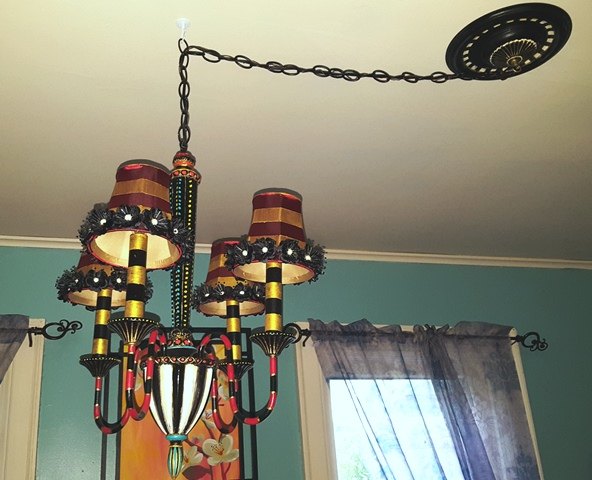
Here are pictures of the finished product. I originally intended to add more floral hand painting, but I ended up falling in love with it just as it was at this stage! My friend said it reminded her of Beetlejuice. That is how it ended up more "Tim Burton" and less "Mackenzie Childs". Either way, it fits perfectly in my VERY eclectic dining room!
Comments
Join the conversation
3 of 5 comments
-
How fun!
-
Oh my gosh, I love this! It's a sophisticated take on Beetlejuice!


Frequently asked questions
Have a question about this project?