


How to Decoupage a Vase With Floral Napkins & Mod Podge

Today, I'm going to teach you how to decoupage a vase. I’ll take you through the magical process of transforming ordinary thrifted vases into something truly extraordinary using the decoupage technique.
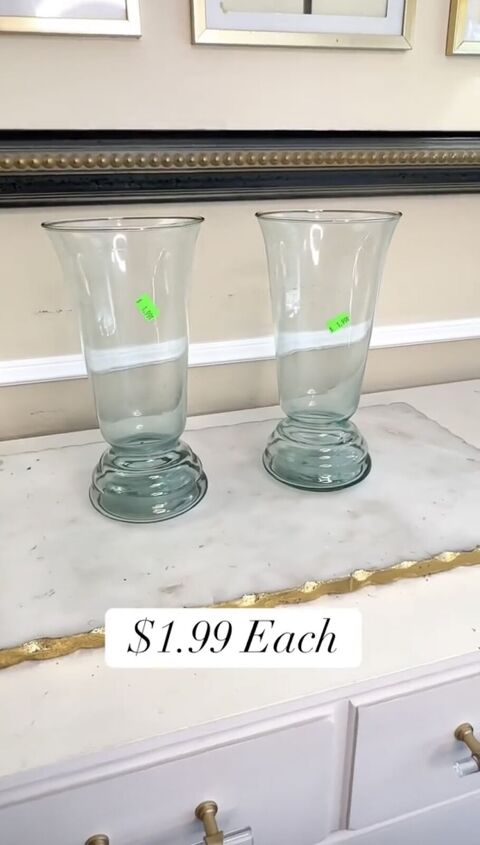
Get ready to witness the stunning metamorphosis of these $1.99 gems!
Tools and materials
- Thrifted vases
- Copy paper
- Blue painter's tape
- Gold spray paint
- Blue and white napkins with a floral design
- Mod Podge
- Sponge brush
- Scissors
How to decoupage a vase
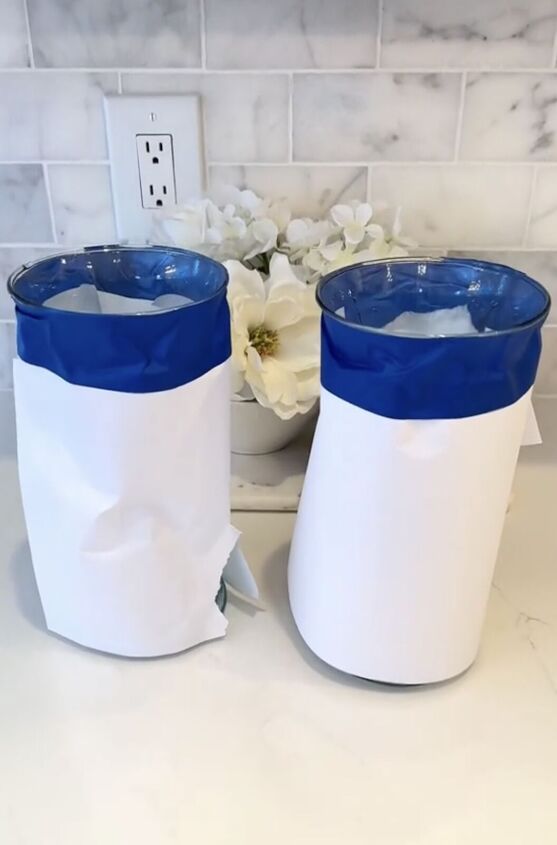
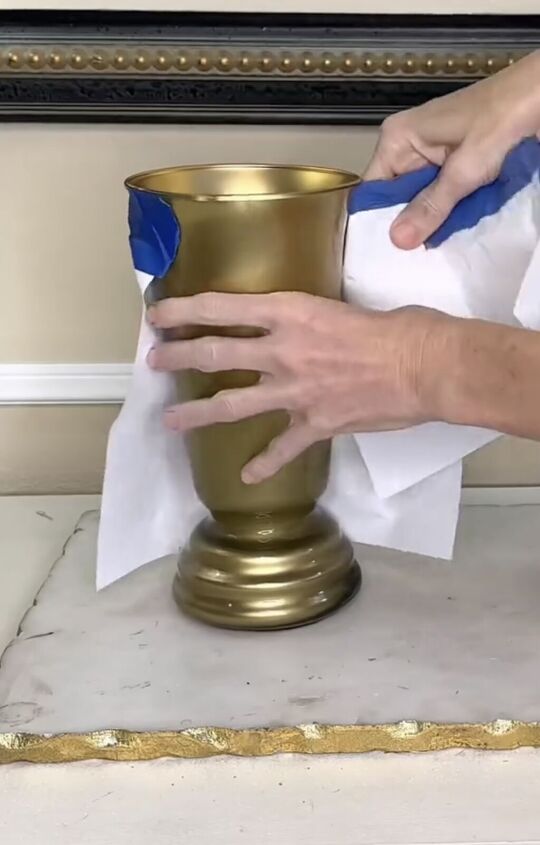
Step 1: Prep Work
To ensure a flawless transformation, start by preparing your work area. Lay down some copy paper and use blue painter's tape to protect the outer surface of the vase. We're painting the inside, so this step is crucial.
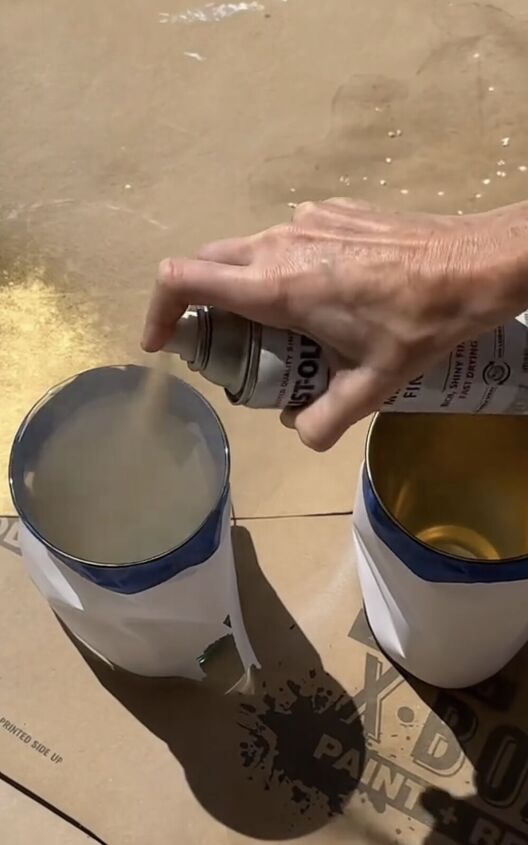
Step 2: Spray Gold
Grab that gold spray paint and give the insides of the vases a luxurious makeover. A few spritzes, and you'll see the magic unfold. Let it dry completely before moving on to the next step.
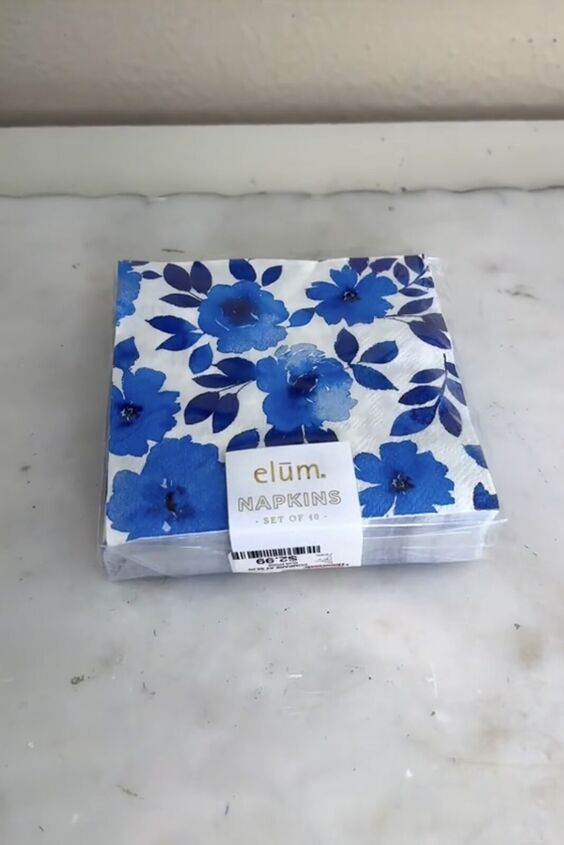
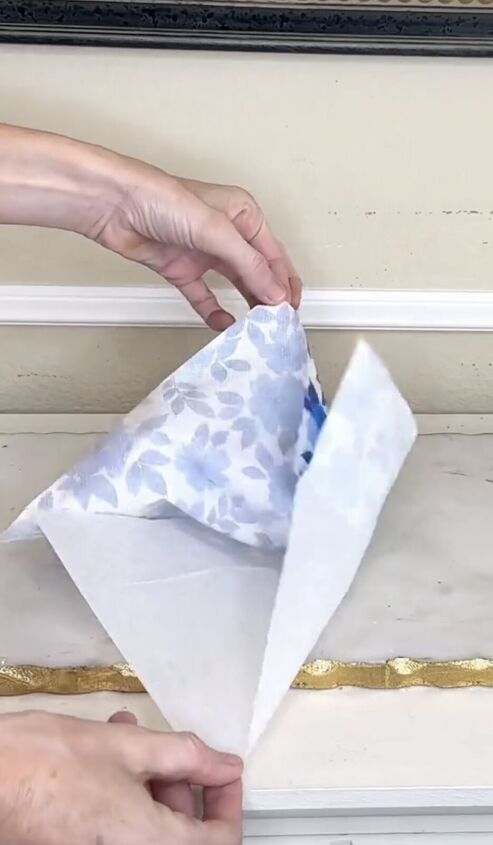
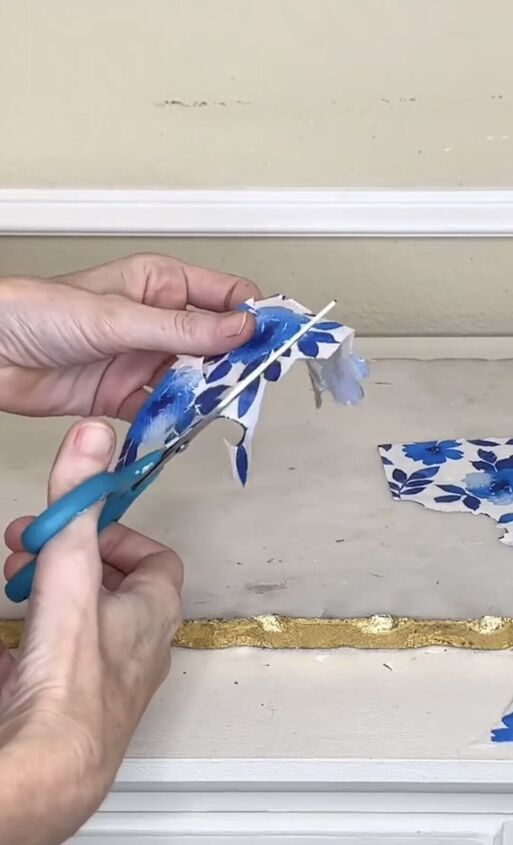
Step 3: Cut out the Flowers
Now comes the artistic touch! Take those blue and white napkins with the floral design and prepare to work some magic. Separate the two-ply layers of the napkin, and then carefully cut out individual flowers and leaves.
Step 4: Remove Tape
Remove the paper and painter's tape from the dry vases to reveal the golden interior beneath.
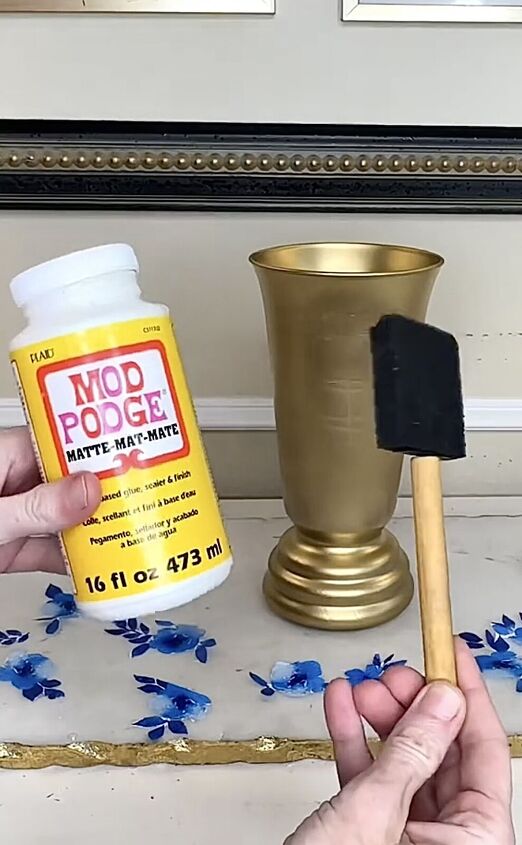
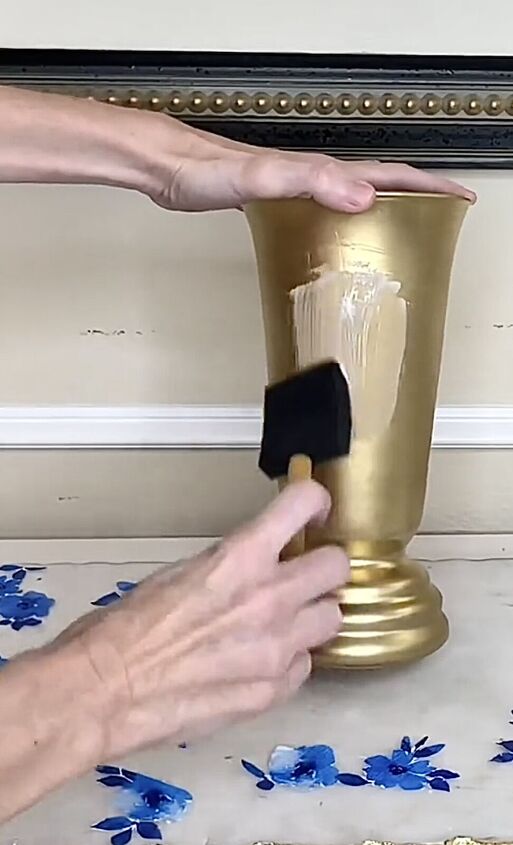
Step 5: Mod Podge
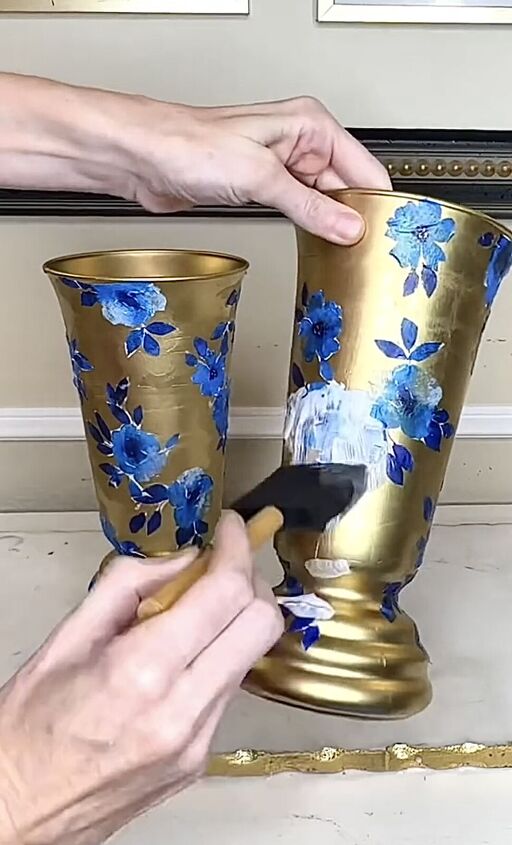
Enter the world of Mod Podge! Armed with a sponge brush, apply a generous coat of Mod Podge onto the vase.
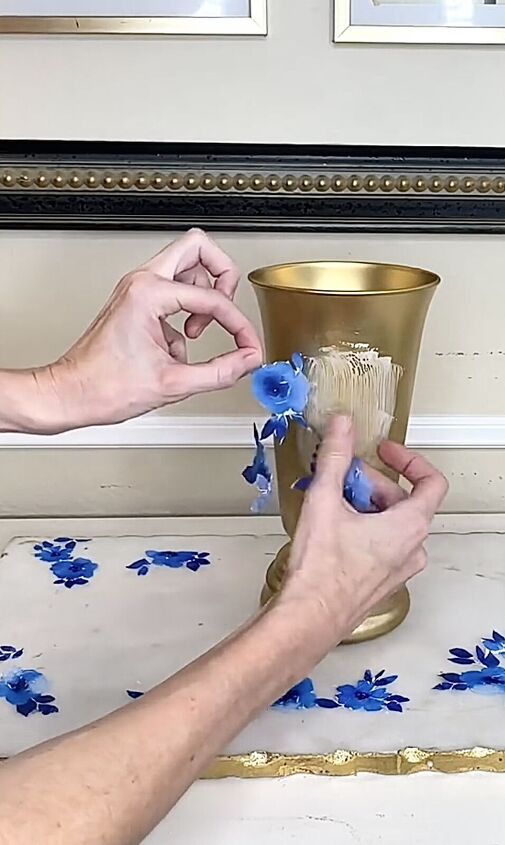
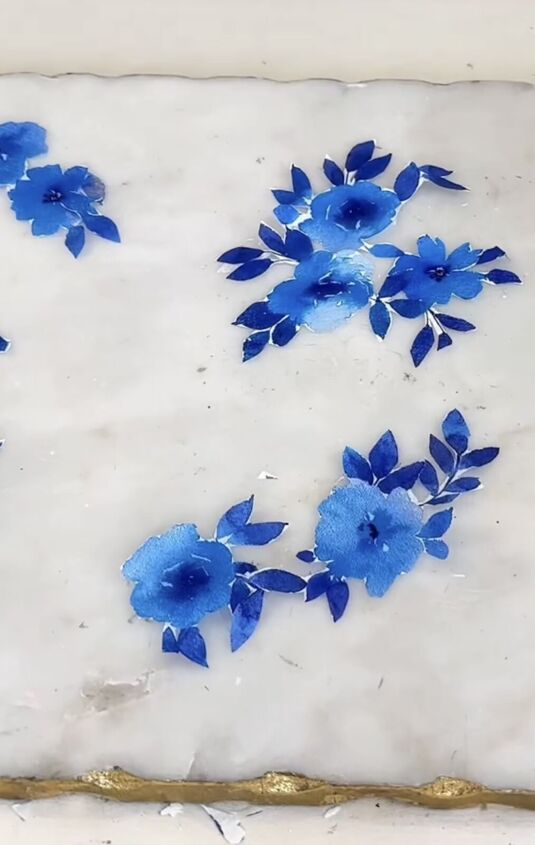
Step 6: Placement Precision
It's time to adorn our vases with these delicate floral pieces. Take those carefully cut napkin flowers and gently place about 10 flower bunches on each vase’s Mod Podge-covered surface, arranging them in a way that speaks to your artistic vision.
Step 7: Sealing
After an hour of letting the Mod Podge work its magic, it's time to add another layer. Apply a top coat of Mod Podge over the flower-adorned vase, ensuring a thorough and even coverage. Now, the waiting game begins—let it dry for three hours.
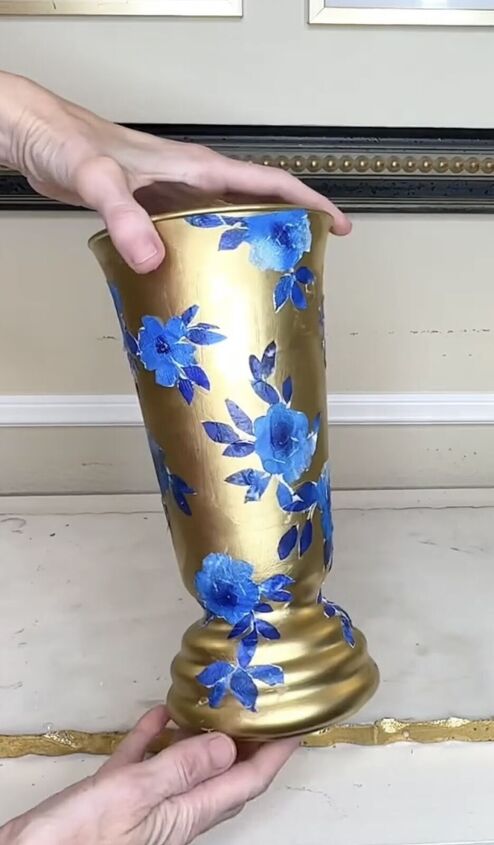
Step 8: Finishing Touch
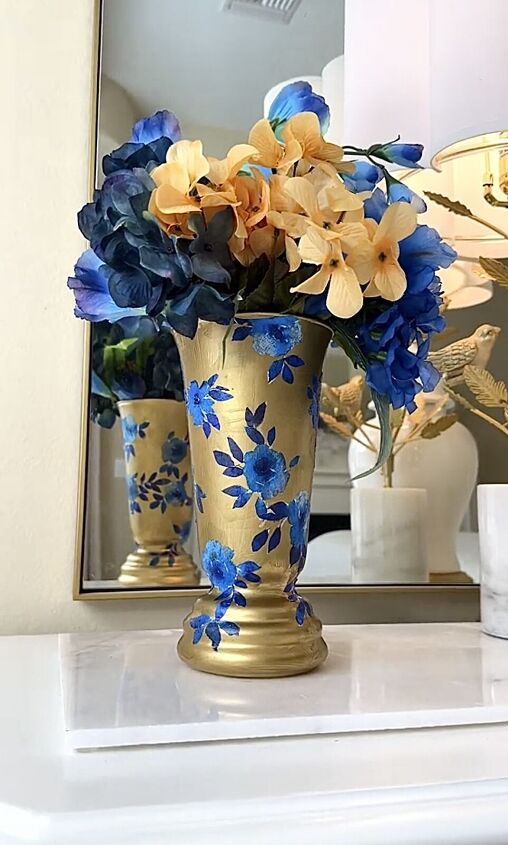
The moment of truth has arrived! Once the Mod Podge has dried and sealed the floral elegance onto the vase, it's time to add a few more flowers for that extra pop. And just like that, our transformation is complete!
Find the perfect spot for your newly crafted masterpieces. In this case, I've chosen my nightstands in the bedroom. The custom and unique look of these thrifted vases adds a touch of chic elegance to any space.
How to decoupage a vase
There you have it; a step-by-step guide to how to decoupage a vase. You can experiment with different napkin designs to create your own unique vase designs. Do you decoupage? Share your projects in the comments below.
Follow @lisa_burningham on TikTok for more DIY ideas.


Frequently asked questions
Have a question about this project?