


Fence Pickets Repurposed Into a Plant Stand

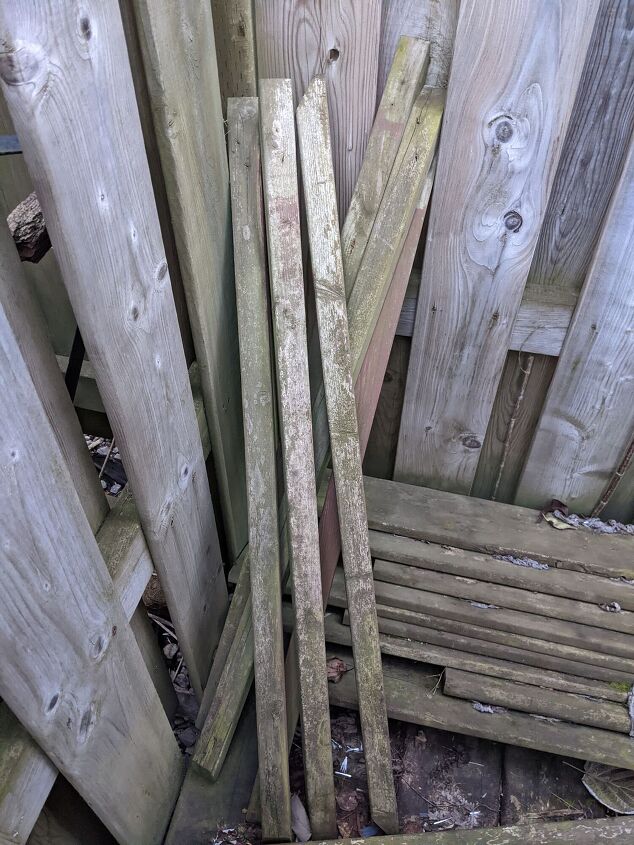
I have been running out of space for my plants and decided to build a plant stand. I remembered seeing some old fence pickets behind our shed and decided to attempt using those for my project.
I retrieved the pickets from behind the shed.
MEASURING & CUTTING
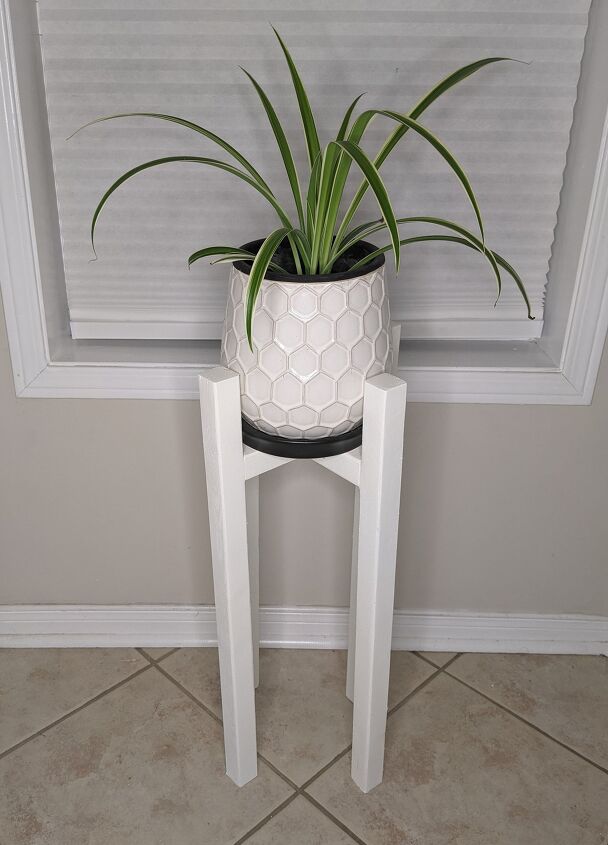
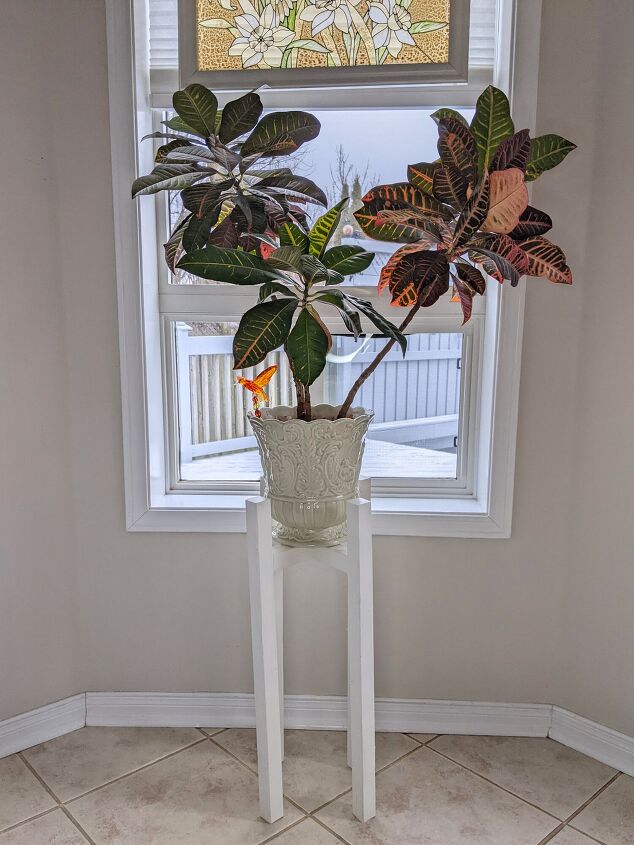
The first thing I did was measure the distance from the floor up to the bottom of the window sill, as I wanted my plant to sit at roughly the same height. I wanted the side pieces on the stand to come about 4” above where the plant sat, so I added 4” to the height of the window sill and cut out four pieces to use as legs.
I measured the diameter of the plant pot and added about 1” of space to that measurement (8” in my case). I cut one picket at 8”. Then I subtracted the width of the pickets (roughly 1.5”) from the 8” and split that number (6.5”) in half and cut out two more pieces at 3.25”, using a miter saw for my cuts.

SANDING
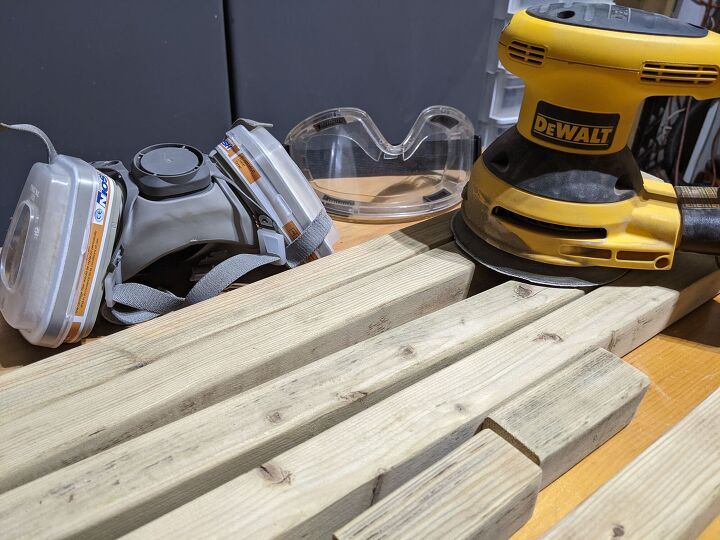
I sanded all my pieces with an orbital sander, using 80 grit paper. Because the pickets were likely pressure treated for outside, I wore a respirator and goggles while cutting and sanding.
BUILDING
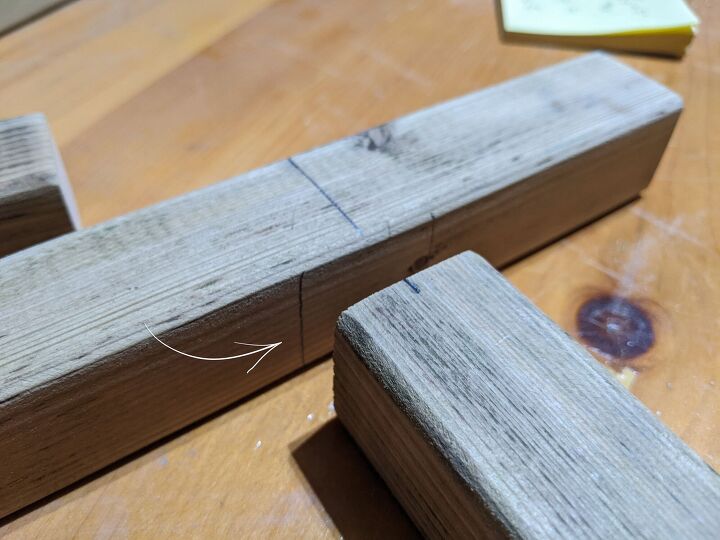
I lined up the centers of my smaller pieces with the center of the longer piece and drew a pencil line.
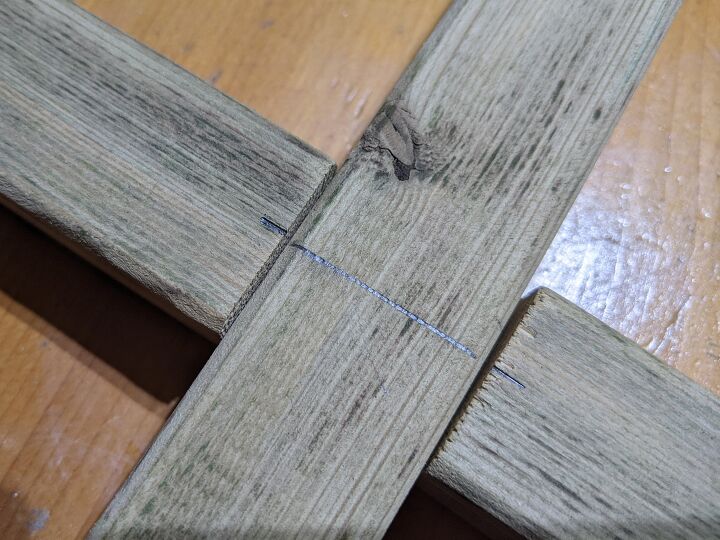
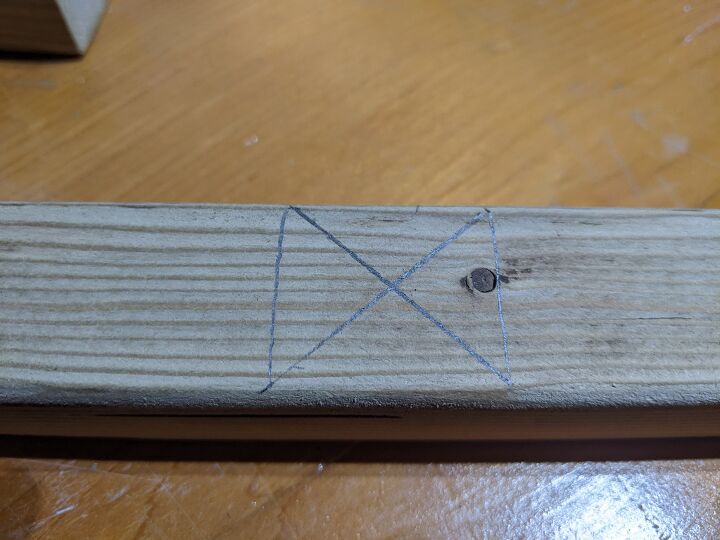
I was planning to use wooden dowels on the centers, where the plant sits, for added strength. To find the center of my two smaller pieces I drew a pencil line from corner to corner. Then I drilled my holes where the lines intersect.

To find the coordinating centers in the longer piece, I lined up my original pencil line and marked both edges on the longer piece.
I used those edges to mark corner to corner, to find my center point, and drilled holes where the lines crossed over. I kept increasing the drill bit size until the dowels fit into the holes. I think it was the 9/32 that ended up being the perfect bit size.
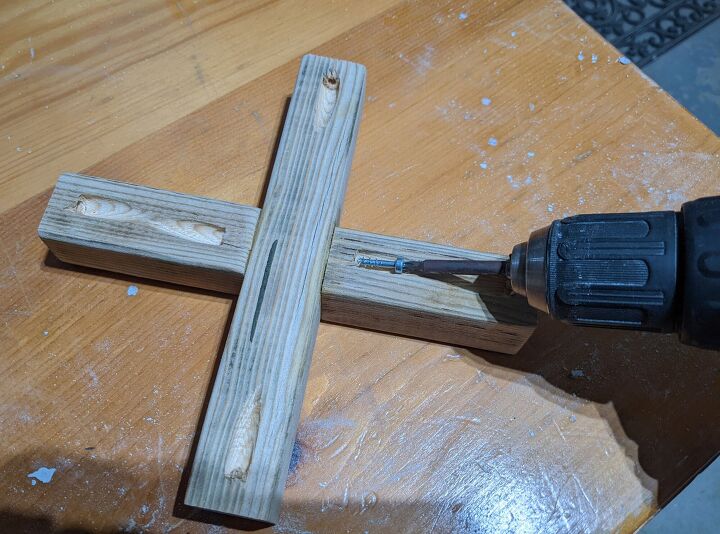
I drilled pocket holes in both ends of all three pieces, using a pocket jig.
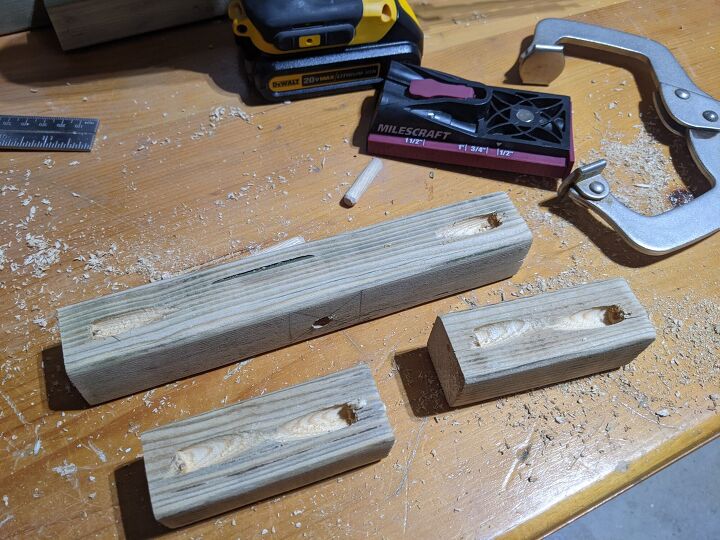
I added glue to my holes and the surface, inserted the dowels and clamped the pieces together. I left this to dry for 25 minutes, as per the glue instructions.

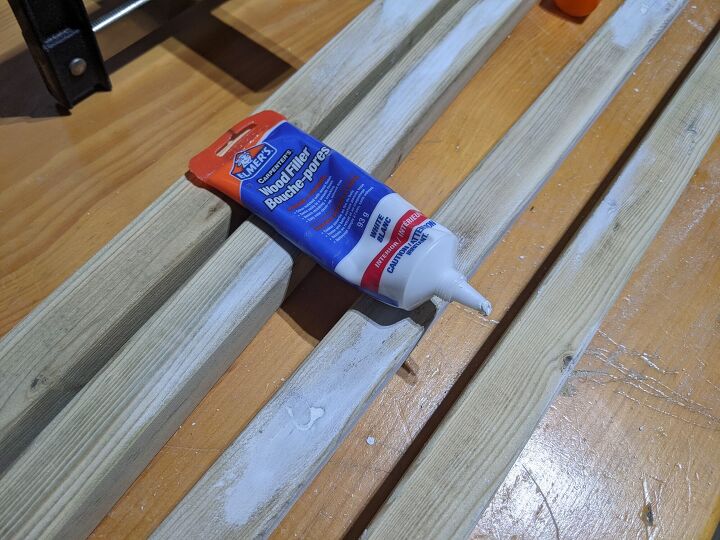
While I was waiting for that to dry, I filled any of the little hairline cracks and knots in my leg pieces with wood filler. I applied it with my fingers and smoothed it out with a rag.
I screwed my three smaller pieces together, using pocket screws.
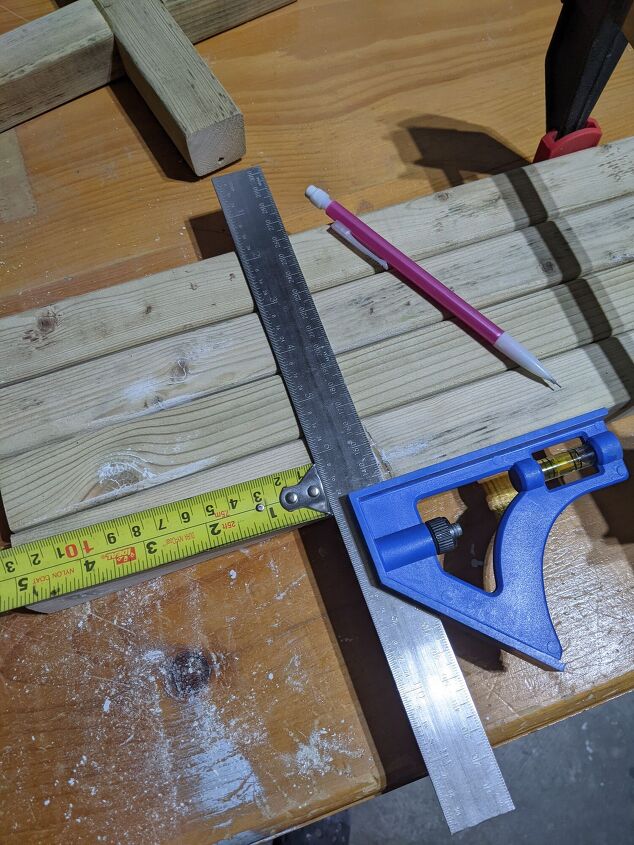
I lined up my four legs side by side and clamped them together. Then I drew a straight line across all four, at 5.5” down, to use as my guide for attaching everything.
Then I glued and screwed my center piece to the four legs. This was the most challenging part of the project for me. Every time I got them lined up, by the time I got my screw and drill in place they had slipped off the mark! I ended up adding a few brad nails to help hold them in place while I screwed them together. After some sweating (and colourful language) I got it together!
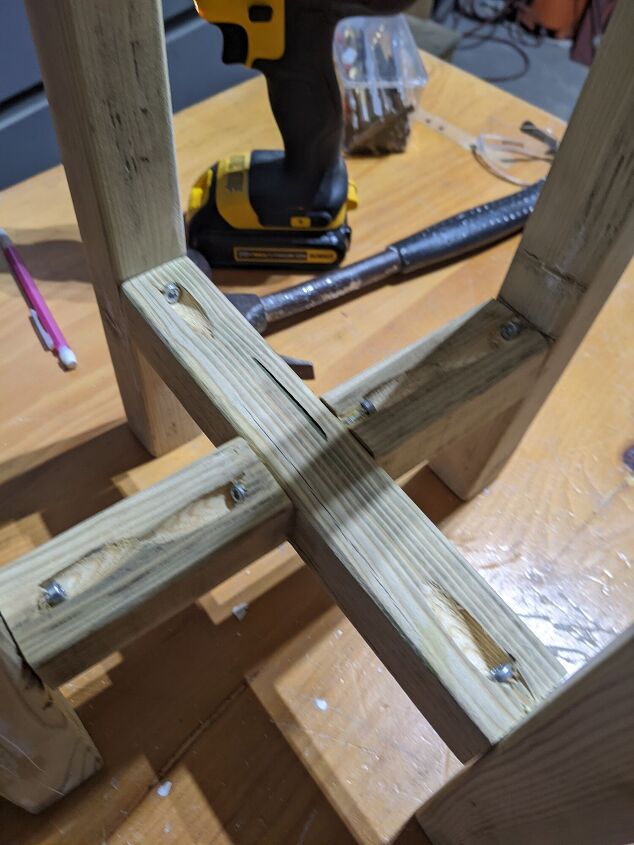
I used wood filler in my joins and to fill the brad nail holes. Once dry I sanded everything one last time using 120 grit.

I painted it white, using my new paint sprayer system, two coats.
And done!
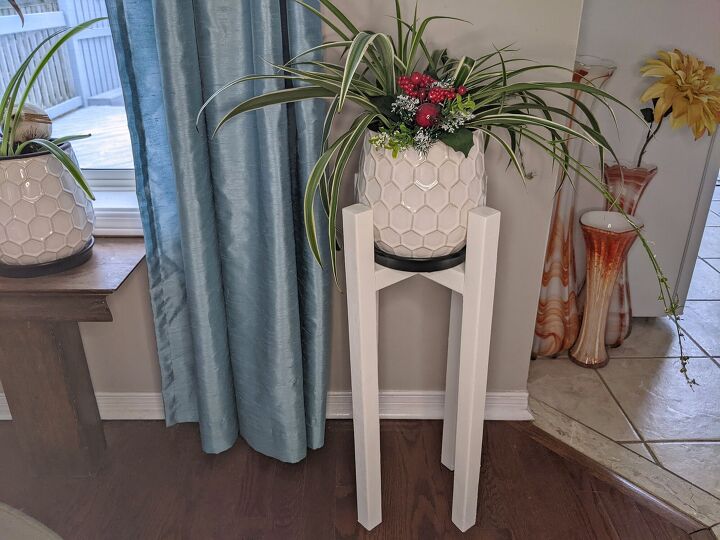
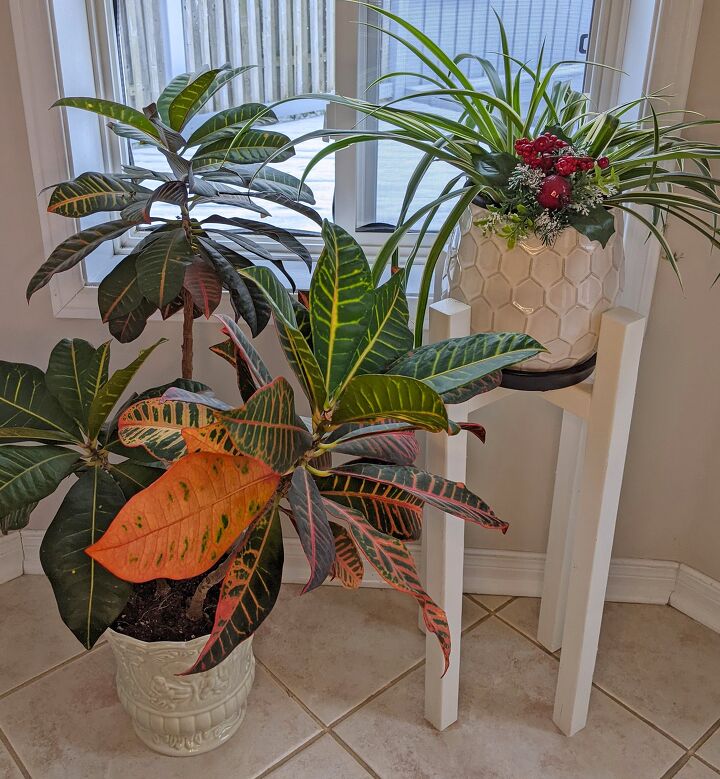
I tested it with different plants and locations and determined it will live in this south facing window with this croton plant. :) This plant clearly needs more sun to bring back it's vibrant colours.
I think it turned out pretty cute and the best part of all is that it was free. I listed the cost as $2 to account for the dowels and the small amount of glue and wood filler.
I'm hoping I stumble across more cast off pickets so I can build a shorter one to sit beside it. 😊

Resources for this project:
See all materials


Comments
Join the conversation
-
Very nice project
-
Could have made a second shelf on the bottom


Frequently asked questions
Have a question about this project?