


Fun Flower Pots Designed Using the Silhouette Cameo

These flower pots are so easy to make and using the conical warp feature in Silhouette Studio, you can find it in this edition, it couldn’t be easier.
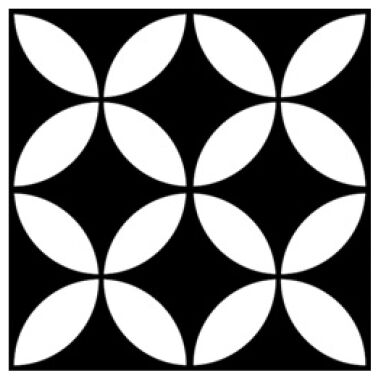
Here is the tile I used for my pot. I love the way it came out with the repeated pattern. Does anyone know if this pattern has a name? I don’t, but I know what I like. Eric wants me to do a similar flower pot in a Southwestern design, and I think that’s a great idea. I will be doing that one very soon.
You can have a lot of fun finding your perfect design online, or even better, designing your own. If you want to use the one above, go right ahead, that’s what it’s there for.
Once you have your design picked out, it’s time to gather the supplies you will need for your decorated flower pot.
- Silhouette Cameo
- Permanent Vinyl
- Flower Pots
- Silhouette Studio Software
Okay, now that you have everything you need, let’s get started with the technical stuff. If you are familiar with Silhouette Studio, you can skip ahead to the warp feature, but if you are new to this software, I am being as thorough as possible for you to follow along.
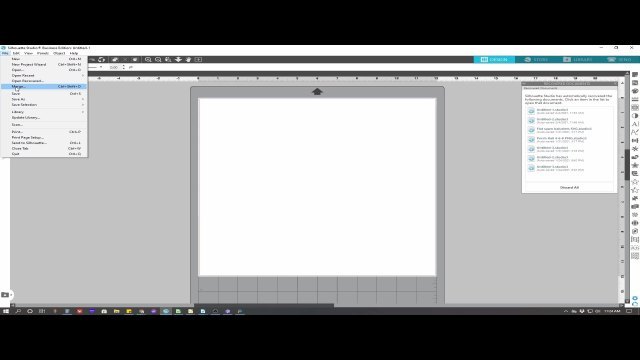
In order to get your pattern into your Silhouette Studio click on the FILE tab in the upper left corner, scroll down to MERGE and click. You will then pick the file you want to edit for your project.
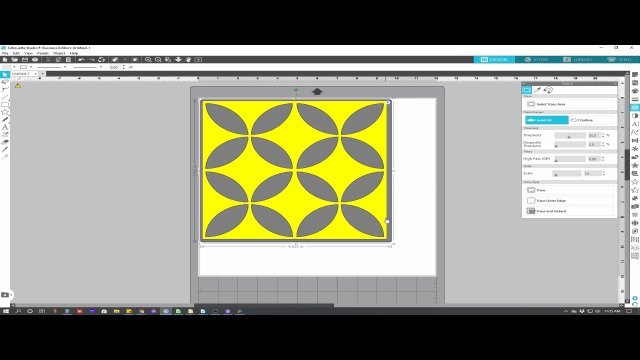
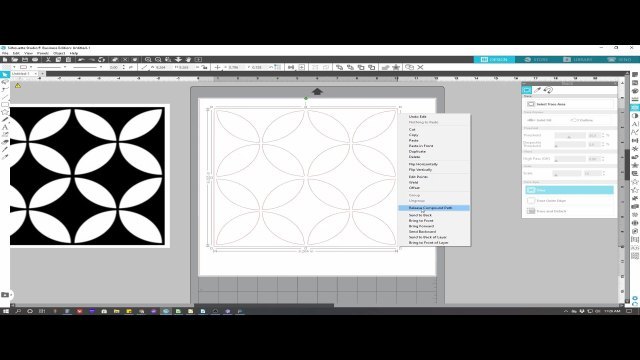
Open the TRACE Panel and select the SELECT TRACE AREA button. You can then cover the area you want to be traced with the trace tool. The area to be trace will be grayed out, and your actual trace area will be yellow. If it needs adjusted use the slider bars in the Trace panel. When you have the area completely covered, click the TRACE button. You will know it is done when the yellow color disappears.
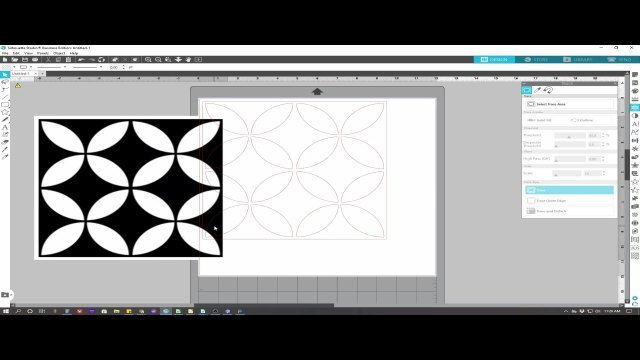
Now you can move the original pattern off of the mat area and off to the side.
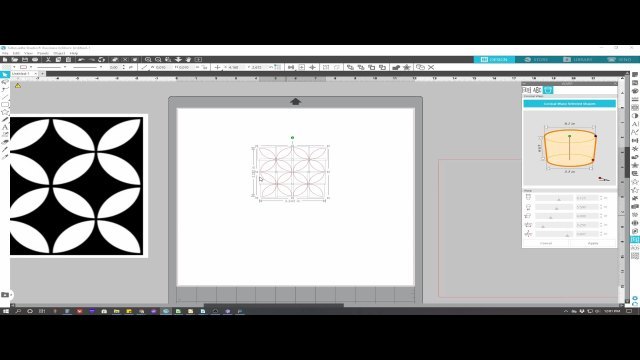
Select your design and then open the WARP Panel. Click on the Conical Warp tab at the top of the panel. Click “Conical Warp Selected Shapes”.
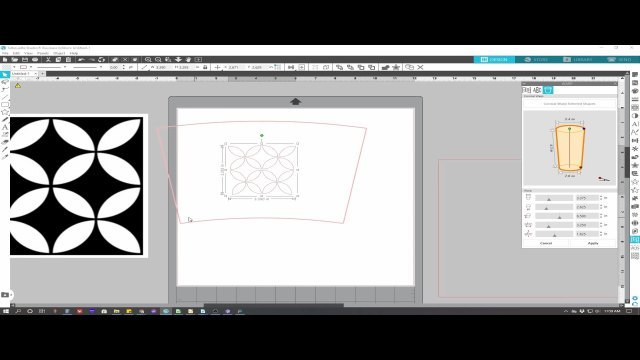
Now it is time to pull out all those measurements we took earlier of the flower pot. Enter the top measurement in the first slot, the bottom measurement into the second slot, and the height in the third slot.
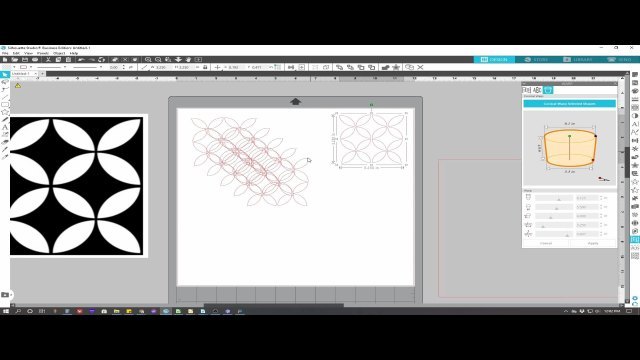
And now for the math… If you want a repeat pattern that goes all the way around your flower pot you want to do a bit of simple math and figure out what you want your pattern repeat to be. For my flower pot, I decided that since my tile was 3.25″ and the circumference of my flower pot was 19.75″, I would need 6 tiles printed. (19.75÷3.25=6.076) It will be close enough for me as I can put the gap at the back of the pot.
I simply cut and pasted until I had the number of tiles I needed and arranged them on the mat..
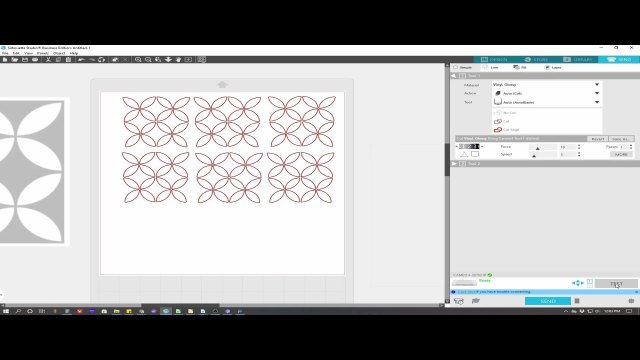
Once you have the tiles laid out, click on the SEND tab in the upper right corner. Make sure your material settings are correct and test your material to be sure it cuts correctly. I have learned over the years that this is a necessity. Different brands of the same material can cut differently and while the Silhouette default may cut one perfectly, a different brand may not cut through. This can be a very frustrating event, so trust me, save yourself some grief and hit that test button. Every. Single. Time. Once you are sure the vinyl will cut properly hit that send button.
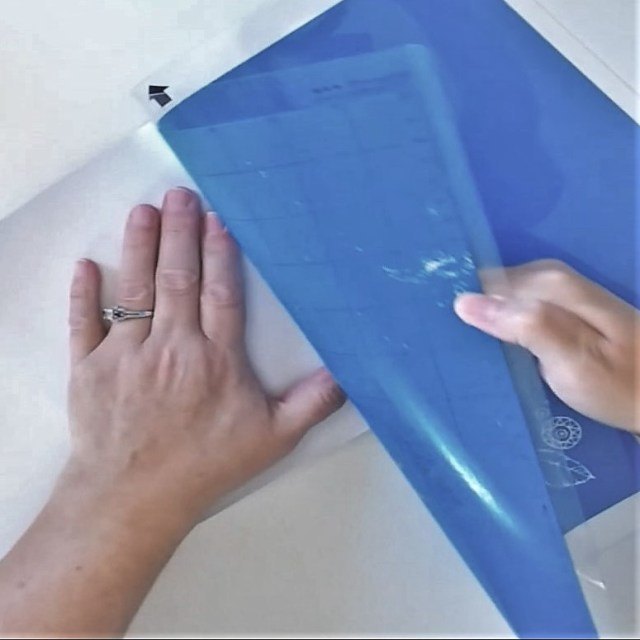
Once the design is done cutting remove the vinyl from the mat before weeding. The best way to do this is to flip the mat face down and pull the mat away from the vinyl (or whatever material you have cut). This helps keep the material from curling during removal.
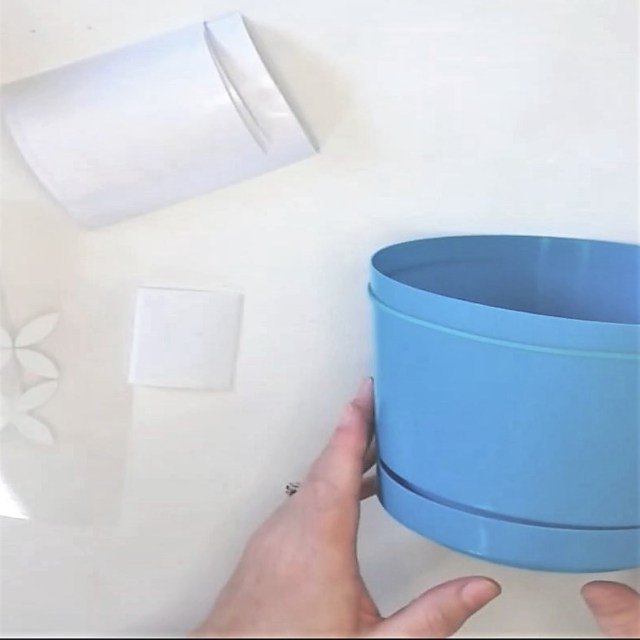
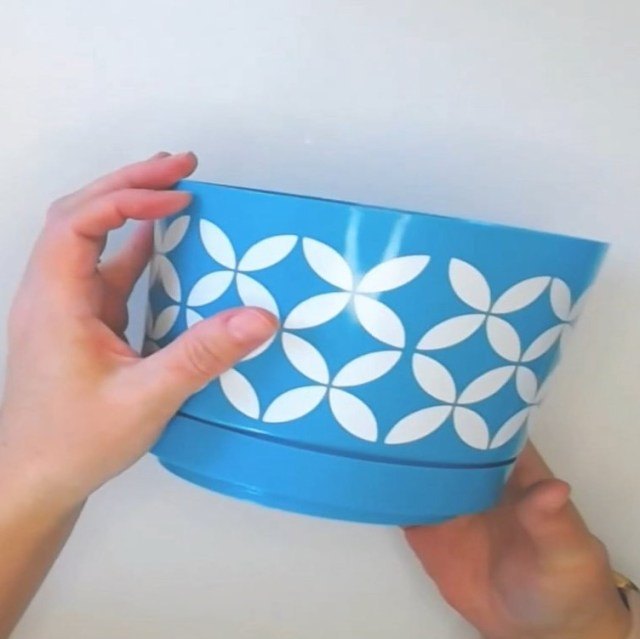
Now it is time to weed the vinyl. The design I chose was really simple to weed and only took a couple of minutes. I then took a piece of transfer tape and started moving the vinyl onto the flower pot. I used a rubber band to mark the top of the flower pot temporarily so I had an even line to follow.
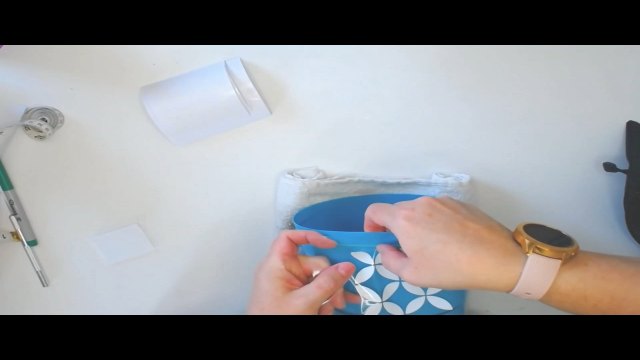
Once I had the first couple of tiles set I removed the rubber band because it was really easy to place the design the rest of the way around.
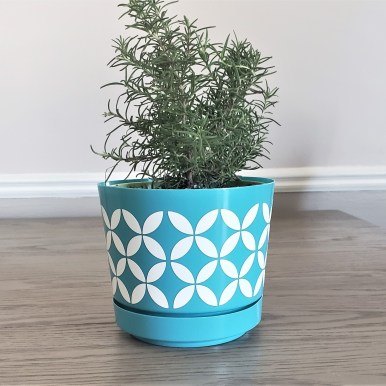
Here is the finished flower pot, completely decorated with my Silhouette Cameo cut design. I love how this came out, and the turquoise and white complement each other perfectly.


Frequently asked questions
Have a question about this project?