


How to Make a Fabric Bowl With Mod Podge

Do you ever see a DIY project and think, “I’d love to try that one”? I do that all the time and this time I actually did. So let me show you this new project, how to make a fabric bowl with Mod Podge.
Now, I’ve used Mod Podge many times. It’s one of my favorite ingredients for creating unique accessories for the home. I use fabric quite a bit. But I’ve never used Mod Podge to make a fabric bowl.
I actually found a few different methods to make a fabric bowl. Same result, but different ways to get there.
I picked one that seemed interesting. But there was one problem: I can’t blow up a balloon.

What do balloons have to do with this project you ask? Everything!!
Fabric Bowl with Mod Podge: One Way to Get There
This is actually an easy project, especially if you have worked with Mod Podge before. Mod Podge is the product you use and decoupage is the method.
Most of the time you think about Mod Podge and paper.
Here are some previous decoupage projects that I’ve done.
- How to Make a Chinoiserie Lamp
- 3 Ways to Decorate Terra Cotta Pots with Decoupage
- Rescued Tray Gets Makeover
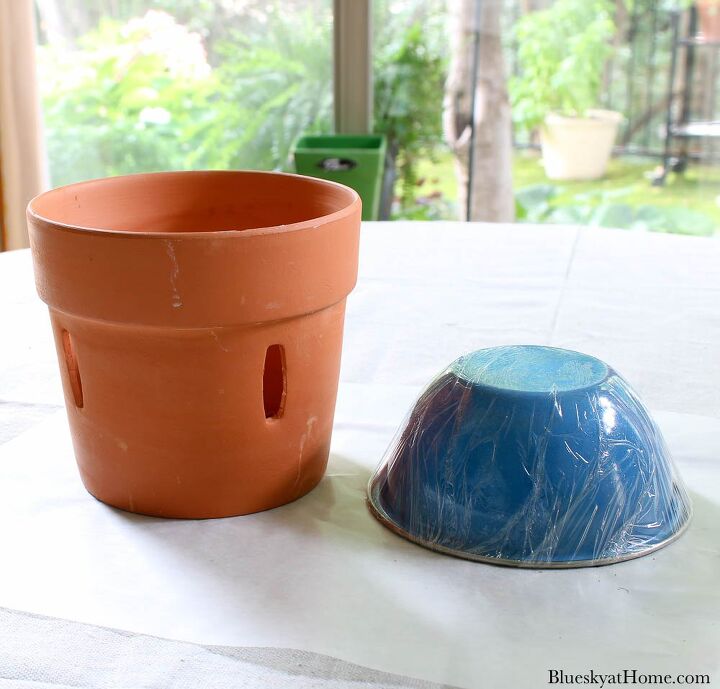
I did use some fabric scraps on one of my terra cotta pots. Making a fabric bowl from nothing but fabric and Mod Podge was a new endeavor.
If you Google “how to make a fabric bowl”, you will find a few different methods. All of them require fabric, of course. I had plenty of fabric pieces, both large and small to choose from.
I had plenty of Mod Podge.
I just had to decide which method. The balloon method won out. It seemed the easiest. And it was ~ until it wasn’t.
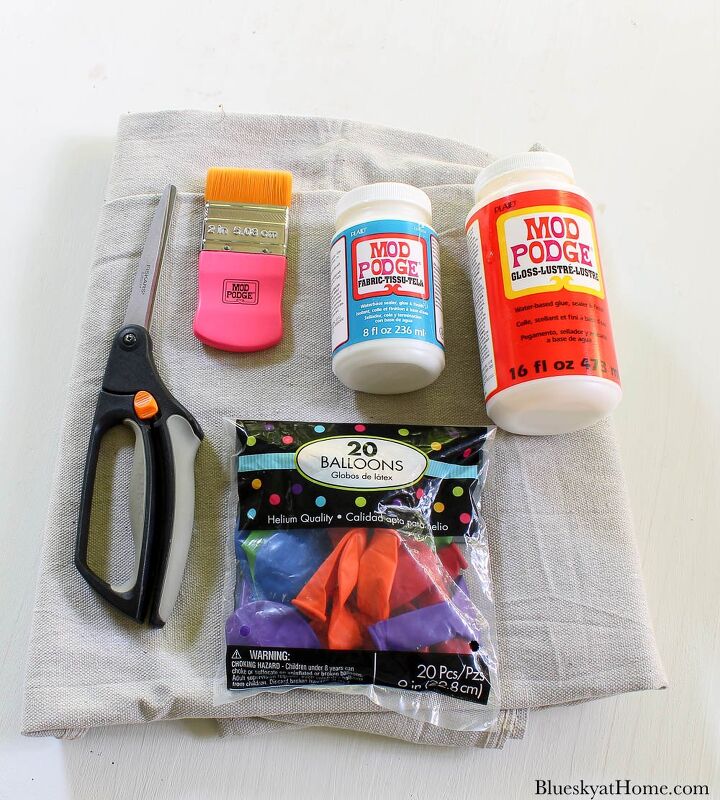
SUPPLIES FOR YOUR FABRIC BOWL WITH BALLOONS
- fabric scraps ~ You won’t need much; if you don’t have any, then fat quarters would be perfect for this project.
- Mod Podge ~ I used the Gloss version.
- Mod Podge Brushes ~ I love using these brushes; they make the application and clean~up easy.
- sewing scissors ~ for cutting your fabric
- cover for your workspace ~ I used a drop cloth. I also recommend using a piece of wax paper for easy clean-up.
- balloons ~ this was the only supply I bought. I bought a package of 9~inch balloons. The color doesn’t matter since you will discard them when you are done with the project.
GATHERING FABRIC FOR YOUR FABRIC BOWL
Keep in mind that this is sort of an experiment. Since I had never tried to make a fabric bowl, I had no idea how it would turn out.
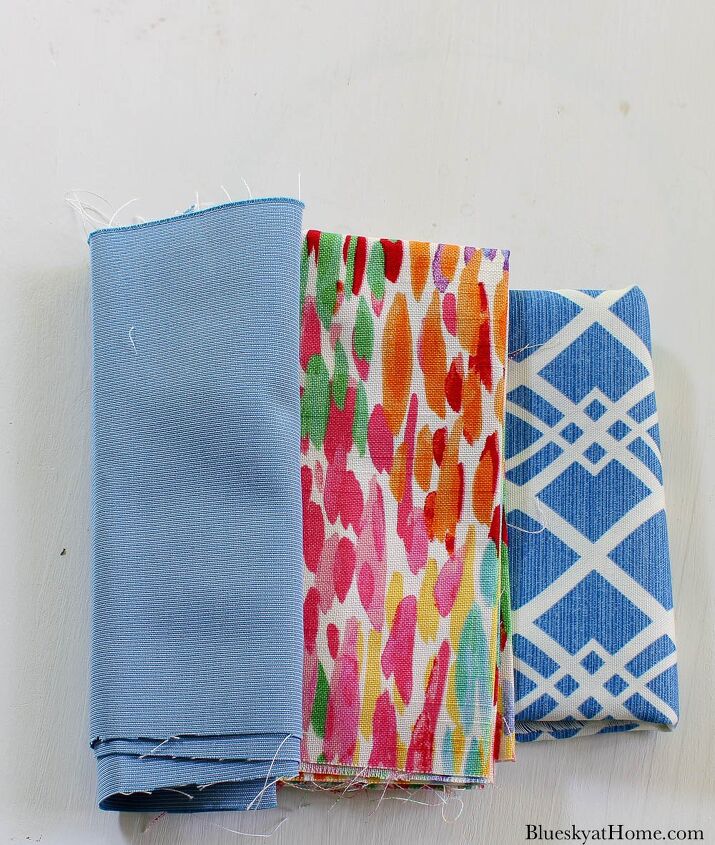
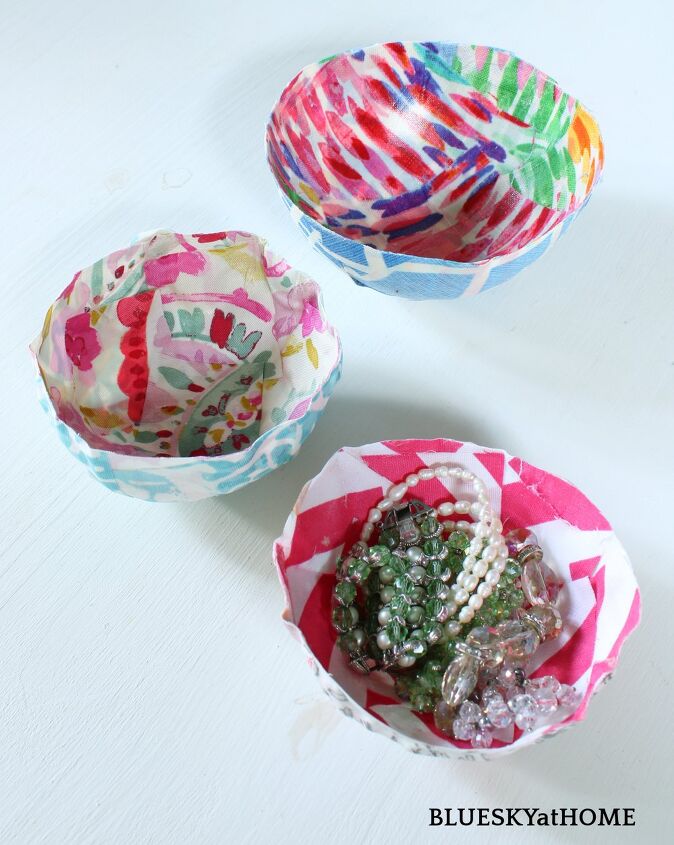
I planned to make three fabric bowls.
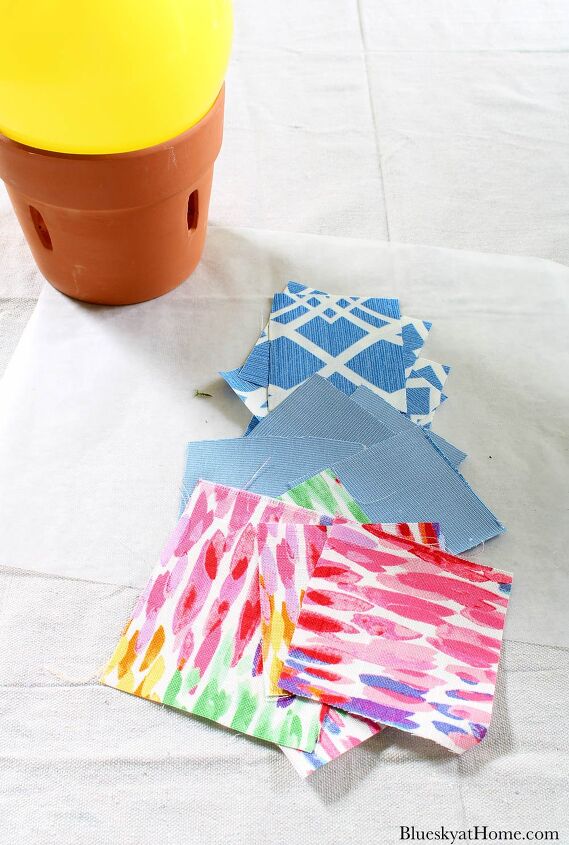
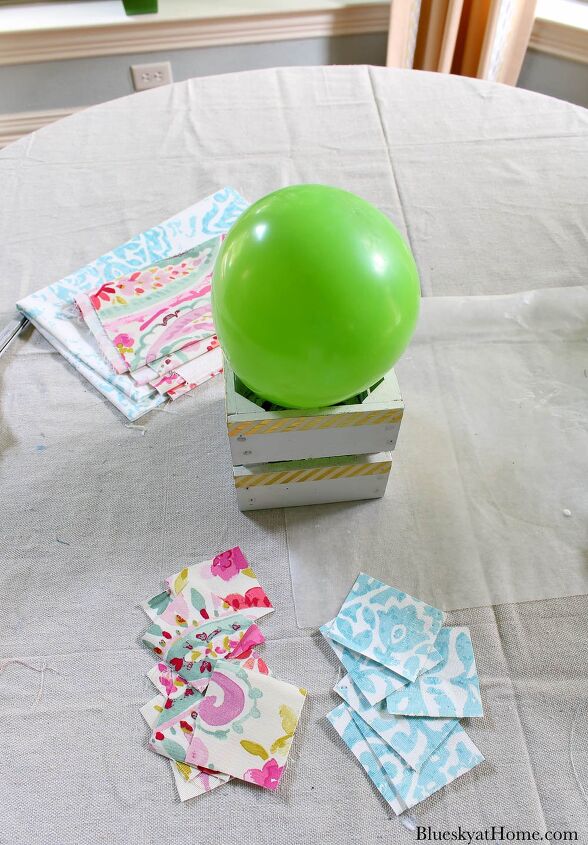
I went through all my fabric boxes (organized by color) and picked three sets of coordinating patterns that I liked. You can use one fabric pattern, if you like, for a solid look.
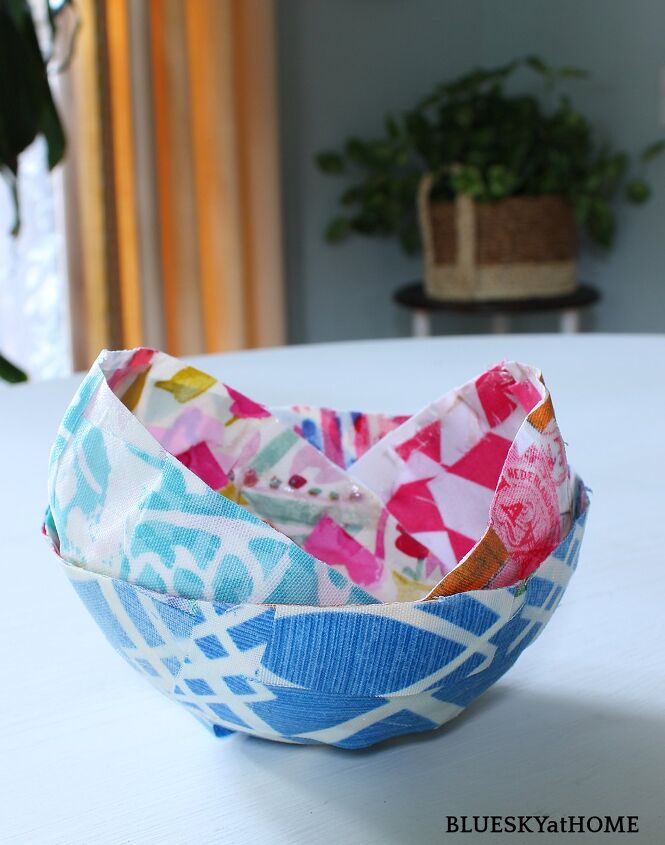
I want to try one pattern for the inside of the bowl and one pattern for the outside of the bowl.
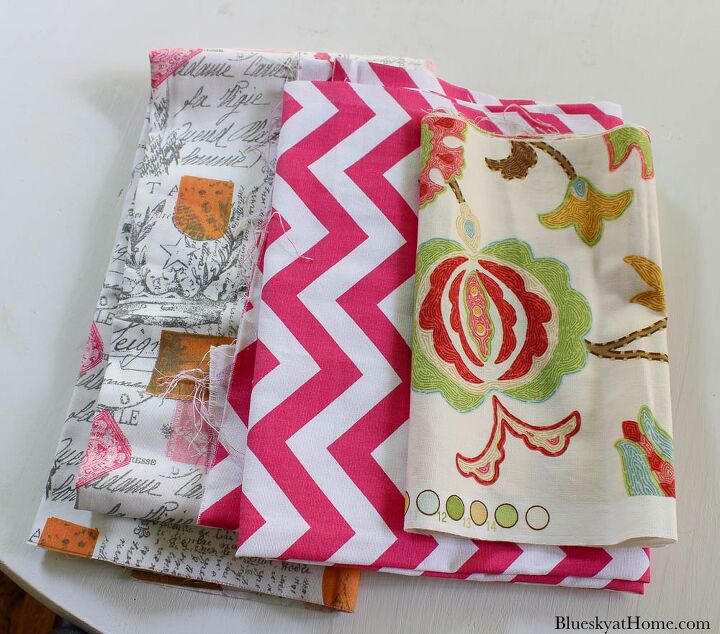
The center paisley fabric is one of my favorites.
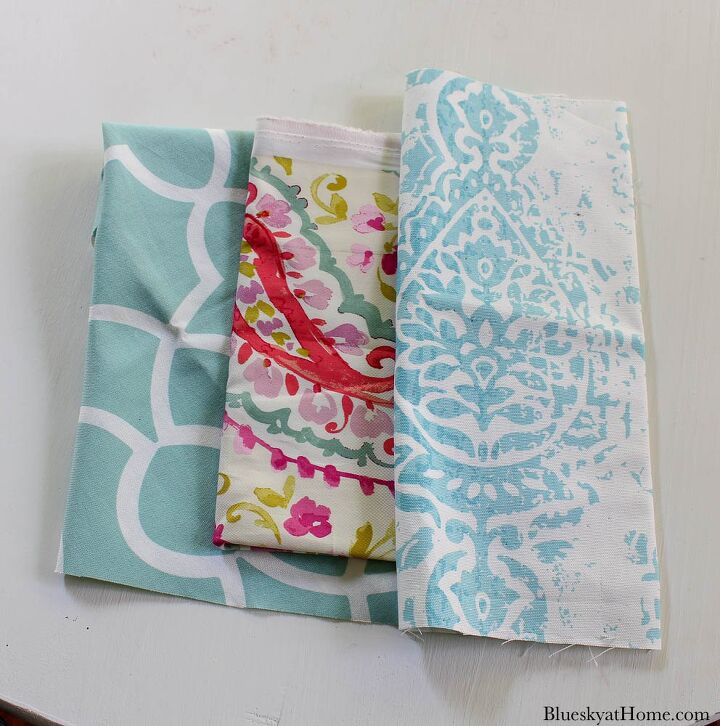
The abstract bright colored fabric is another favorite. The blue and white fabric was used to make cushions for our patio a few years ago.
TIP: Keep fabric scraps!
SETTING UP YOUR WORKSPACE
Lay your cover down on your work surface. I added a piece of wax paper so that any Mod Podge drips would be on the paper.
You will also need containers to hold your balloons.
BLOWING UP THE BALLOONS
I was ready to start my fabric bowl project when I hit a snag. I literally cannot blow up a balloon. I had forgotten about this flaw in my character. I even tried a pump that we had in the garage. Nada. Floppy balloon.
I thought I was going to have to go to the party store and get them to blow up the balloons. Fortunately, my housekeeper, Betty, arrived. She is always interested in DIY projects that I’m working on.
When I told her what I was working on and my balloon dilemma, she asked if she could try to blow them up. In three seconds, she had three balloons blown up to the sizes I needed! I was back in business.

MAKING THE FABRIC BOWLS
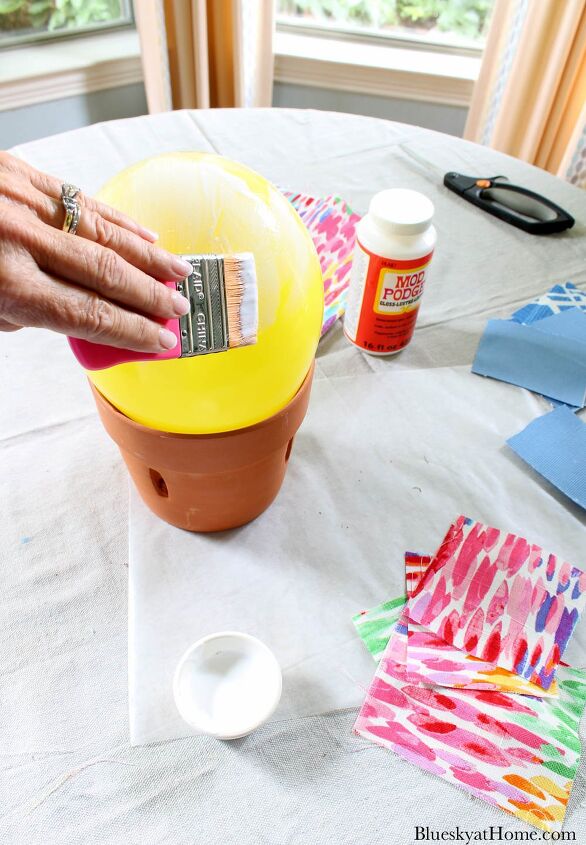
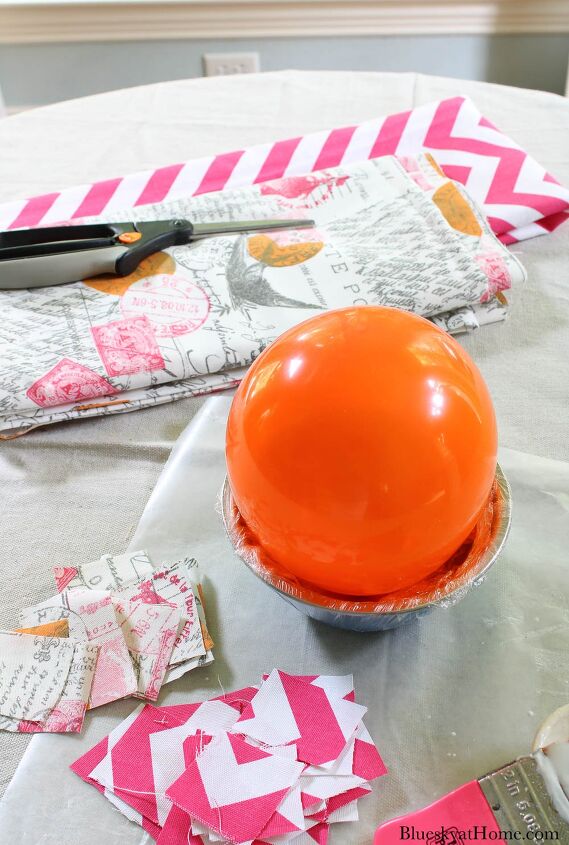
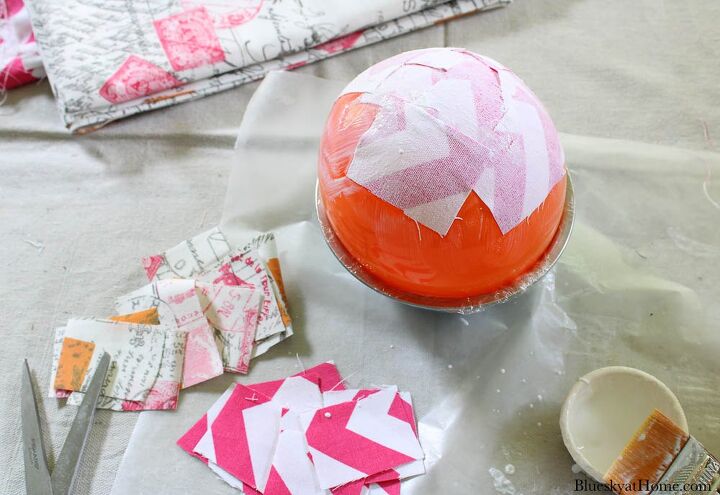
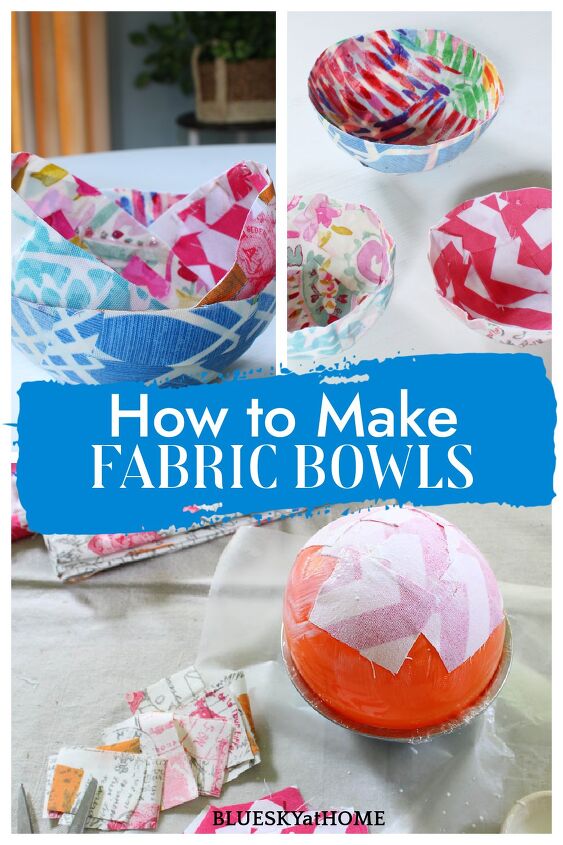
Step 1 ~ Blow up your balloon to the size you want. This one was about 7 inches in diameter. With the tied side down, place on a container to hold it.
Step 2 ~ After choosing your two fabrics, cut pieces into squares or rectangles. about 2 ~ 4 inches. I cut about 6 of each fabric to start, but you will need more as you go.
NOTE: I thought I would use three fabrics for each fabric bowl, but I only needed two.
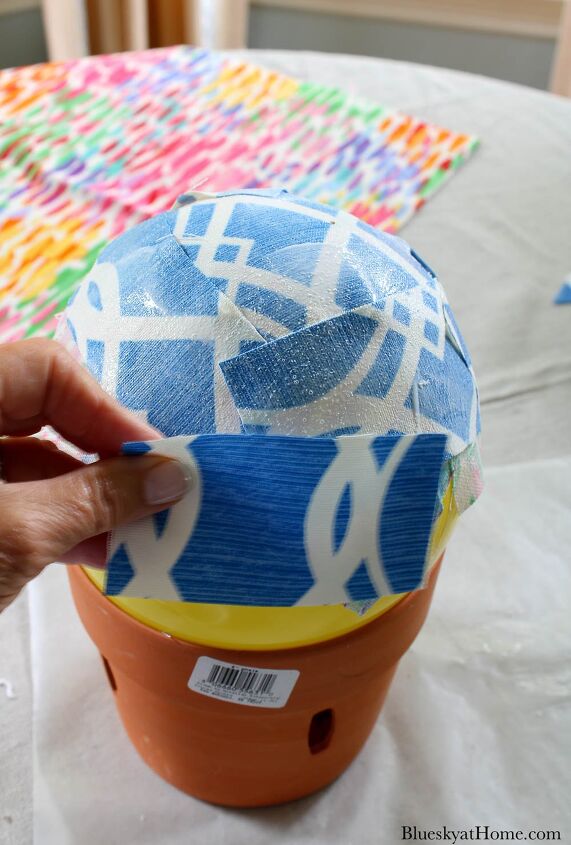
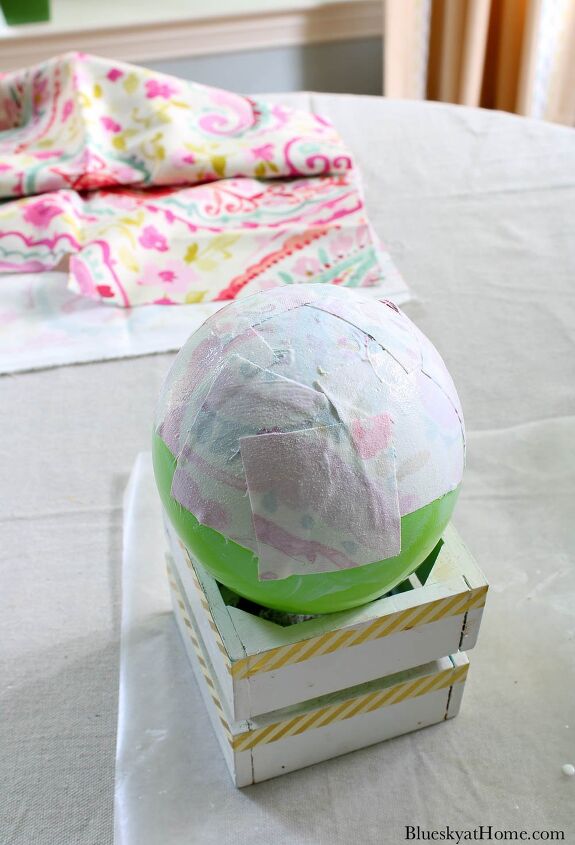
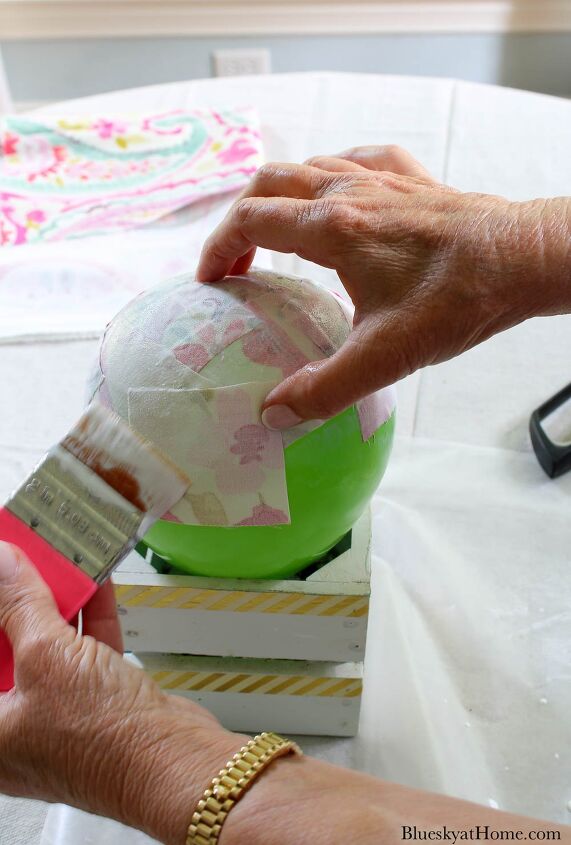
Step 3 ~ Using your Mod Podge brush, apply a very generous amount on the top of the balloon. Choose the fabric that you want to show on the INSIDE of the bowl. Place a piece of fabric with the RIGHT side facing DOWN on the balloon. Press down on the fabric and apply more Mod Podge on top, smooth the edges down to the balloon.
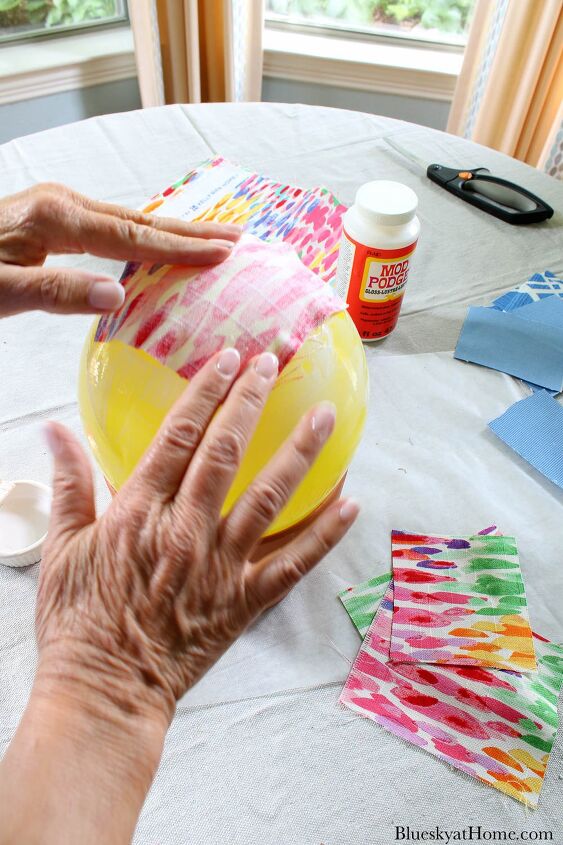
Step 4 ~ Continue layering the pieces of fabric on the balloon, making sure to overlap them. Repeat adding more Mod Podge to the balloon and to the fabric until you have the sides covered as much as you want.
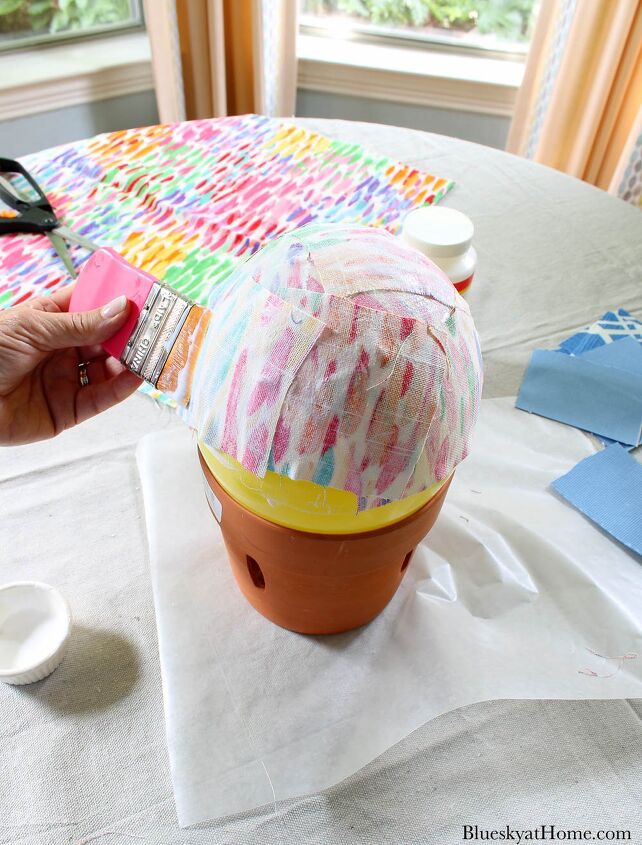
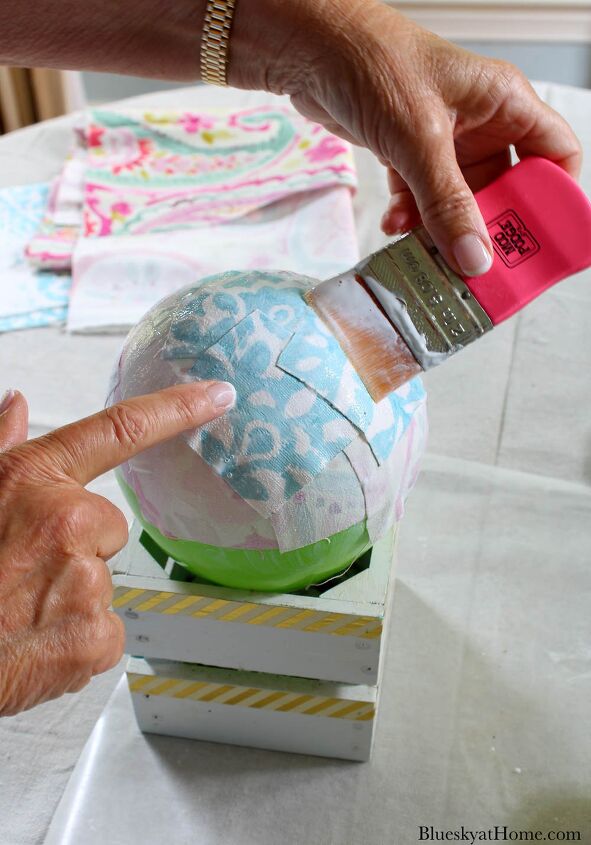
Step 5 ~ When you have covered as much of the balloon as you want, add another layer of Mod Podge all over the fabric. Later you will trim the fabric around the sides for an even bowl.
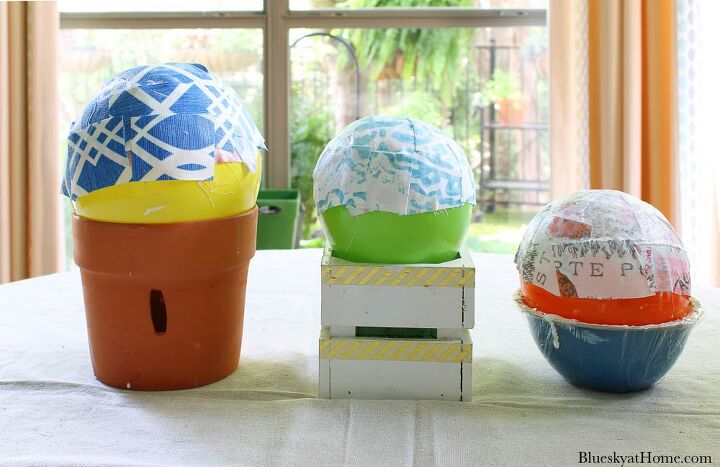
Step 6 ~ Now you are ready to apply the fabric that will go on the OUTSIDE of the bowl. Apply it in the same way as the first fabric. But this time the fabric will go with the RIGHT side UP.
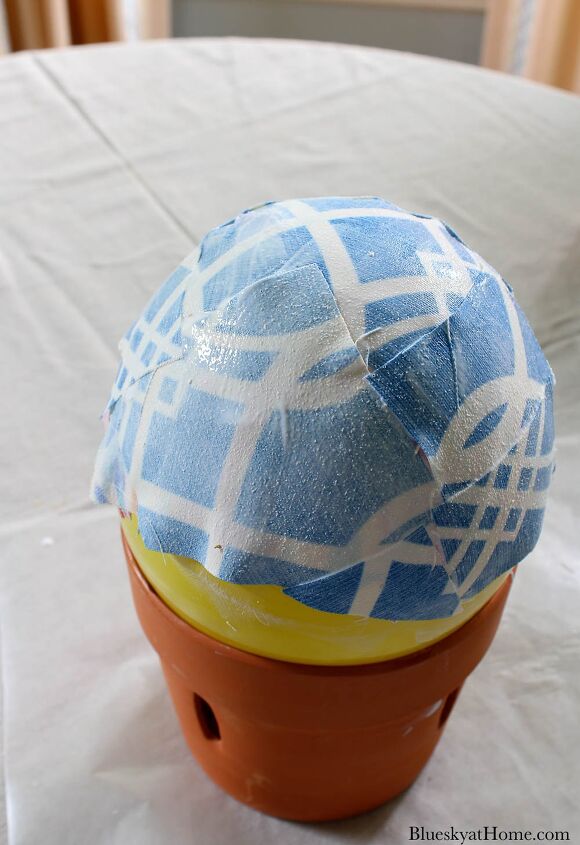
Step 7 ~ Again, when you are finished, give the fabric another good coat of Mod Podge.
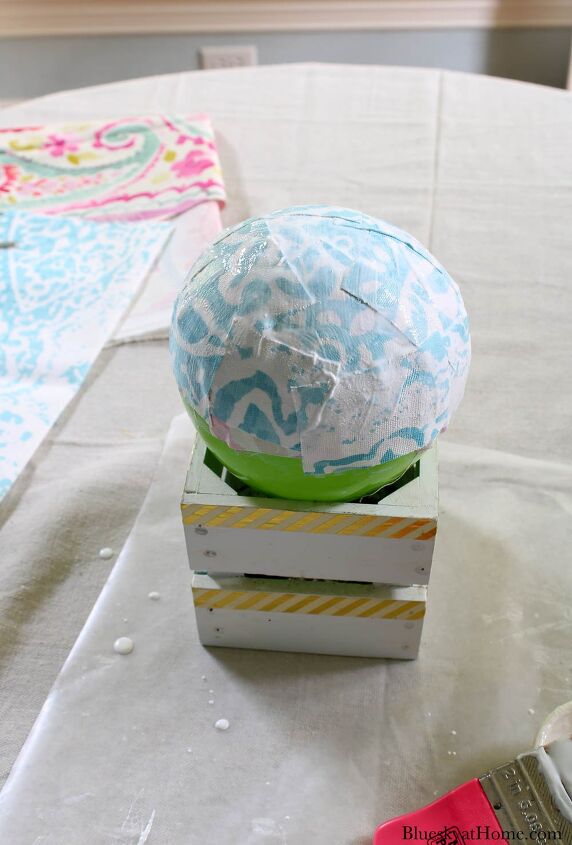
Step 8 ~ Now set the container with the balloon aside to dry.
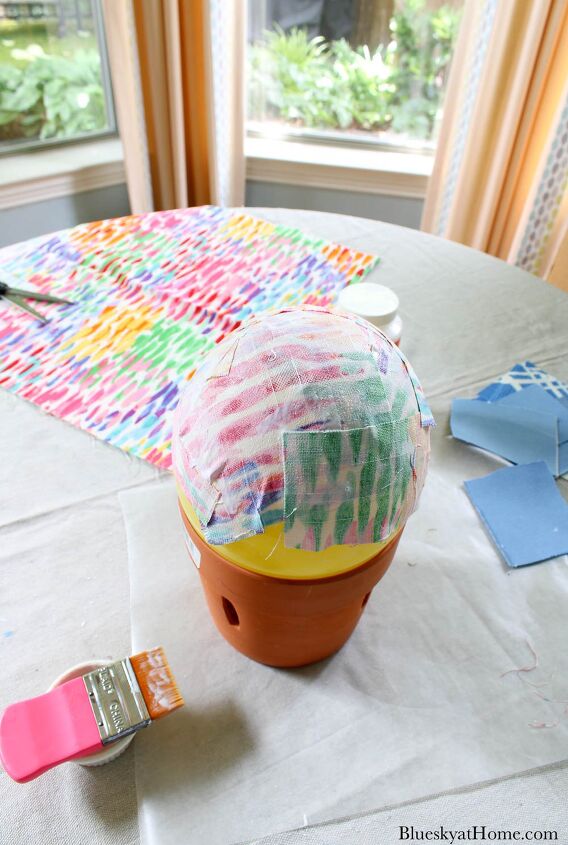
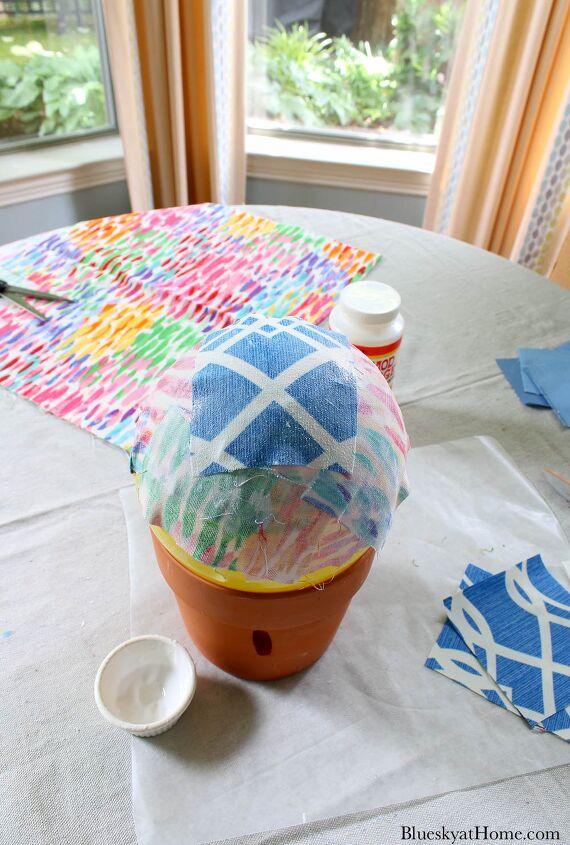
For more fabric bowls, repeat the exact same process.
The next two fabric bowls were smaller, about 5 inches in diameter.
Continue applying Mod Podge and fabric layers until you have covered the first fabric layer.
Decoupaging the three fabric bowls took me about 45 minutes.
Once you are done with applying the fabric, set all your bowls aside to dry. This could take several hours to overnight.
I set all three of my bowls in our south~facing breakfast room window, hoping they would dry faster. Since I had lost all morning, I was behind on my project. I finished the bowls at 1:00 and let them dry until about 6:30.
FINISHING THE FABRIC BOWLS
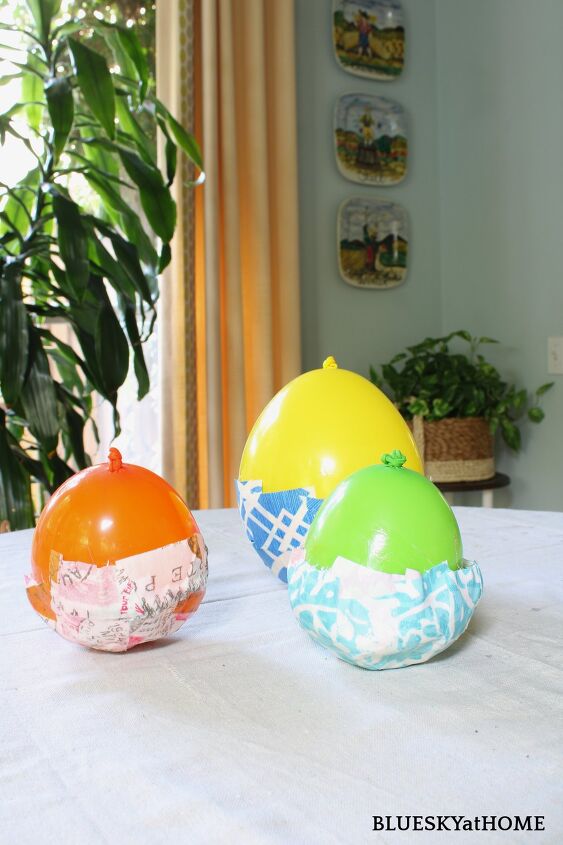
Now for the moment of truth. Since I had to finish the project, I started popping balloons after about 5 hours of drying time.
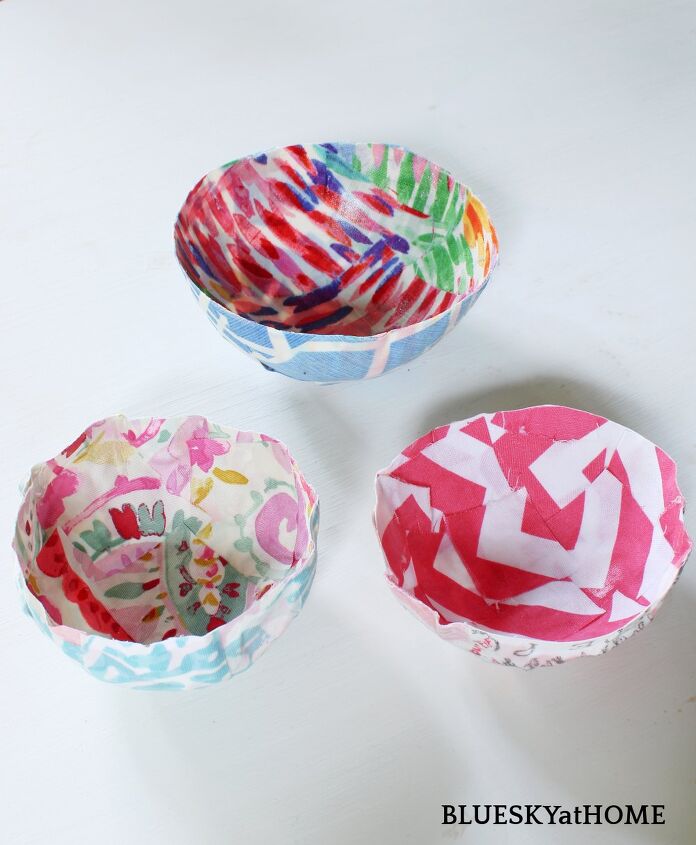
Step 9 ~ This part was easy. Just take a straight pin and pop the balloons. They will deflate and pull away from the sides of the fabric bowl. Discard the balloons. Remove any pieces of glue sticking to the fabric.
On the two smaller bowls, in a few places, I did reshape the fabric a bit. Then I let the bowls sit for another hour to further dry.
Step 10 ~ Using sharp scissors, trim the fabric to the size you want.
TIPS FOR MAKING THE FABRIC BOWLS
Here’s what I learned from doing this project.
- Plan ahead and make sure you can blow up balloons.
- Only blow up the balloons as big as you want your bowls.
- Keep your fabric pieces smaller for easier application.
- Move the container around, not the balloon.
- Keep a damp paper towel handy for cleaning off your fingers.
- Allow plenty of time for the bowls to dry.
- If necessary, cover any balloon holders with plastic wrap to keep Mod Podge off it.
USING THE FABRIC BOWLS
Remember, these bowls are not food safe. They are strictly for decorative display or holding items like jewelry, paper clips, shells, or other small things. Make a small bowl for your guest room or guest bath.
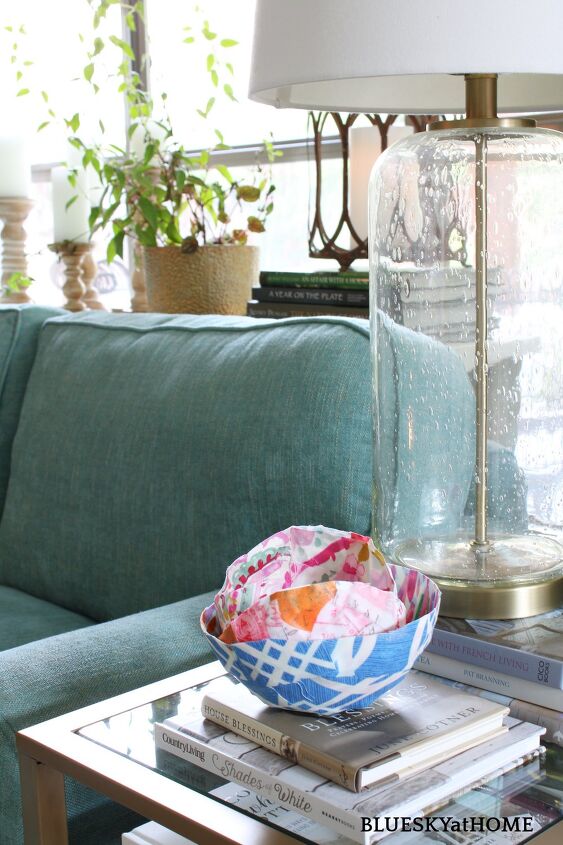
You can even stack them for a pretty look. Think of them as decorative arts.
Set them on a table or bookshelf.
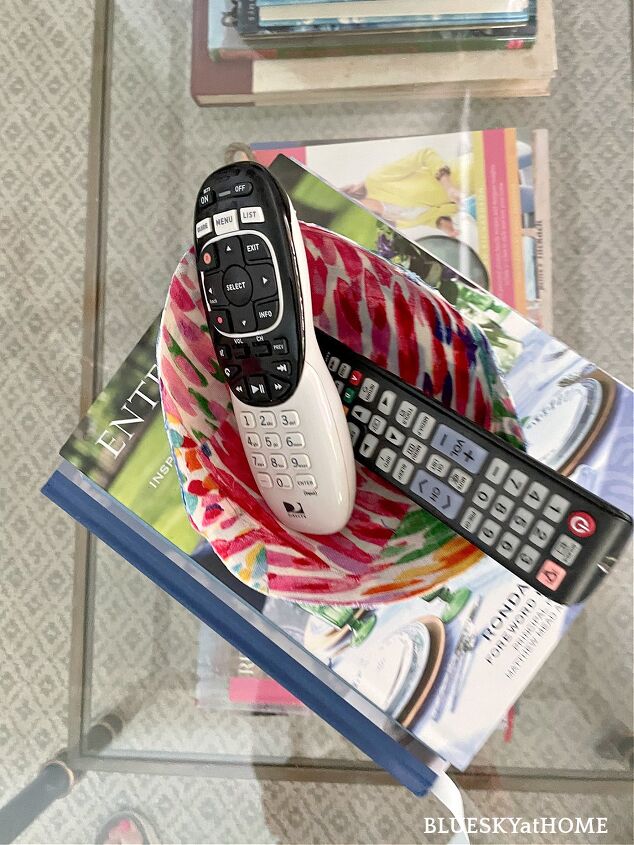
Use the fabric bowls to hold things like glasses on your nightstand or remotes in the living room.

SHOP THIS PROJECT
Hope you had fun watching how to make fabric bowls. It was much easier than I thought it would be. I would love to make some really small bowls.
PIN IT so you have the project at your fingertips.


Comments
Join the conversation
-
What a cute idea. I think I’ll add a magnet to the bottom of the bowl and make a pin holder for my sewing table. Thanks for sharing!


Frequently asked questions
Have a question about this project?
How can you make the bottom flat?