


How to Make a Triangle Quilt
4 Materials
This triangle quilt is a perfect beginners quilting project that is sure to make a special gift to snuggle with.
Frist, cut out 132 triangle pieces (triangle template is found on my blog) out of the variety of colours of fabric. I used about 12 different colours of fabric to create a soft, pastel rainbow look however, two or three colours would also work for this project.
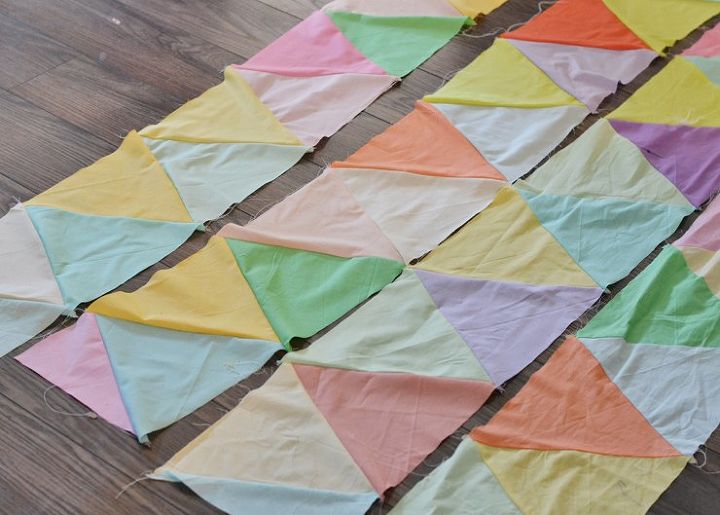
Arrange the triangles in a pleasing pattern on the floor – 11 rows + 12 triangles per row. You will cut one triangle in half for the beginning and end of each row. I made mine random with no two colours touching. It was a process.
Sew each horizontal strip of triangles together as show above. Use a 1/4″ seam allowance.
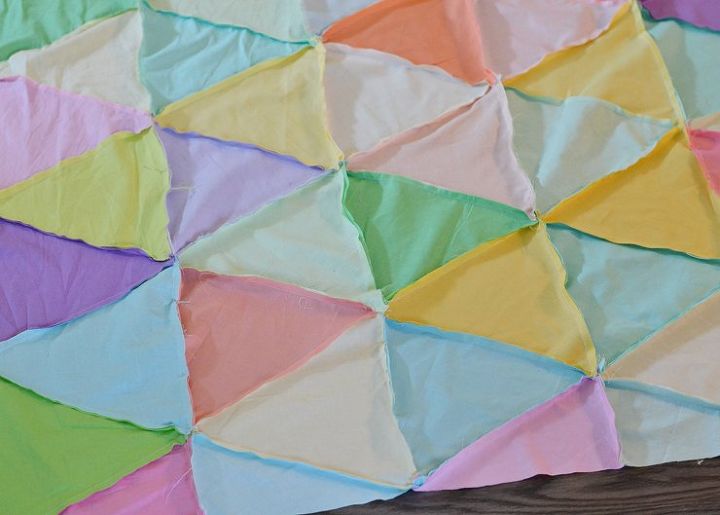
After all 11 strips are sewn, pin + sew the strips together in the order you’ve designed. Use a 1/4″ seam allowance.
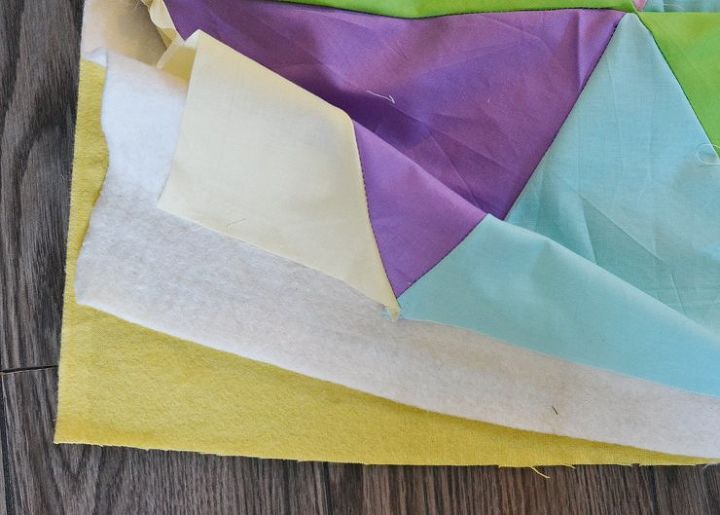
Next, gently iron the quilt top once it’s sewn together. Place your quilt backing right side down on the floor, then your quilt batting, and then your quilt top.
TIP: Glue these layers together with a temporary spray glue so that they don’t slide around when you’re quilting everything together. I also like to pin the entire thing quite generously after I glue it.
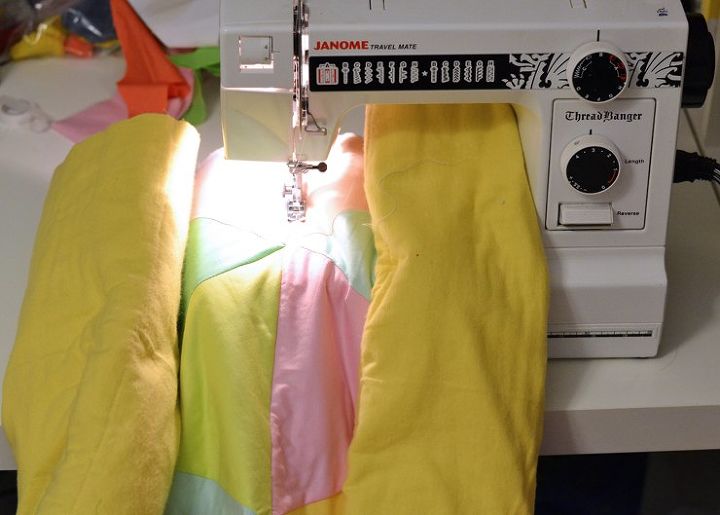
Next comes the quilting! If you don’t have any proper quilting equipment, roll the quilt like a scroll as pictured above, and sew over the seams of the quilt design – through all of the layers – to keep everything from sliding around.
For this triangle quilt, I simply sewed over the seam that held each row of triangles together. It was just a few straight lines of quilting and then I was done! You could quilt over all of the triangle seams too if you’re feeling ambitious. I’m sure it would look great!
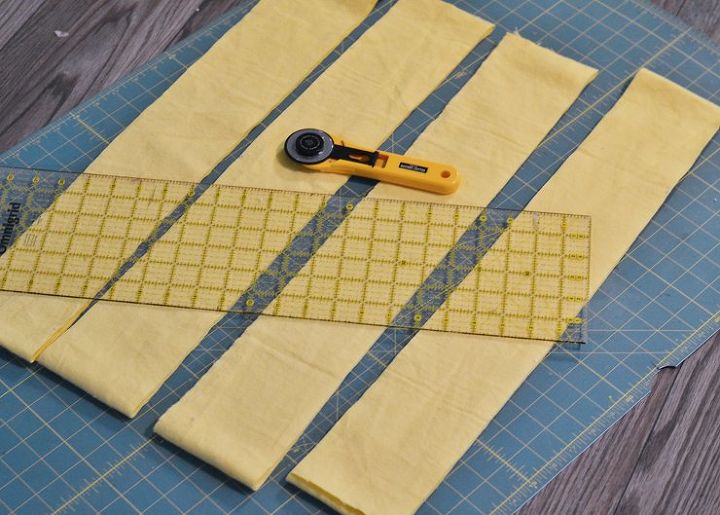
Next, cut out 4″ wide strips of binding fabric that will be long enough to bind the perimeter of your quilt.
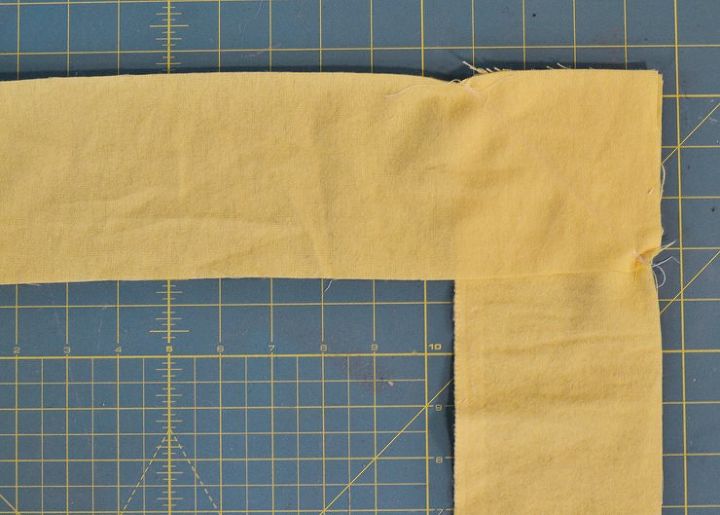
Sew them together at a 90 degree angle like this to attach them together. You then trim the excess, open up the seam, and press it to make it less bulky. Fold the binding in half lengthwise and press it.
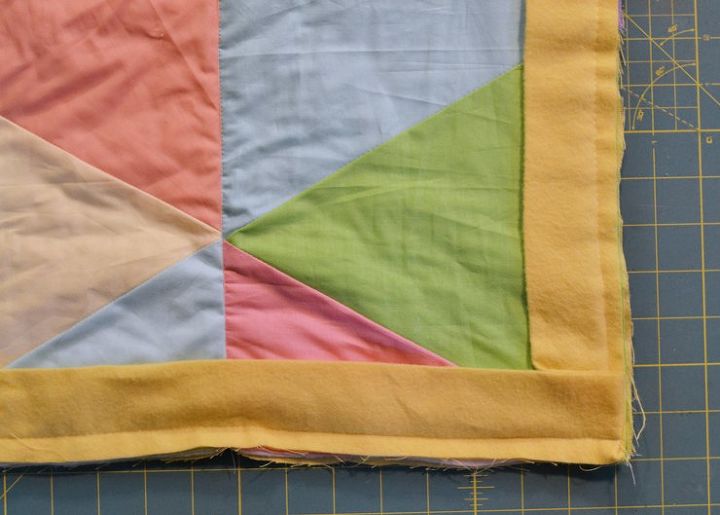
Sew the binding to the quilt as shown above. I used a 1/2″ seam allowance.
Flip the binding up and around to the backside of the quilt and hand stitch it to the back.
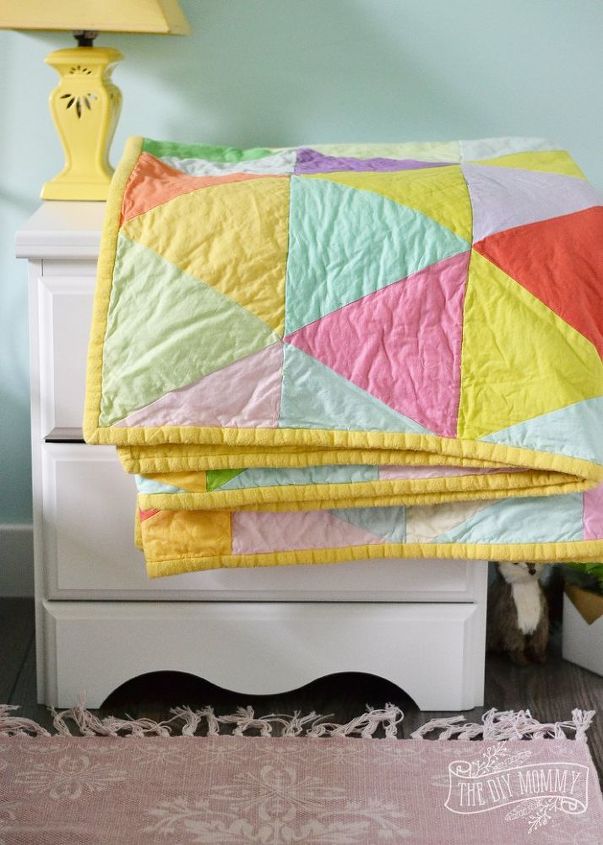
Finally, wash the quilt to get rid of the temporary glue and give it that lovely, wrinkly quilty look. I use a gentle cycle on my washing machine and a warm heat setting in the dryer.
Enjoy!!

Want more details about this and other DIY projects? Check out my blog post!
Comments
Join the conversation
3 comments
-
What is the finished size?
-
Thanks Dori. I may try it...tho I have never tried a pieces quilt.
It's so pretty!


Frequently asked questions
Have a question about this project?