


Indoor Herb Garden

Do you love fresh herbs to cook with but hate going out in the heat to battle mosquitos to clip your favorite additions for dinner? I’m going to show you how to make any container into a planter! Wood, plastic, no drain holes, no problem! Follow along I’ll teach you how!
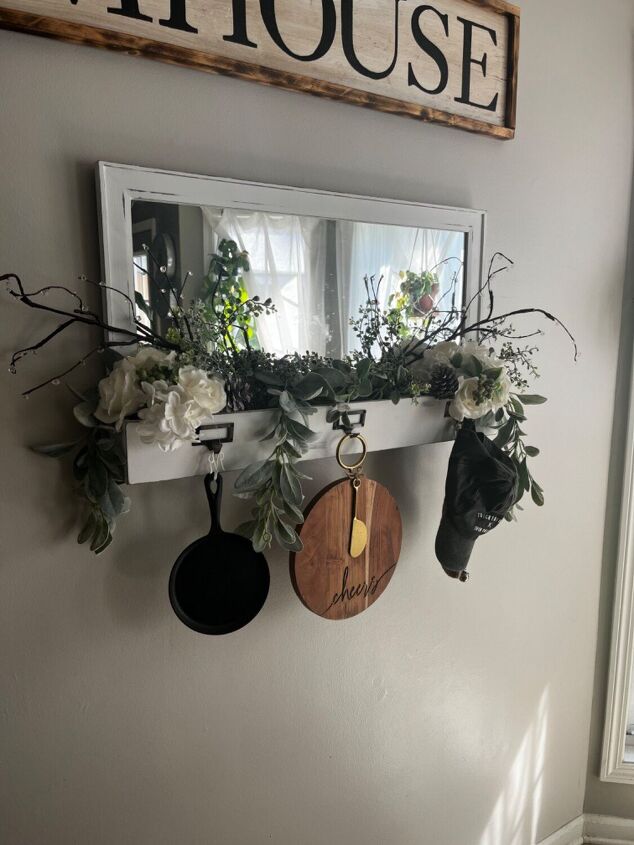
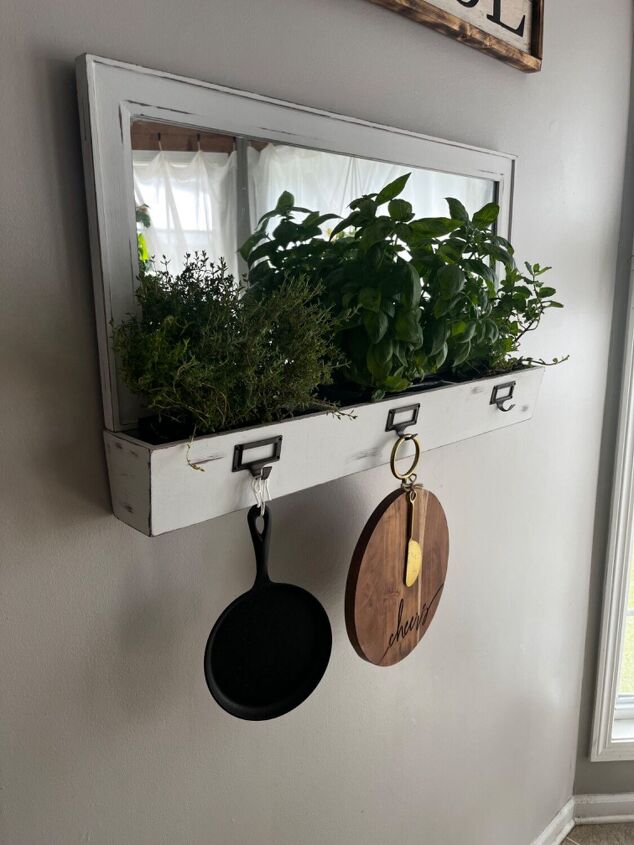
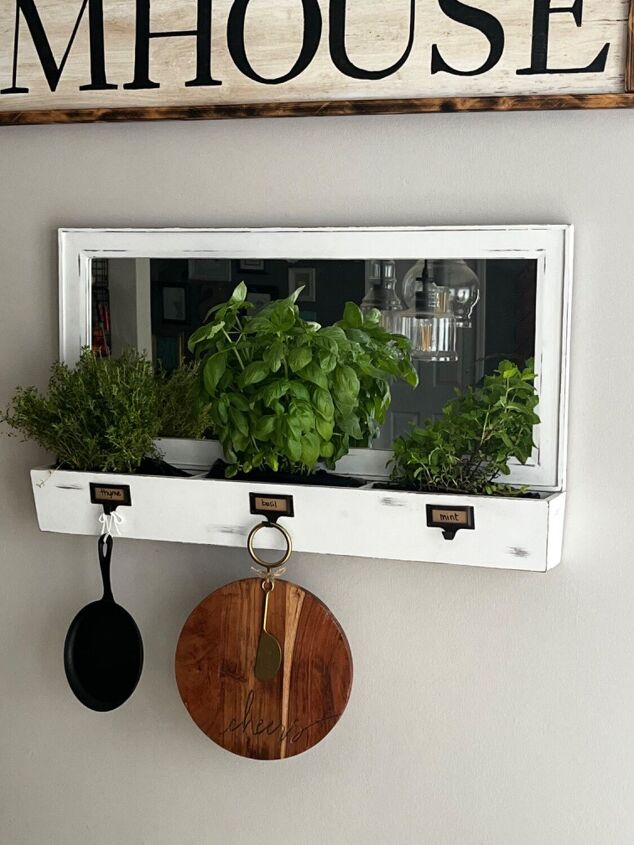
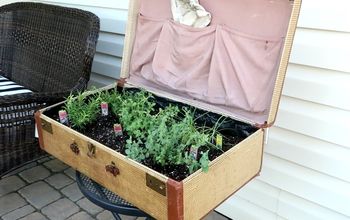
I’ve had this organizer in a few different places in my house, but it’s landed in my kitchen and has been here a while. I usually decorate it for the season, but its been looking like this for a while. With summer here, we use the grill A LOT and love fresh salads and cold pasta, nothing better than fresh herbs with fresh summer dishes! We use Thyme And basil with a lot of meals, and I LOVE a nice fresh mojito on the porch, so we had to have some Mint! I thought this would be so cute as an her planter, but beating wood and having no drainage holes…. Tricky right? Here’s how to protect your decor and make it a planter!
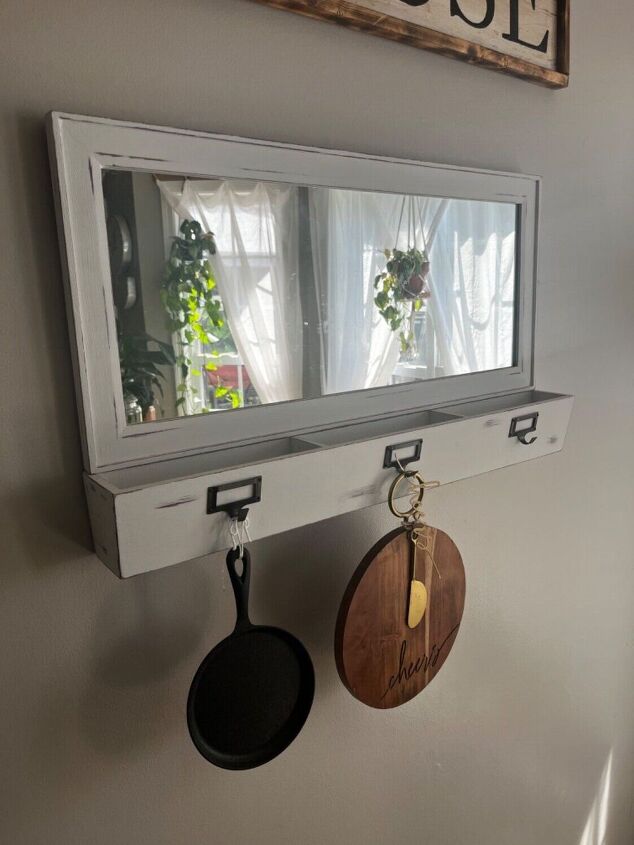
First step was to clear out the faux florals. I picked this up at a yard sale years ago, it was a cherry wood finish, I painted it white and distressed it. I found something similar on Amazon that I will link if you want to create this look.
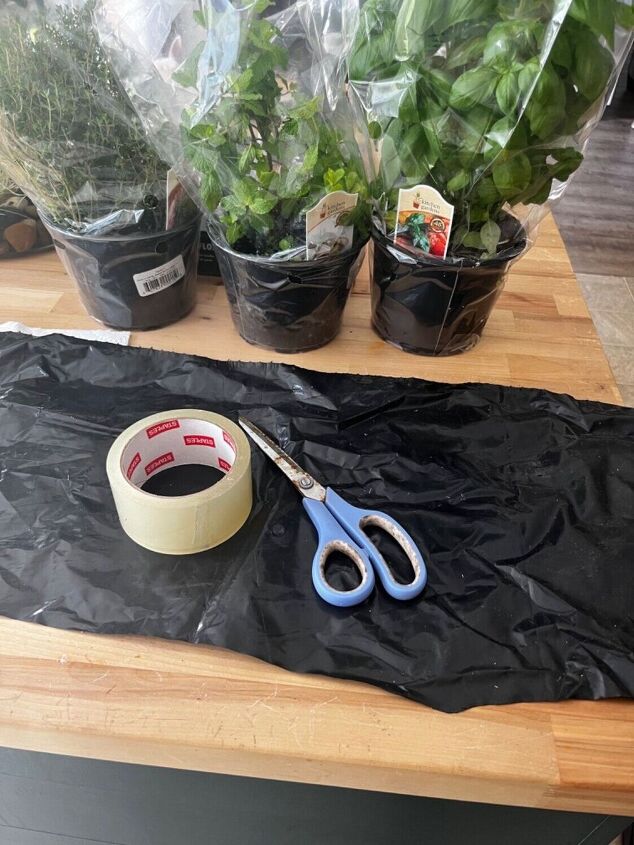
Our local Publix has the most beautiful full herbs, so I picked up 3, Thyme, Basil, and Sweet Mint! you can choose what you like!
Other supplies needed:
- lawn and leaf bag, or any other heavy duty plastic, I’ve found a big quality hefty zip lock works well too!
- scissor
- packing tape
- gravel or small rock (not picture)
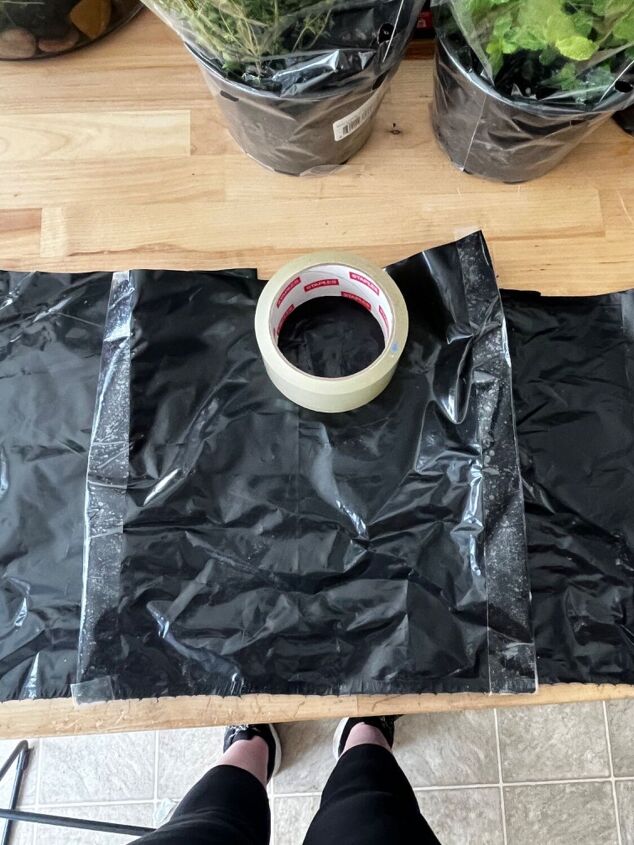
I started by cutting the bottom of the bag off so the bottom of my planters has a good solid bottom, I then taped the sides closed. I’d you use a ziplock bag, I would tape along the bottom corners, that’s where I have found the tend to leak over time. Since these are edible plants, they aren’t going to last forever, we typically eat them up and buy new before they can grow back fully.
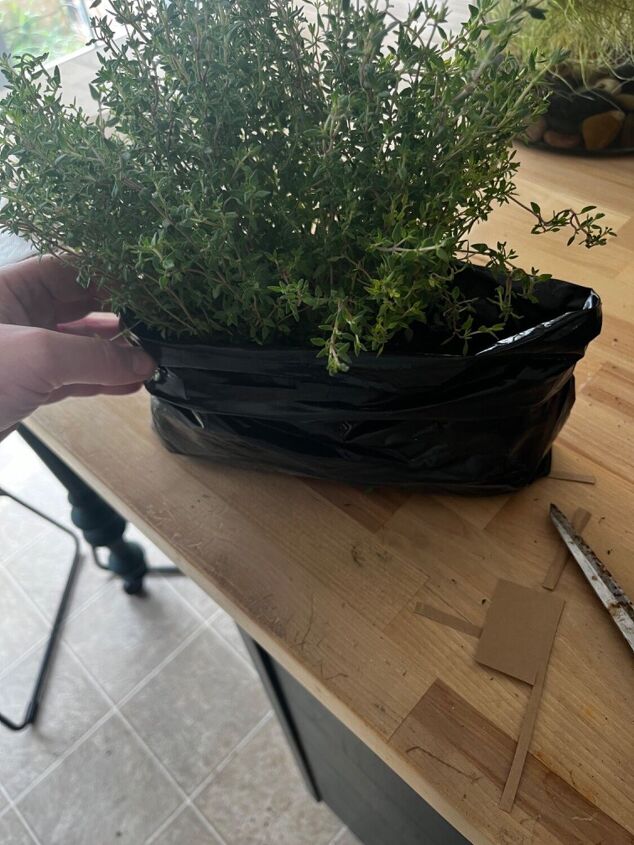
I forgot to get a photo, but I placed some small rocks in the bottom for some added drainage, and gently manipulated the root ball to fit in my container, I did have to remove some dirt, when I replace the herbs with fresh I will definitely be buying smaller plants!
Place in your container and tuck in any extra bag. I wrap the bag over the top of the base of the plant to hold in some moisture. Just remember to fold it out to water if you’ll get water splashing everywhere!
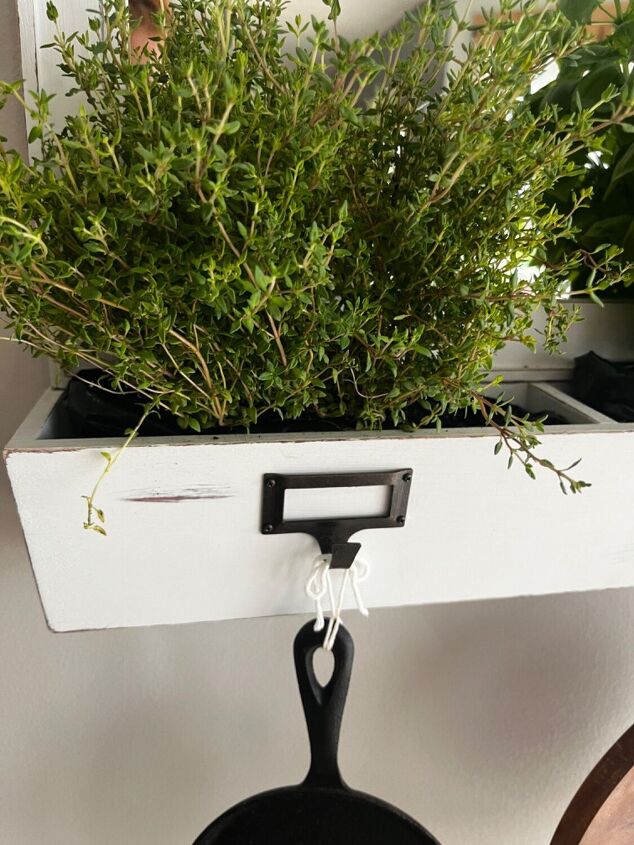
My container had these cute hooks, with name tags, so I decided after placing the plants to label them. We know what they are, but why not complete the look?
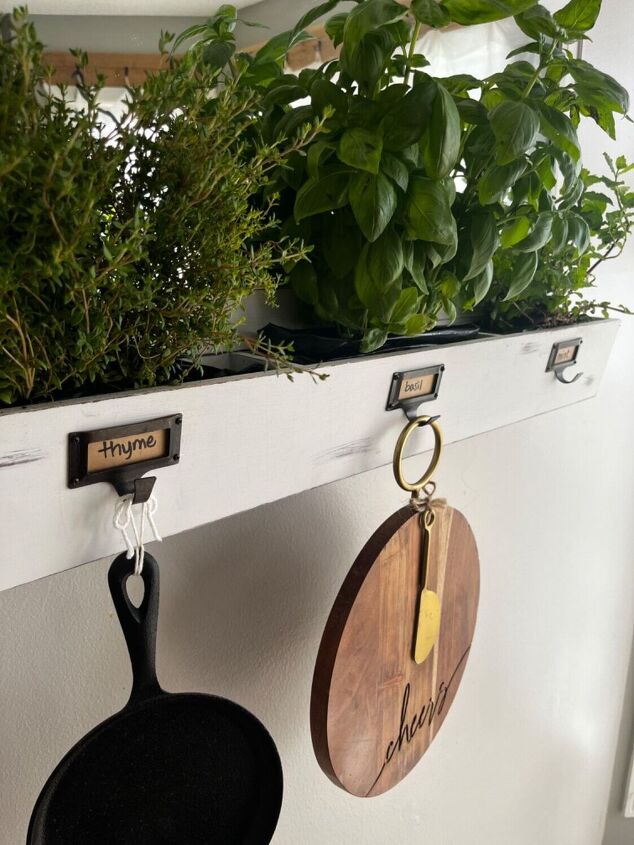
I wrote these entirely too many times… I really don’t like my handwriting but, it really finishes the look.
Enjoy your fresh herbs! Make sure you remember to water and hang in an area that gets some good outdoor light!


Frequently asked questions
Have a question about this project?