


LOOK-FOR-LESS : A HOME OFFICE MAKEOVER ON A BUDGET
*This post was sponsored by Beyond Paint®, however, all opinions expressed are my own.
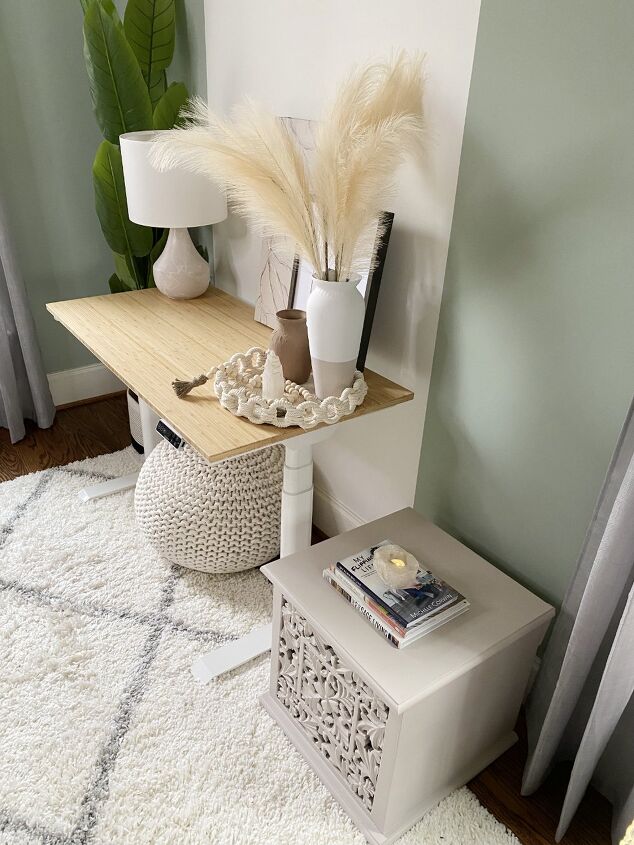
I am excited to share this next level makeover in my blogging home office with you all today. I bought my first house in the middle of 2021, and did a little makeover of this space when I first moved in. Mostly because I need my environment to have some sense of order and beauty to it when I am being creative. But it was always meant to be temporary.
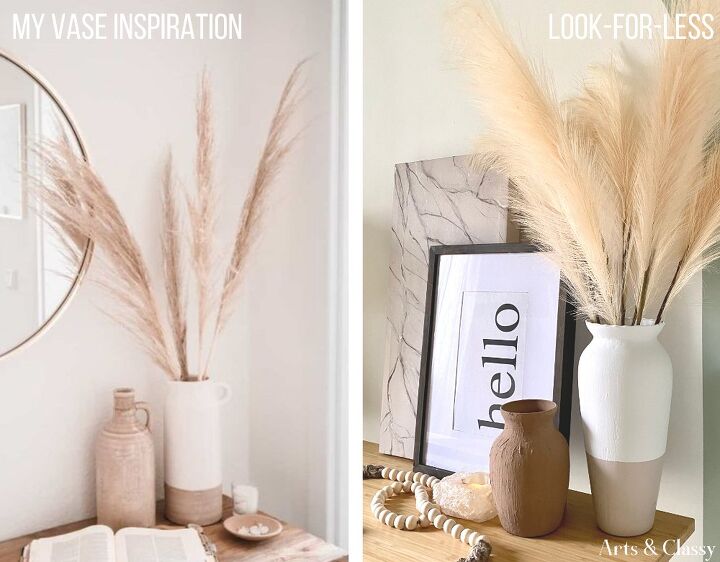
Now that I have existed in this space for longer, I decided a new pass at this room was my next project. You all know that I love a good deal, so the first place I went was my local thrift store to score a vase and canvas art. I also wanted a table lamp, and my husband had one to give me.
The total cost of this makeover was less than $20 on all four decor accessories!
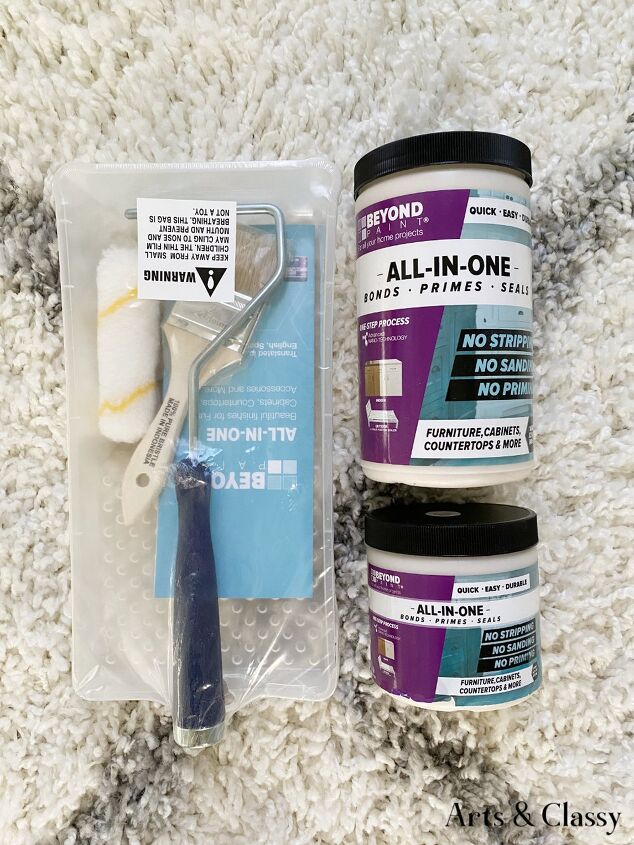
I have really been vibing with the neutral aesthetic floating around the interwebs, and the color palette that comes with it. Beyond Paint® was a great fit for this makeover for many reasons. The application of this paint is easy and not a lot of prep is needed (i.e. sanding and priming). Their paint is all-in-one as a bonder/primer/finisher! With projects that I am tackling today, durability was also factored in and this is by far the most durable paint on the market!
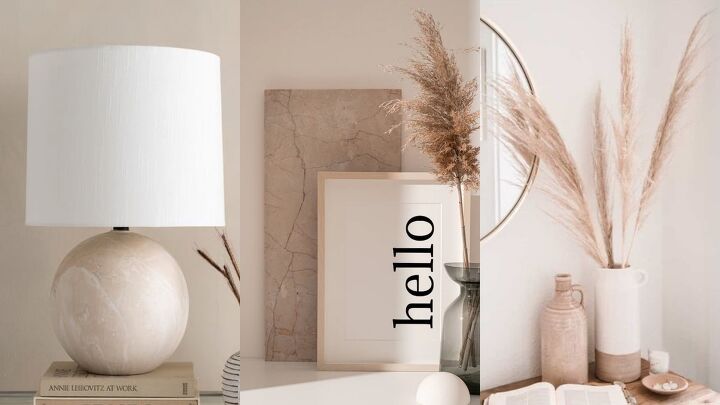
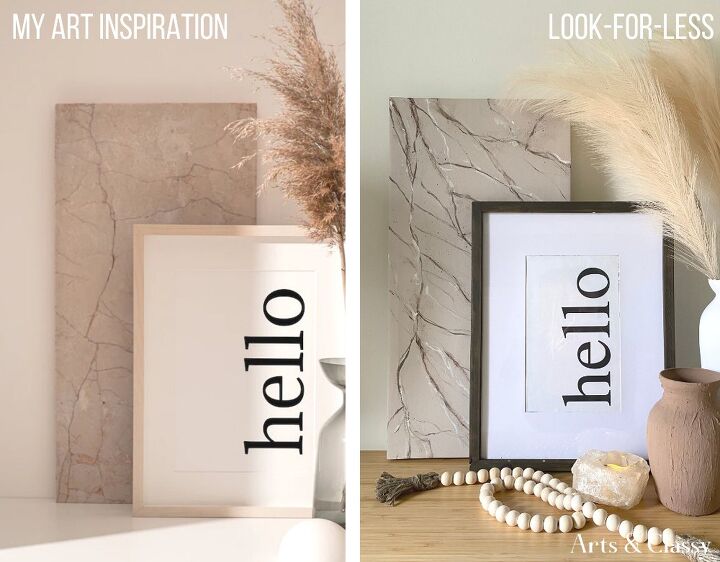
After a lot of research, here is the final home office ideas inspiration that I gathered to make this look for less.
Supplies I used for this home office space makeover on a budget:
- Beyond Paint® in the color Sand
- Beyond Paint® white paint, in Bright White
- Foam roller – 3/8 inch woven fabric nap is recommended
- Paint tray
- Wide paint brush
- Artist brushes (various thickness)
- Sponges
- Spray bottle with water
- White nail polish
- Large bowl
- Painters tape
- Brown, gray, white acrylic paint
- Modern white lamp shade
- Fake pampas grass
You can check out the video tutorial with tricks and other steps broken down for the diy projects I did for this home office makeover on a budget below.
Project # 1 – Neutral Designer Vase
Step 1
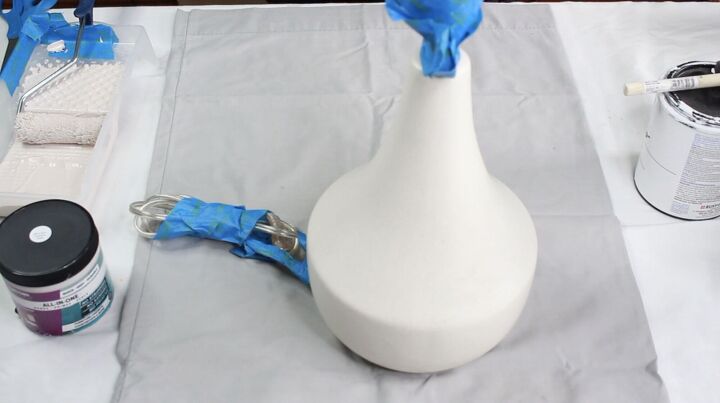
I had to source a tall narrow vase. Luckily, I easily found mine at a local thrift store for $3.99!
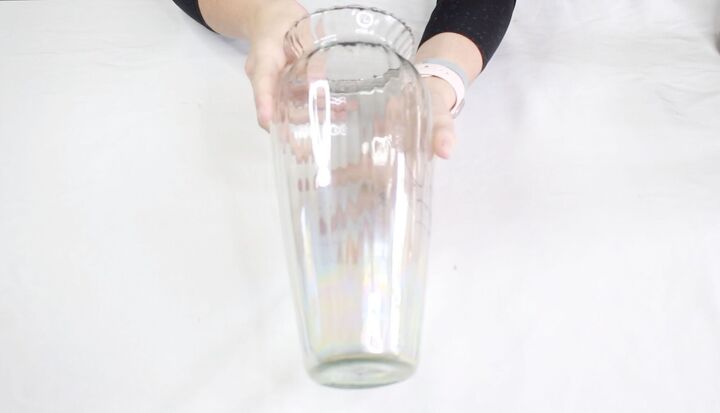
Step 2
I cleaned the surface thoroughly with a degreaser multi-surface cleaner. I had to make sure the glass surface was clean, dry, grease and oil free. This is an important step for any project and BONUS it is the only prep work needed before I began!

Step 3
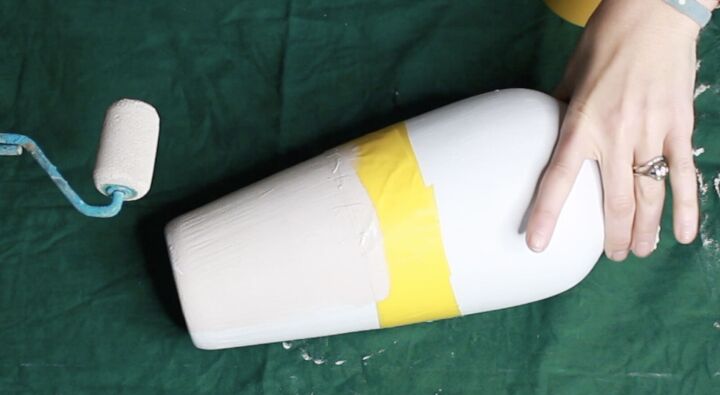
I started with a base coat of a white flat paint. Due to my inspiration, having a two tone look was my desired outcome and starting with white would really help any additional paint I added to the surface.
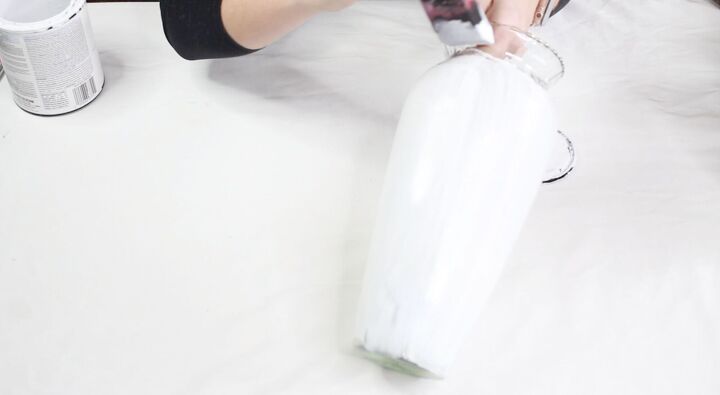
Step 4
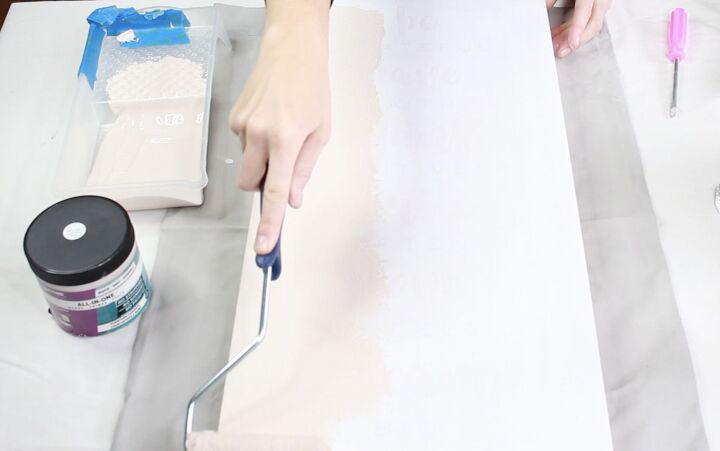
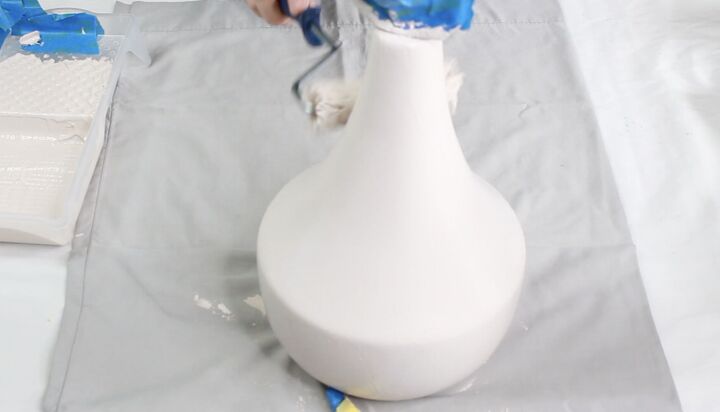
Once I let the white paint dry, I added delicate surface painters tape to the vase. I made sure it was secure on all the edges before using my foam roller to apply my Beyond Paint® Sand paint color. I want to mention that a 3/8 inch woven fabric nap is recommended when applying this paint, but I chose to use a foam roller for this specific project which required about 2 coats of this color and extra time for it to dry.
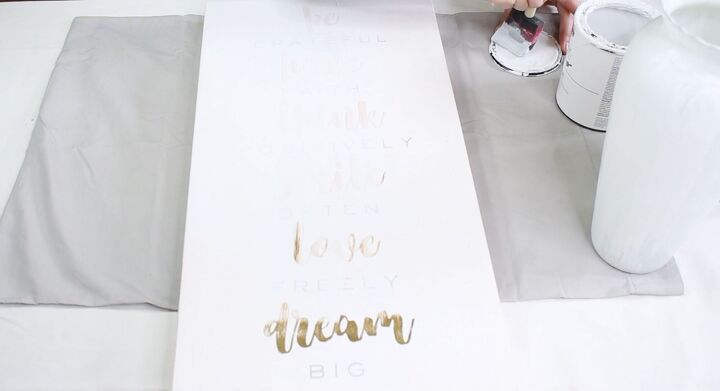
And now the canvas …
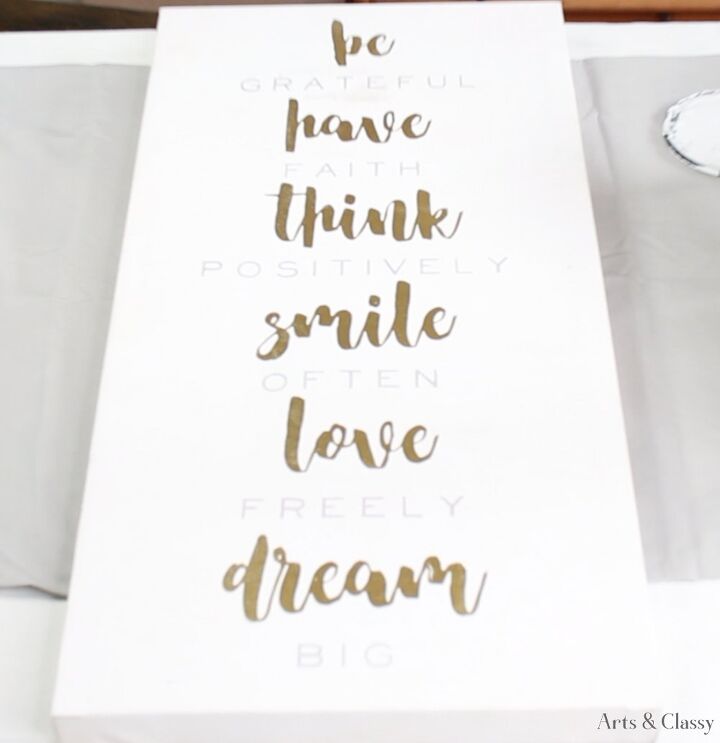
Step 1
I applied the same white flat paint to cover up this quote art text first. One coat of white was the perfect amount to better prep my canvas.
Step 2
Once my white paint dried. I wiped it down one more time with a rag and cleaning solution before pulling out my Beyond Paint® and a roller to apply this Sand color all over. It only took a couple of coats of paint and I also made sure to cover the sides of the canvas. To continue my fake marbling grain to the sides, I continued to use the painting technique as I turned the canvas. I wanted this art to look more like a slab of marble than just art.
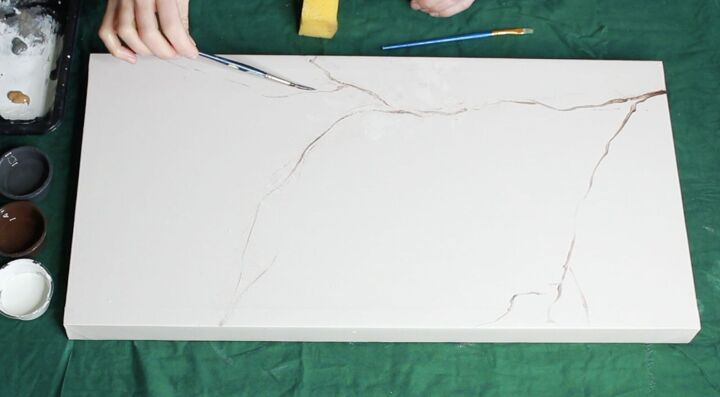
Step 3
Once the Beyond Paint® dried, I pulled out my smaller artist brushes, sponges, and my other acrylic paints for this step. The art of making faux marble is to not have as much control over the thickness of the grain and the direction in which it goes. I have found that holding the brush at the top allowed me to create a more organic looking grain. I also twisted the top of the brush as I went to give the brush the ability to change the thickness of the lines I created.
Using a spray bottle with water and a sponge really helped to break up the lines and to add more variety in texture.
Step 4
Faux marbling looks most real when there is a little bit of depth and variation added. I found that sponging in some of the white acrylic paint allowed for more dimension. By adding more layers in general with my gray and brown paints helped to make this look more real. One other technique I used after I was done with the graining was to use a dry brush and brown paint to lightly splatter some of that color in some areas around the grain lines.
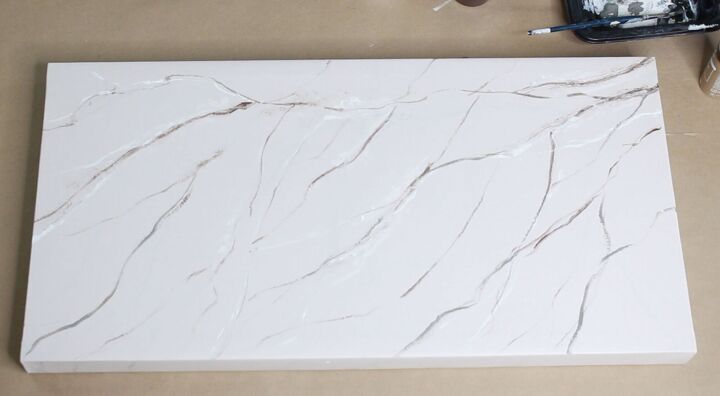
I am really happy with how this piece of faux marble art turned out and I think it is close to my original inspiration.
The next makeover is a lamp:
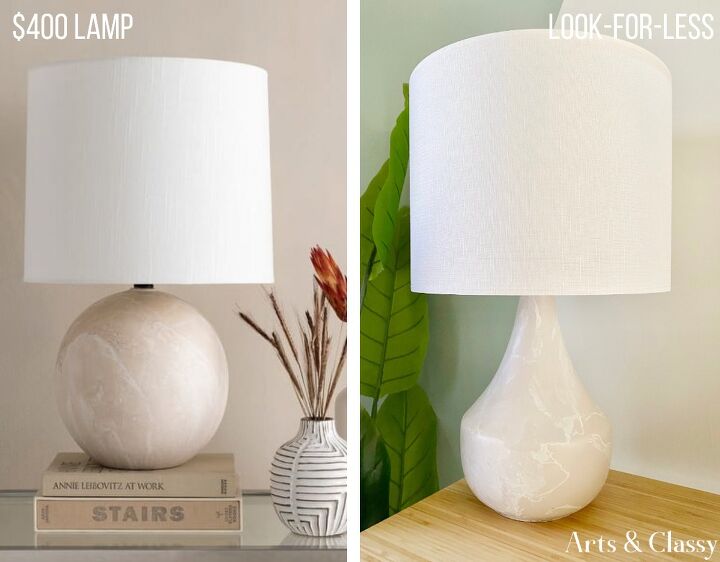
Step 1
I applied this paint directly to the surface with my roller. Beyond Paint® has more pigment for better coverage. This is handy since it only took one coat to cover this whole lamp!
Step 2
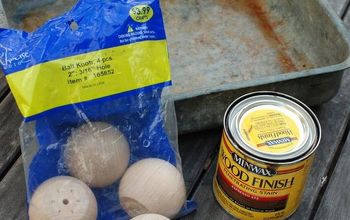
If you look back at the table lamp inspiration I shared earlier, I was trying to achieve a very cool faux marbling look. That lamp inspiration was $400!! Eek! That is way too much for me to spend.
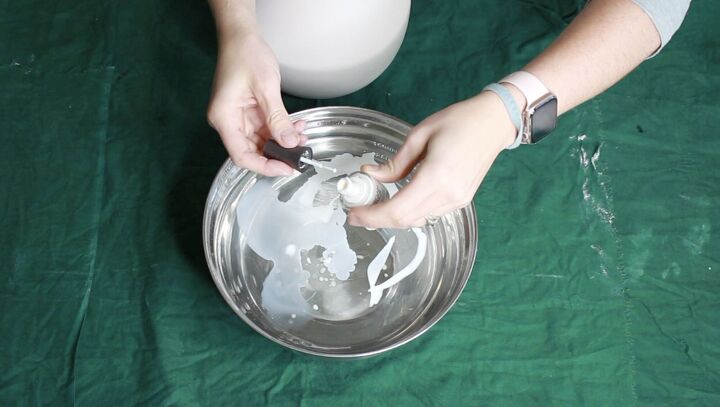
So we are definitely doing a look-for-less with this project. I realized that using white nail polish in water might be the perfect way to achieve the look I wanted. With a large stainless steel bowl, I filled it with water to use as my dipping basin. I took my white nail polish and added drops of it to the surface and allowed it to create an interesting shape.

Step 3
I took my lamp at an angle and gently dipped the surface into the water to allow the nail polish to cling to it in an organic way.
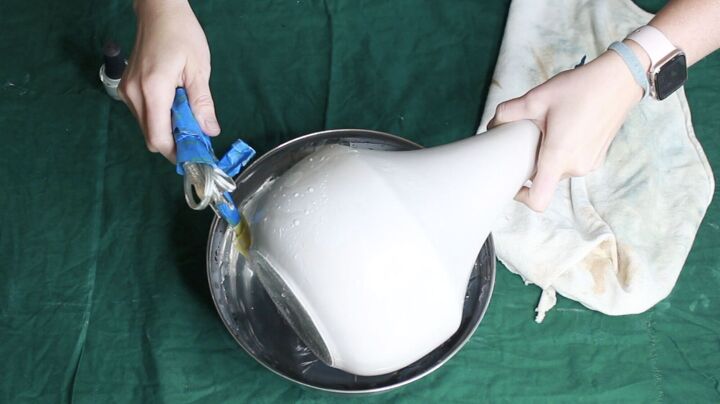
Since I wanted this to appear around the entire base, I had to drip more nail polish into the bowl and turn and change the angle in which I dipped the lamp to cover the entire surface.
Once I was satisfied with the coverage, I was able to pat it dry and allow it to sit to completely dry overnight. I added a new modern white shade to this light fixture and it really helped to make it look more high-end! It even resembles the design of my inspiration! Hooray!
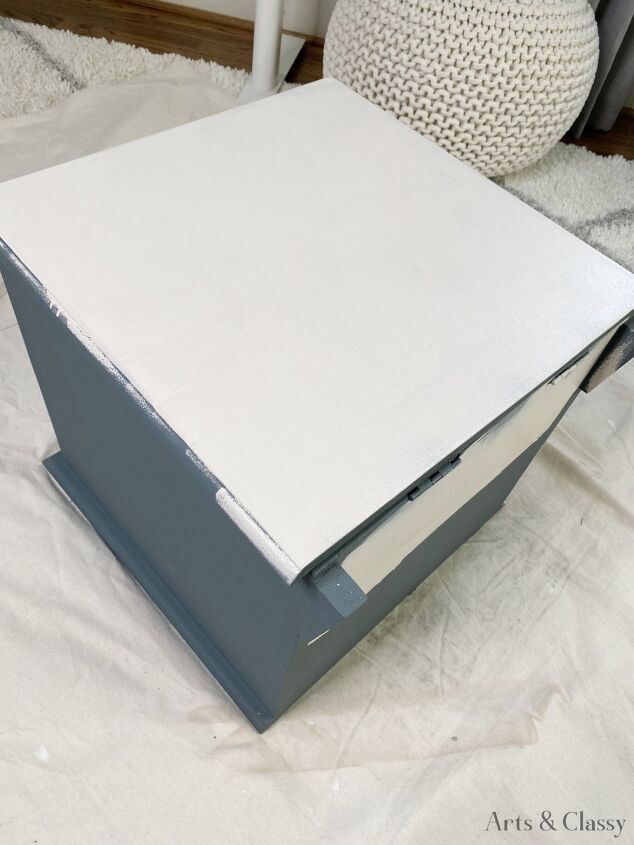
And finally I made over this ornate chest:

Step 1
I love that I didn’t have to sand this project before I began to paint it. With my Beyond Paint “Sand” color, and a foam roller it was was easy to apply it to the majority of the surfaces. I was so happy that it really only took one coat of this lighter paint to cover the previous darker paint job.
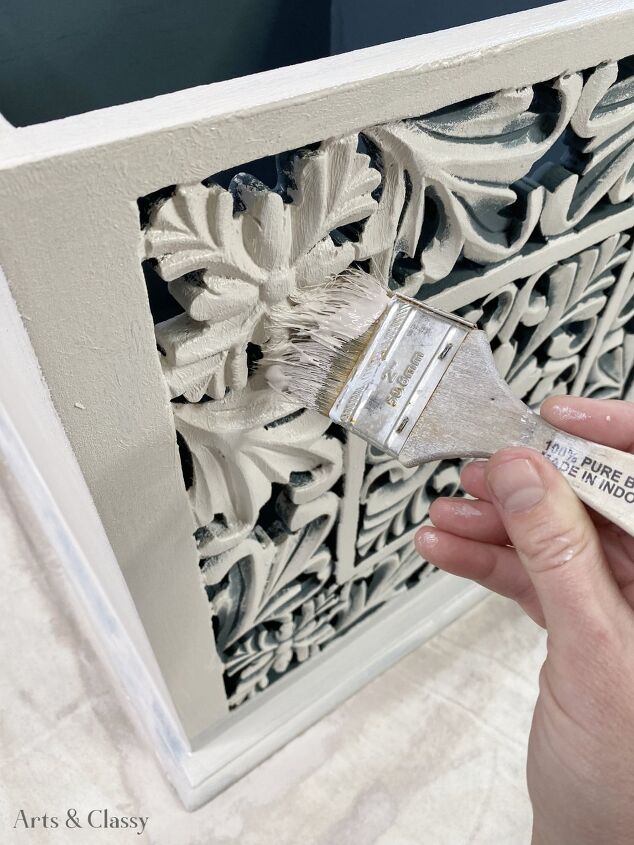
Step 2
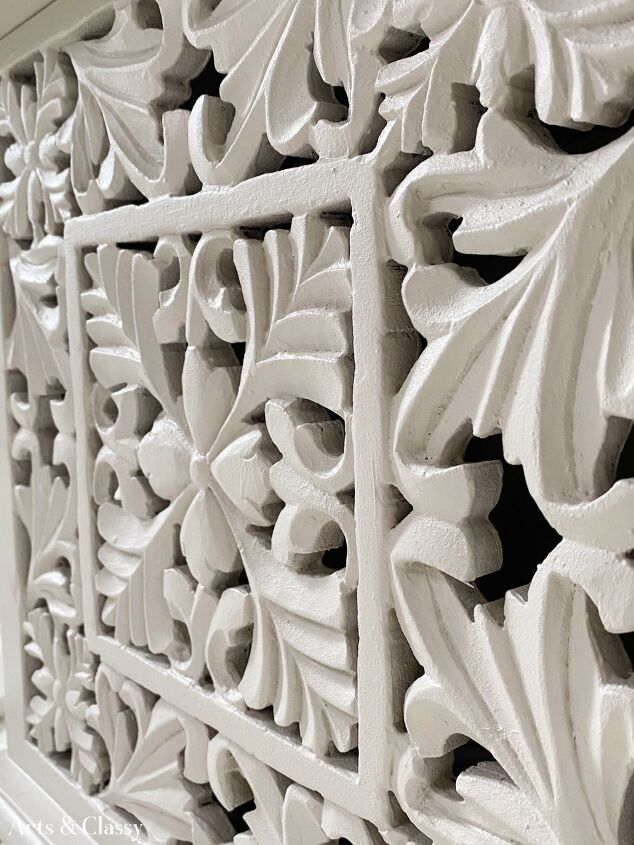
Once I covered all the smooth flat surfaces with paint, I moved onto the ornately carved side with my foam roller. I tried to cover the flat surfaces first before going in with smaller brushes. I wanted to make sure I got every nook and cranny of the face of this ottoman.
Step 3
The last step after letting my paint dry overnight was to use an antique gold rub and buff. Using this type of product was able to give my hinges and hardware a pop of metal. I did this with a small artist brush and a shammy.
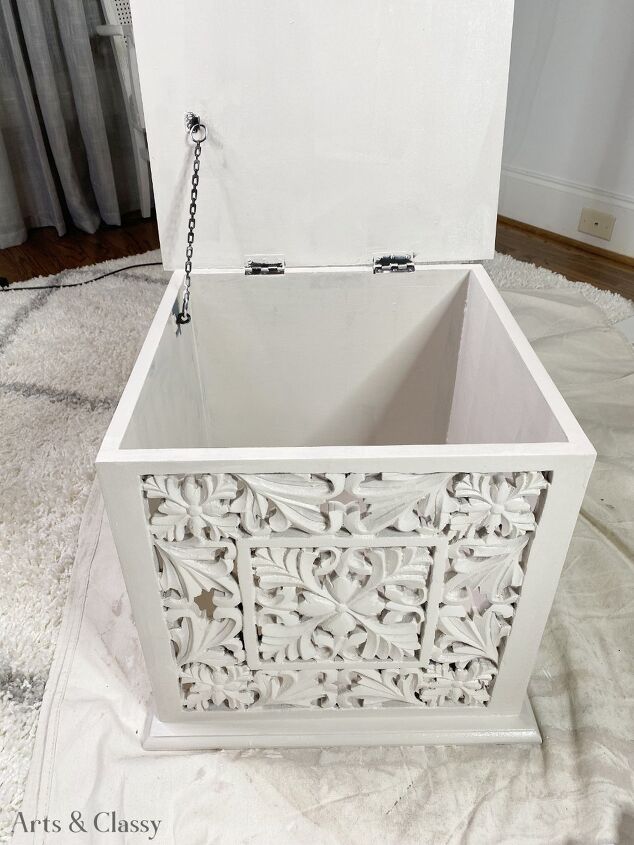
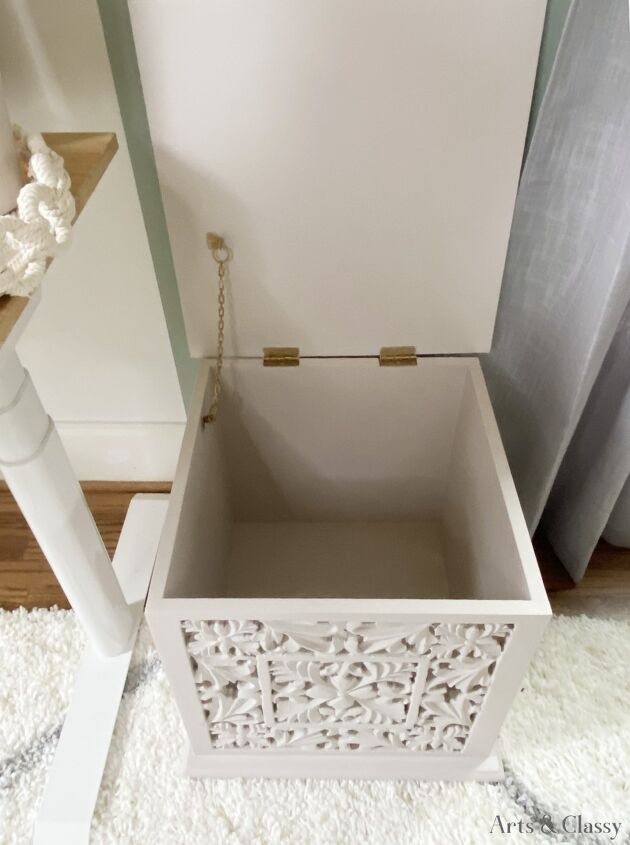
I am very pleased with how this last project turned out! The detailed carving on the front really stands out now! It really gives this ottoman a much more high-end look for much less.

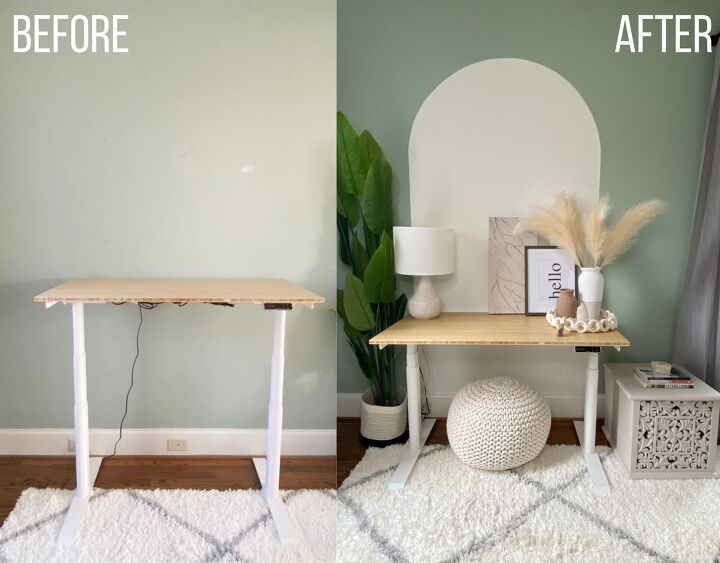
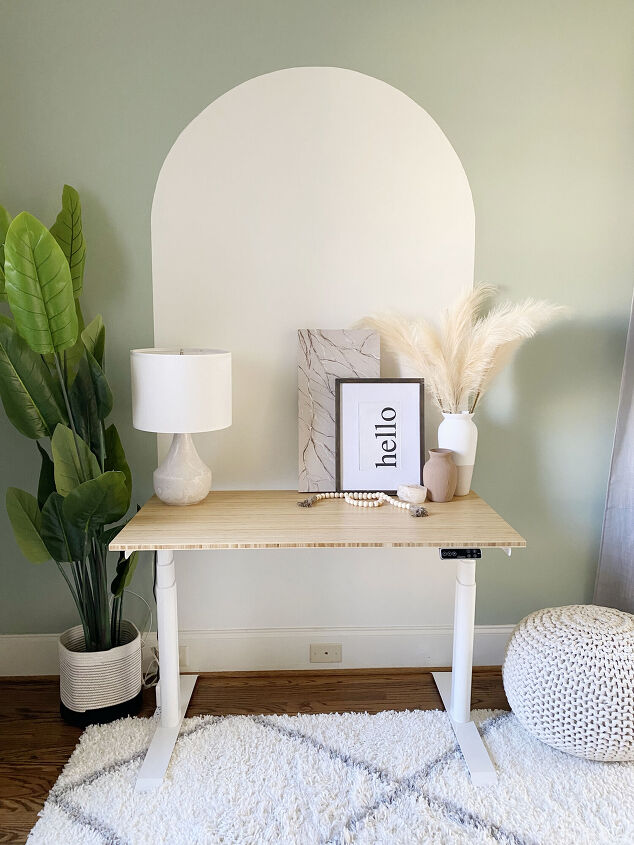
Here is one last bonus project for this home office makeover on a budget! To tie this neutral color palette in a chic way, I needed to create a focal point in my home office space.
Since this separate room is right next to my entryway, I wanted it to have a look of a staged console table when I am not using it.
I have seen what is called a “color block” accent wall floating around Pinterest and other blogger spaces. The difference was that it typically is used to add color to a boring white wall. My home office walls are a beautiful and calming blue/green color so I wanted to do the reverse. I decided to call it a reverse color block wall. I used painted tape and white paint to create an arch to live behind my desk.
This was very easy to do and really helped to bring this whole design concept together!
I hope you enjoyed these projects and my new office space! This home office makeover on a budget was really fun and very rewarding to complete. I hope this look-for-less functional home office shows you that you don’t need a lot of money to make your home reflect your style.
Please let me know what you think of this home decor in the comments below. Make sure to visit Beyond Paint® to see all the colors they have to help transform your home.
Resources for this project:
See all materials


Comments
Join the conversation
-
Wow! So fresh and serene💕
-
Each turned out superb...lamp is my 😍


Frequently asked questions
Have a question about this project?