


Quick and Easy Mini Planter
I saw the cutest bamboo planter online, but it cost a lot of money. So, instead of breaking the bank, I decided to make my own DIY mini planter. To do this, all you need is to find one bamboo stake that you like the color of and snip it into smaller pieces.
Tools and materials:
- Bamboo stakes
- Food container
- Garden shears
- Hot glue and gun
- Jute twine
- Raffia ribbon
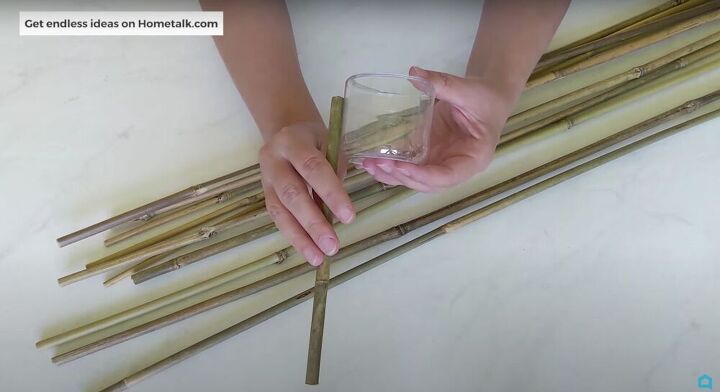
Measure your bamboo
Take an old food container and snip off the twist-off cap. Then, grab your bamboo stake and measure it alongside your container, measuring it so that it goes over the bottom and there is excess room leftover on the top (as pictured above). Mark the place where you want the bamboo to be snipped and use some garden shears to break it up.
Build your planter
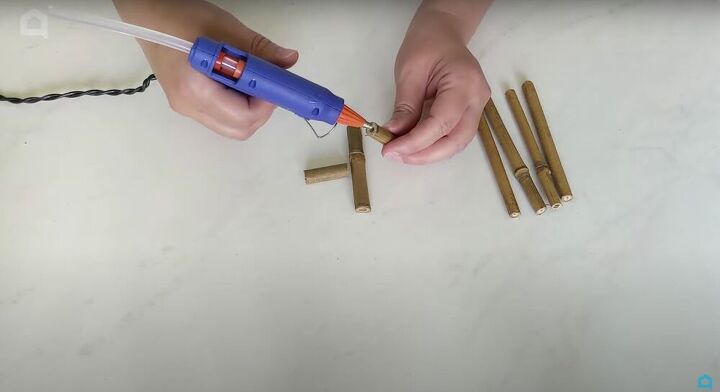
Measure the diameter of the container and add a quarter of an inch. Cut out two pieces that are that length, cut one in half, find the center of the other and then glue them together into a plus sign (pictured above). Next, using the jute twine, take your bamboo pieces, find their center, and bind the cross brace to the middle using twine. Then, use that same twine to secure the center by putting a dab of hot glue on the bottom and then wrapping the jute around all the separate pieces of the cross brace.
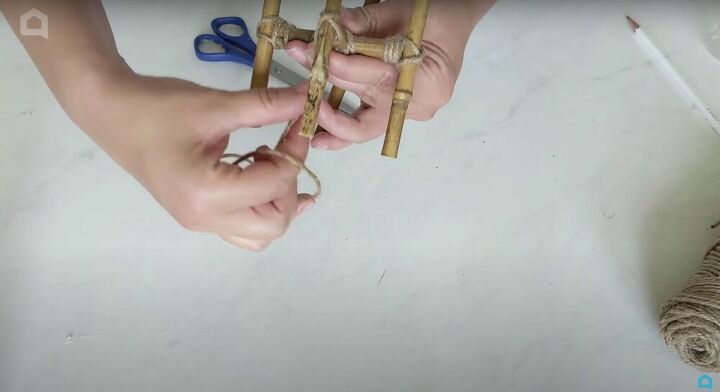
To do the cross wrap binding, cut off 12 to 15 inches of string, place a dab of hot glue on the underside of the leg and then attach the end of your twine there. Leave it for a second to dry. Next, flip the planter right side up and wrap the twine across the leg, around the back, across again, and then down and underneath. Once that’s done, wrap it around the cross brace three times
Make the basket
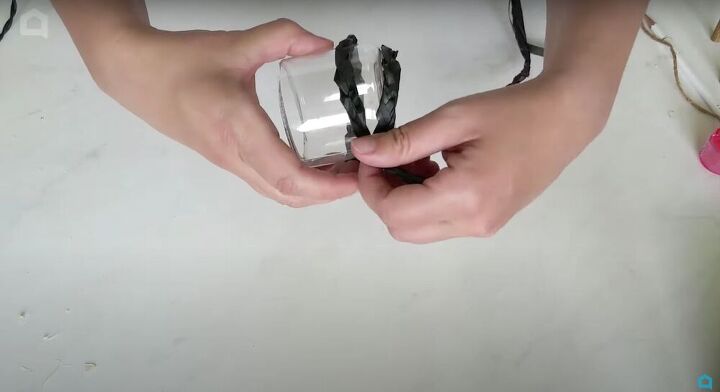
For the basket, cut three pieces of raffia ribbon and then braid them to create a material that is sort of basket-like (without actually having to go out and buy anything crazy!). Once the braid is done, glue it to the bottom of the food container and then wrap it around - making sure to cover the rounded part so that none of the plastic peeks through. Use glue as you go to keep the braid in place.
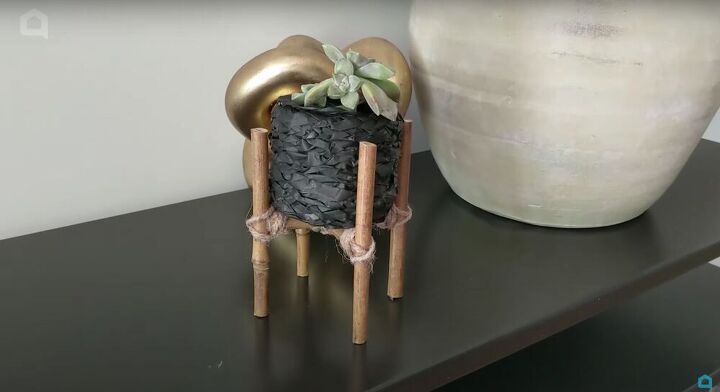
This easy mini planter is the sweetest thing I’ve ever seen. My daughter has already called dibs on it! I am definitely going to have to make more, and maybe get a little creative with the baskets!
Resources for this project:
See all materials


Comments
Join the conversation
-
Your right it is the cutest thing, I bet the store price was outrageous. Love when something at the store can be created for cheap. Thank you for sharing it is super cute.
-
Ditto 😃


Frequently asked questions
Have a question about this project?