


Shampoo Bottle Fish

This upcycle of the family’s old plastic bottles is as easy as a grade school project, except the outcome is very adult.
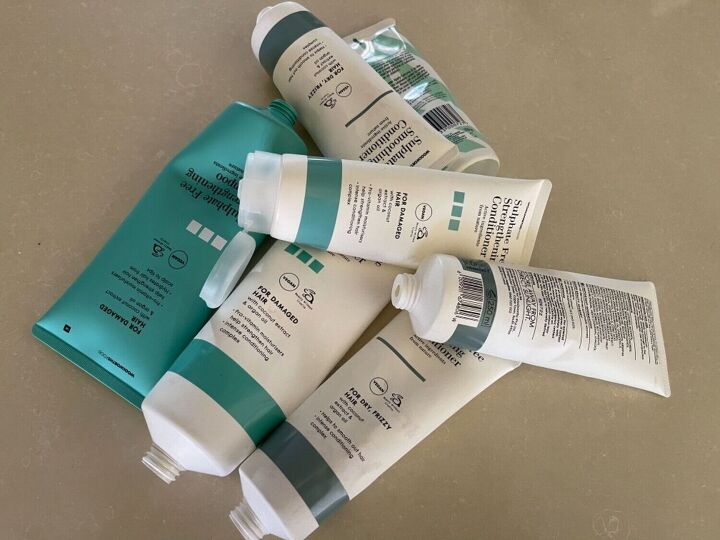
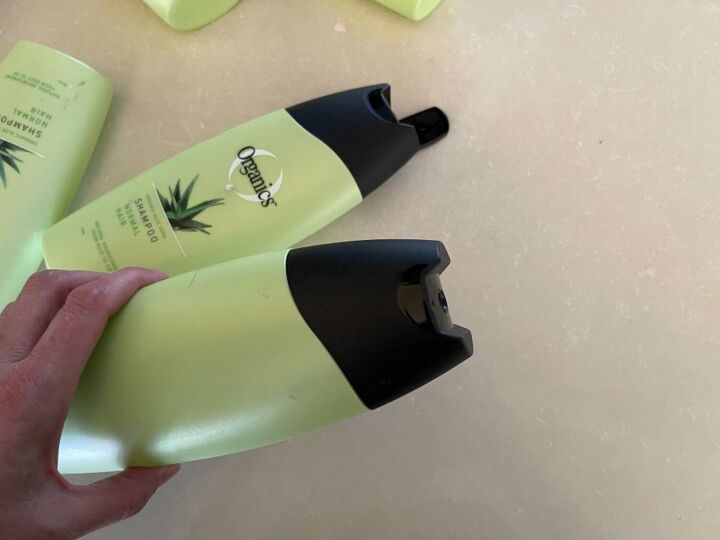
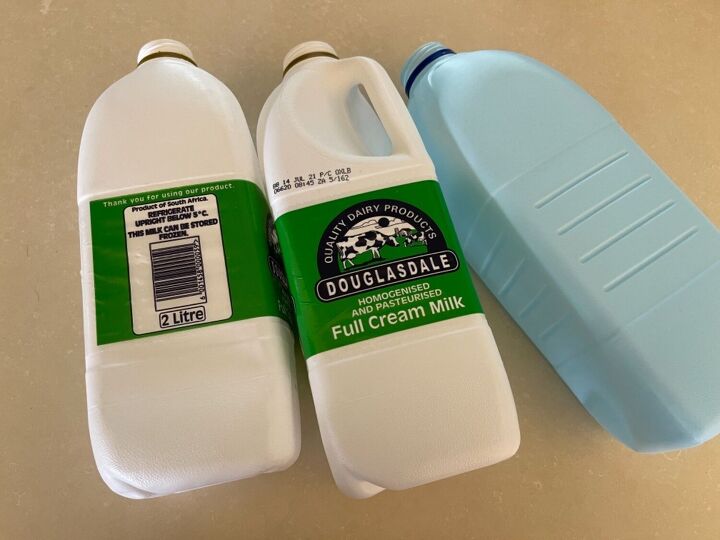
Nobody in our family ever steals anyone else’s shampoo because each one sticks to their own favourite brand. You can gather quite a lot about our personalities from our shampoos. The above collection is the sensitive and socially aware Gen Z’s tubes - all sulphate, paraben and everything, except plastic, free.
As a typical older male, Dad also uses his green shampoo as face and body wash! No comment on the state of his skin. But doesn’t it remind you of…a fish?! Inspiration!
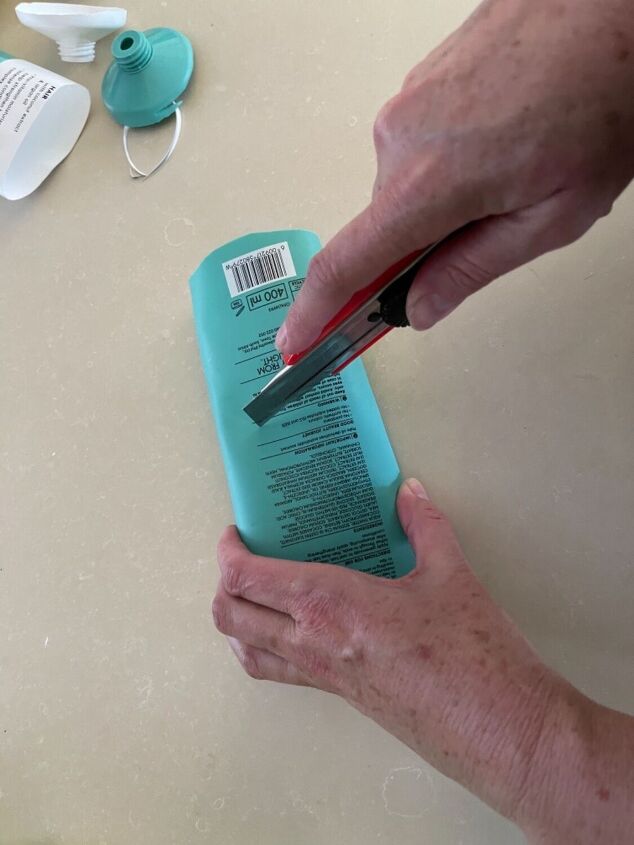
I cut off the tops of the tubes with a boxcutter. Just a note, these are really big tubes that are in proportion to the green bottles, not little ones.
Make a tail
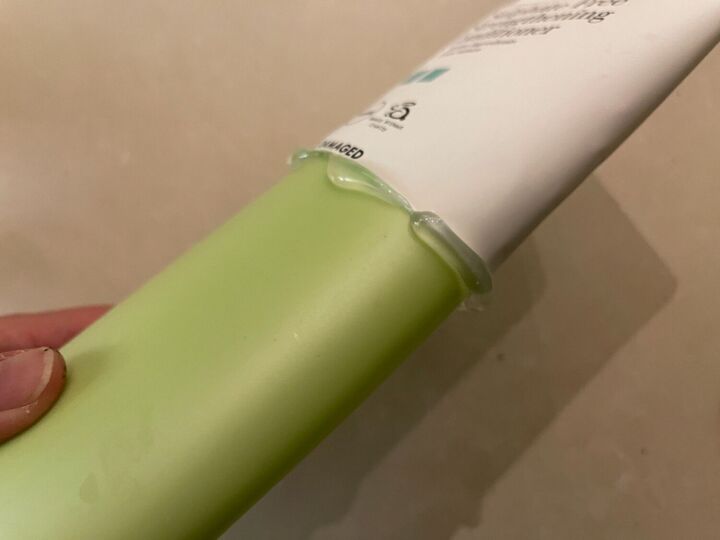
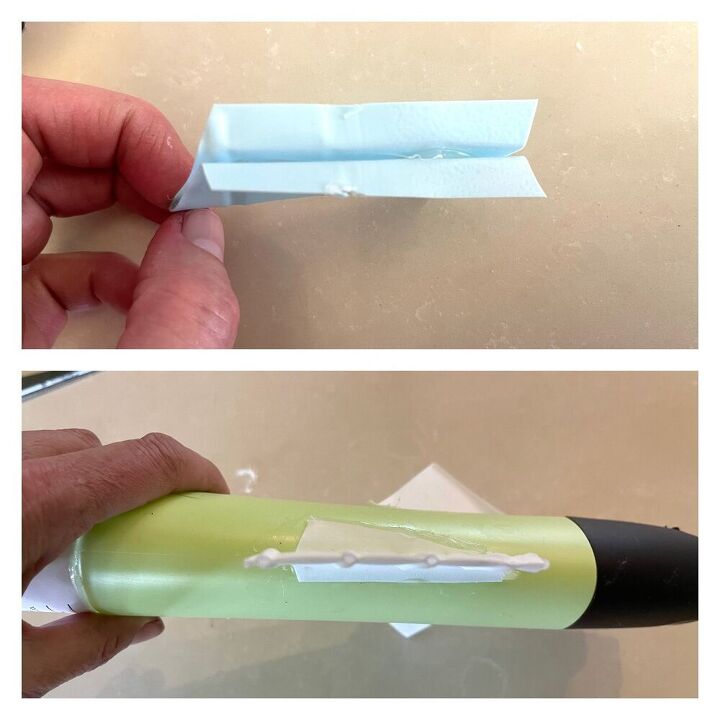
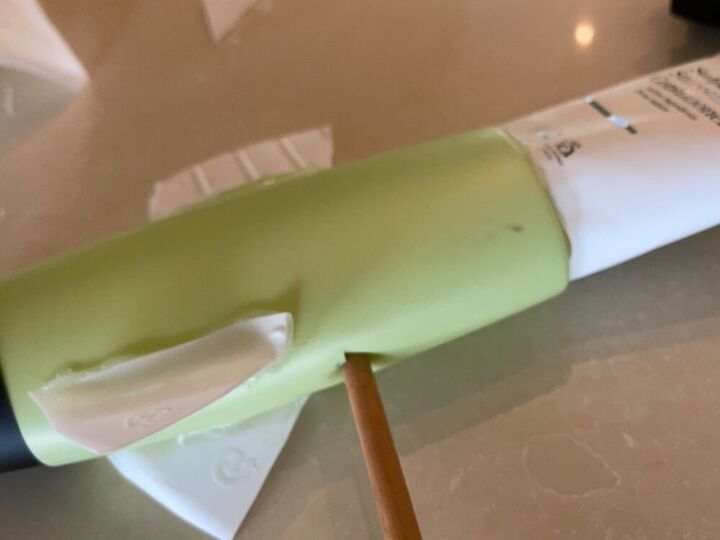
Then I stick the tube to the bottom of the green bottle with hot glue by sliding it over the end.

Some tubes are too small to fit over the green bottles, so I apply a big blob of hot glue to base of the green bottle and stick the tube directly onto this. The tubes cannot be too small otherwise the tail will look out of proportion.
Make a dorsal fin
Next, I take some plastic milk bottles (no, we don’t wash our hair with milk, you haven’t missed the latest beauty craze)…
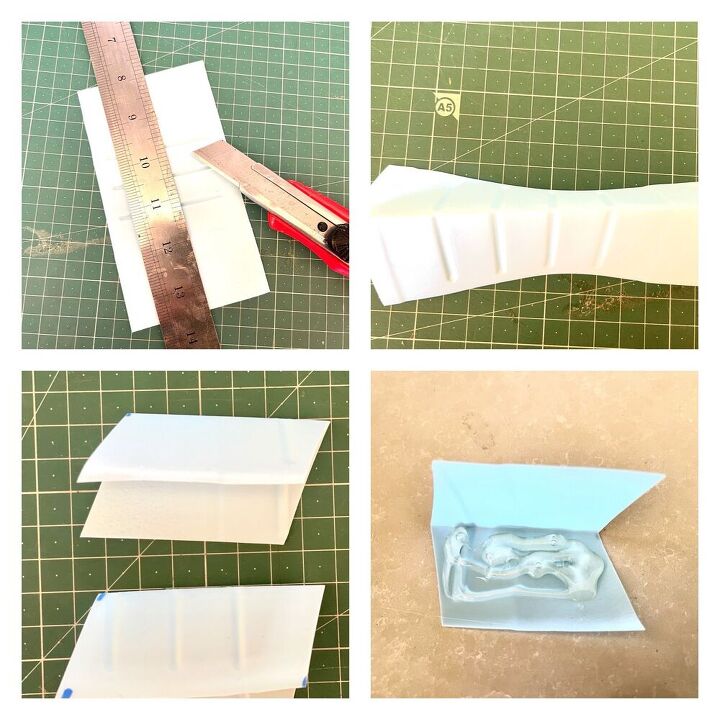
And cut out rectangles from the sided. I score the middle of the rectangle as shown in the first picture above, make a fold and cut it into a trapezium. I then stick the sides together, leaving a strip unstuck at the base. Don’t burn yourself, the plastic is thin and hot!
To stick the fin on top of the bottle, I fold the unstuck parts outwards in opposite directions and glue them down. This creates the dorsal fin.
Make more fins
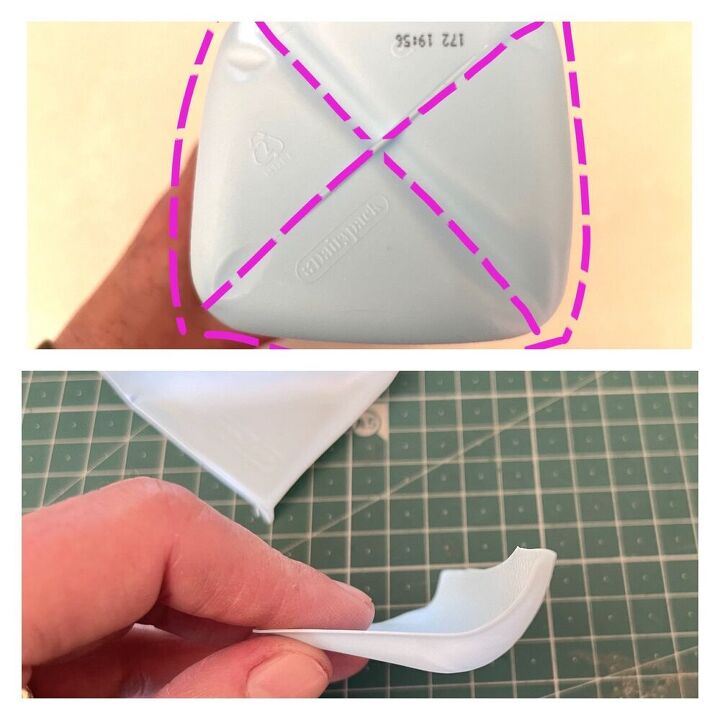
The curved base of the milk bottle is used to make 4 pectoral fins, enough for 2 fish. Cut as indicated above and include a part of the curved side so that the piece looks like the 2nd picture.

Keeping a part of the curve creates an easy way to stick the fins into place and ensures that they are at the perfect angle. Stick one either side of the bottom centre.
Now check that everything is very securely stuck down because any movement may cause cracks at a later stage. Whilst the glue gun is on, I also use the opportunity to fill any gaps, I’m not too precious about squelching glue.
Stick the fish on something
Cut a cross at the centre bottom, add a big blob of glue inside the hole and stick a dowel in. There isn’t much for the dowel to stick to, so it helps to push it all the way up until it reaches the top end of the bottle. Add more glue to the outside of the join. You could also stick the dowel down with tape. Also consider varying the dowel lengths, depending on how you want to display your fish.
And if you don’t want to mess crack filler on the dowel, now would be a good time to mask it.
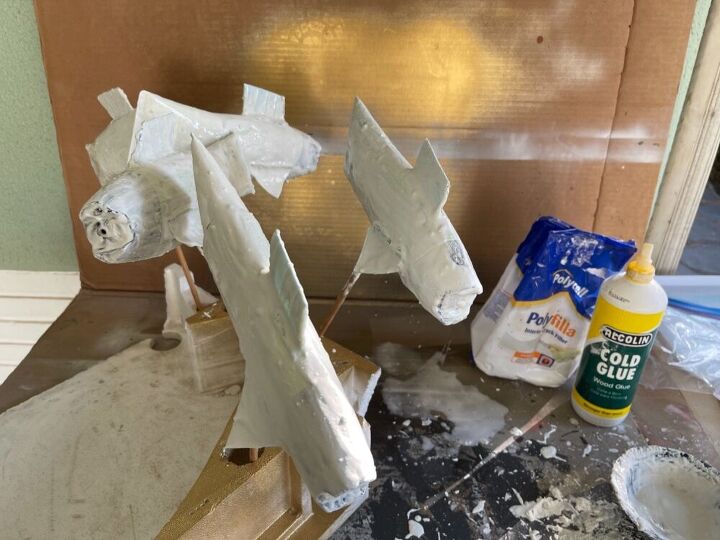
Paint with crack filler
Mixing about half a cup of water to 1 cup of crack filler (you can add more water as you go along but adding more crack filler to the mix, seems to make more lumps) with a spoon in a bowl, creates a stiffish paste. There will probably be lumps anyway, so mash the biggest ones and just go with the rest. Add about a quarter cup of wood glue and mix again.
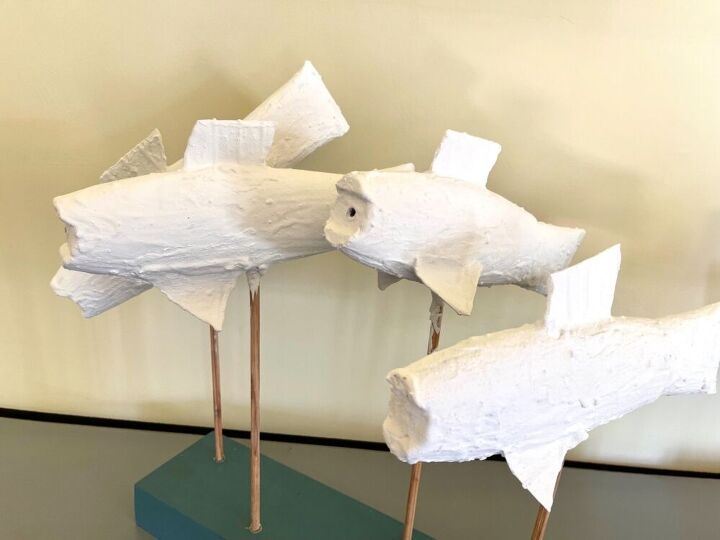
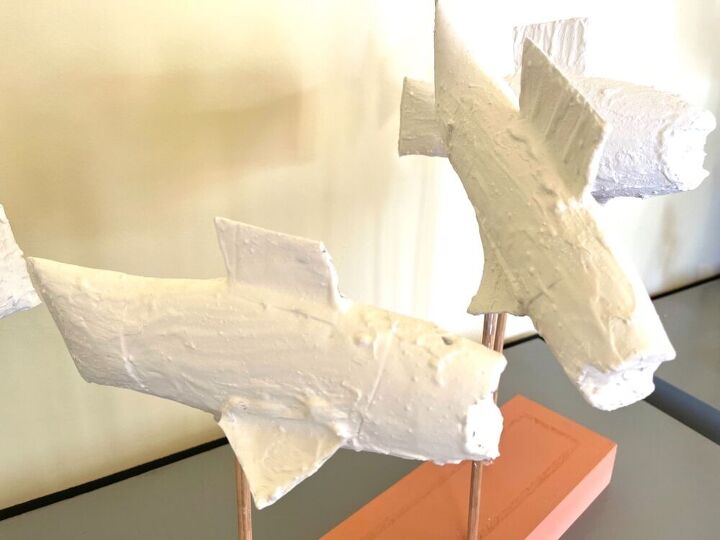
Cover the fish with this using a paintbrush. How throughly depends on whether you want to paint your fish later (in which case you only need a thin layer) and how many joins you want to cover. All in all you get a nice crude effect which, oddly enough, makes everything look less like a grade school project.
Dry overnight. The next day, check for cracks and patch them. I found that if the bowl of mix is kept in a sealed plastic bag in a cool place, it can easily be stirred up the next day. Repeat the process for a third time, if need be.
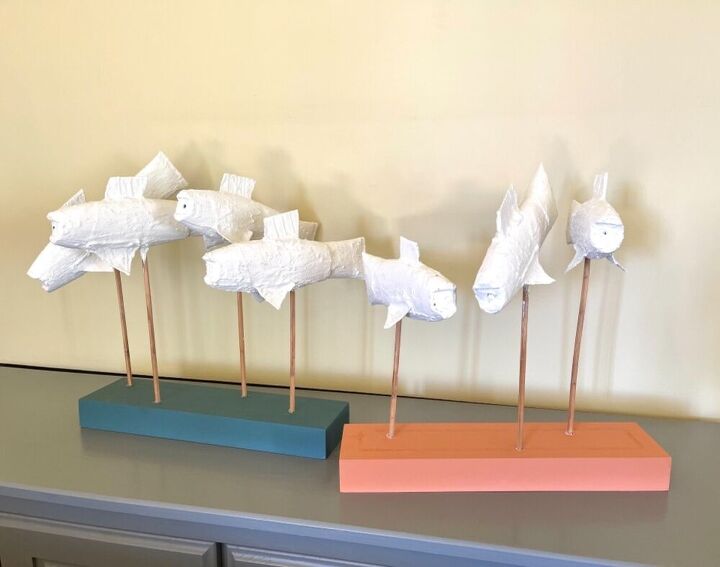
Your fish are now ready to be painted if you want to. The quickest way is to spray paint them. A good top coat is also a good idea. I just left mine with their natural colour.
Mount the fish
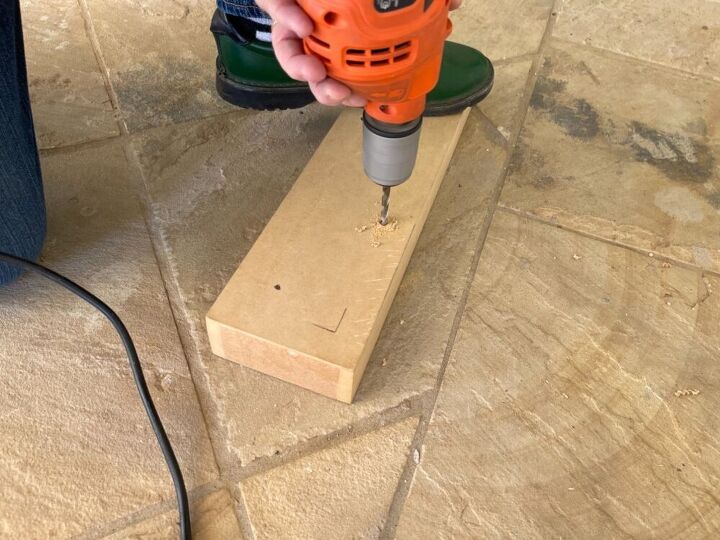
The easiest way to mount the fish still remains a thick piece or single pieces of wood into which you drill holes and then use glue to secure the dowels. Otherwise, mix some concrete and set the sticks in that. I didn’t have wood, so used supawood craft boxes with smaller pieces of wood stuck on the underside to make the base deeper.
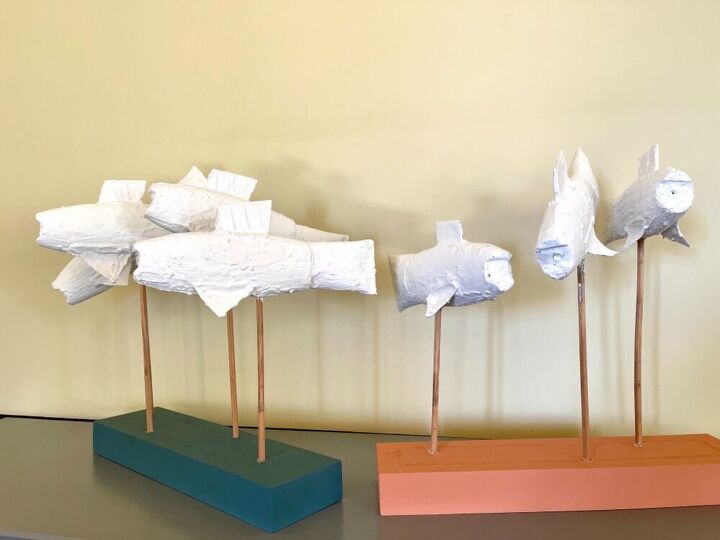
You would never guess that there are ugly plastic bottles beneath.


Comments
Join the conversation
-
What a fun, interesting idea! Thanks for sharing!
-
It's dramatic, unique, and coastal. I like it!


Frequently asked questions
Have a question about this project?
Interesting idea. Why didn't you paint them?