


Taper Candle Chandelier

Inspired by the Urban Outfitters Grace Chandelier, this dupe takes the design to the next level.
To tell the truth, making this chandelier was not difficult but coming up with the design was. I saw the wrought iron Grace taper candle chandelier on the Urban Outfitters website. “How difficult can it be to hack this,” I thought, “All you have to do is to take a planter basket, attach a couple of cups to it and ta-da - you have a chandelier…”.
Not so fast, two weeks and a zillion attempts later, as is evidenced by the pictures above and below, and I still couldn’t figure it out. Maybe it is just because I’m not an engineer or a member of Mensa and someone reading this post will come back with a breathtakingly simple solution but I just couldn’t nail it. On the other hand, having to tweak the design meant that the end result is a lot more exciting than the original I was trying to copy.
You see, wax candles are actually quite heavy and the laws of physics very much against my grand idea. Since I was determined that the chandelier be for real taper candles with real flames, getting the design wrong would be disastrous. And did my designs go wrong - those candles toppled over every time - forward somersaults, back somersaults, cartwheel left, cartwheel right!
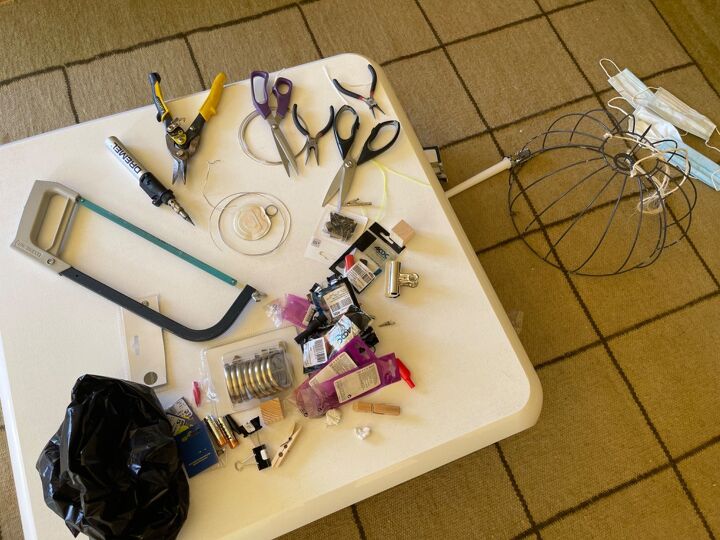
After trying every clip and hook that I could think of and after throwing numerous tantrums out of frustration, I used the one obvious solution I had been avoiding all along, wire. Don’t let me scare you though, this project is very doable if you have strong hands and can work with wire, I just don't like working with it.
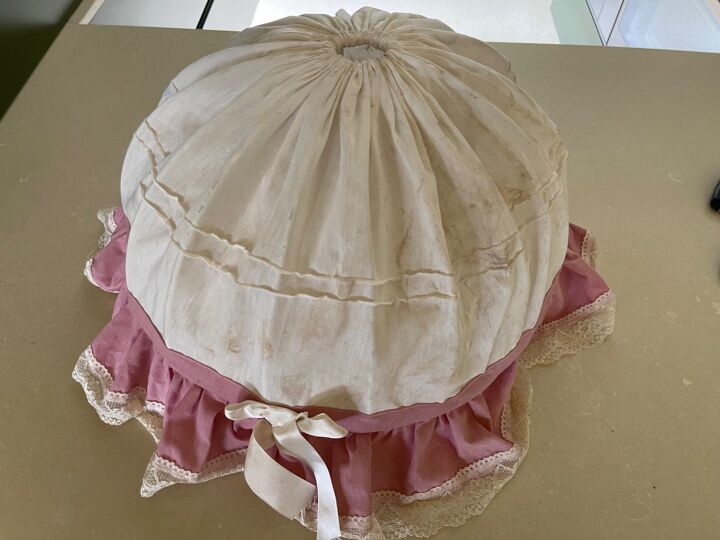
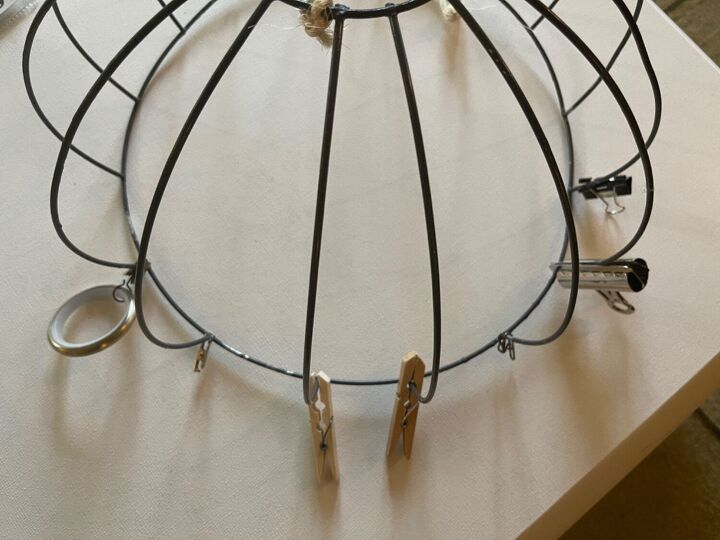
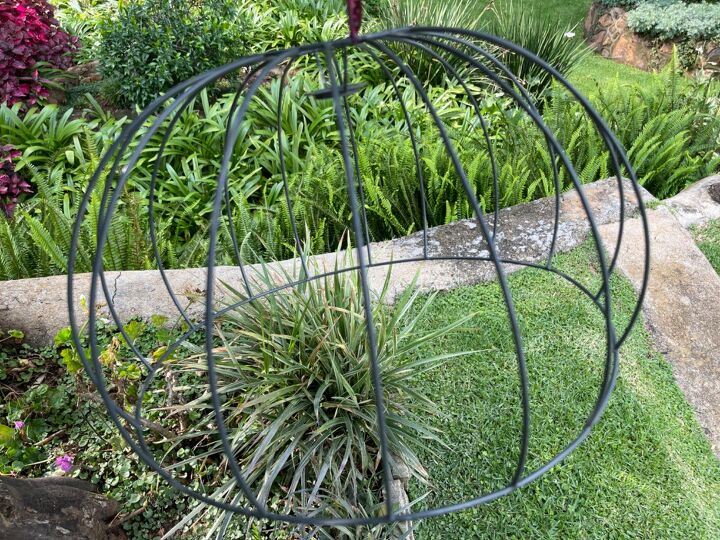
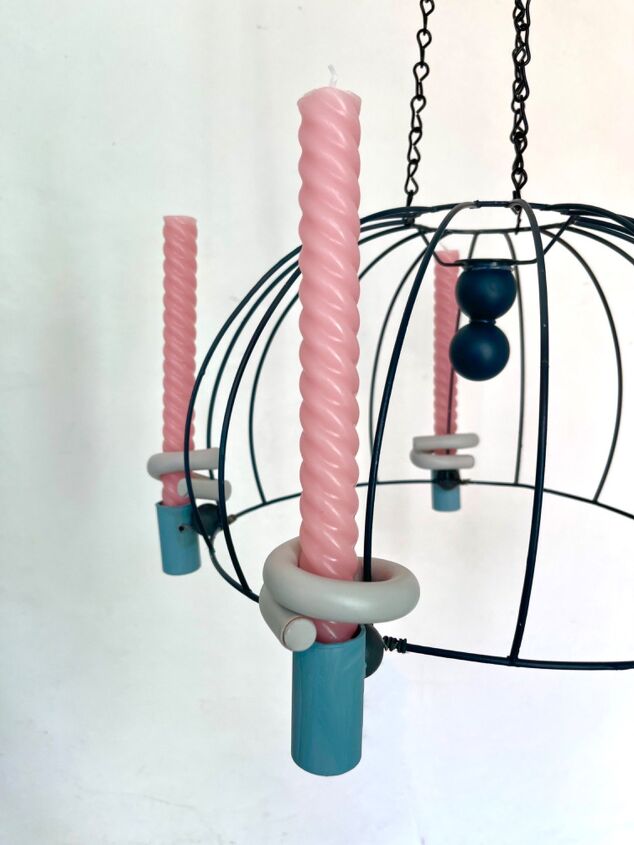
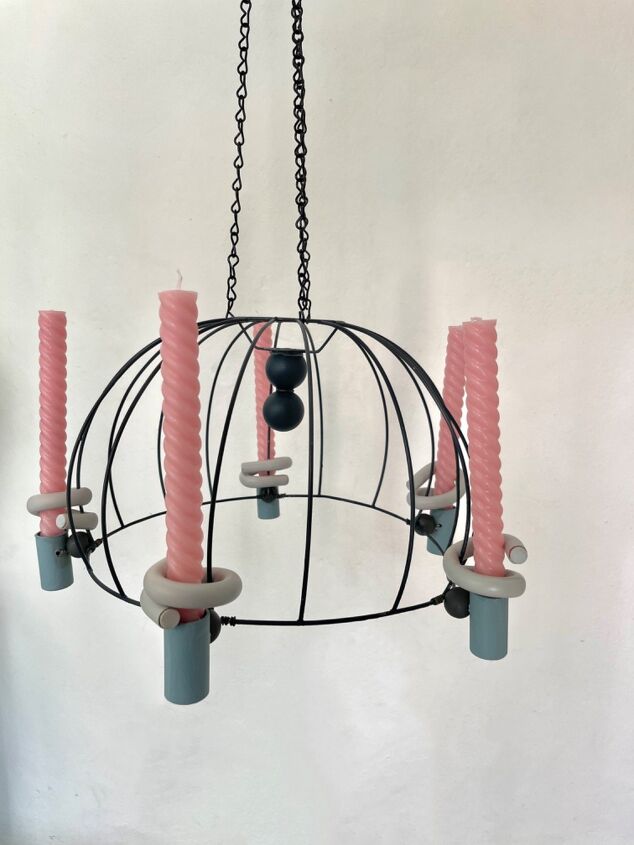
Part of my problem was using this bonny bonnet lampshade that I just had to use, instead of a hanging metal planter basket which would be much better because the rim doesn’t curve inwards past a 90° angle. They are also already powder-coated black.
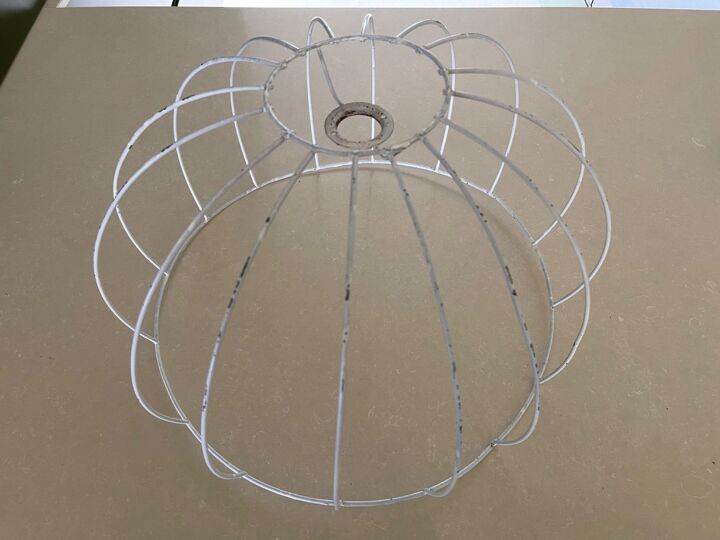
The bonnet came off easily. Do you see the curve at the bottom? Therein lay my problem, planter baskets aren't shaped like this.
Not taking any chances, I sprayed it with a high heat spray paint.
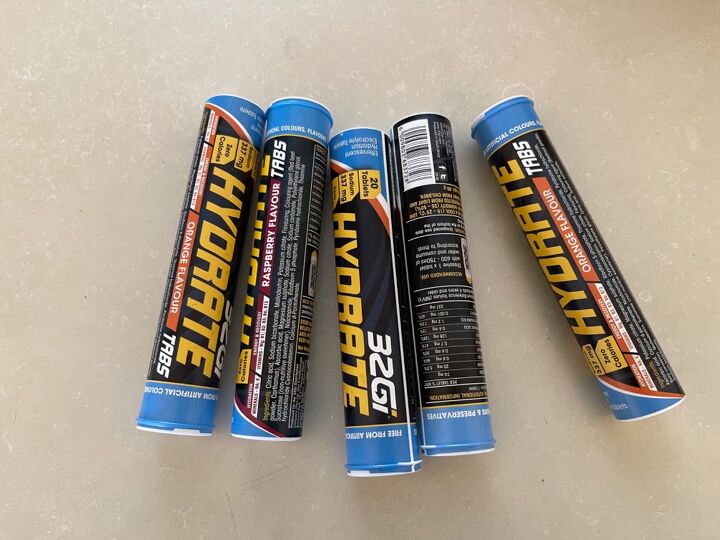
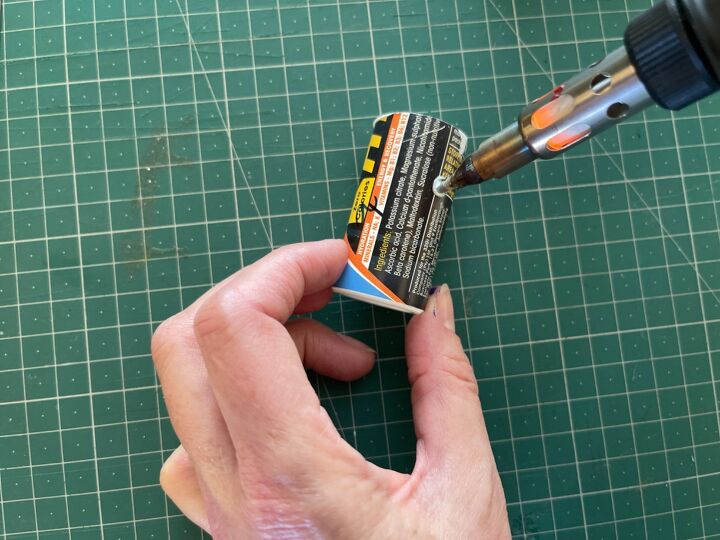
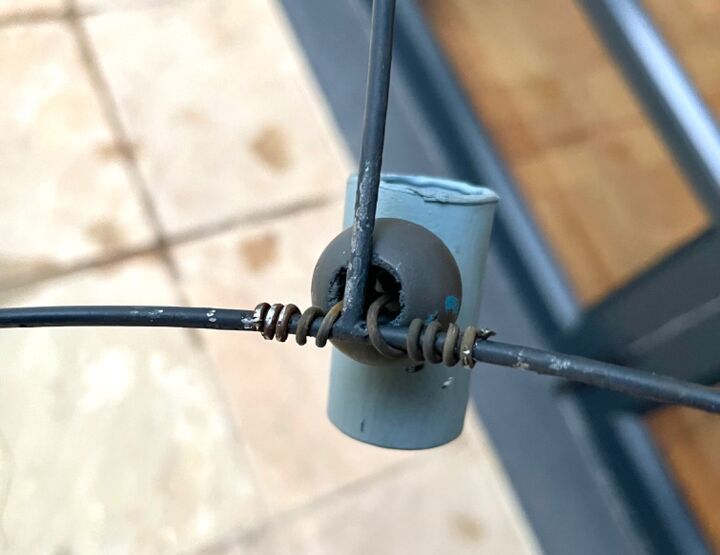
To make the holders, I used a couple of plastic lozenge tubes.
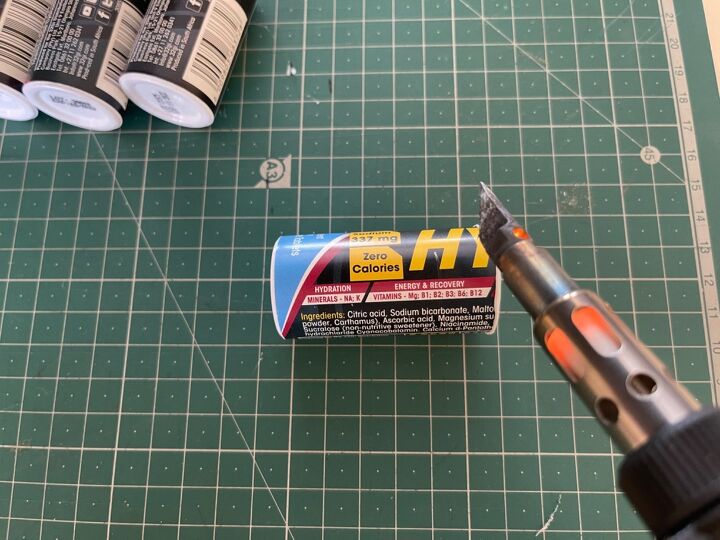
I cut them shorter, my Dremel Versatip worked a treat for this but you can also use a hacksaw. If you are using a planter basket, you can make the tubes slightly taller so that there is enough space to attach the them in two places, which would solve the problem of the somersaulting candles instantly.
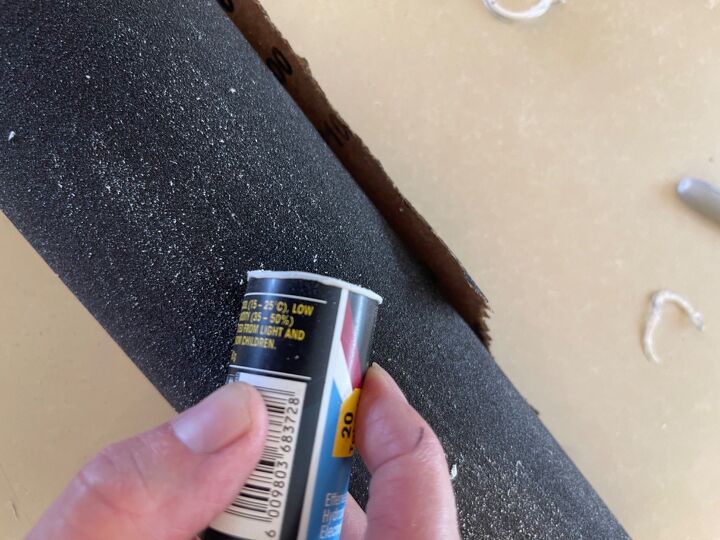
Sand down any rough edges.
Then make two holes a fingernail's breadth apart with a nail heated over a candle. Too far apart and the wire gets in the way once the candle is inserted. Too close and the holder loses stability and strength. If your structure (i.e the hanging basket) allows, you could also make a second set of holes below the first.
Once again, the little Dremel worked like a bomb.
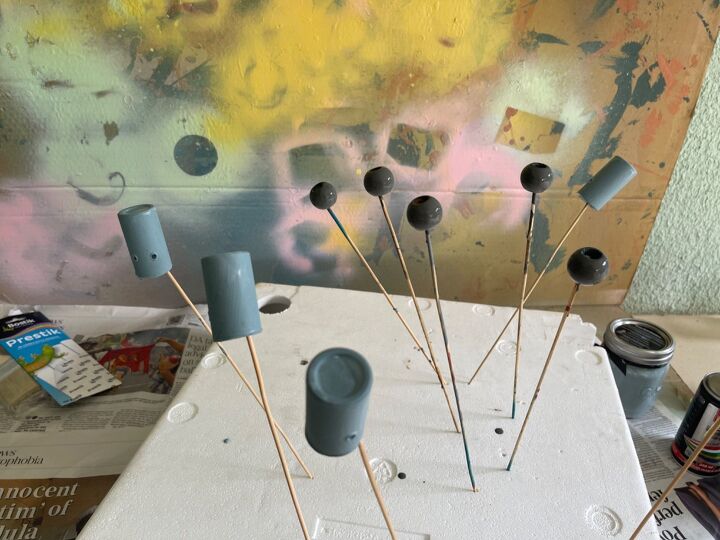
Paint the lozenge holders as well as a large wooden bead for each. I used a brush and normal paint because it makes it easier to do touch-ups later.
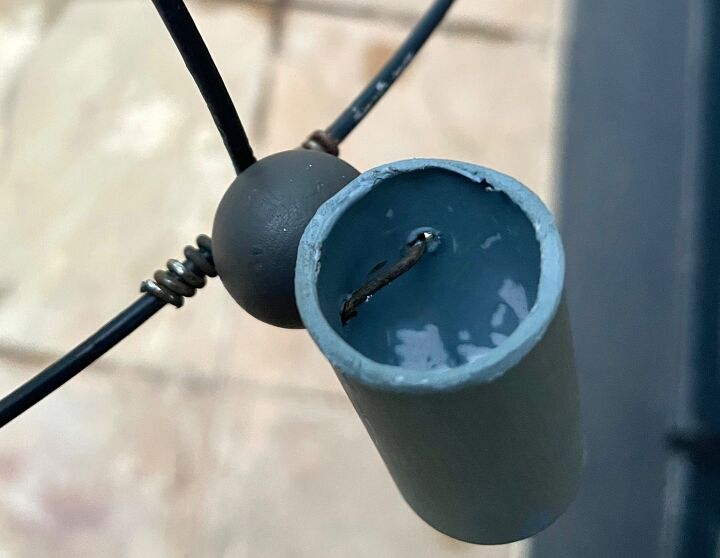
Now comes the important part, thread the wire through both the holes in the holder and then through the bead. The bead is there to ensure that the flame is not too close to the frame in case of a draft.
Make sure that the holder is completely upright before you secure the wire and make it really tight. As mentioned, in hindsight, making two sets of holes and securing the holder in two places would work well for a planter basket.
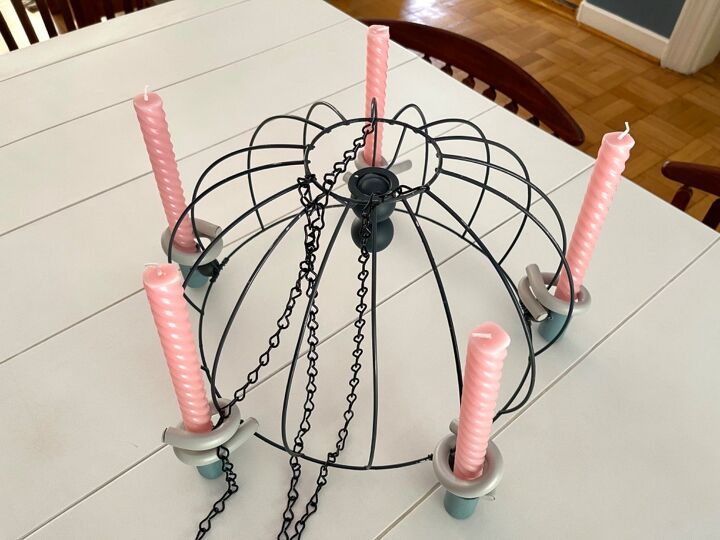
Now secure the wire to the frame, the more places the better. Make sure that the join is very tight and that the candle will not dive downward or stand skew. But no, I fiddled with mine and they loosened. This I only discovered much later.
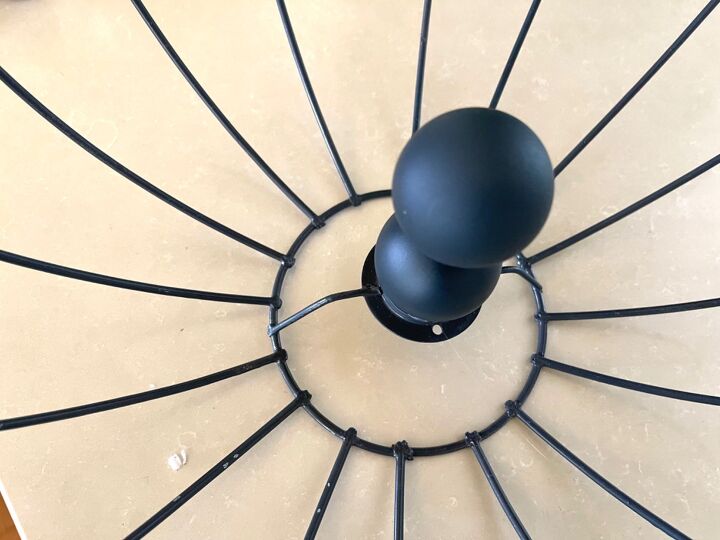
Since I wasn't using a basket but an actual lampshade, there was an odd space that begged for some extra decoration. These are ping-pong balls stuck together with hot glue and spray-painted, then stuck to the frame.
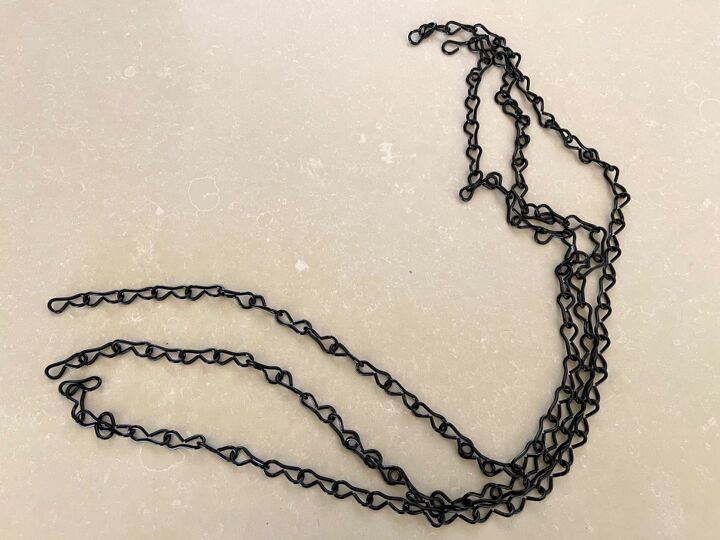
I also attached three chains and a hook to the chandelier.
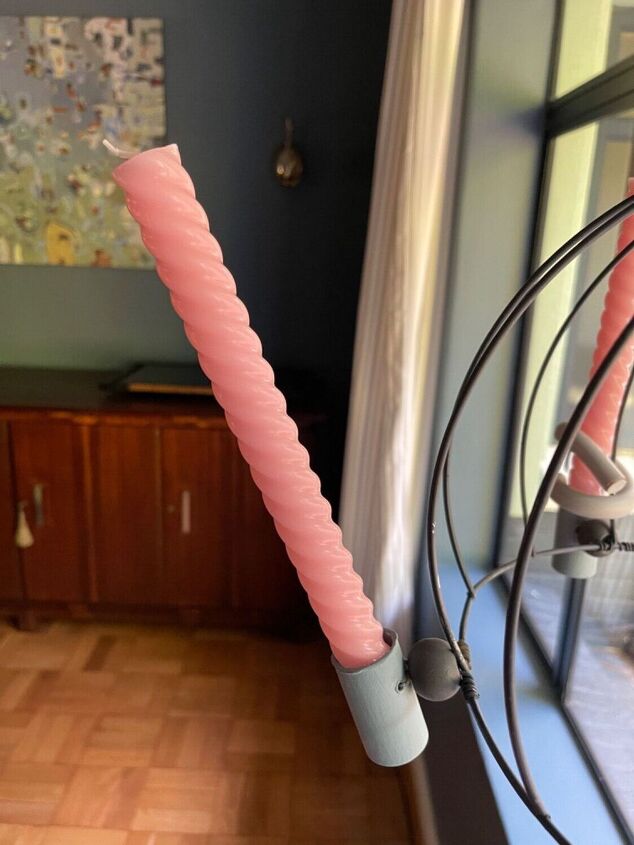
Still the dastardly things wouldn't stand upright!
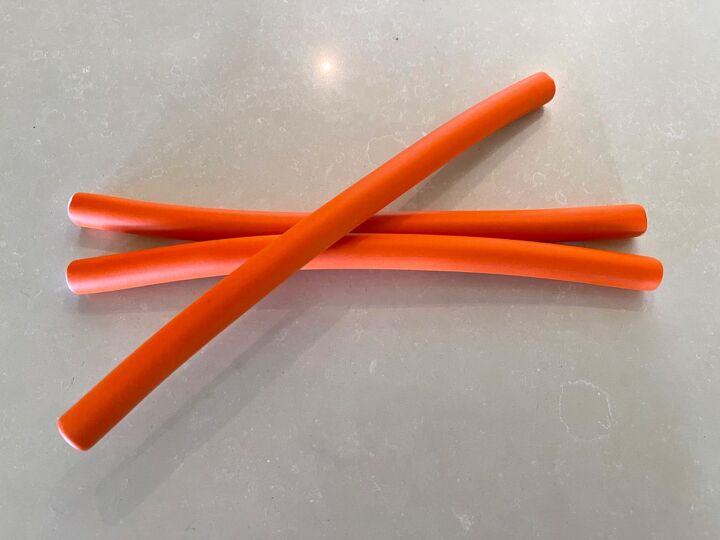
I had to resort to one of my favourite craft materials- foam perm rollers. They are so much fun and easy to work with. After a coat of paint I simply wrapped one around the base of each candle. I was a bit concerned that they would be flammable until someone pointed out that the plastic holders are as well. As long as you keep an eye on the candles, as one should anyway, there shouldn't be problems.
Here is how I wrapped them. They are not intended to wrap tightly, the candles can still be removed easily without undoing the rollers. The extra fixing makes all the difference in the stability. They also catch drips.

Now tell me my chandelier isn’t a lot more fun than the Urban Outfitters one.
Resources for this project:
See all materials


Comments
Join the conversation
-
Hi Thea. After all the hurdles you jumped over, this project turned out fabulously! Every time you fell down, those creative juices went into overdrive! Nice job! I love the candles but I have a hard time finding those in the colors I want here in the U. S. 🤯🤯
-
I got half way through reading this and had to go look to see if it was Thea.
You are so unique.


Frequently asked questions
Have a question about this project?