


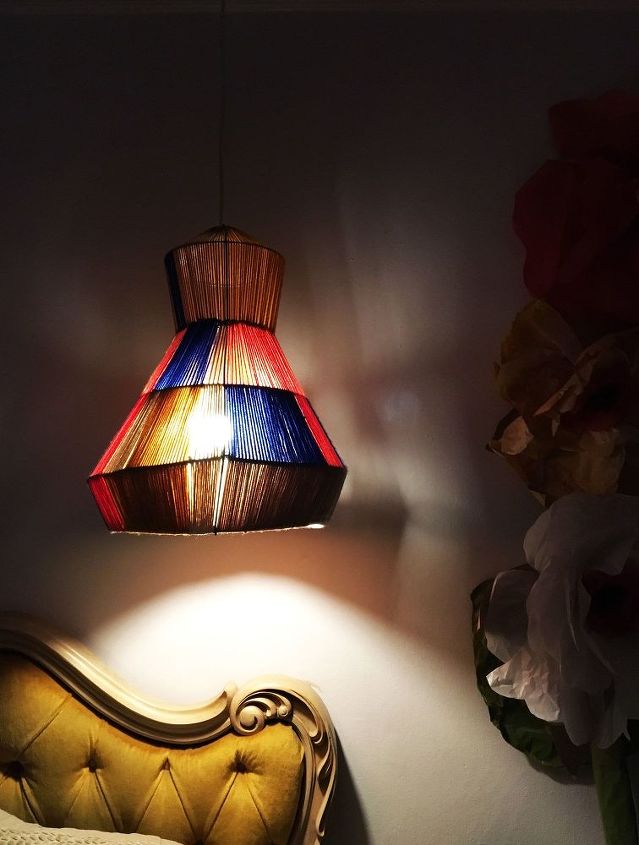
Yarn and Wire Lamp Pendant From a Tomato Cage

4 Materials
$35
5 Hours
Advanced
Transform a wire tomato cage into a colorful lamp pendant! Pick any color of yarn to match any room in the house!
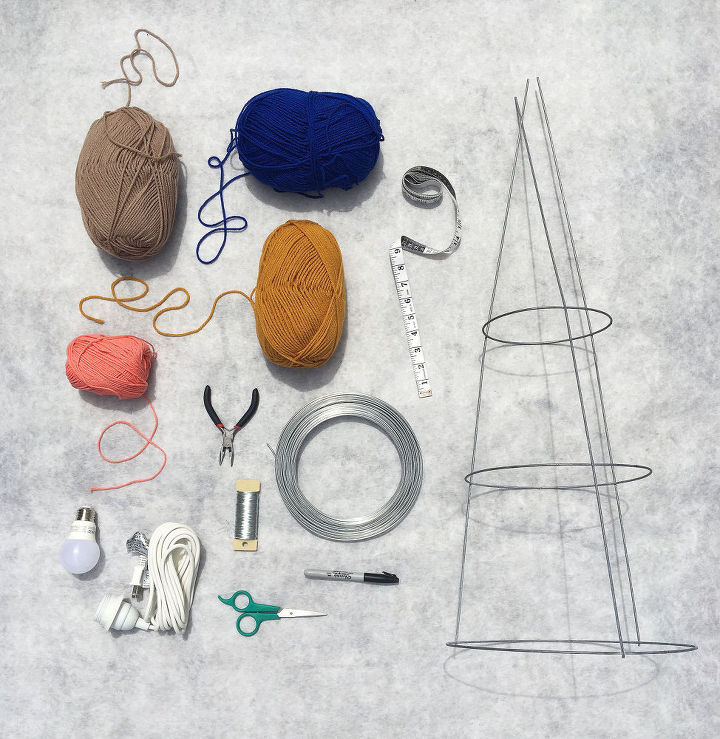
MATERIALS: -A Variety of Yarn Colors -A Small Tomato Plant Cage -Metal Wire (Utility (Thick) + Floral (Thin)) -Measuring Tape -Wire Cutters / Pliers -Scissors -Lamp Cord Set -Light Bulb -Glue (Not pictured)
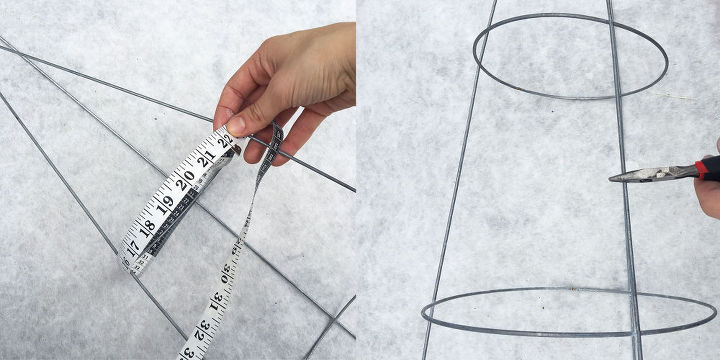
STEP1: Take your tomato cage and measure the 3 circles on the cage. Find the halfway point between each circle on your tomato cage and bend inward or outward depending on the shape you wish to create.
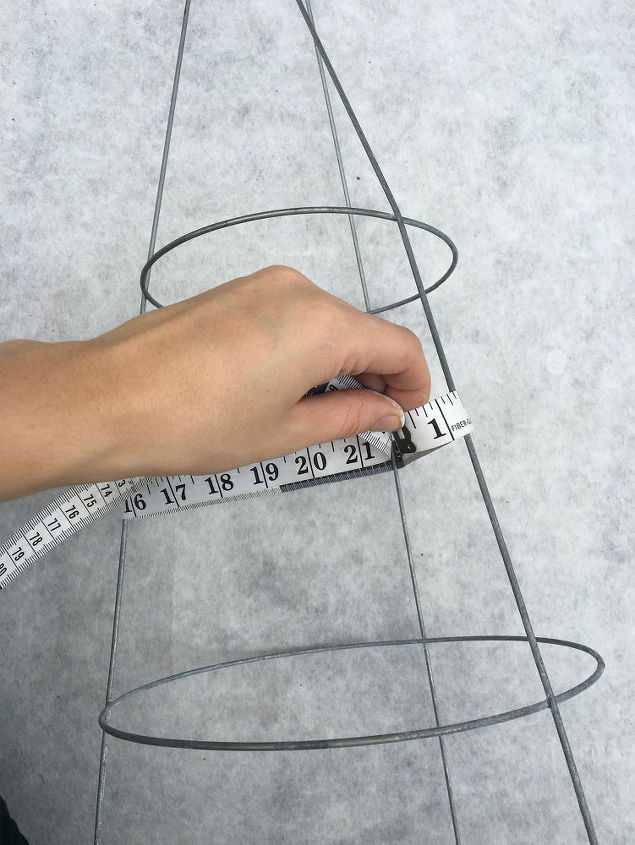
STEP 2: Measure the circumference of the "bent" areas on the tomato cage to determine the circumference of the circles you will be creating in step 3.
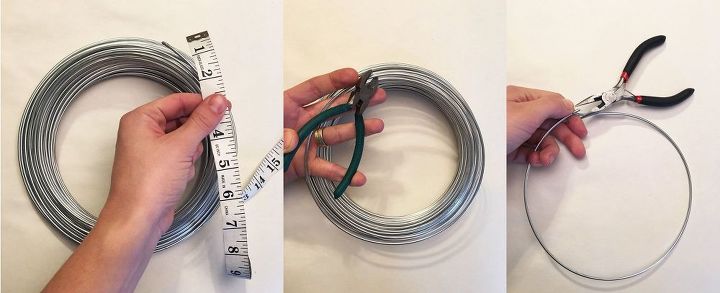
STEP 3: Use the measurements from step 2 and cut 2 circles from the utility wire matching the lengths you measured. Also cut a small circle for the top of the pendant where your light wire will feed through. Create a loop at the end of each wire circle you've created with your pliers.
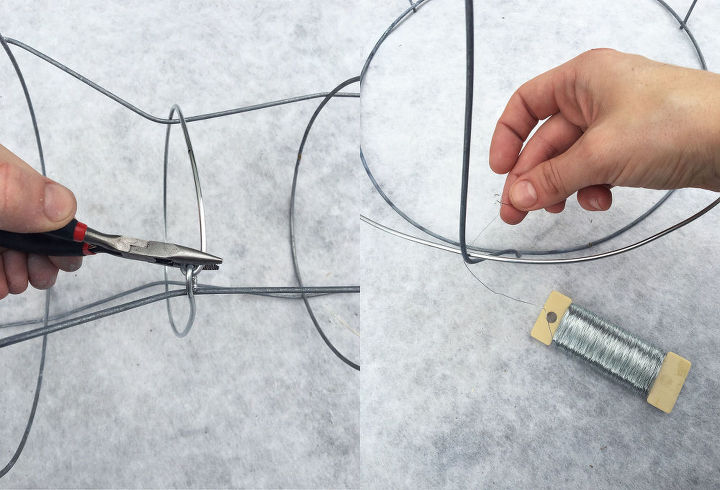
STEP 4: Place your new circles around or within the bent areas you've created on the tomato cage. Feed the straight end of each circle through the loops you created and loop the straight end around the first loop interlocking them allowing the circle to keep it's shape. Secure the circles to the tomato cage by using floral wire to wrap around where wire meets wire.
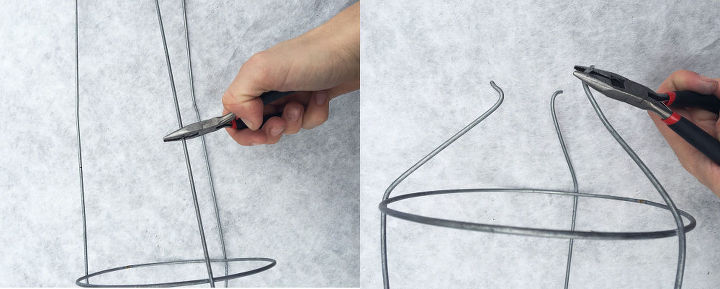
STEP 5: The Tomato cage usually has extra long legs to allow it to be placed in the ground. Cut these down a bit with your wire cutters and bend the ends outward in a hook shape. Bend the legs toward one another so that they almost meet.
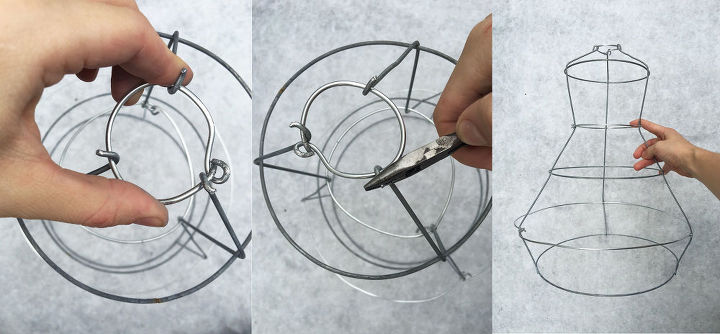
STEP 6: Place the small circle of wire you created in step 3 around the hook shapes you made in step 5 and clamp the hooks down around it to secure in place. Now you are ready to weave the yarn on! (or you could just leave it as a cage pendant)
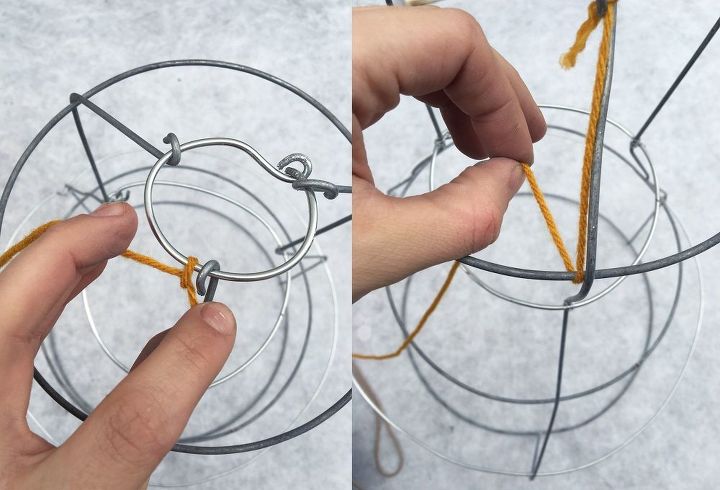
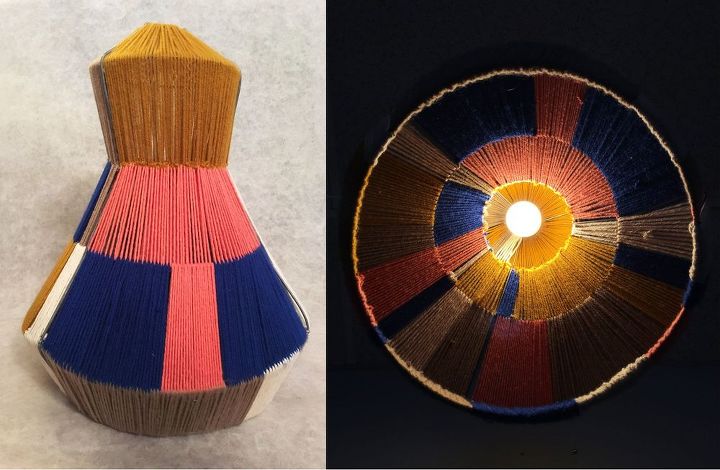
STEP 7: Take a piece of yarn in the color of your choice and tie the end to the top circle of your lampshade making a sturdy knot. Tie the other end to the second or third circle down making sure the yarn is nice and taught. Repeat until the top of the frame is full.
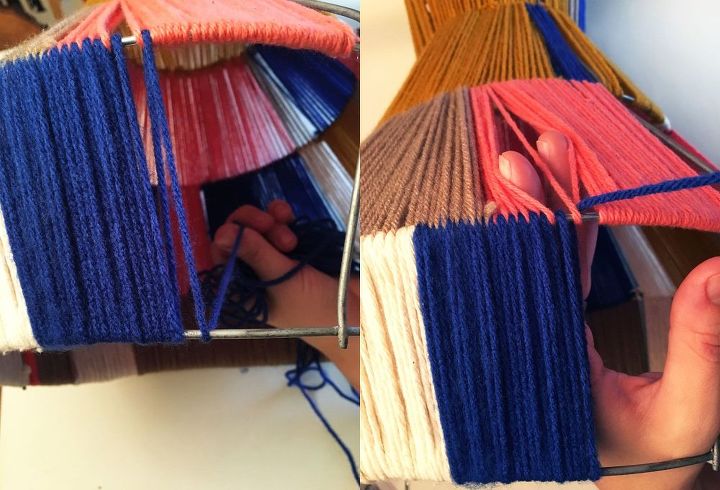
STEP 8: Once the top portion of the lampshade is finished being filled in with yarn you can move onto the second level. Simply cut a long piece of yarn and tie one end to the second circle and loop it around the third circle. Then weave the entire strand of yarn in between each piece of yarn you tied in step 7. When you reach the end of this piece of yarn tie it to one of the metal circles. Continue this process between each set of circles on the tomato cage creating a design of your choice until all spaces are filled.
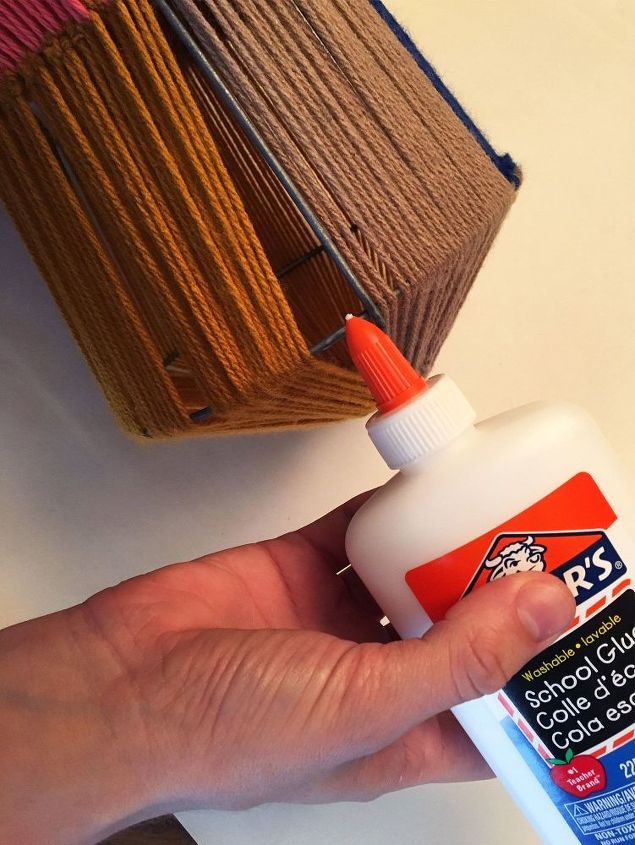
STEP 9: Place a small bit of glue along the second wire circle and distribute the strands of yarn evenly setting them in place with the glue.
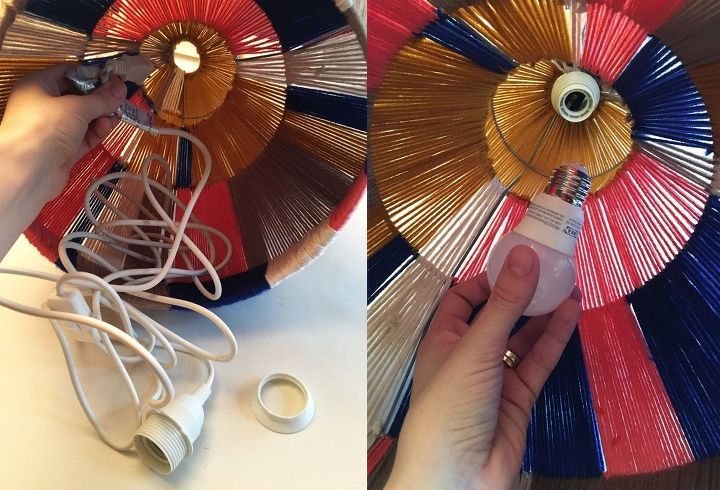
STEP10: Now feed the lamp cord through the bottom of the lamp pendant and up through the top circle. Now simply screw the light bulb in place.
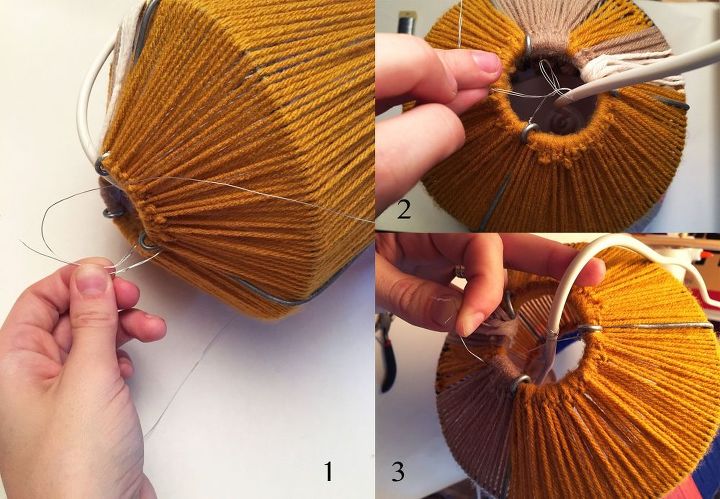
STEP11: To allow the light bulb to hang in the middle of the lamp pendant take the floral wire and cut a nice 7" piece or so. Feed the wire through two pieces of yarn and secure it by twisting it to the top wire circle. Wrap the wire around the lamp cord several times to hold in place. Now feed the wire through two pieces of yarn on the opposite side of the top circle and secure by twisting it in place.
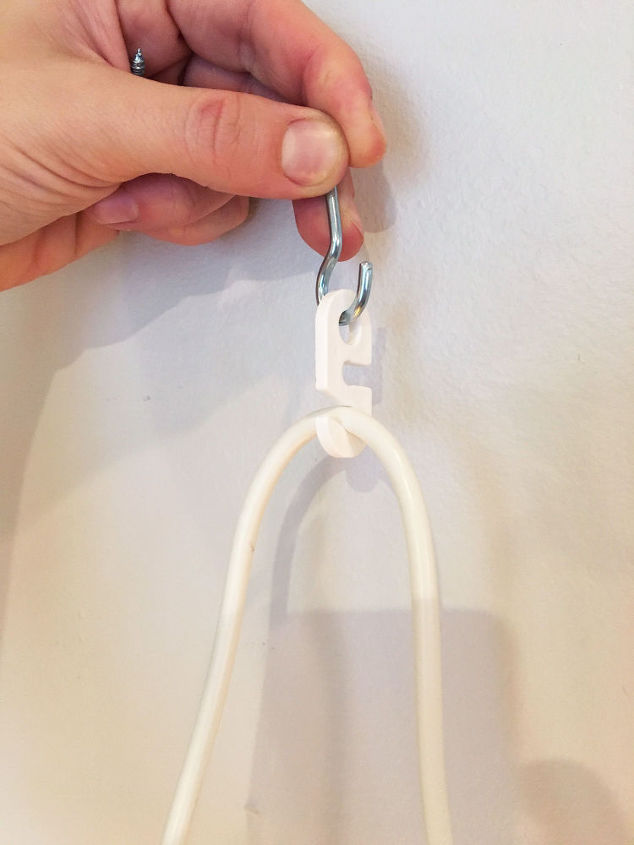
STEP 12: The cord set that I bought (see details below) came with a screw hook and plastic cord placement hook. Find the spot where you would like to hang your lamp and screw the screw hook into the ceiling, hang the cord placement hook on it and feed the cord through. Now simply plug it in and there you go!
Comments
Join the conversation
2 of 30 comments
-
I am with Clair Wankiewicz, this is such a clever idea!! I will be using this idea for sure!! Thank you so much!!
-
I love the idea of this, however I work with stained glass and am considering trying to do it in different colors of glass. I can't wait to see how it turns out. Thanks for the idea.


Frequently asked questions
Have a question about this project?
Okay so what if I already have the best shape lamp(AT LEAST I THINK IT'S PERFECT)And I also was thinking about taking a couple of charms onto either like threading onto the yarn? Do you think so that will work?or no bc that would be way to tedious for me