


Add Some Character - How to Create a Gallery Wall on a Budget
4 Materials
$40
3 Hours
Easy
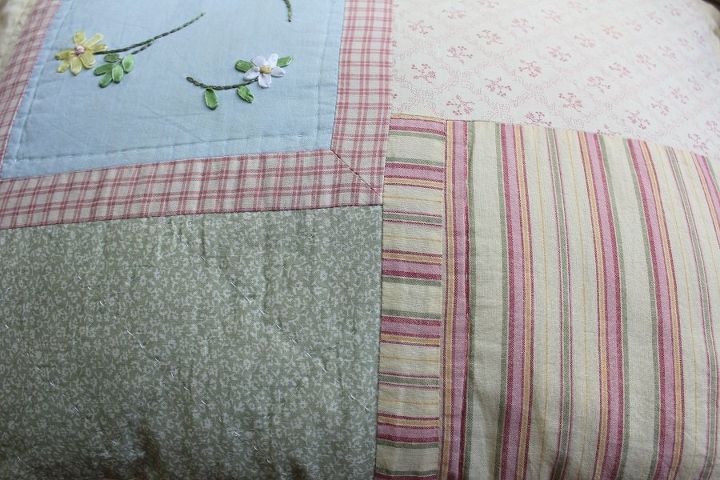
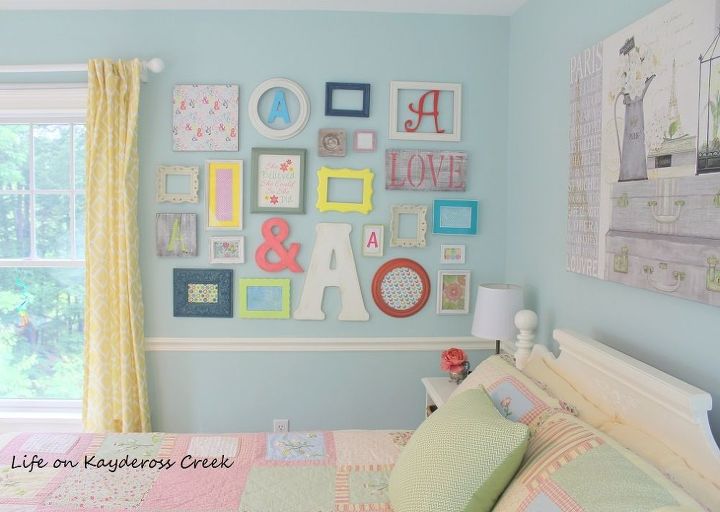
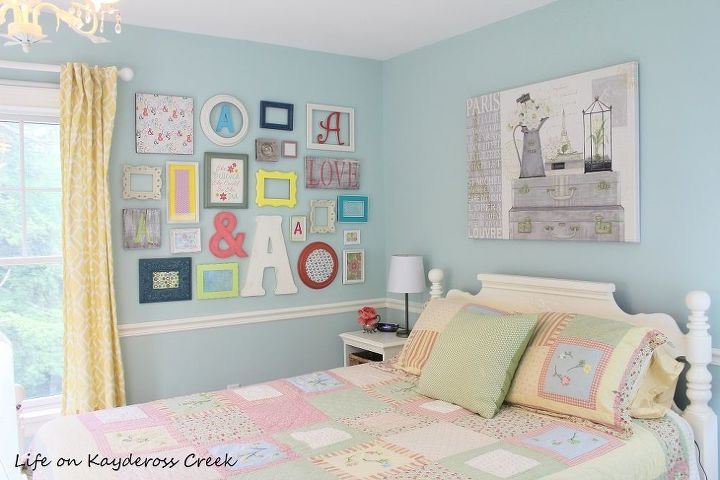
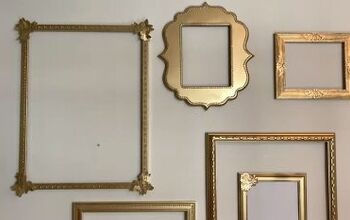
Hey everyone! Today I’m sharing some tips on how to create a unique gallery wall without breaking the bank. I love the way a gallery wall adds tons of character to a space. There are no rules when it comes to creating one so go beyond photos and think about the many combinations of elements you can use. When I create a gallery, I start by finding inspiration from colors in the room. In this case, I pulled out several colors in my daughter's quilt including green, pink and blue.
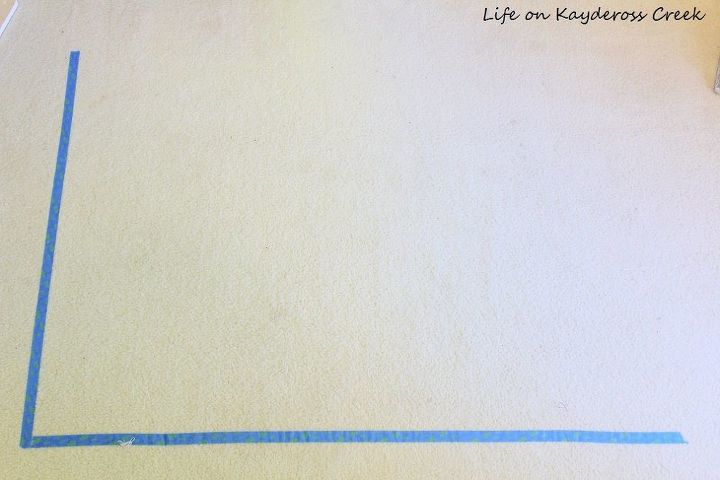
I started by taking down the old gallery, spackling the nail holes and touching up the paint so I could start fresh. To make sure I spaced everything out correctly, I measured the wall space I wanted to fill (42 x 54) and taped out that dimension on the floor.
To make sure I spaced everything out correctly, I measured the wall space I wanted to fill (42 x 54) and taped out that dimension on the floor.
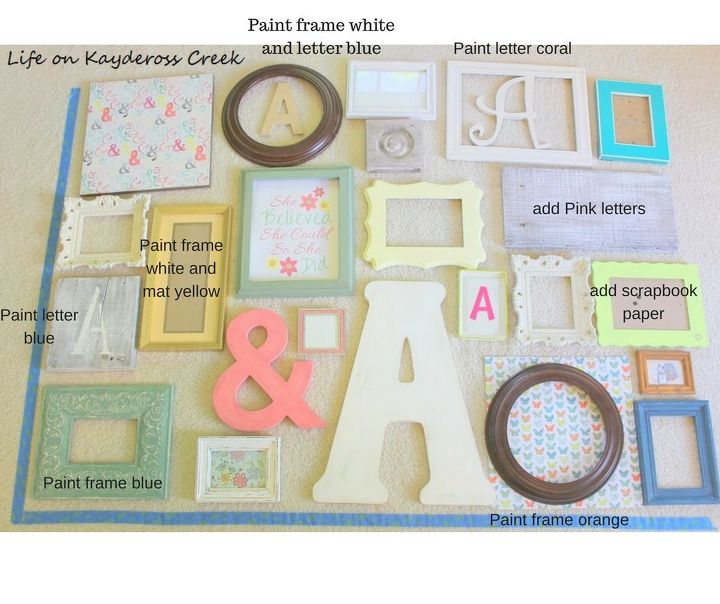
Then I gathered those pieces I had originally used, my frames, some plain craft letters and the scrapbook paper. I love using scrapbook paper for decor. See how I used it to make art HERE.
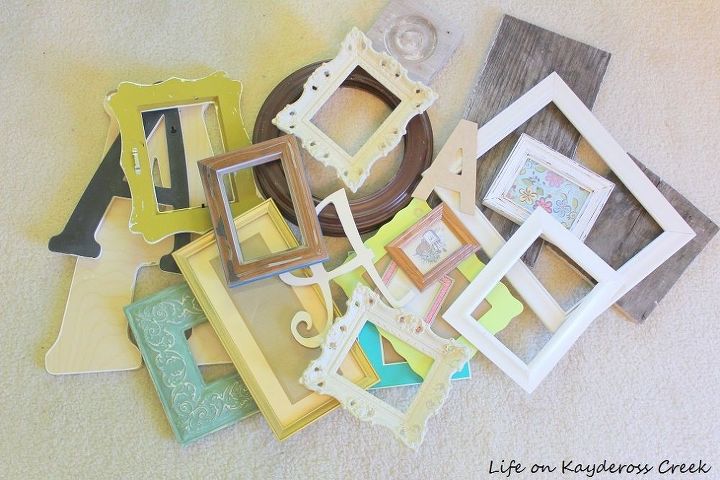
Then I started placing different pieces in the space, playing around with size an shape. I started with the bigger pieces first and laid out my design. The trick is to have different size pieces, different textures and colors and different types of materials. It’s important to get size and shape placed first because if the color isn’t right, you can always break out the craft paint or spray paint, which I have to do here. I tried a few different combinations until I got what I wanted. Here is the layout I finally decided on. I like how the shapes are spaced out. The materials. including the wooden elements, seem balanced but I’m ready for some color. Here’s how I’ll add color to the layout:
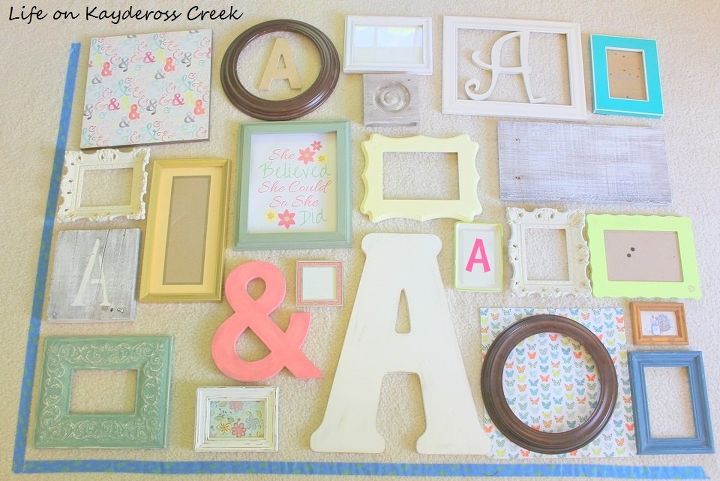
The materials. including the wooden elements, seem balanced but I’m ready for some color. Here’s how I’ll add color to the layout:
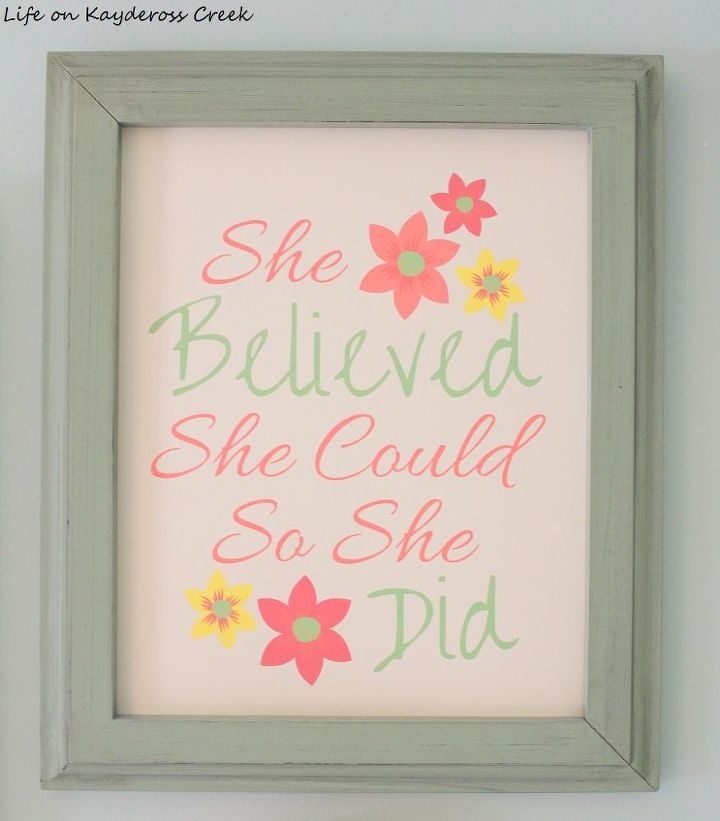
One of the pieces I wanted to use was this “She BELIEVED she could so she did” printable that I made using a free program called Canva. I made it using the same colors I pulled from the quilt.
After painting the pieces as labeled above and adding the scrapbook paper to a few of the frames I started hanging the pieces on the wall. I started with the largest piece and then worked out from there.
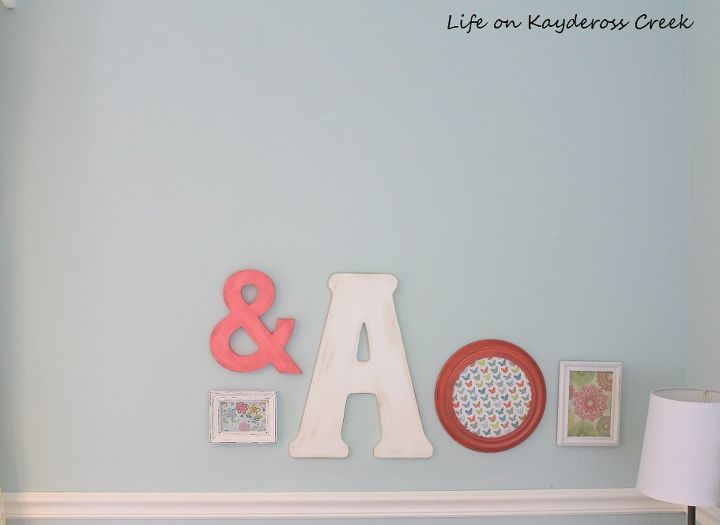
Then build up and out.
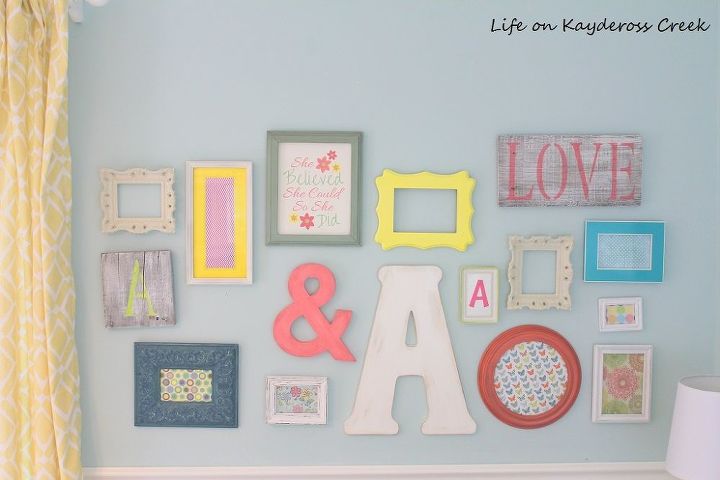
I ended up moving things slightly and adjusting a bit as I went (I’m not gonna lie, there are a few more holes in the wall than I would like)THE FINAL PRODUCT:
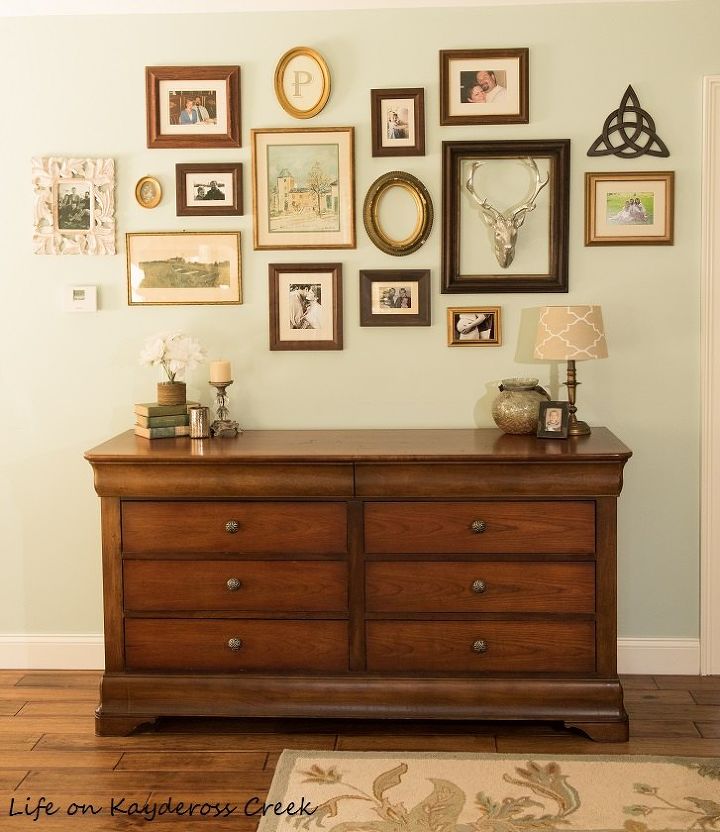
Here's another gallery wall I did in my master bedroom...
For more on this project, budget friendly décor ideas and DIY projects, please visit my blog at http://mylifeonkayderosscreek.com or on facebook at https://www.facebook.com/lifeonkayderosscreek/

Want more details about this and other DIY projects? Check out my blog post!
Comments
Join the conversation
4 of 6 comments
-
Love this. Thank you. Been trying to come up with something different. This is perfect.
-
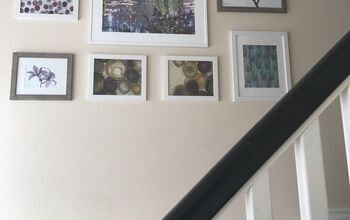
I like your mix of shapes and textures. Beautiful bedroom. I also used scrapbook paper for a gallery on a staircase. Just a plain rectangle and not very intricate but budget friendly.


Frequently asked questions
Have a question about this project?