


Coffee Crate Organizers

I bought this coffee crate at a yard sale for $10.00. I almost fell over when I saw it. I've seen coffee crates all over magazines and blogs and Pinterest and everyone was using them and creating amazing projects.
So I bought it.
But it just sat in my attic.
I couldn't find a purpose or a project for it.
I tried it everywhere and it was always too big or too empty or too awkward or too bulky to use.
Until.
Until I created this project making wall organizers out of it.

Here's the before of the side of the coffee crate. It's a big crate that measures 4 feet wide and three feet deep.
It was originally made to hold coffee beans during shipment.
Start by cutting the box in half.
You want to cut vertically so each piece now measures 4 feet wide by 1 1/2 feet deep.
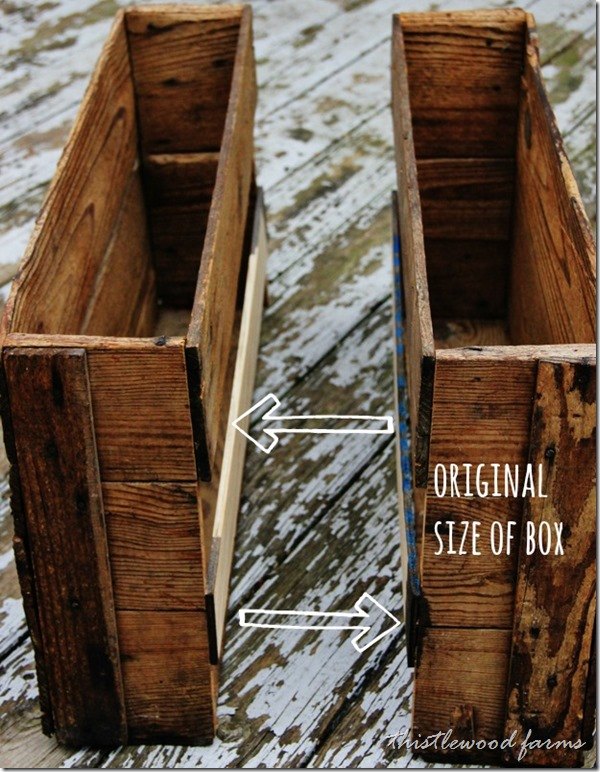
When we cut the box in half, the organizers were still too deep. So we trimmed even more depth off of the box.
We reduced the size of the boxes to about a 1/4 of the original size of the crate.
Now the boxes measure 4 feet by 7 inches deep.
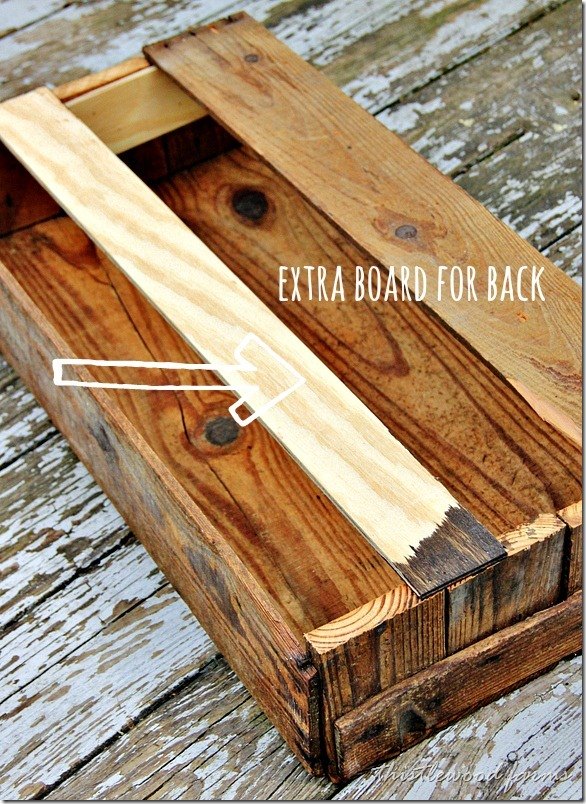
The organizers are now the right size, but the challenge is that they don't have a back to attach to the wall.
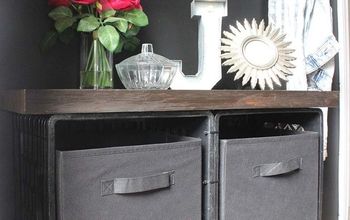
Cut another piece of wood the width of the box and attach to the back as shown.
If you need to use another board, make sure you place the older wood at the top because that is what you see when you hang it on the wall.
You may also want to reinforce the bottom if you are planning on putting anything heavy into the box. The additional wood also helps keep the organizers stable.
By simply reuse the wood you cut, so you don't have to purchase additional wood.

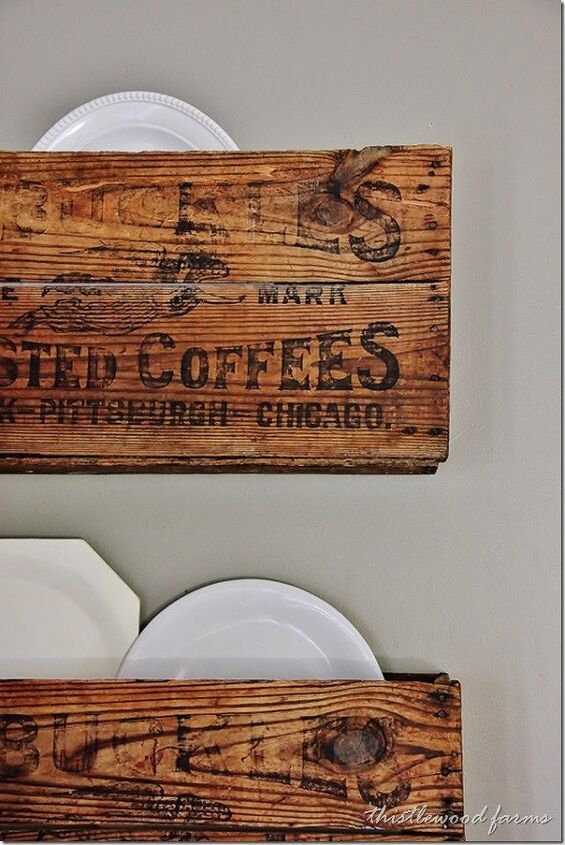
Attach the organizers directly to the wall. We have wood walls, so we just used large screws to attach the wood from the back of the organizer to the wall.
And then?
It was time to start to organize.
Vertical storage is a great option for over-sized things that don't really have anywhere else to go. I used them as extra storage for platters.
You could also store games or cards or wrapping paper or trays or out-of-season wreaths or baskets.
It’s an easy project and a great way to re-purpose almost-forgotten-about-crates from your attic.
Looking for some other repurposed projects?
Here are two more DIY's:
Here are the finished crates hung on the wall. And then?
It was time to start to organize.
Vertical storage is a great option for over-sized things that don't really have anywhere else to go. I used them as extra storage for platters.
You could also store games or cards or wrapping paper or trays or out-of-season wreaths or baskets.
It’s an easy project and a great way to re-purpose almost-forgotten-about-crates from your attic.
Looking for some other repurposed projects?
Here are two more DIY's:
DIY Fold-Up Pallet Wood Desk
Pallet Wood Clock
Comments
Join the conversation
-
KariAnne-I LOVE this idea!! I think I have a flea market crate down in my decor hoarding stash in my basement too!!💙


Frequently asked questions
Have a question about this project?