


DIY Brick Accent Wall

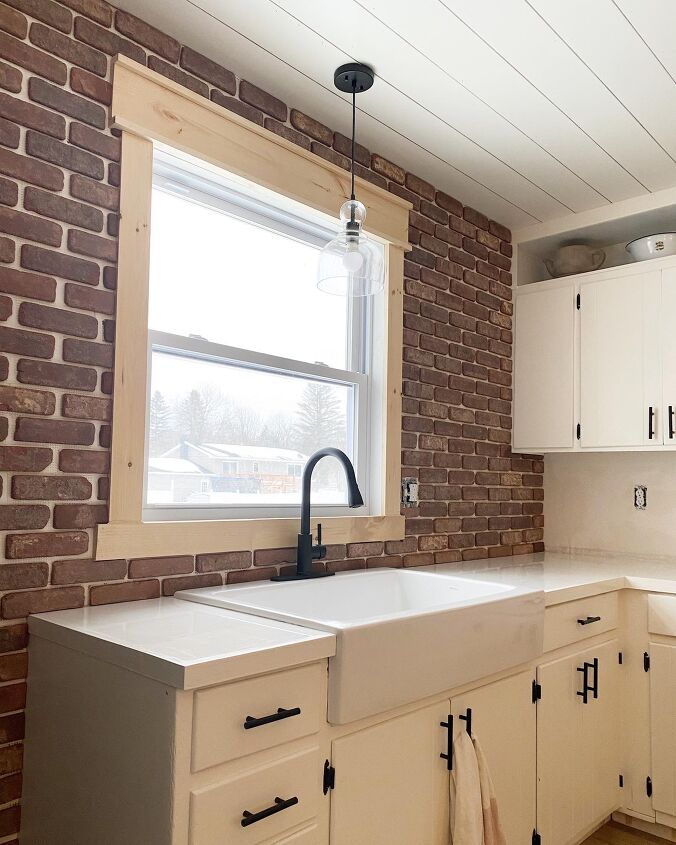
My kitchen needed a statement wall, and this brick accent wall transformed my kitchen into just what I was hoping for. I am in love! Creating a brick wall and using a tile saw sounded like it was going to be a challenge and to be honest, I was kinda freakin' out. But, I am here to tell you that this was very doable and not scary whatsoever. In fact it was so rewarding and actually quite simple! I will walk you through step by step on how I achieved this look!
Supplies:
- Brick - Old Mill Brick Thin Brickwebb sheets Castle Gate
- Loctite
- Caulk Gun
- Level
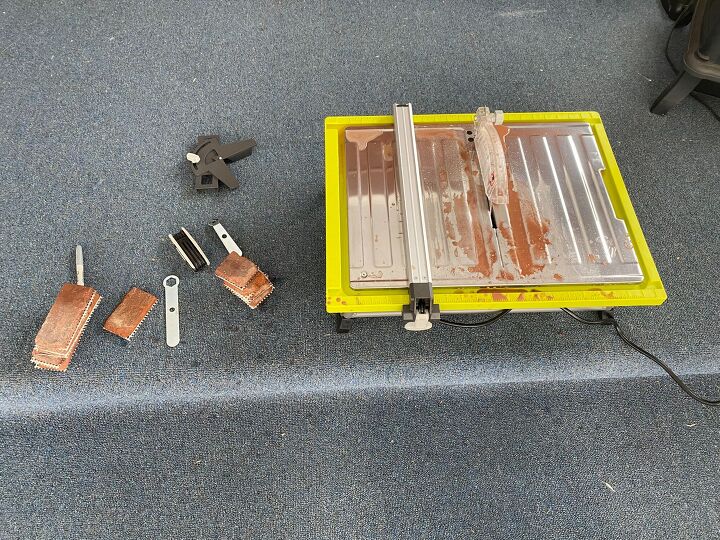
- Tile saw
- Bright White and Oyster Gray Grout Sanded Grout
- 2 - 5 Gallon Buckets
- Mixing Tool
- Drill
- Plastic Solo Cup
- Gloves (Dish washing gloves, 2 just in case, I just bought these from the dollar store)
- Sponge
- Grout Bag
- Tarp and plastic sheeting (sorry I don't have links to these, just use anything that will protect your floors!)
First I made a schedule. I planned this in 3 days. The first day I put all of the full brick pieces up. Second day I made all of my cuts and finished putting all of the pieces of brick up. Third day I grouted. The first 2 days are totally doable. I was not expecting the grouting to take so long. I would plan more time for the grouting part if you can. I personally just wanted to get it done so I powered through, but my hands and arms were so sore and I was going a bit crazy. That third day was definitely tiring.
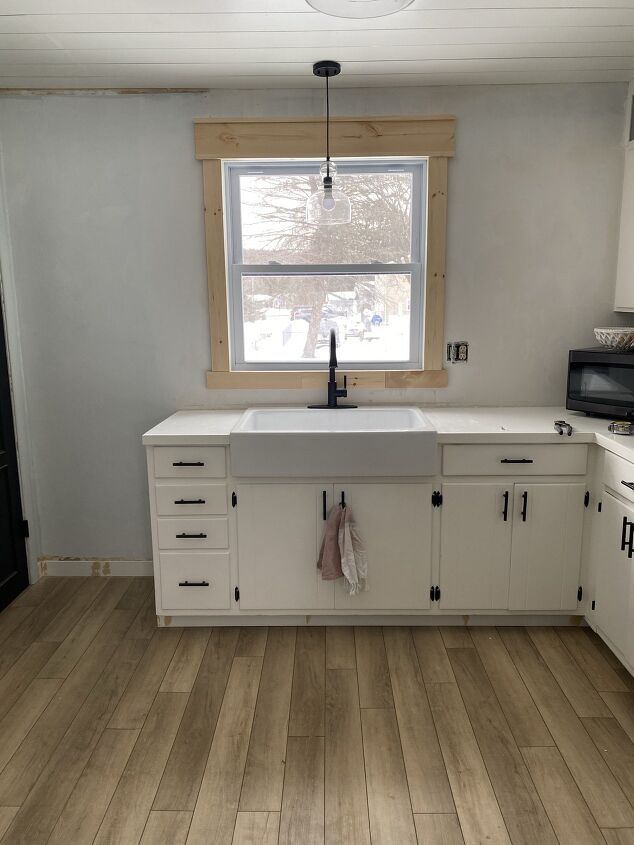
Here is the wall I started with...
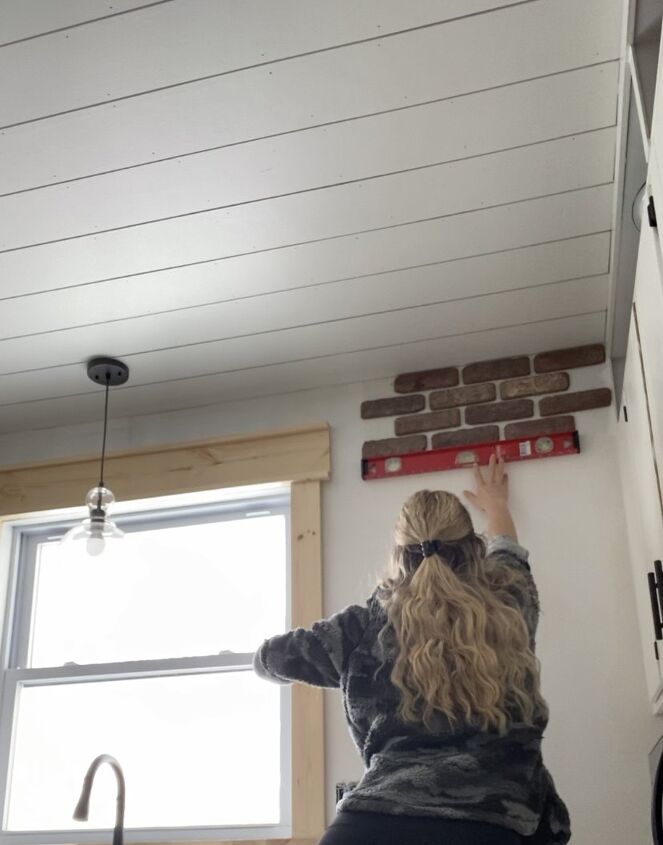
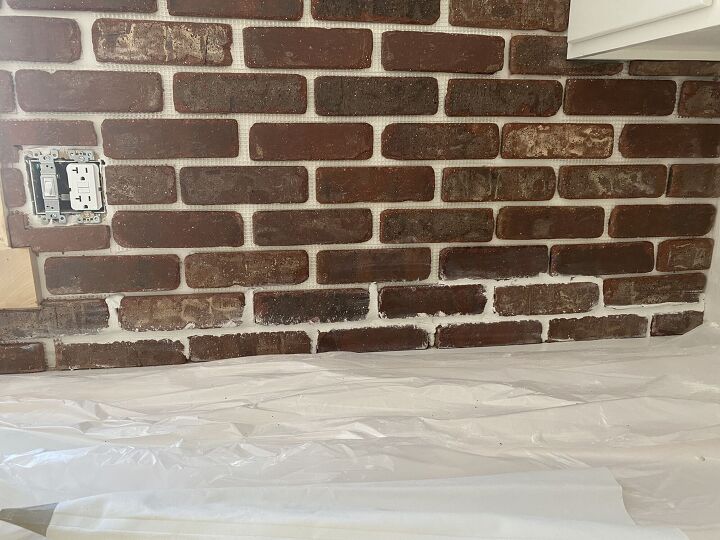
Day 1...I decided to start in the right upper hand corner of my wall. I started on the top because I wanted full bricks to be seen there because this is where your eyes go when you enter my kitchen. I didn't want to start at the bottom and risk the chance that partial bricks would be at the ceiling. This is totally up to you where you want to start, but I would recommend starting in a place that is most visible and where your eye is drawn to in that room. You also want to check to make sure your ceiling and floor are level. My ceiling was slightly off. The left side of my wall/ceiling was slightly higher than the right. I just kept this in mind when applying my brick. I checked to make sure every piece was level going across the wall and knew there was going to be a slight gap from the brick to the ceiling on the left side. This wasn't a problem because the gap was so small and I knew the grout would nicely cover this up in the end. So, I started by applying Loctite with my caulk gun to the back of the first brick web sheet and placed it in the right upper hand corner. I used my level to make sure it was straight, and pressed the bricks tight to the wall. I highly recommend using Loctite, it was so simple compared to mortar and it held the bricks unbelievably well.
After the first sheet of bricks, its a breeze. I went down the right side of the wall. Lined up each sheet with the previous sheet, staggering the bricks, and verifying each was level.
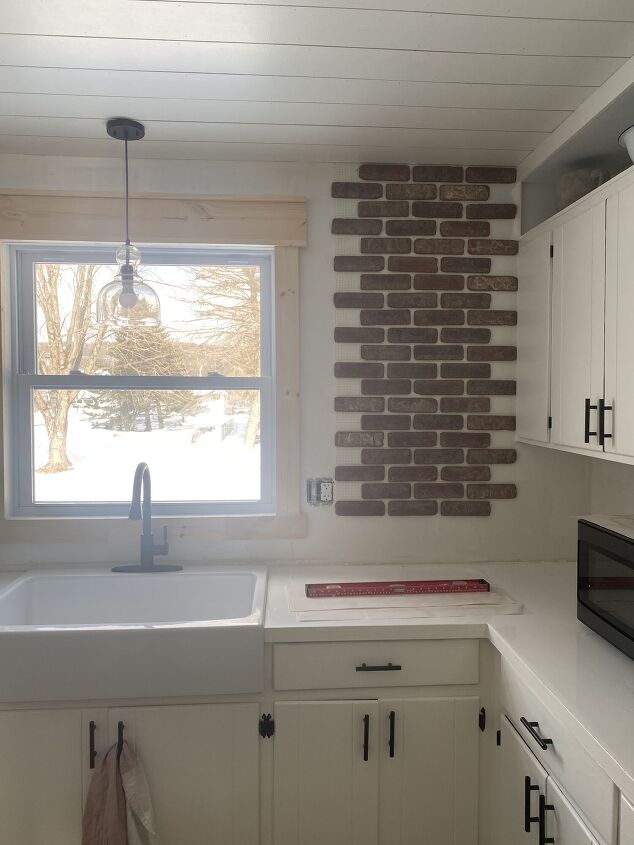
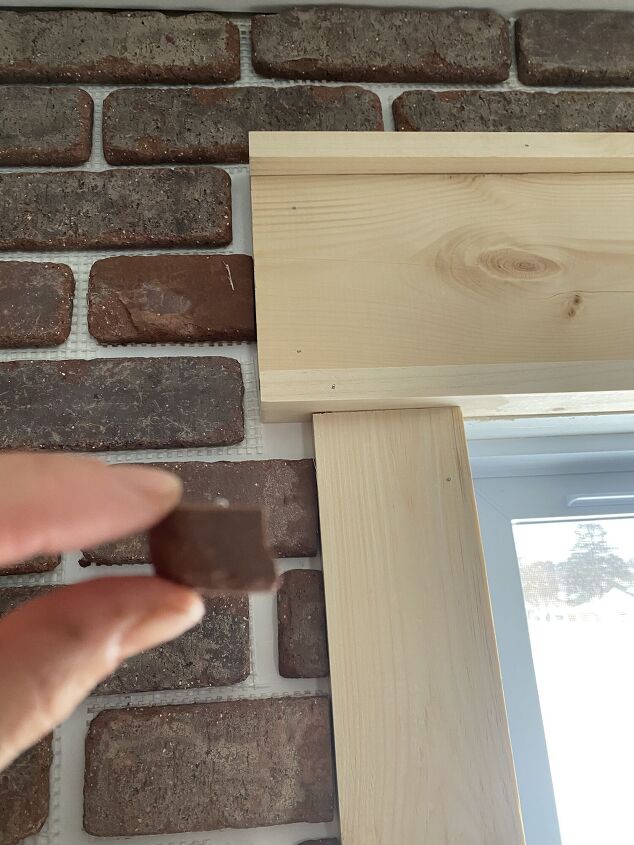
I then worked around my wall and cut out individual bricks out of the web to place them in the smaller crevices. I went over my window with cut out pieces and down the left side of the wall with more full sheets. I just eye balled the spacing. I like the not so perfect look. If you want more of a perfect look, there are spacers out there that you can purchase but I didn't feel this was necessary. Here is what my wall looked like after Day 1, I was so pumped, clearly... hahah
Day 2...Today was the day to bring out the tile saw. I was freaked out. Thoughts to myself "I don't know what I'm doing, this is a bad idea, what if I hurt myself." So I read the manual, watched some Youtube videos, and made sure to wear my safety goggles. I practiced with an extra piece of brick and went very slow with my first cut. I felt so much better and prepared and slowly felt more confident and got the hang of it. You can do it, I promise!! I won't go into too much detail here on the tile saw because I am no pro, but I will say that it is messy. It is called a wet tile saw because you add water to the base. The water helps keep the blade from getting too hot. And when you turn it on that water splatters all over, so be prepared for that :)
I measured each cut by placing it up to the spot on my wall and marked it with a sharpie where it needed to be trimmed. I measured 2-3 pieces at a time so that I would not get too confused and overwhelmed. I made plenty of mistakes and needed to re-cut, just make sure to have some extra bricks in case this happens. I learned that it's better to always cut less rather than more, you can easily take more off if needed. Also remember to include the spacing between bricks in your measurement when the piece of brick needs to be trimmed. Here was my last tiny piece!
This is what my wall looked like after Day 2. Yay you are done with the brick, now just need to grout!
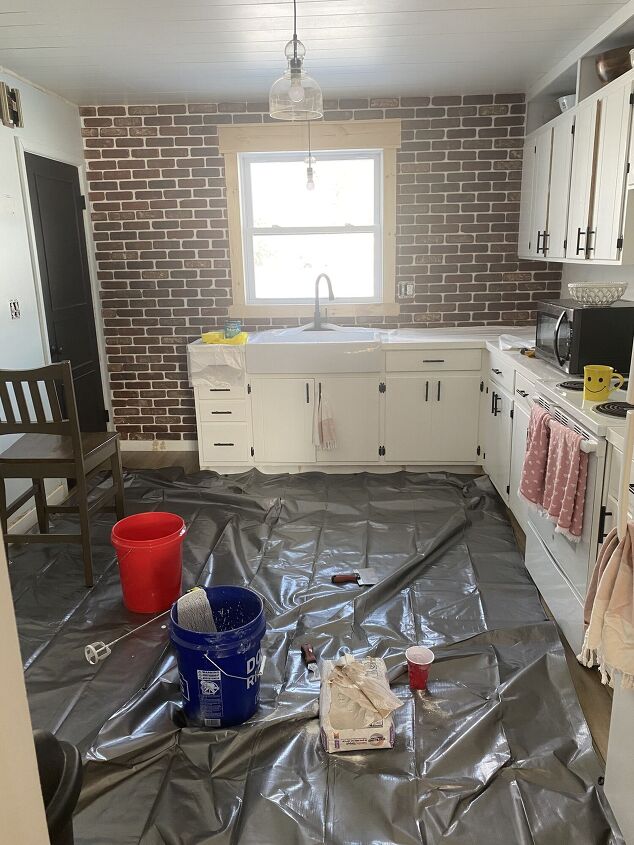
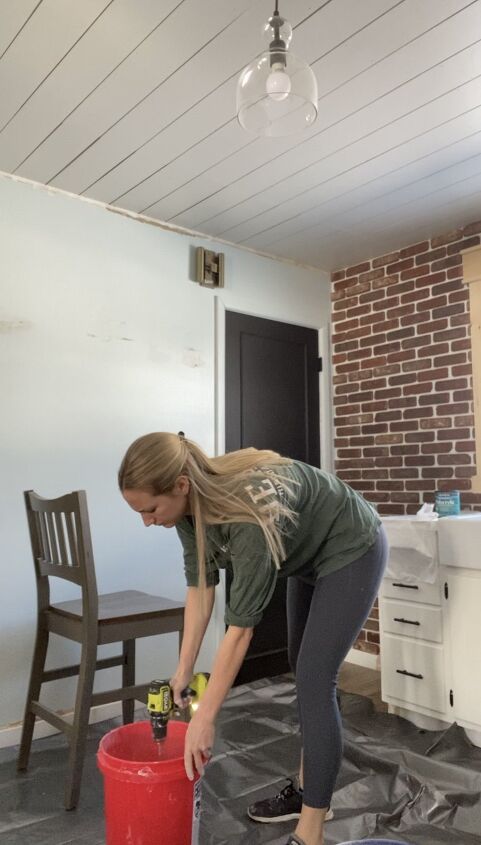
Day 3...It is time to grout! Get some clothes on that you don't care about getting messy in, cause trust me this day is a mess! Also, put your plastic gloves on, and have back up just incase. This is the day where the tarp and plastic sheeting will be needed. I laid a 9x12 tarp down in my kitchen so that I could protect my floors. You can also work outside or in your garage, but I wanted to eliminate all of these trips in and out of my house. Plus, it was freezing out that day so no thank you hahha. I also placed plastic sheeting on my counters and floors under the brick wall to try and protect them from grout that will inevitably drop. This also made clean up way easier in the end. Here's what my kitchen looked like in the midst of the crazy. Note the coffee mug, don’t forget the caffeine!
To start I thought I had a plan for the grout color. I knew I wanted a lighter grout so I started with bright white in a small section of my kitchen. Here the bright white is...
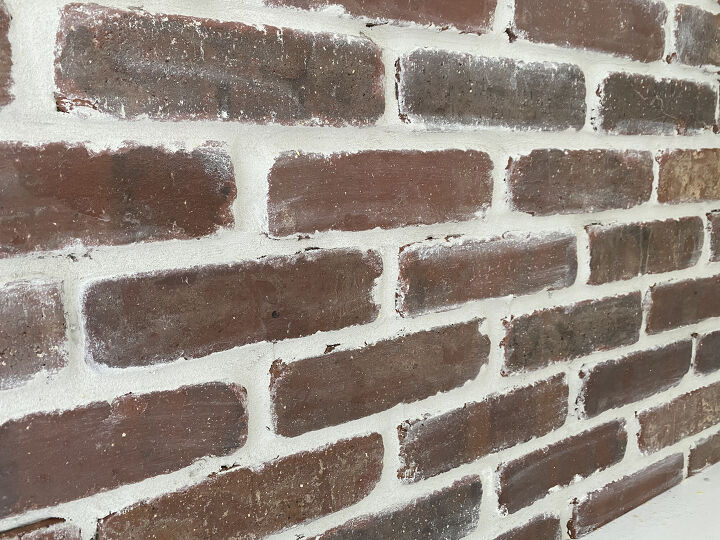
I ended up not loving it. I wanted to dull that brightness down a bit. So I ended up adding a small amount of oyster gray with the bright white and it was perfect for what I had envisioned. I mixed 3 parts bright white with 1 part oyster gray and that was my magic mixture. Not a huge difference, but I can tell and it makes me happy! Here’s a close up!
To mix the grout you will add a small amount of cool water to your large 5 gallon bucket. I don't have a specific measurement for this, but start with a very small amount! You can always add more! Then, add in your grout slowly while mixing with your drill and mixer attachment to get a thick milkshake consistency. You don't want it to be drippy. Start with making a small amount at a time. You only want to make enough that you could use within 30mins. After your first batch you will get a hang of how much you can grout at a time. I probably did about 5 batches for my size wall. Once you've obtained the right consistency, let is sit for about 10 minutes and mix it once more with your mixing attachment. Then scoop your grout into your grout bag (you can just use a plastic solo cup for this).
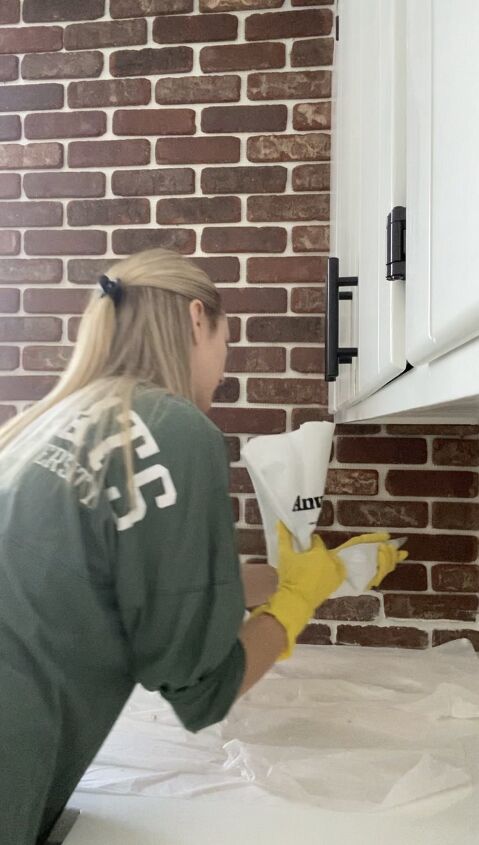
To apply the grout, use two hands to hold the grout bag. One hand tight towards the top twisting the opening to push the grout firmly down. The other hand towards the tip to control the bag and squeeze the grout out. Fill each gap with grout. It will look like this. It's just like piping a cake! :)
Once you have grouted let it sit for 20-30mins. You want it to start to harden but not be too hard that you can't work with it? Does that kinda make sense? After it has set, I had first went through with a damp sponge and dug my finger in the grout to smooth it out and to remove any excess grout. I later learned that this was actually easier to just do it with just your finger (with your glove on). After I did this step my wall looked like this...
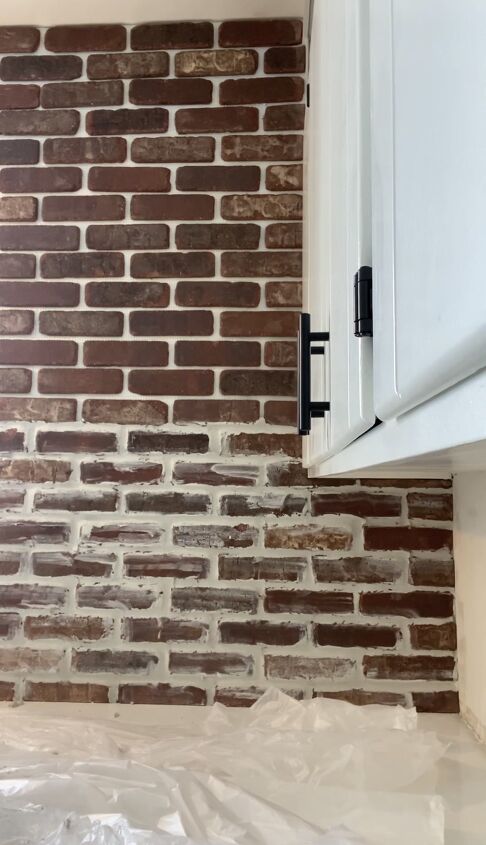
At this point I freaked out a little bit because I didn't want to white wash my brick and this looked soo messy. I liked the look of the natural brick. So I snapped that picture for you guys really quickly (because priorities ya know) and grabbed my sponge and scrubbed the brick. THANKFULLY, the grout came right off of the brick! Phew! I just wiped each brick, rinsed, wiped, rinsed etc. Kept repeating until I got this look. And I love it!! Again, I like the not so perfect look!
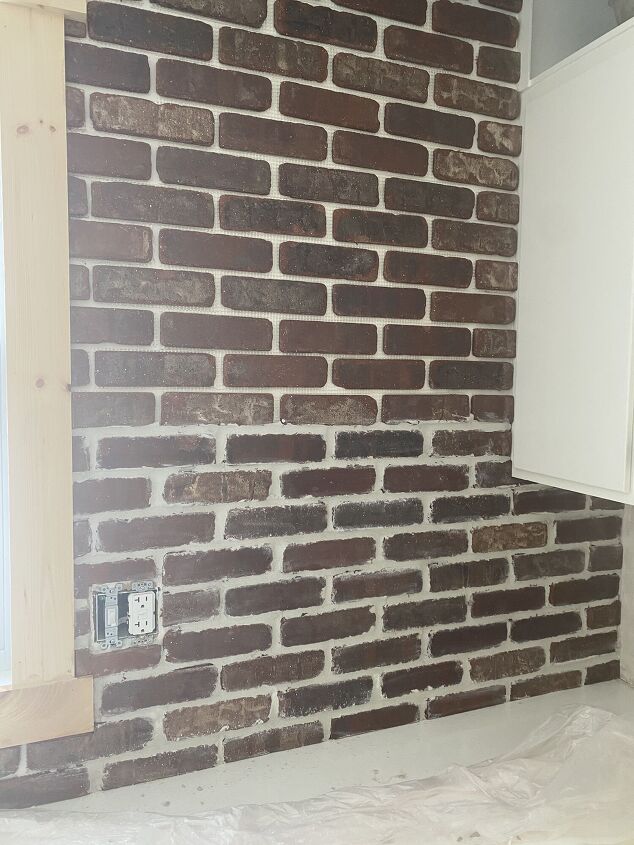
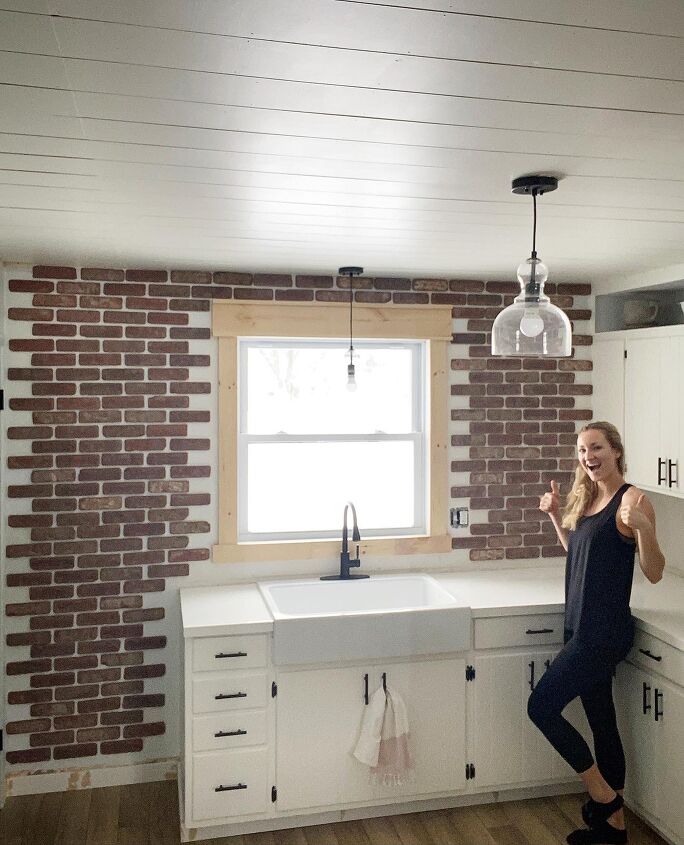
Then I just kept mixing up more batches of grout until my wall was done! My hands were so sore but I powered through. This is where 2 buckets came in handy for me. I switched between the 2 to mix my grout while the other bucket soaked to clean in between. It was important to clean the bucket and grout bag between each batch! You don't want any hard dried up grout in your fresh batches. Especially clean the grout bag because it can easily clog up. Before you know it you will be done! Here is how mine turned out!
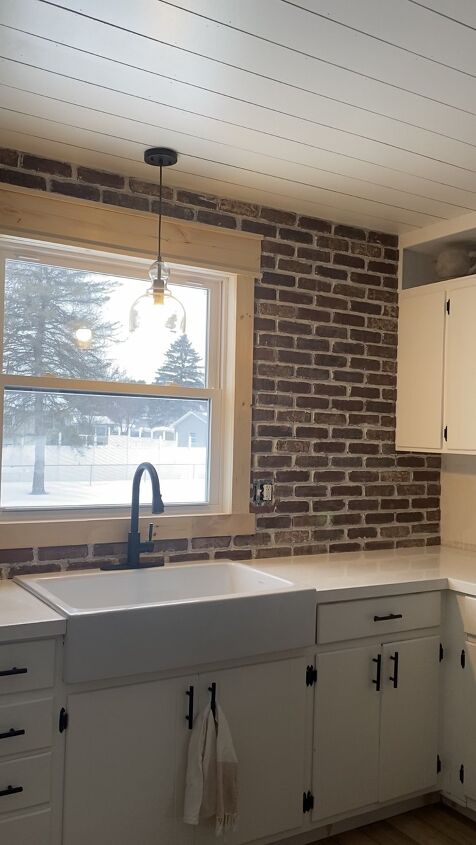
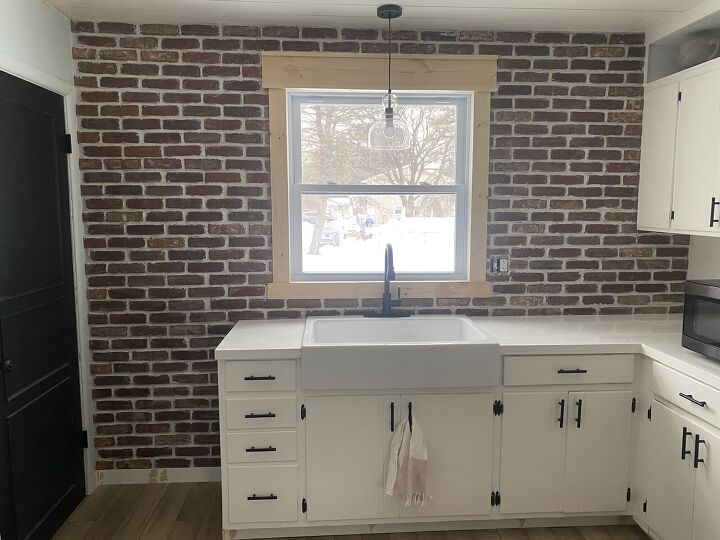
I am obsessed with this wall! This project was so rewarding and I love learning new things. Creating this accent wall is the best feeling, trust me, do it! You wont regret it! If you re-create this look I would love to see! Make sure to tag me on Instagram @abbbclark_homee!


Comments
Join the conversation
-
Well done, it adds a lot of interest to your kitchen
-
Love it


Frequently asked questions
Have a question about this project?
how do u clean it?
I already did this project! Love it also Don’t know how to put pics on or I would. Also bought a spray sealer to finish as reconnected but haven’t had the nerve to do it??? Did u use a sealer snd if u did , did it work out? Gals u can do this. I was 75 last year when I did this 😂😍
How many boxes of bricks did you have to buy?