


DIY Clock - How to Make a Vinyl Record Into a Clock

One of my favorite go-to projects when I am feeling creative is acrylic pour painting. Mixing different colors and watching them slowly flow into beautifully distinct patterns is a fun and rewarding project that could not be easier to do! I often use canvases but had a vinyl record that I knew would be perfect to make into a clock and decided to create an acrylic pour painting for the clock background first. The result is an amazingly unique and stylish wall clock that no one would know was made by repurposing a vinyl record!

You Will Need:
- Vinyl Record
- Scissors
- Clock Movement Kit
- Clear Spray Sealant
- Drop cloth
- Floetrol or another Acrylic Pour Medium
- Artists’ Loft Flow Acrylics Paint
- Water
- Plastic Cup
- Spray sealer
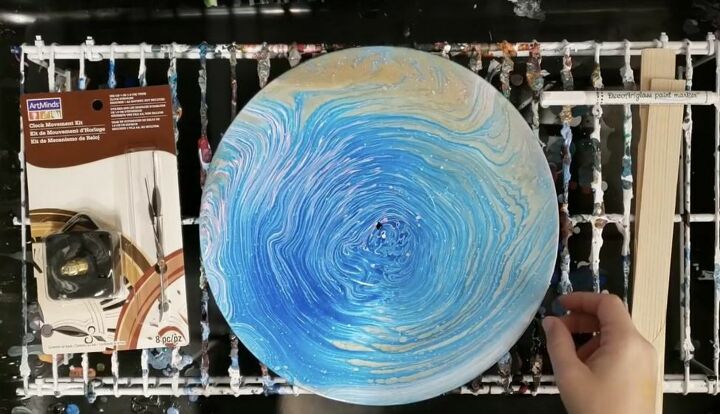
Step 1: Prepare Vinyl Record
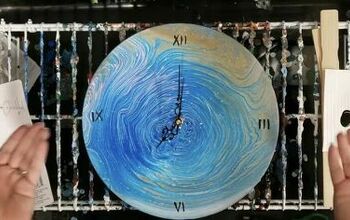
I mixed several colors of acrylic paint with water and a pouring medium and then combined all of the mixtures in a plastic cup. I poured the contents of the entire cup slowly over the record to create an acrylic pour painting background on the vinyl record clock. Place the record on an overturned plastic cup and pour the paint onto it. Pour slowly onto the same spot near the center of the record until you achieve a pattern you are happy with. Make sure to use a dropcloth to catch all of the extra paint that will flow off the sides and protect the floors in your work area. Let the painted record dry completely and then seal with a clear spray sealant. Acrylic pour painting creates a thickly painted surface that will need ample drying time. Let the sealant dry.
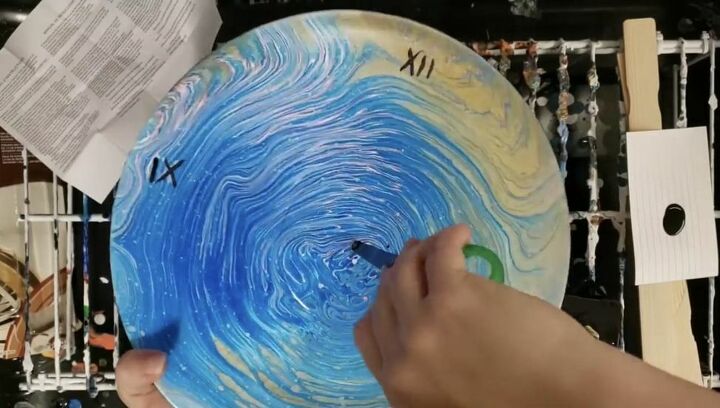
Step 2: Label the Clock
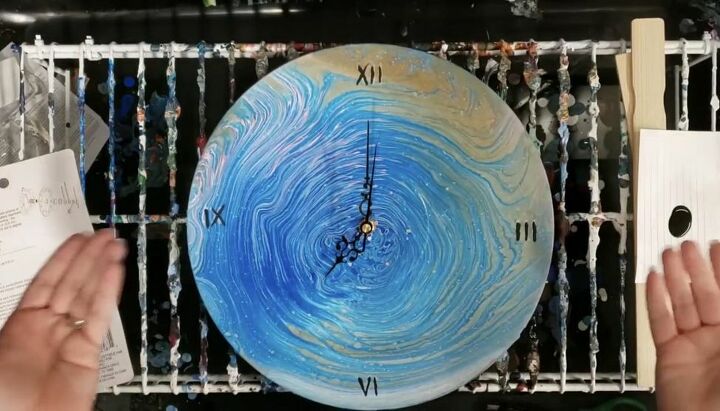
I used a paint marker to label the clock numerals on the clock face. I used a white paint pen initially and then hand-painted over the white with a paintbrush using black paint. I labeled twelve, three, six, and nine using Roman numerals. Use rulers or paint sticks to make sure you center the numbers. If you don’t want to hand-draw the numerals you could use stickers or vinyl numbers to label your clock.


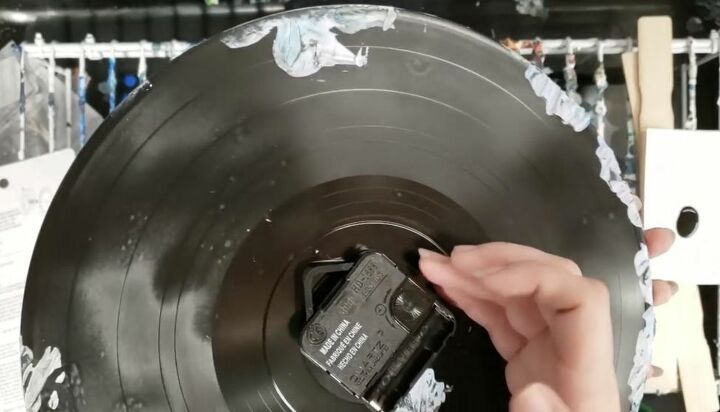
Step 3: Widen the Center Opening in the Record
In order to fit the clock mechanism, I needed to widen the center hole in the record slightly with a sharp pair of scissors. Insert the closed scissors into the hole and twist and turn them until the hole widens just enough to securely hold the clock mechanism.
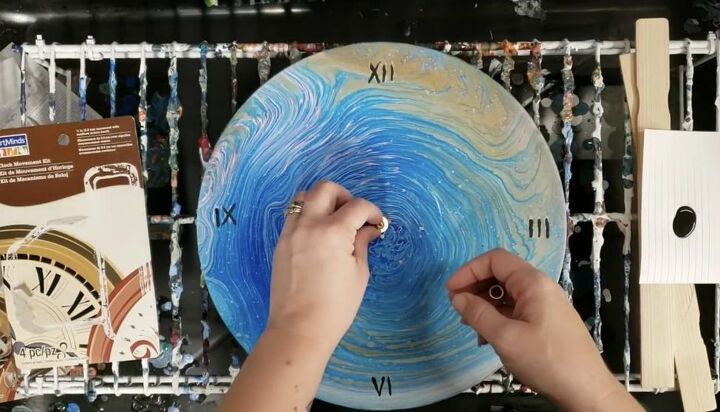
Step 4: Install Clock Movement Kit
Because my vinyl record was very thin, I installed a kit made for up to a ⅜ inch thick surface. Insert the mechanism from the back through the center hole. I screwed the washers included in the kit onto the center mechanism to hold it in place.

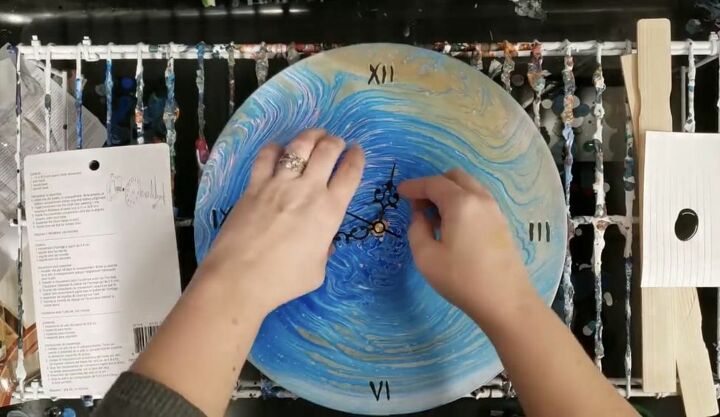
Step 5: Place Hands on the Clock
I carefully placed the three included hands onto the center movement mechanism. They are very thin and fragile so be careful not to bend the hands and cause them to be wobbly or force them on.

Step 6: Install Battery and Hang Clock
My clock movement kit required one AA battery so I installed one and used the built-in hanging fixture attached to the movement kit to hang my new clock.
So many people have old vinyl records around their house that they no longer have any use for and either end up donating them or just throwing them out. I love that the acrylic pour painting design on my vinyl record clock created functional art by repurposing such a cool piece of history. This was a fun, easy, and inexpensive project and I can’t wait to make more to give away to friends and family as gifts. Once the vinyl record is painted, the clock can easily be assembled in a matter of minutes. Next time you see a collection of old vinyl records, don’t hesitate to grab them and create some art museum-worthy clocks like this one.
What unexpected materials have you turned into beautiful and functional art for your home? Share your best DIY creations and find inspiration for other ways to turn items that often end up in the trash into home decor you love to use at Hometalk!


Frequently asked questions
Have a question about this project?
Now that is an idea ahead of it's time, could not resist. lol. Do you happen to know if there is a clock kit that runs silent no ticking sound Marcy? I do not own a wall clock because of the irritating sound but this music lover would copy your idea if such a thing existed...thanks so very much for sharing the beauty. Regards, Linda