Painting Wood Paneling & Opening Up a Wall in a Small Living Room

We purchased property with a small cottage as a vacation place in August 2018. The cottage was built in the 1940's and was in good condition, but needed lots of updating. If you search, you will find some of my other posts on the same cottage. The living room walls were covered with wood paneling and it made the small room seem dark and even smaller. Additionally, the room was closed off from the kitchen and other parts of the cottage.
There was a lot of work to be done in this living room, it had a large unsightly brick fireplace that was covered in rocks (we removed the rocks), the ceiling had two false drop ceilings in addition to the drywall ceiling and the flooring was old linoleum.
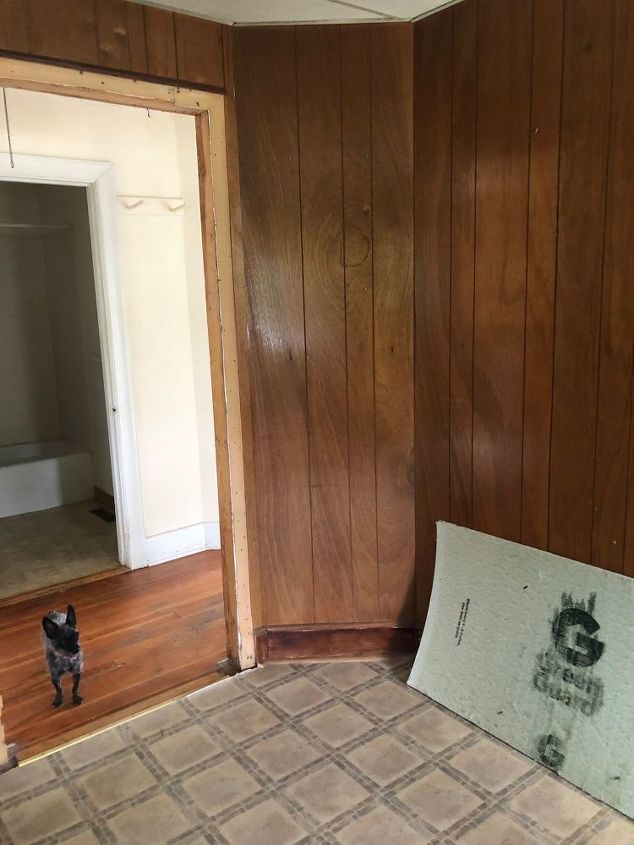
This is a wall to the left of the rock fireplace - we decided to remove this wall to make a counter that will be open to the kitchen.
This is the fireplace, but I put up another post about removing the stones.
This is the area to the right of the fireplace, front door is there too. Because of the small space, we will be using this space in the living room as a dining area.
We tore out the wall next to the fireplace - beginning the process of building a counter/bar to open up the small space.
Painted the paneling for an instant update! Primed the walls with Kilz and then painted with a paint + primer paint by Valspar.
Studs were cut down and electrical was rerouted for the wooden counter to go in place.
Room with painted walls, new ceiling and light fixture.
This is the board that I purchased to make the bar/counter - from Lowes. It needed to be cut, sanded, and stained to fit the space.
Counter in place, tongue and groove wood planks placed in the front of the bar (same as the ceiling).
Purchased LVP (luxury vinyl plank) flooring to put over the top of the old linoleum floor.
Here's the before and after photos of the area left of the fireplace that we made a bar/counter - open to the kitchen.
Here is the before and after of the area to the right of the fireplace (near the front door) that we are using as a dining space.
This is another photo of the fireplace - after the renovation on it - look for the post on the fireplace if you are interested in that information.
Enjoyed the project?
Suggested materials:
- Tongue and Groove Wood Planks (Lowes)
- Luxury Vinyl Plank Flooring (Lowes)
- Paint (Lowes)
- Kilz Primer (Lowes)
- Light Fixture (Amazon)













Frequently asked questions
Have a question about this project?
Wow what a difference Cindy! Are you planning on keeping this one or is it a flip?
Oh Cindy, I’m a few steps behind you but following the same path.
I purchased a bungalow about the same size as this as yours in Gastonia NC. Built at the same time as your as well. No rock on the fireplace but it was covered over. Has similar drop ceiling, paneling needs a lot of cosmetic changes.
I notice in your after pics What looks like beadboard on the ceiling, was it there and covered by the drop ceiling? If so, did you need to do any restoring to it?
I have beadboard on my ceilings under the drop ceiling, YAY.... but the drop ceiling tiles have been glued on unfortunately. Hoping the beadboard can be salvaged, time will tell