


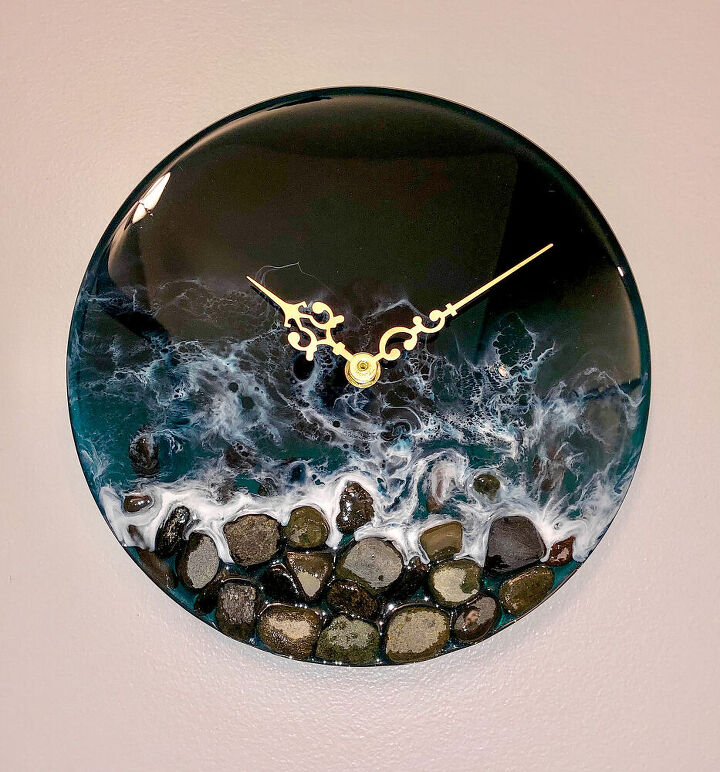
Pebble Clock & Resin Waves

Hello all, thanks so much for checking out my post today.
Today I'll be showing you how to create this super easy resin clock and how to make the most of pebble keep-sakes. Maybe I'm the only one who collects all sorts of beachy rubbish on vacation but if you're like me then this could be great 👍🏻😂
If you prefer to watch your tutorials then you're in luck, I have the full video of this project up on my YouTube channel now, link and info below 👇🏻
WHAT YOU'LL NEED
- Resin - I use Rockstar Resin products. Use HANNAH at checkout for 10% off along with free shipping
- Round silicone mold (9 inches)
- Mixing container & Sticks
- Pigments
- Clock mechanism
- Pebbles/stones
- Heat gun
- Blow torch
- Painters tape/liquid latex
- Drill
- Sand paper
Always use protective wear and follow appropriate safety measures when handling resin
STEP 1 - SIT BACK AND WATCH YOUTUBE
As I mentioned above, if you prefer to watch tutorials instead of read them then I have a YouTube channel where this exact project is up and available to view now, just click the video link above.
Please also consider subscribing to my channel for future crafty tutorials. I upload videos for most of my Hometalk projects plus loads more! 👍🏻
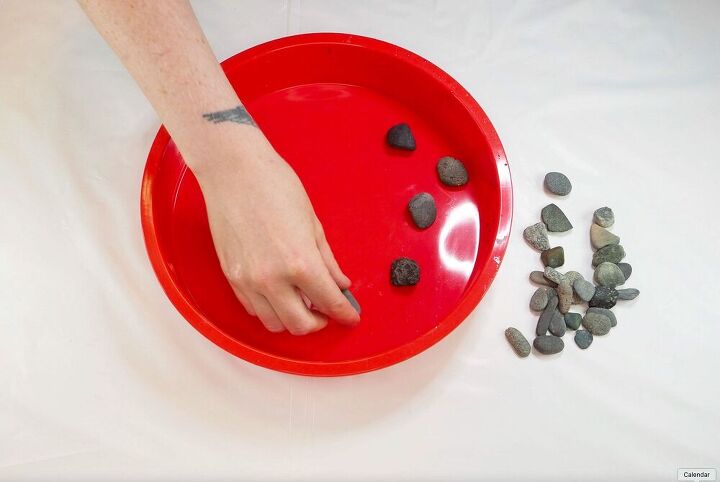
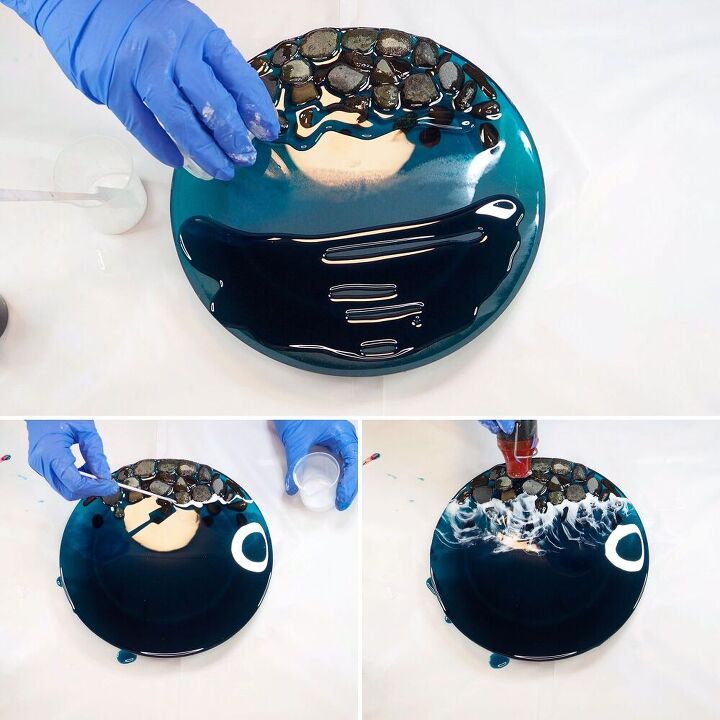
STEP 2 - MAKE YOUR SHORE
Using pebbles or stones, line these up along roughly one 3rd of your silicone mold. My pebbles were collected on vacation in San Diego ☺️
I had flat pebbles as well as more rounded ones so I tried to position these strategically to create a balanced look. I placed some of the flat ones at the front so that the resin might cover them more than the larger ones and I tried to spread out the larger ones whilst aiming to have them generally further towards the back.
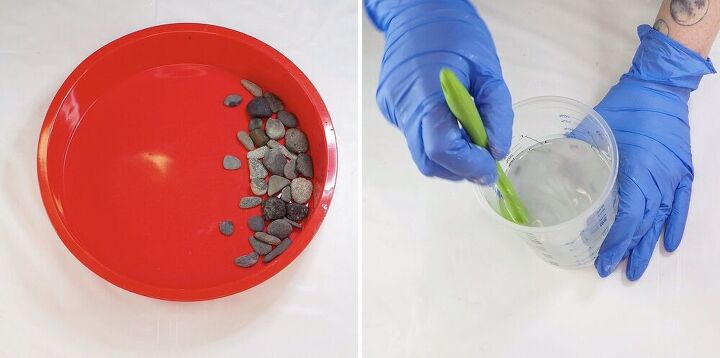
STEP 3 - MIX RESIN
When you're happy with how your pebbles look, mix together roughly 200mls of resin.
I colour my resin a nice dark blue by mixing in green, blue and black liquid pigments. If you have food colouring or acrylic paint, these will also work. If you're using acrylic paint, add a very very small amount at a time to gradually achieve your desired shade.

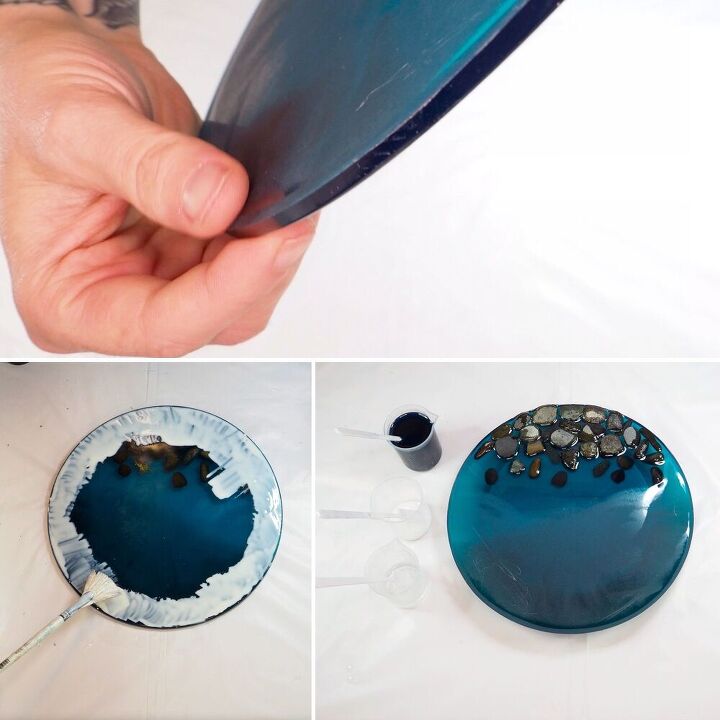
Pour the resin into the mold and make sure the resin goes into all the gaps between the pebbles. Don't pour the resin directly onto the pebbles and try to leave the tops of the pebbles exposed so that they still have the matte, stone texture at the end.
Use a heat gun to pop bubbles and to gently push the resin into the pebbles for a natural wet look and for how water would push up against them. Because the pebbles are so porous, if the resin touches them, that surface will remain shiny so bear that in mind.
You'll see in my finished picture there's a sort of half and half split of shiny and matte pebbles which I think looks quite natural and as though water has just lapped up over or around some of them.
I held a small amount of the resin back when pouring it in before. I mixed in a little more black to this resin and then poured this into the mold at the opposite side to the pebbles. This gave a very slight ombre effect. this is not necessary but I liked the look it gave.
Allow the resin to cure.
STEP 4 - PREPARING FOR THE WAVES
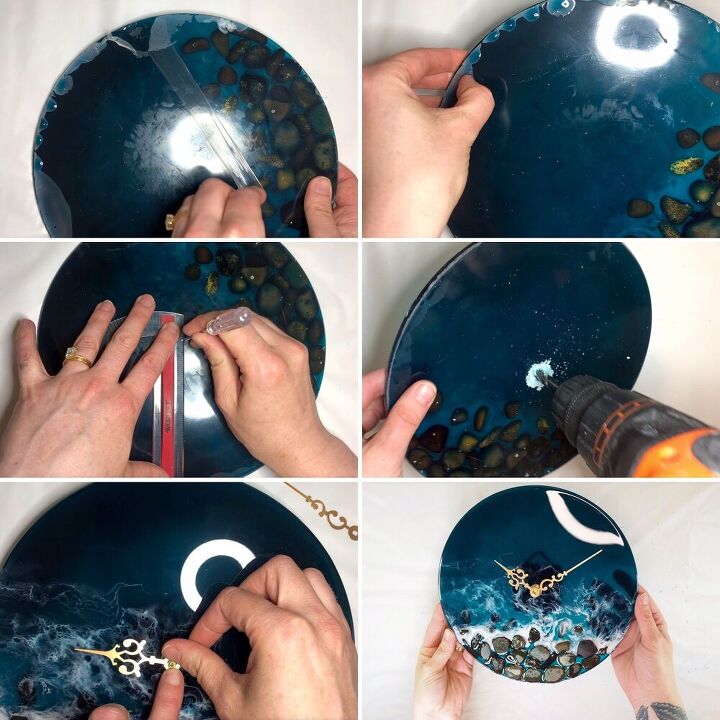
Once cured, demold the clock base.
The top edge will probably have a lip due to how the resin cures. Sand this off so that the top surface is flat. Don't worry about the area around the pebbles, you only need to sand the lip off of the blue resin part.
This is so that when we add the waves later, the resin doesn't bunch up and get caught on the lip.
On the reverse side of the clock base, apply a layer of liquid latex around the edge or mask off with painters tape.
STEP 5 - MAKING WAVES
Once the latex is dry (if you used latex) mix together some more resin, only about 100mls this time, and divide this into 3 containers once fully mix. I divide this roughly as: 70mls, 20mls and 10mls.
I colour the 70mls portion dark blue again, I keep the 20mls clear and colour the 10mls white.
Make sure you stand your clock base up off of your work surface (maybe on a coaster mold). Pour the dark blue resin over half of the clock base, the side that doesn't have pebbles.
Pour the clear resin along and around the front line of pebbles and then up to meet the dark blue resin. The dark blue resin and clear resin should now cover the bare part of the clock base. Blur the part in which they join using the heat gun and pop bubbles at the same time. You could also use a gloved finger to blur the line where the 2 colours meet.
Now carefully add a line of white resin to the very front of the clear resin so that it is both right up against that front line of pebbles and in full contact with the clear resin.
Using the heat gun at a low angle, blow the white resin into the clear and dark blue resin to create waves. The resin can take a while to warm up and flow.
Apply a few quick blasts of a blow torch over the white waves to create foamy cells if they aren't forming naturally.
Leave to cure.
STEP 6 - ADDING THE MECHANISM
Once fully cured. Peel off the latex or painters tape from the back and sand off any rough edges left behind.
Drill a hole in the centre of your base with a drill bit the same width as your mechanism thread and assemble your clock kit.
I have another video up on my channel of these steps that go into more detail if you're unsure on how to do this 👍🏻
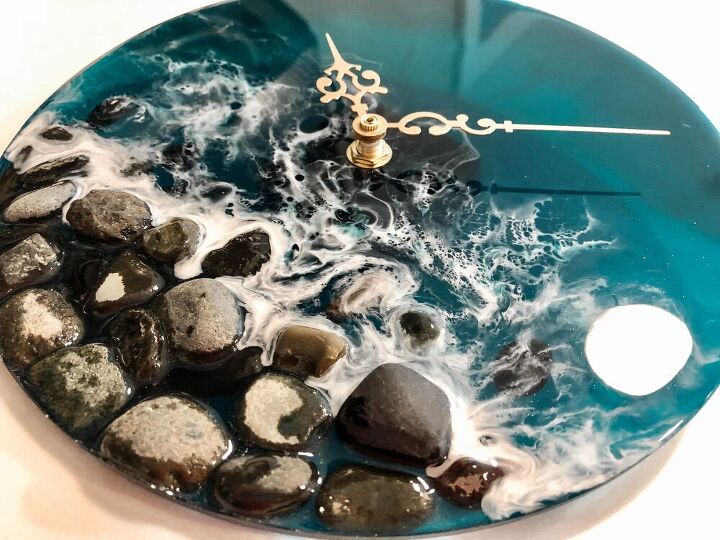
And that's it! 🕒
The blue part of this base looks transparent (and it sort of is) but up on the wall, the absence of light in the small gap between the mechanism pack and the wall's flat surface, it appears totally opaque.
This clock is available in my Etsy Store if you're interested in buying it. Just click this link to take a look around.
Thanks again for stopping by and please do check out my YouTube channel for more tutorials like this.
Drop any questions or comments you have below and I'll happily get back to you ☺️
Take care and happy crafting x

Resources for this project:
See all materials


Comments
Join the conversation
-
This is incredible. What a beautiful piece you have created!
-
Amazing piece! Would pouring resin over a round piece of sanded wood work similarly do you think? I’m totally new to the world of resin and am loving the flawless finish it provides.


Frequently asked questions
Have a question about this project?
Beautiful work- My question is: Do I have to wear a gas mask when working with resin or any of the other components? thanks
What brand of pigment did you add?
Amazing work! Could you please give the links to the product for Canadian Amazon which is amazon.ca please? We cannot buy off American amazon site cause it's either no delivery or the cost of shipping is way more expensive than the item itself. Thanks