


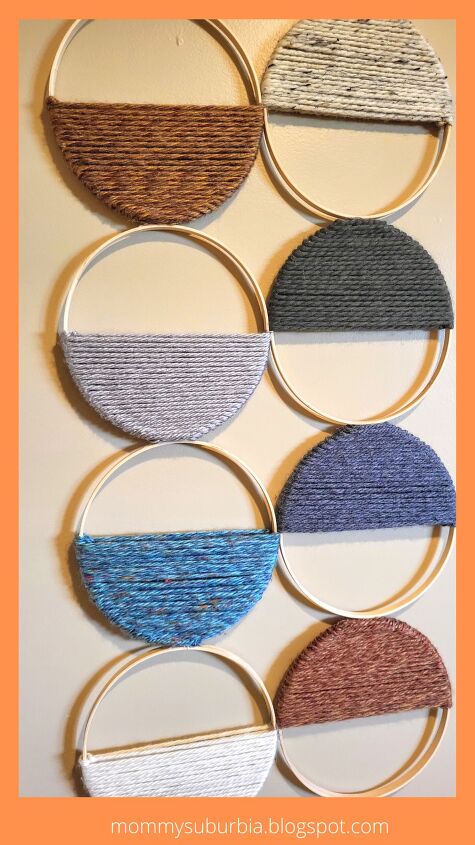
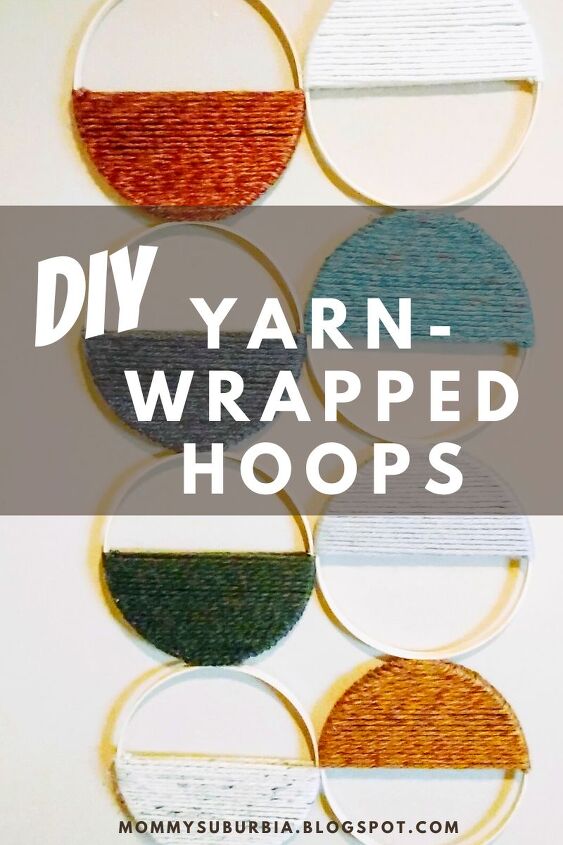
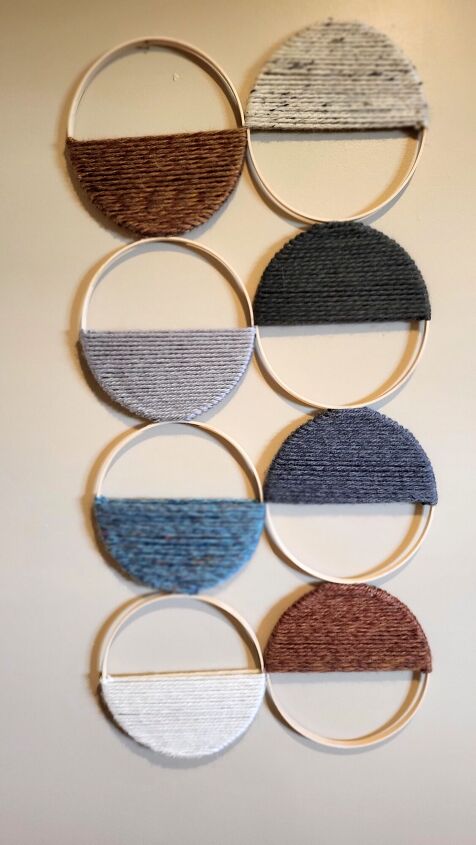
Yarn Wrapped Embroidery Hoop Wall Hanging

Are you looking for a budget-friendly way to update your home decor? Make a custom yarn-wrapped embroidery hoop wall hanging today. This is an easy-to-make, budget-friendly DIY craft you are going to love!
My latest project is a transition in our basement turning it from a kid's playroom into a family entertainment space. The first project I tackled was repainting the space. Once the room was painted and new furniture (bye, bye futon!) arranged it was time to figure out what to hang on the walls. After scouring Pinterest for inspiration I came to the conclusion that:
- The wall hangings I liked were WAY out of my price range and
- If I wanted decorations like the ones I found online I was going to have to make them myself!
The space I’m working on updating has a narrow wall along one side of the room that I thought would be a great place to hang a unique decoration. All I had to do was make it!
I’m excited to share with you how to make a yarn-wrapped embroidery hoop wall hanging with this step-by-step tutorial.

Supplies:
- 8 - 8" wood embroidery hoops
- Several skeins of chunky yarn in a variety of colors you like
- hot glue & hot glue gun
- wood stain (optional)
Step-by-Step Instructions:
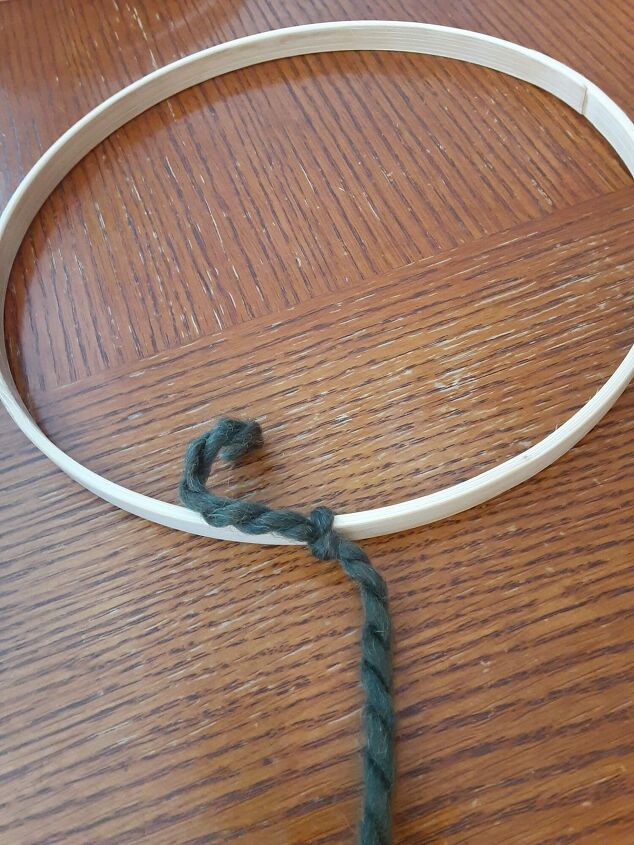
- Separate the inner circle of each embroidery hoop from the outside section that has the medal adjuster on it. You will only be using the inner hoop for this project
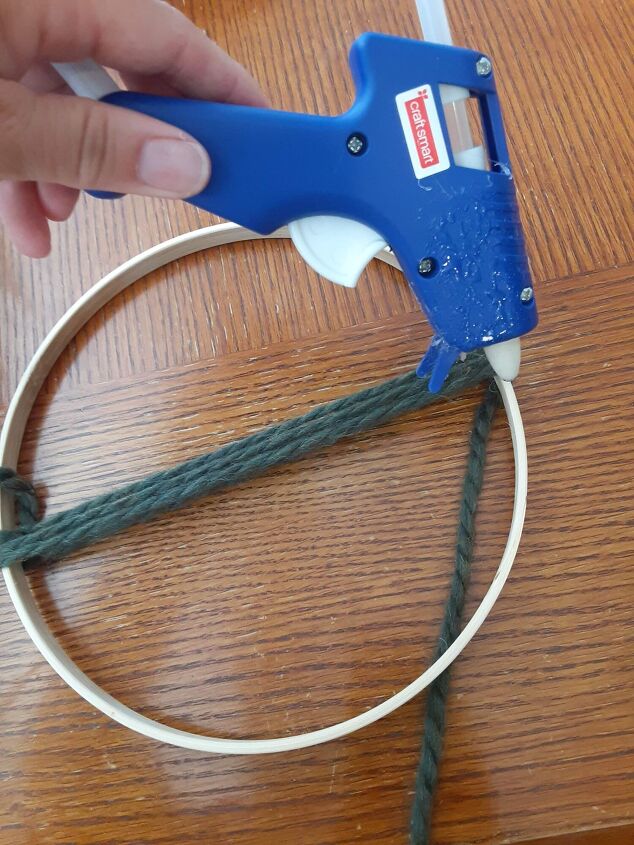
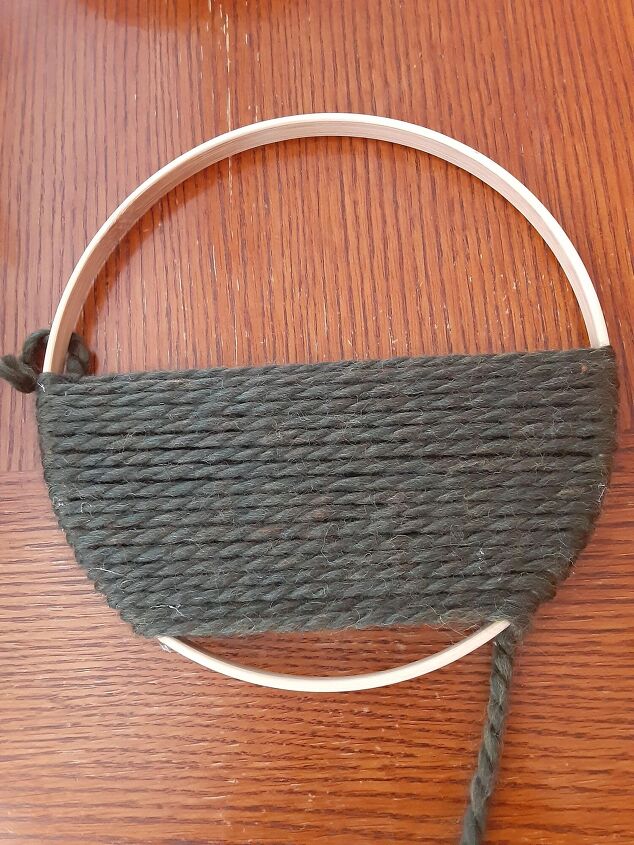
- Select one skein of yarn and securely tie the end of the yarn to one side of an embroidery hoop. Wrap the yarn across the hoop to the opposite side making sure to position the yarn across the middle of the hoop circle. Add a drop of hot glue to the outside of the hoop to secure the yarn.
- Continue wrapping the yarn over the hoop in even layers adding dots of hot glue to the outside of the hoop to secure the yarn. As you progress the yarn may begin to slide so be sure to hold the yarn into the hot glue until the glue cools.
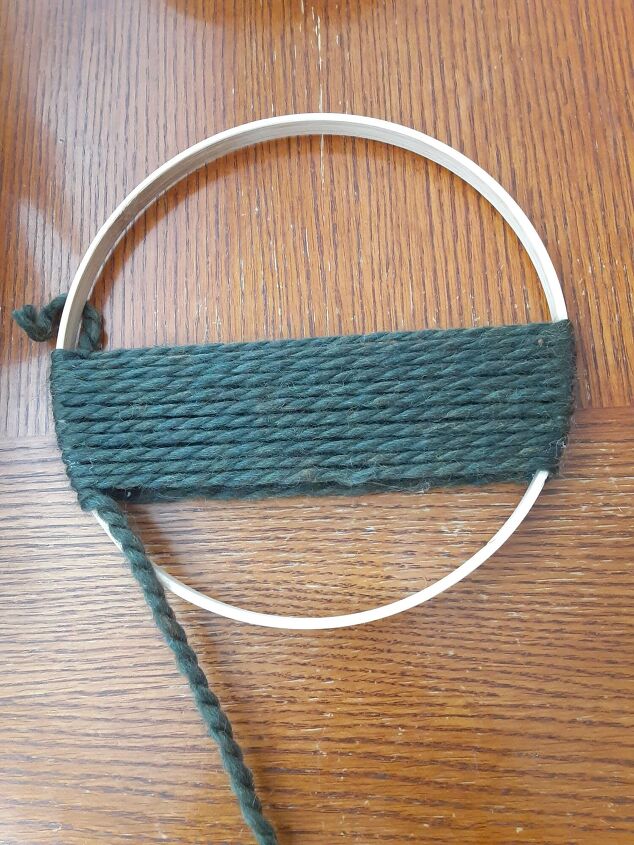
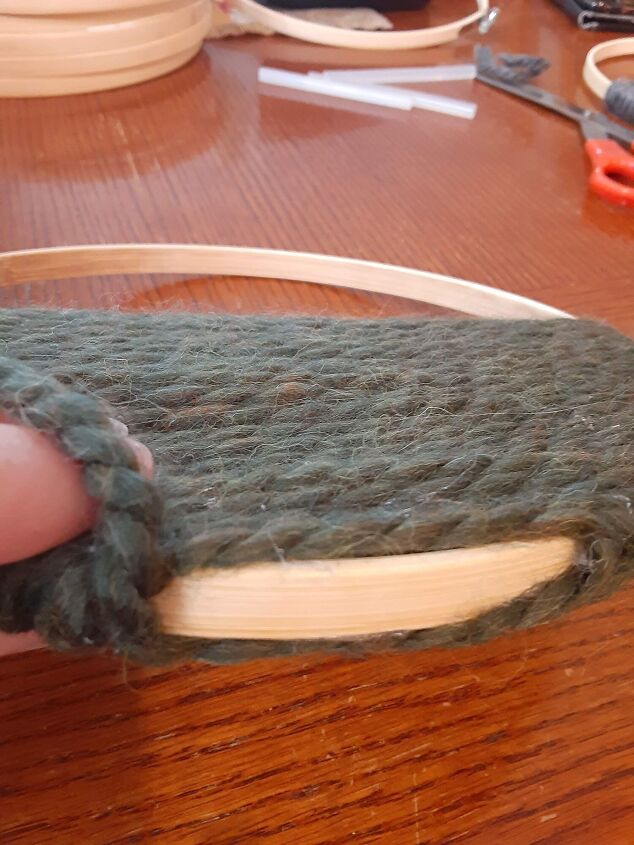
- Once you reach the bottom of the hoop run a bead of hot glue along the wood and weave the yarn over the glue to hide any exposed wood on the hoop. Snit the end of the yarn with scissors and glue any pieces of yarn down so it lays flat. Go back to the starting spot and tuck the tail of the yarn into the hoop so it isn't visible.
- Repeat these steps for the remainder of the hoops.
After I had finished wrapping the hoops with yarn I laid them all out on the floor and arranged them in the pattern I liked. Once I was satisfied with the placement of the hoops I hot glued them together. Since they are quite light I wasn't worried about the weight of them pulling the hoops apart when it was hanging on the wall.
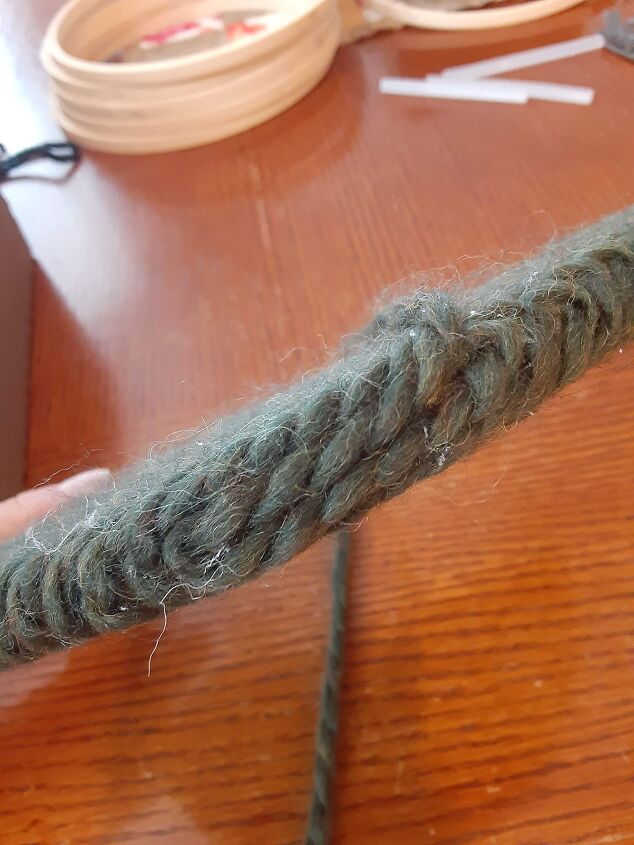
I tried this project with a thinner yarn but in the end, I really liked the thick chunky yarn best. The thick yarn gave the project more texture and I love the flecks of color in the thicker yarn. Of course, you can use whatever yarn, twine, or thin rope you have on hand to keep the cost down!
Resources for this project:


Comments
Join the conversation
-
I really like this. Simple but modern and classy. My style. As soon as I gather the items I plan on making it. Great idea!
-
Nice project! I love the modern vibes!


Frequently asked questions
Have a question about this project?