


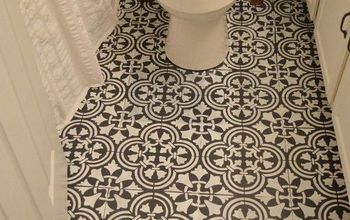
Floor Stenciling Makeover

From what I’ve researched, floor stenciling is a much cheaper and easier route to switch up floor tile vs removing and reinstalling. I was a little nervous to tackle this, but I decided to try my hand at it and am so excited to show you the results!!
Hometalk Recommends!
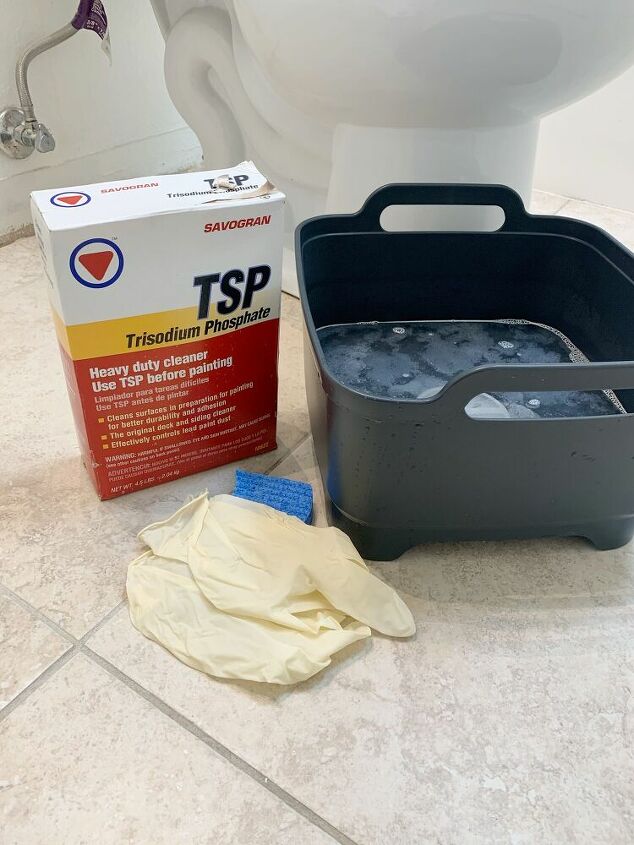
Deep Clean
Start with a super clean slate. TSP is a great heavy duty cleaner for tile and helps remove all wax, dirt and grime. Add a couple TB to warm water and apply with a sponge. Once the floor was dry, I applied painters tape around the edges of the toilet and tub. We are replacing our baseboards, but if you are not be sure to tape off the walls too!
Apply Primer
When working with tile, you want to make sure you are using a BONDING PRIMER to start. This will give you a strong base to ensure your paint holds! I applied 2 coats.
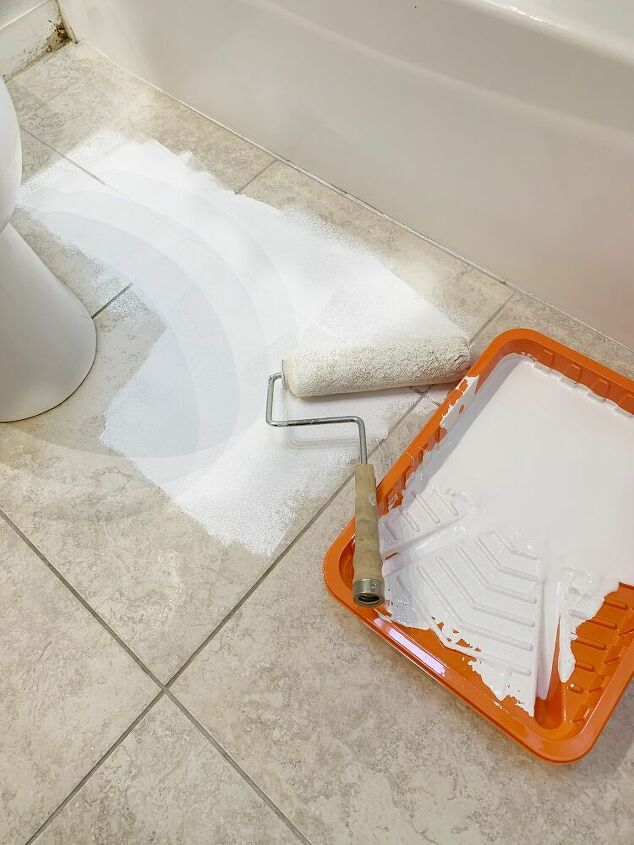
Paint Base Color
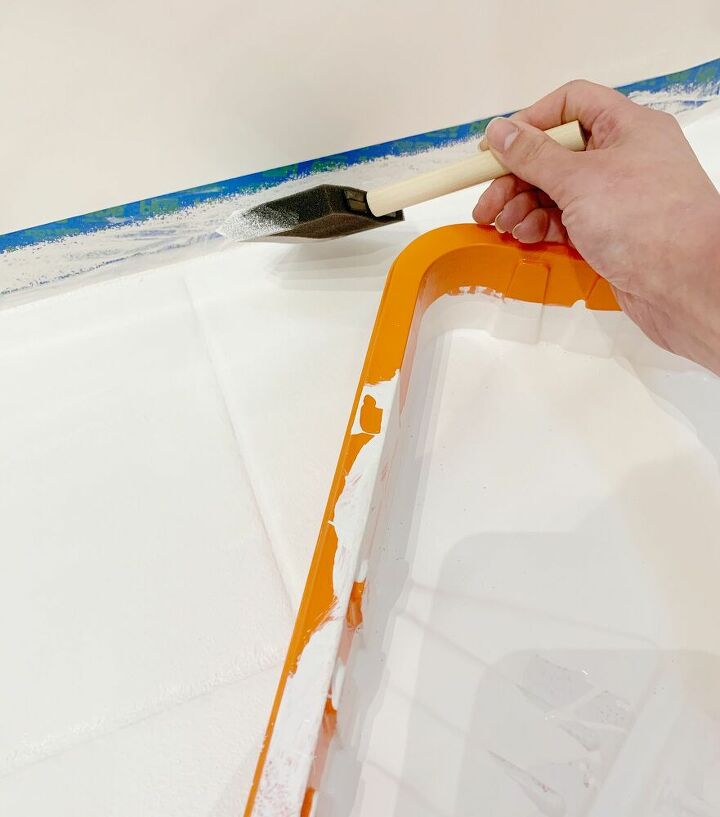
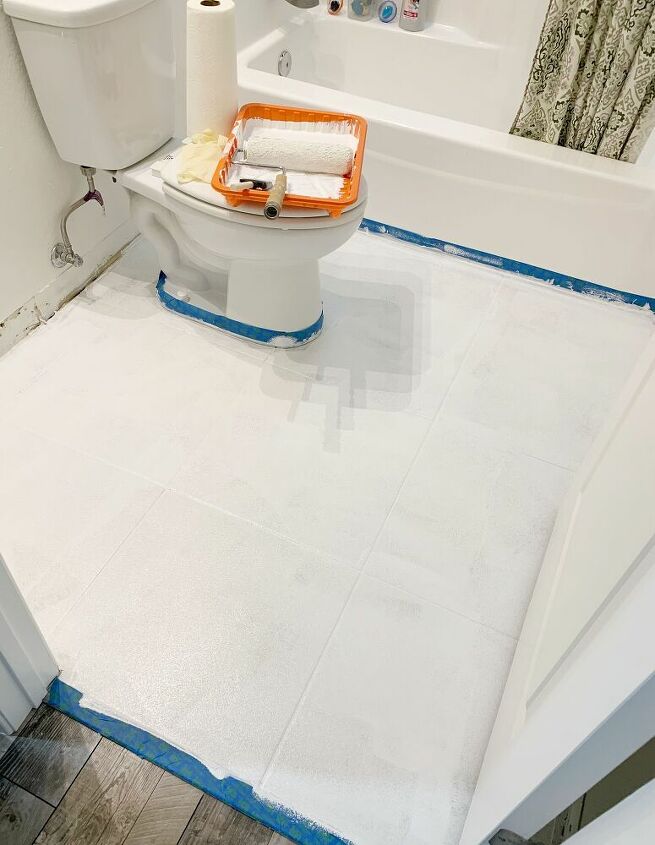
After your primer has dried, it’s time to apply your base color! You can use any wall paint. I decided to go with a semi-gloss in Behr Ultra White. A cheap sponge brush works great for getting in the grout lines and along hard to reach edges.
Dry Time!
After 2 coats of paint, I gave the floor a good 24 hours to completely dry. So much brighter already!
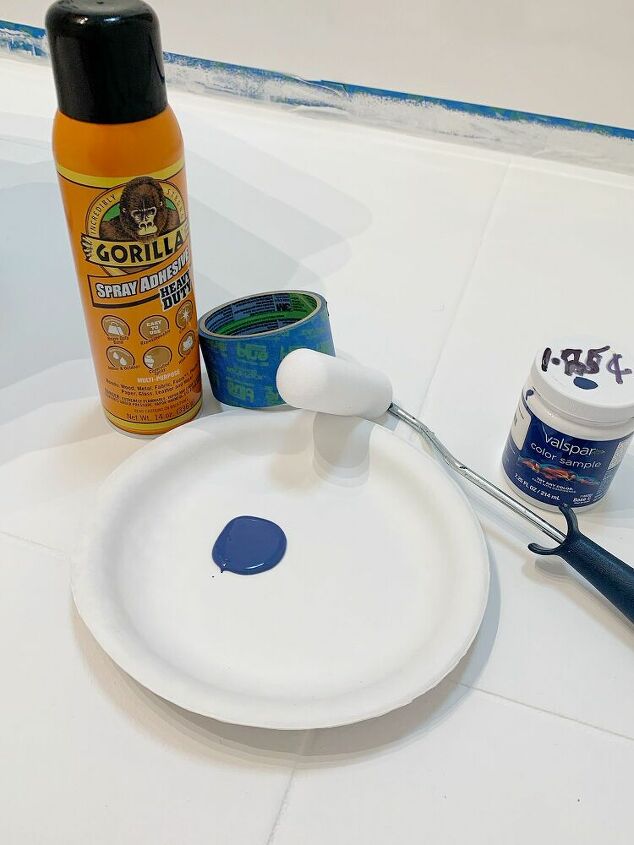
Gather Stencil Supplies
Now time for the real magic! To apply your stencil you will want a small foam roller, Painter’s tape, accent color and optional spray adhesive. I was able to find a color I liked in the discount paint aisle! You don’t need much so a tiny sample size will work.
You also will need a stencil of course! I ordered mine online through Cutting Edge Stencils. You can find them here: https://www.idevaffiliate.com/33076/231-4.html They are very inexpensive and have so many designs to choose from!
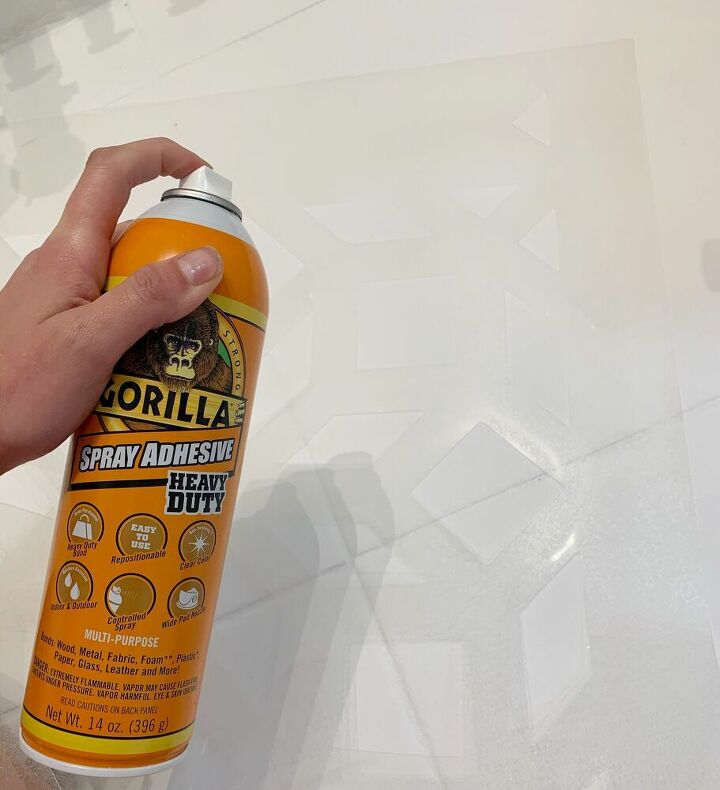
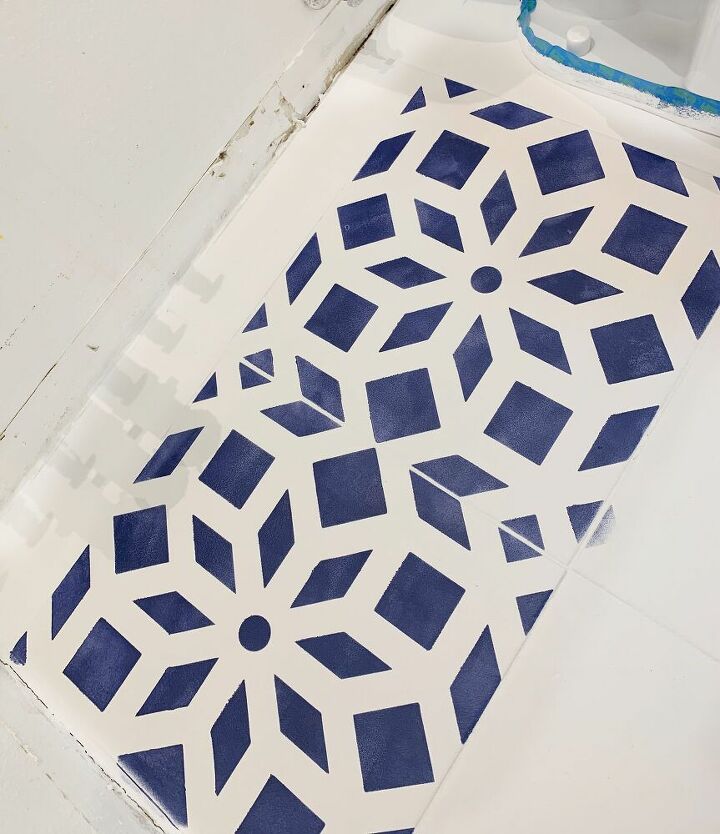
Adhere Your Stencil
Spray adhesive is optional, but I recommend as it will keep the stencil from moving around and help prevent any bleeding. Just lightly spray on the back and then position on the tile. The stencils also have marked grout lines which make it simple to line everything up! I then used painters tape on the edges for additional support.
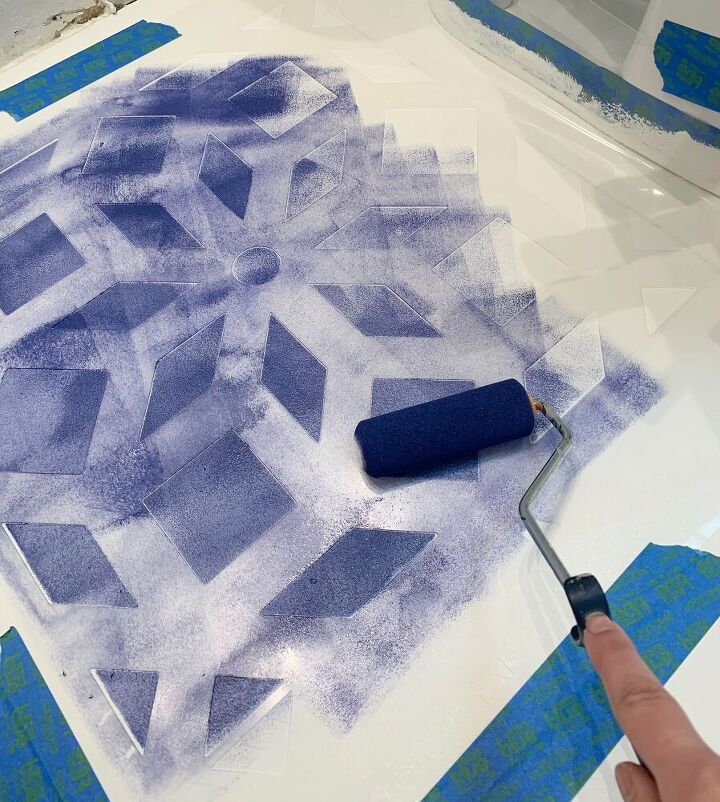
Apply Stencil Color
The key to applying paint on the stencil is to use a very light coat! This will prevent any bleeding. I rolled excess paint onto a paper towel first to make sure there was minimal paint on my roller. Slowly roll over the stencil in light coats. You can always add coats to darken your color!
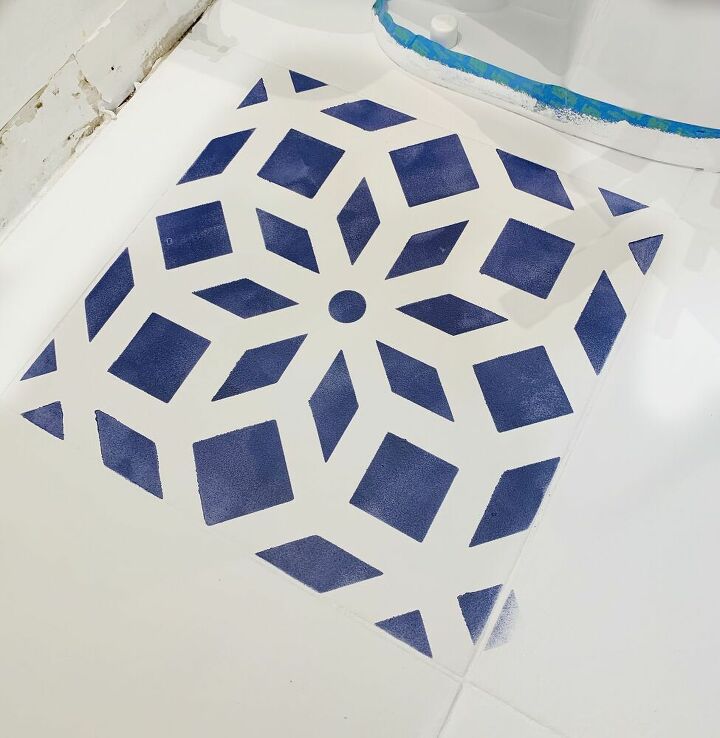
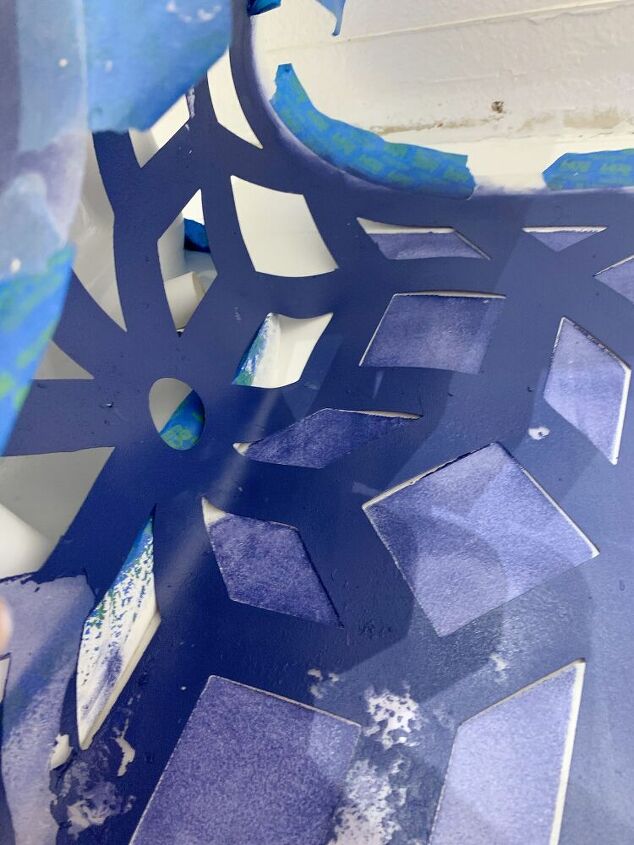
Remove Stencil
After painting, just slowly lift up the stencil and move on to the next. Since your coats are so light there is essentially no drying time and you don’t have to worry about smudging your design. How beautiful is that?!
Edges
Obviously not all tiles will be perfect sizes. When it’s time to go around edges or paint partial tiles, fold up the edges of your stencil and secure with painter’s tape. It’s also easiest to dab on the paint with a small brush in these areas.
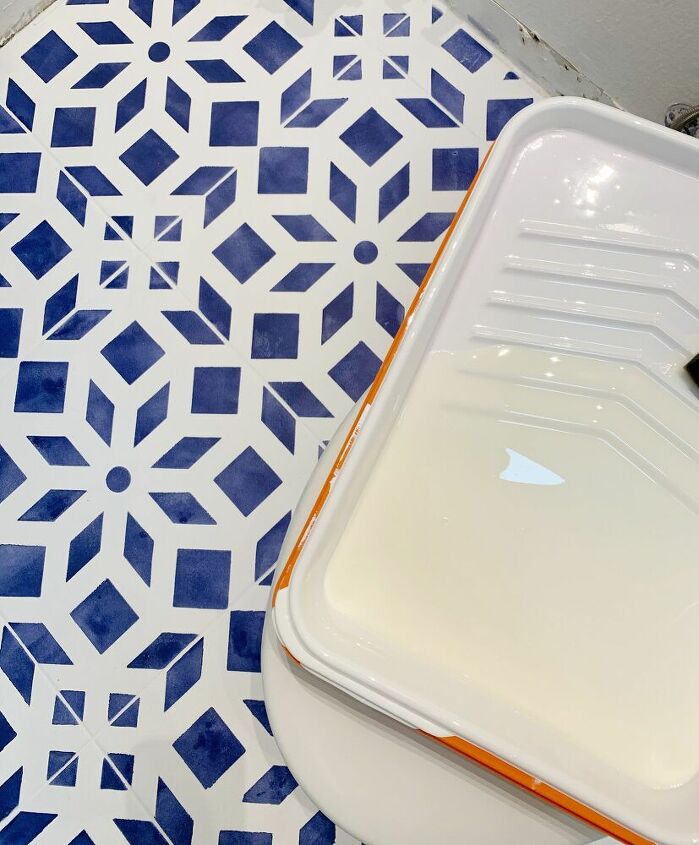
Apply Sealant
Once your beautiful stencil has been applied, you are going to want to seal it all in! I used Varathane Triple Thick Polyurthane in a matte finish, but there are lots of options available! When choosing a polyurethane, just make sure it’s clear to avoid any yellowing on your floor. Like the other steps, I applied 2 coats using a foam roller and foam brush for the edges and grout lines. It might have been overkill since it was triple thick, but I wanted to make sure the floor would hold up to water and traffic!
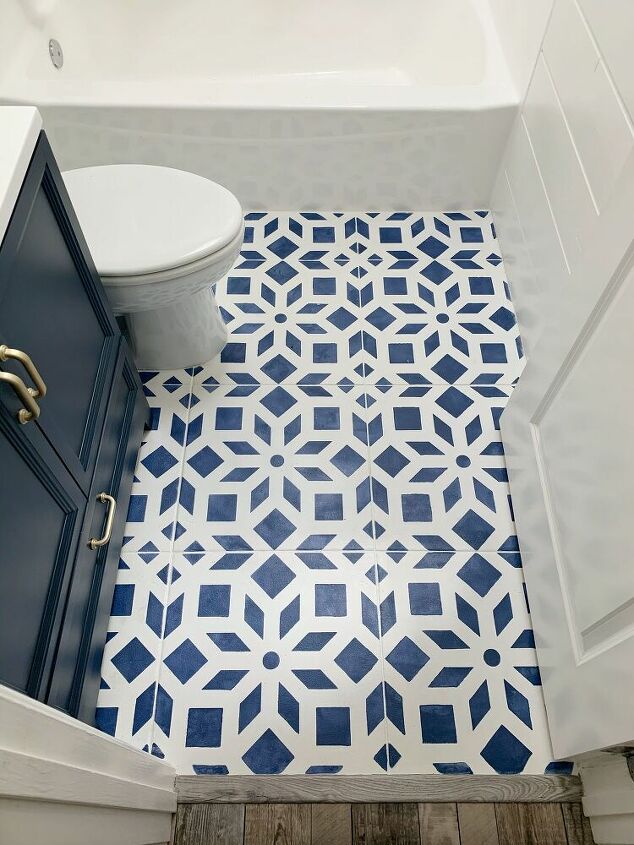
Enjoy!!
After the polyurethane is dry, remove all the painters tape and enjoy your beautiful new floor!!
Resources for this project:
See all materials


Comments
Join the conversation
-
What did you use to make the grout lines look so good
-
It sounds like you took a great approach to transform your floor with stenciling, offering an affordable and creative solution without the hassle of removing and reinstalling tiles! I'm sure the results look amazing. If you're considering more home projects or need reliable resources, BuildDirect reviews might be a good place to check out for materials. They offer a range of flooring options, and many have shared positive experiences with their services. You can look at reviews from others to get a sense of how they can meet your needs.


Frequently asked questions
Have a question about this project?
Wow!!!! So modern 1970’s but yet so vintage…say eighteen hundreds….
Why not just lay new tile?
Love this idea, but can it be used on vinyl tiles?
Do you need to reapply the polyurethane from time to time?