


HOW I PAINTED & STAINED MY CONCRETE FLOOR TO LOOK LIKE WOOD
Hello friends!
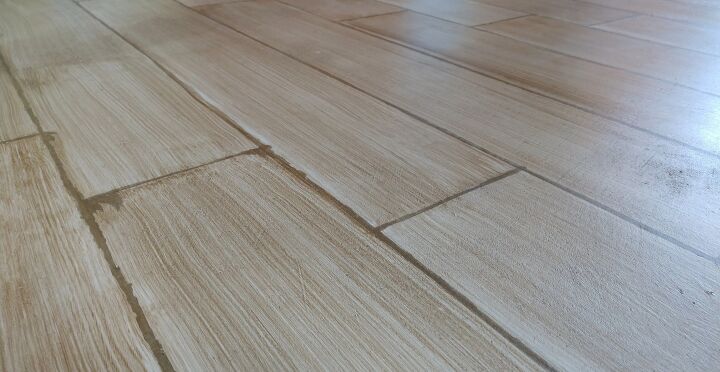
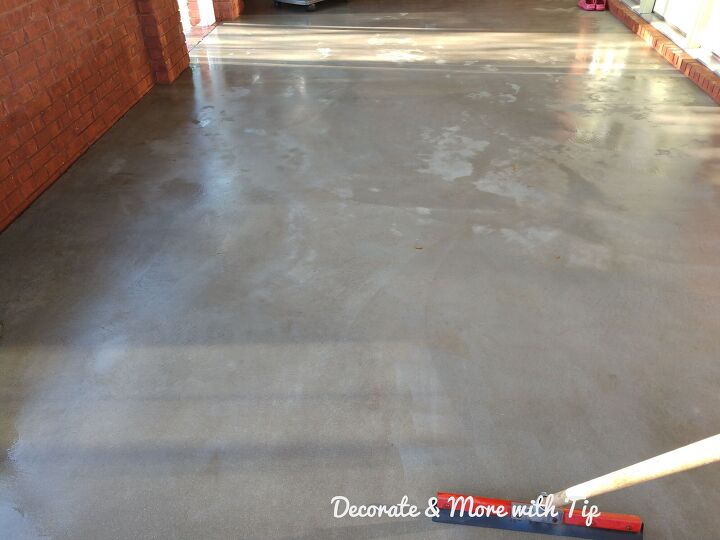
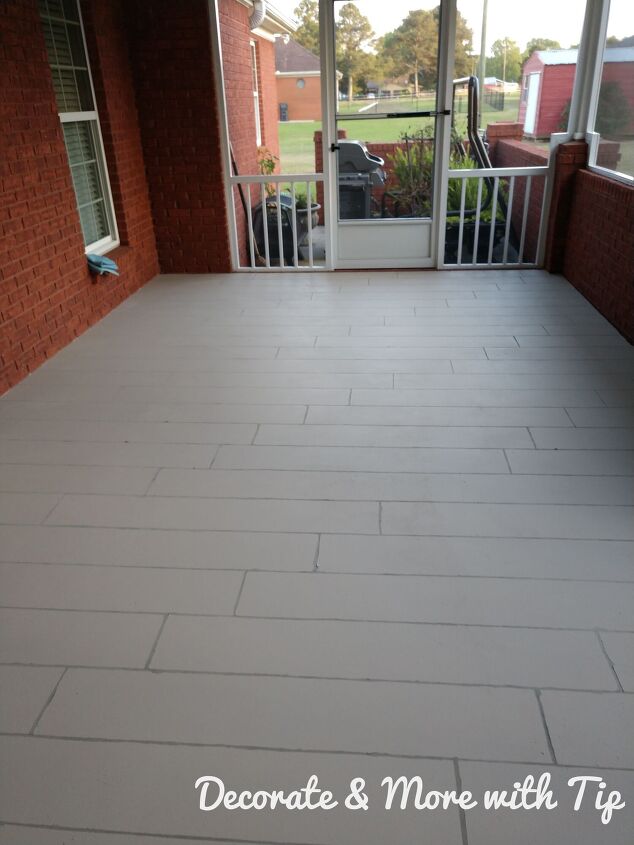
I am so happy on how my back porch concrete floor turned out. Since you are here, you must want to see how I mastered this look.
I want to be honest with you….it was a full weekend to do this project. That is after you prepped the floors 2 days prior to the actual painting and staining.
I won’t lie. I was pretty sore afterwards, but I would do it again in a heart beat.
Let’s get started!
First thing you need to do is prep your floors. This needs to be done 2 days prior to the painting/staining.
The steps we did:
1. Removing old paint, oils and junk that is stuck to the concrete
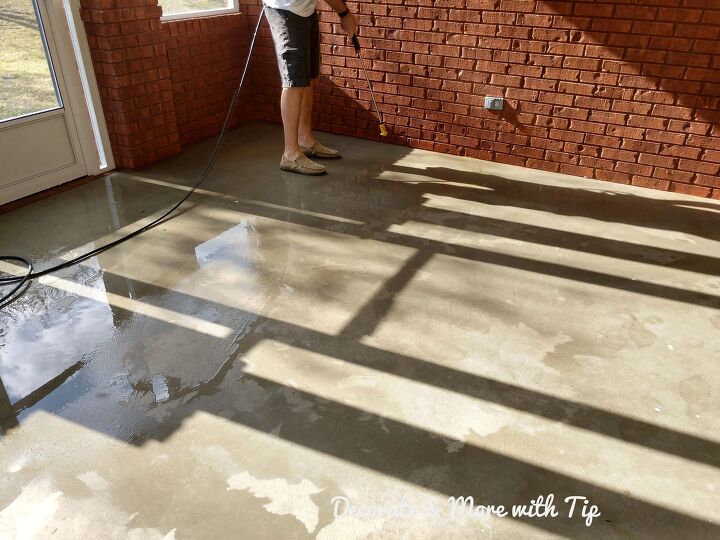
2. Pressuring washing the floors
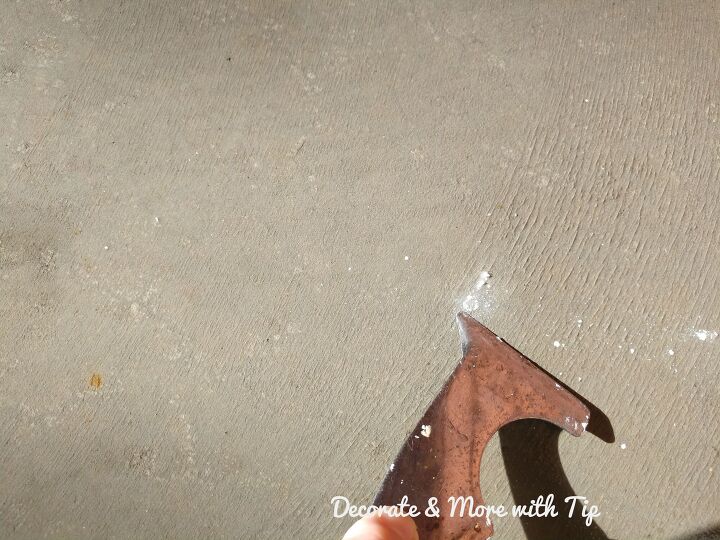
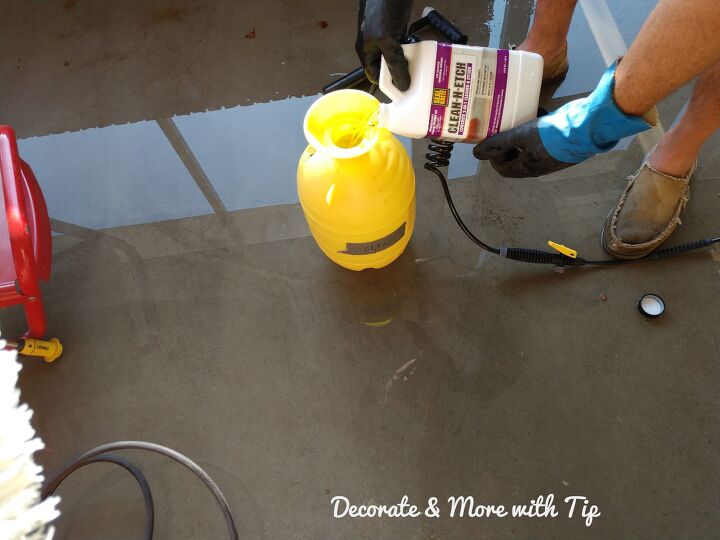
3. Etching the concrete.
We used a sprayer to spray the etching onto the floor. You can use a watering can if you don’t have a sprayer.
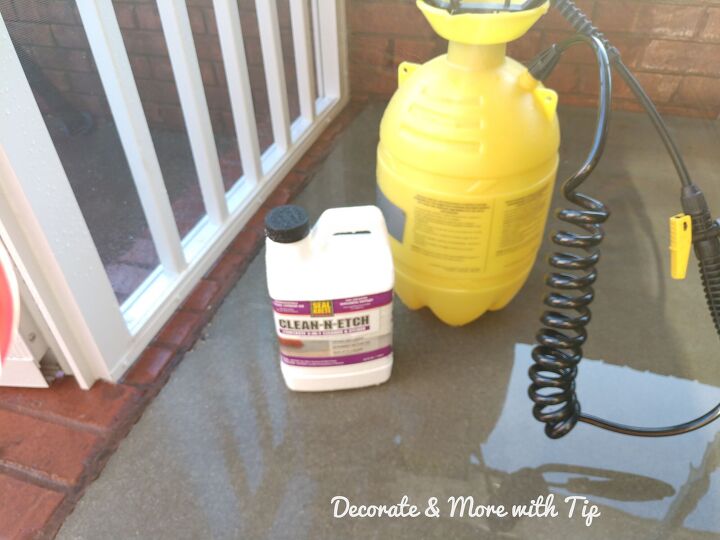
SHOP HERE →
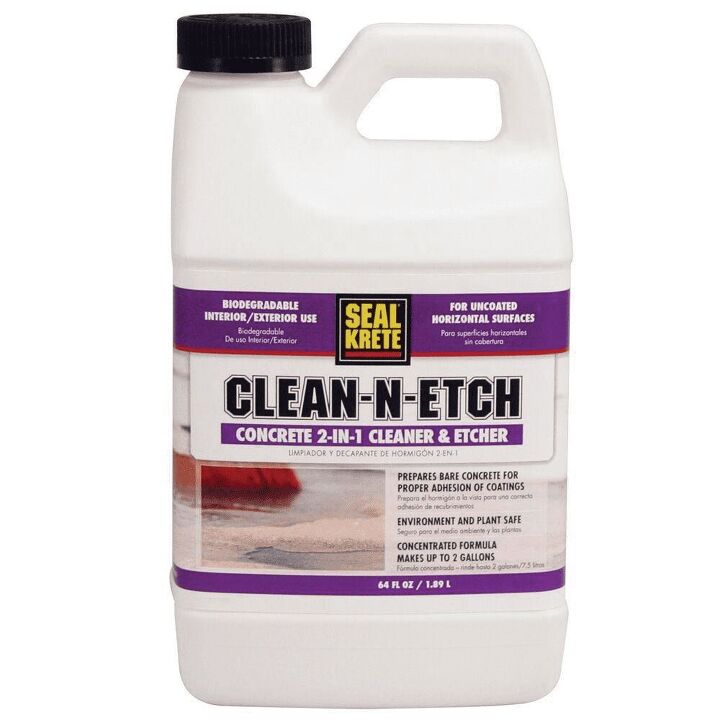
4. Spray the etching onto the floor. Using a stiff bristle brush using circular motions until the etching mixture stops foaming.
SHOP HERE →

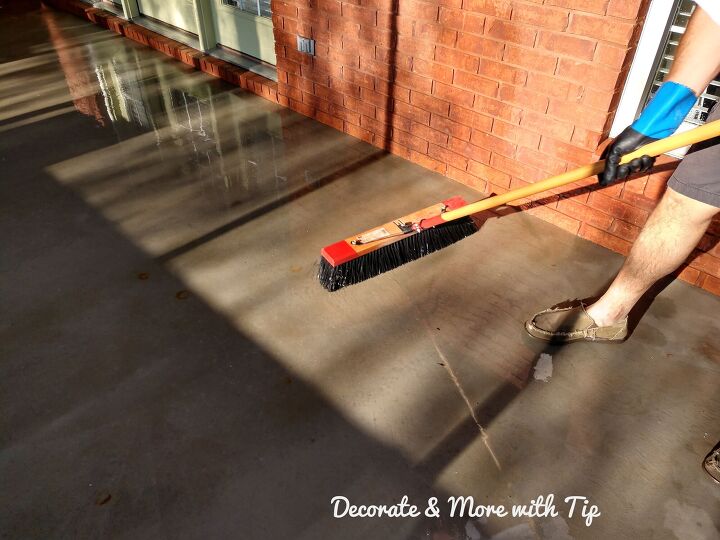
5. Wash the floor real good with water.
So after this, I threw my husband’s shoes away. He doesn’t know it yet!
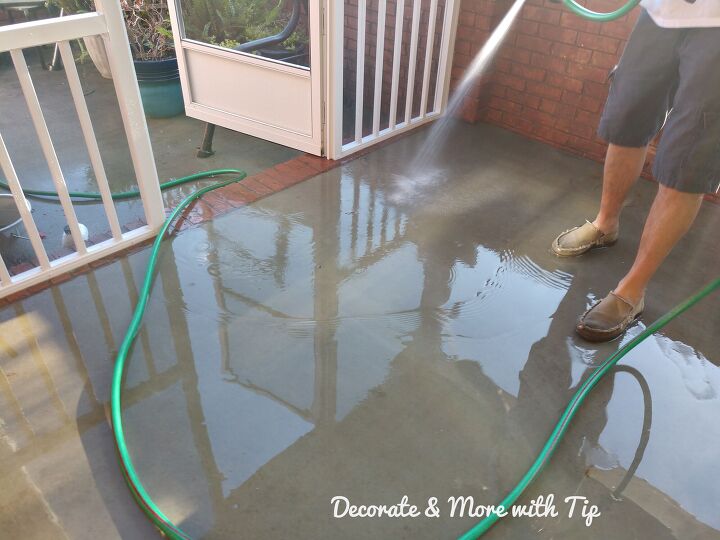
6. We squeegeed the porch.
SHOP HERE →

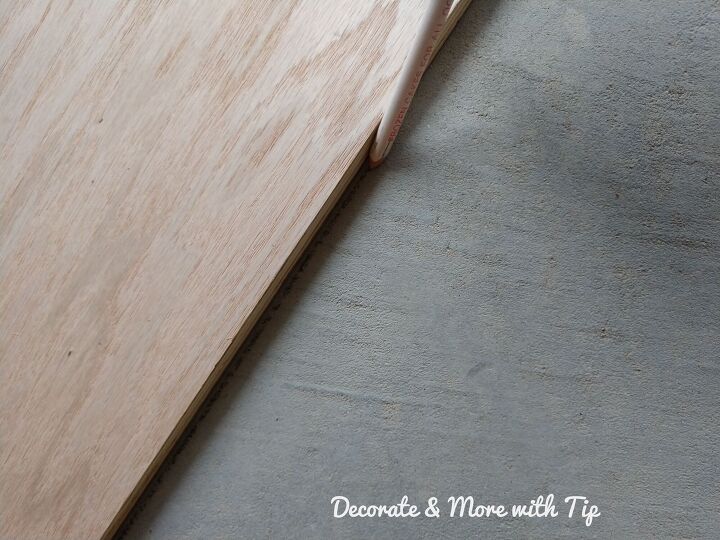
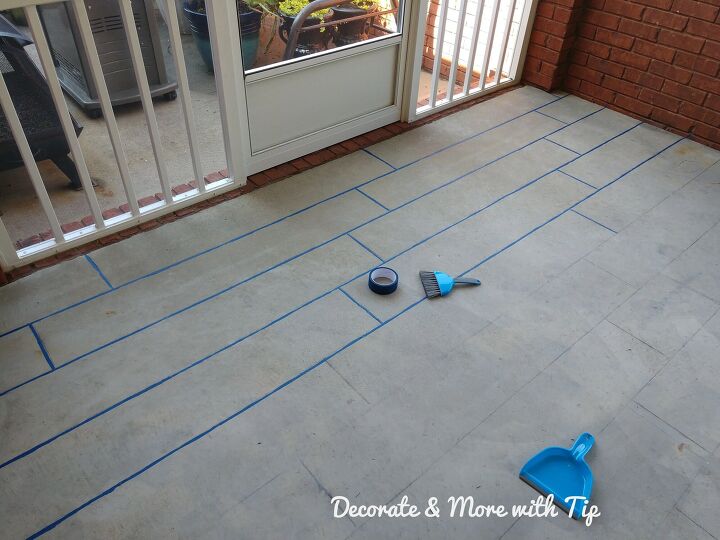
Two days later I marked my lines and taped them off.
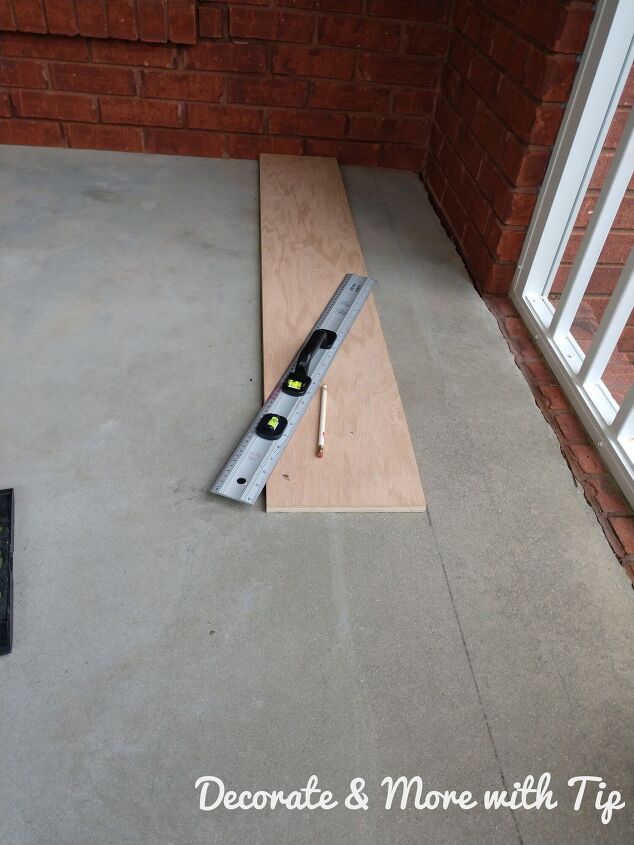
Using a 6″ x 4′ board for my template. Making sure my first line was straight I used my level. Marking the lines with a pencil.
Started making my lines.
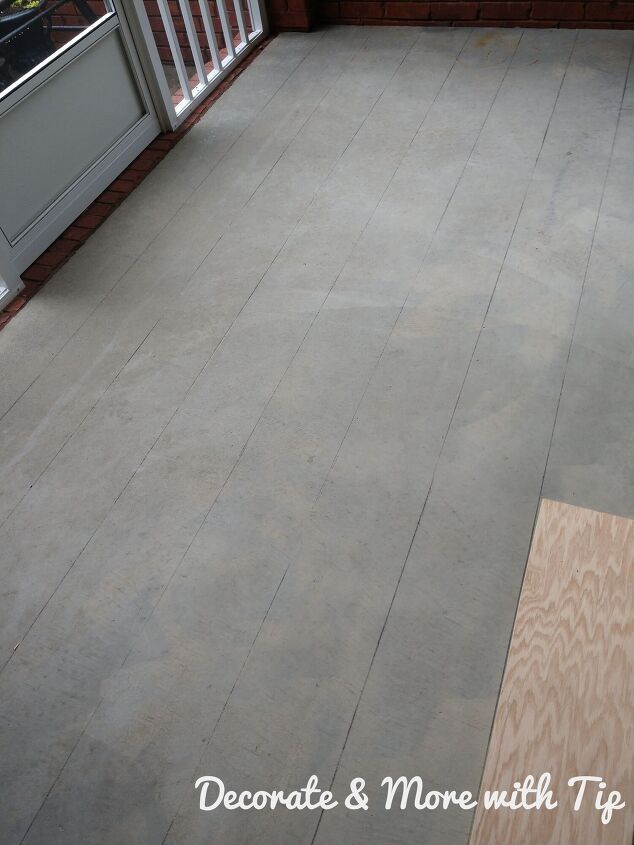
After I had all my long lines made, I need to make the short lines to make it look like boards. I started with a 72 inch mark and kept measuring 72 inches. When I came to the end of the porch that didn’t measure 72″ I brought the remaining measurements to the next top row. Example:
- First row 72″ – 72″ – 72 – 26″
- Second row 46″ – 72″ – 72″ – 52″
- Third row 20″ – 72″ – 72″ – 72″ – 6″ and kept this system until I marked the last row.
After I made all my lines I started taping out the lines. I used painters tape, I looked all over for painters tape that was 1/4″ wide and couldn’t find it. I just cut my own with a crafting knife.
SHOP HERE →

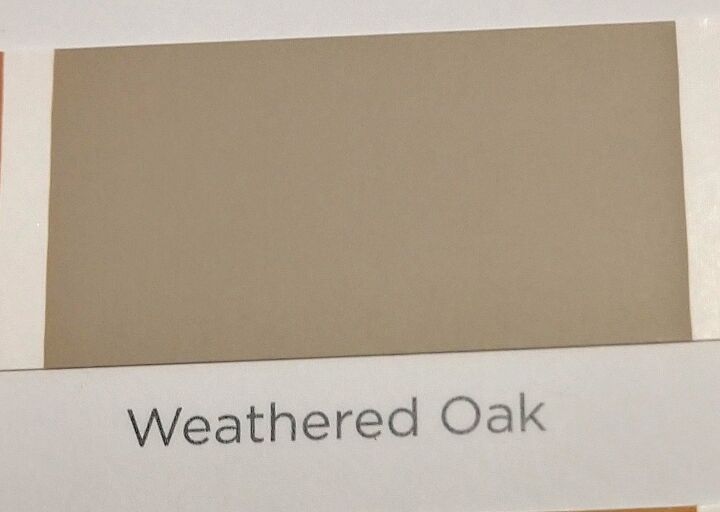
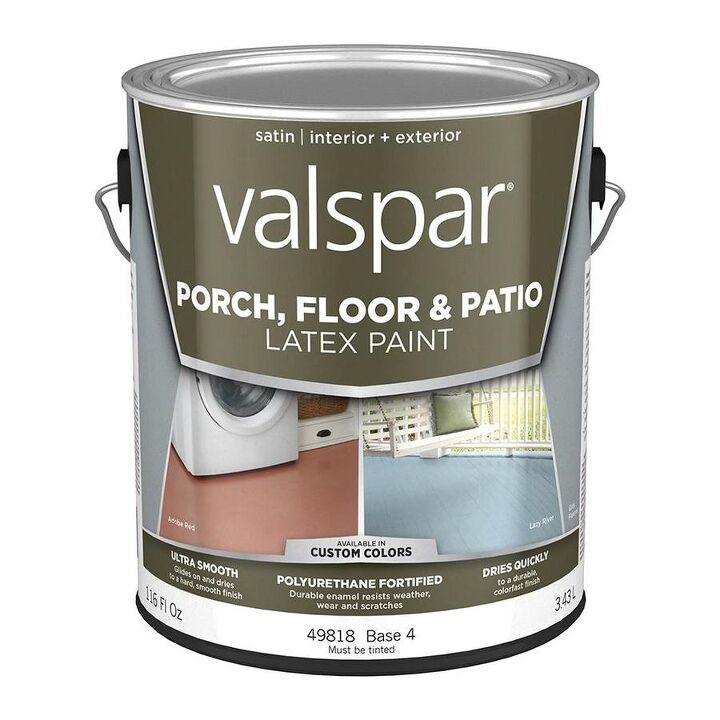
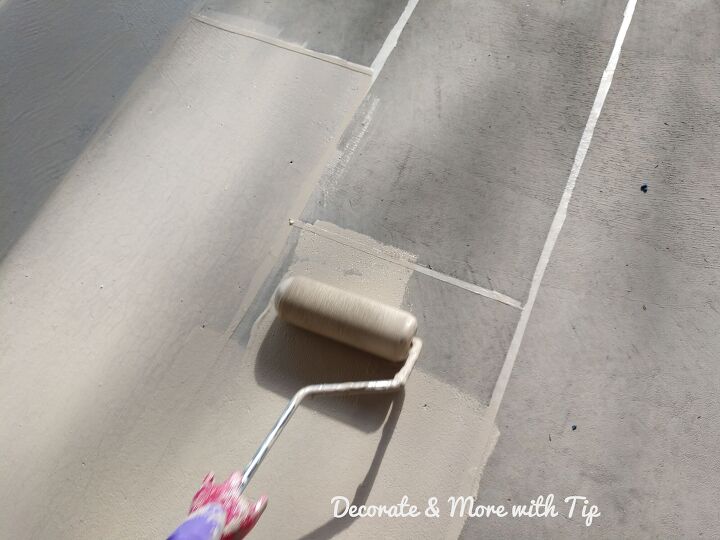
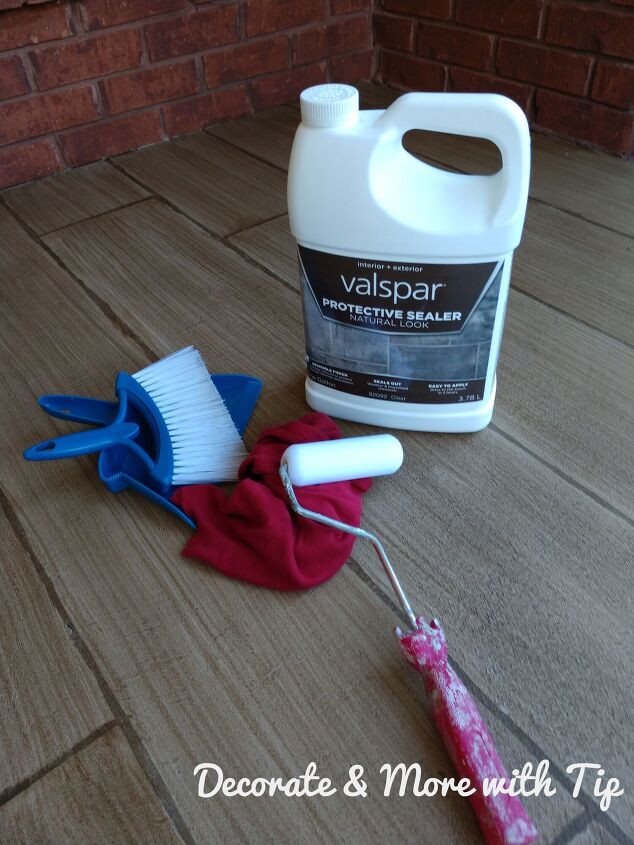
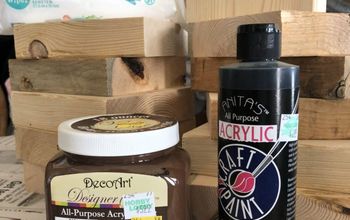
I used Valspar Porch and Floor Latex Paint.
Paint – color Weathered Oak
SHOP HERE →
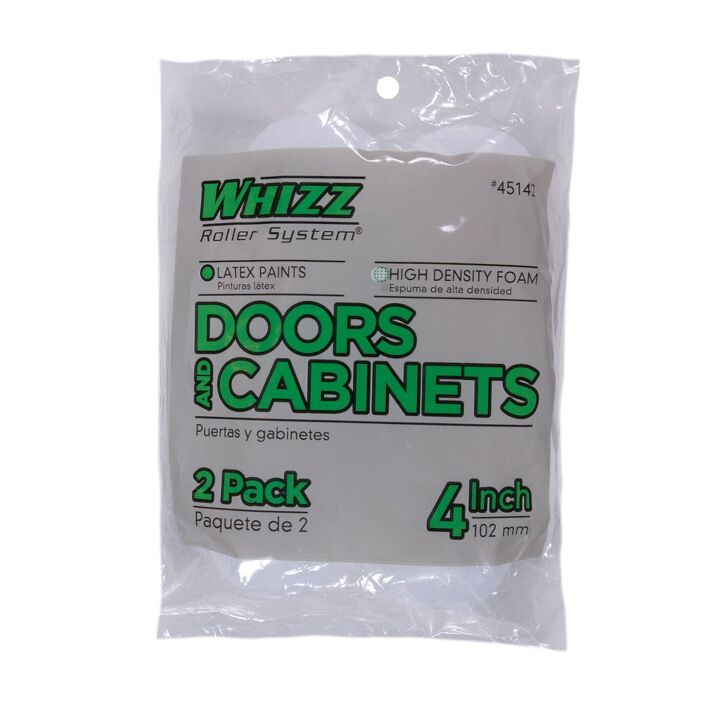
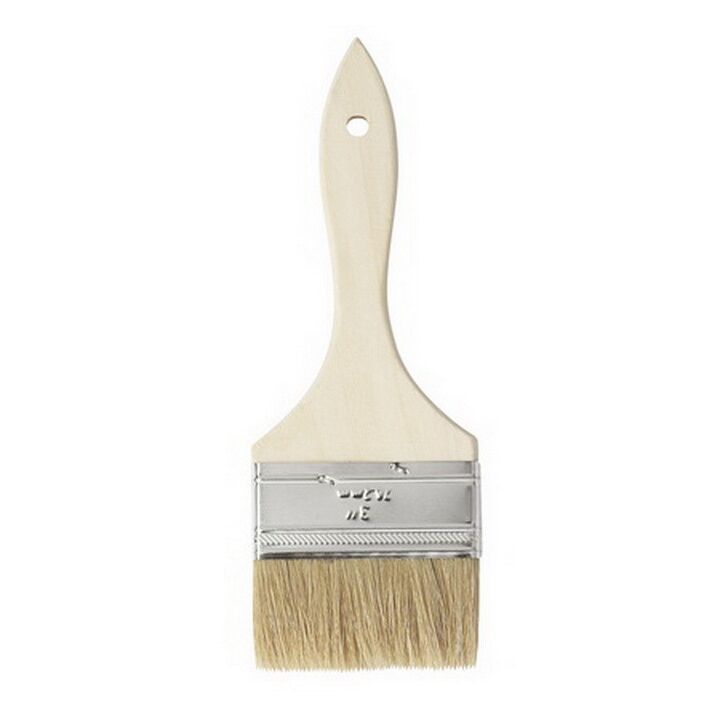
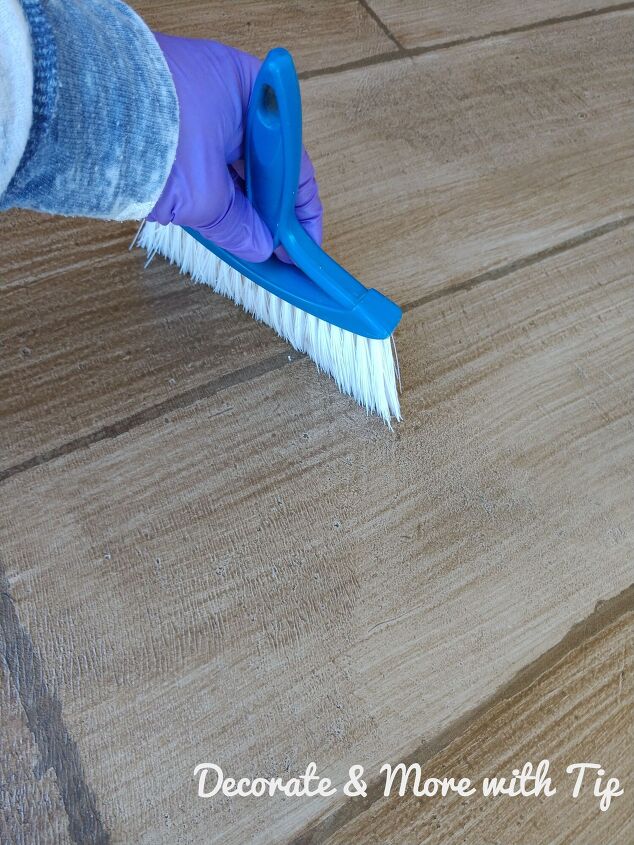
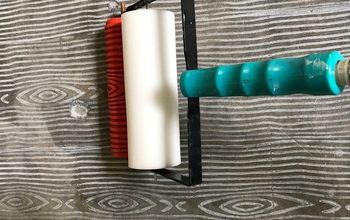
I used a paint brush for edging, sponge roller to apply the paint and a Dollar Tree hand broom to make wood grains in the paint.
- In areas where I couldn’t use the roller I used a chip paint brush.
- I rolled the paint on sections at a time.
- Used the hand held broom to make wood grain marks.
SHOP HERE →

(You can tell I ran out of blue painters tape).
After the section had paint on it I took my little broom and sweeping it down that section.
I wanted some details to make it look like wood grain.
Once I had it all painted I removed the tape.
NOTE TO SELF: The best thing to do is to remove the tape before the paint dries. Since I was by myself, the paint was dry by the time I was able to remove the tape so some of the edges came off with the tape. UGH!
I let that dry for 24 hours.
I wasn’t real happy with the paint tearing off with the tape. Some places had chunks removed. I just went ahead and started staining.
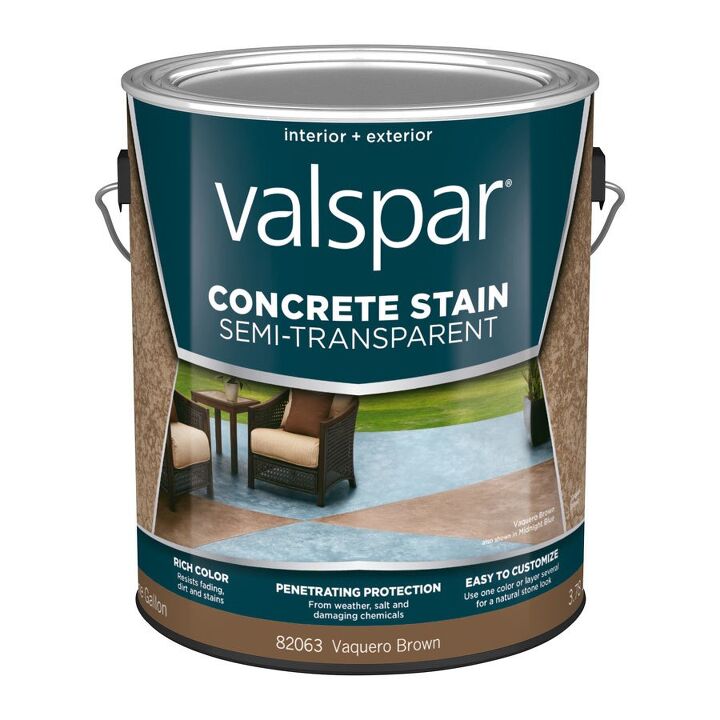
I used Valspar Semi-Transparent Concrete stain color – Vaquero Brown.
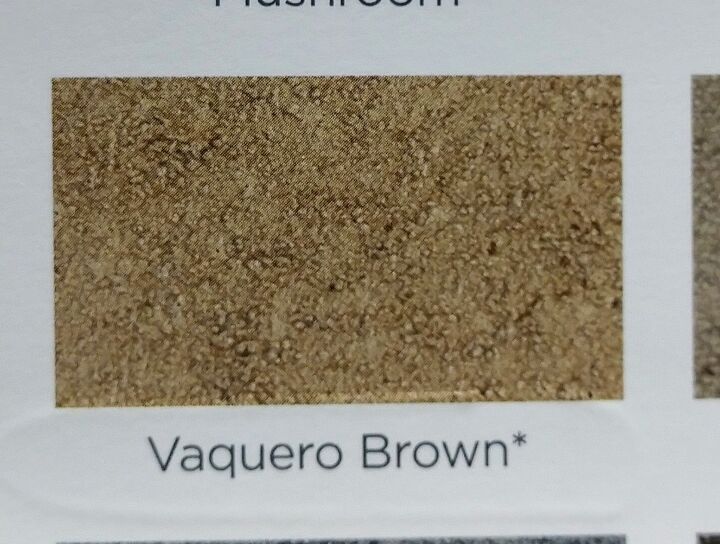
SHOP HERE →
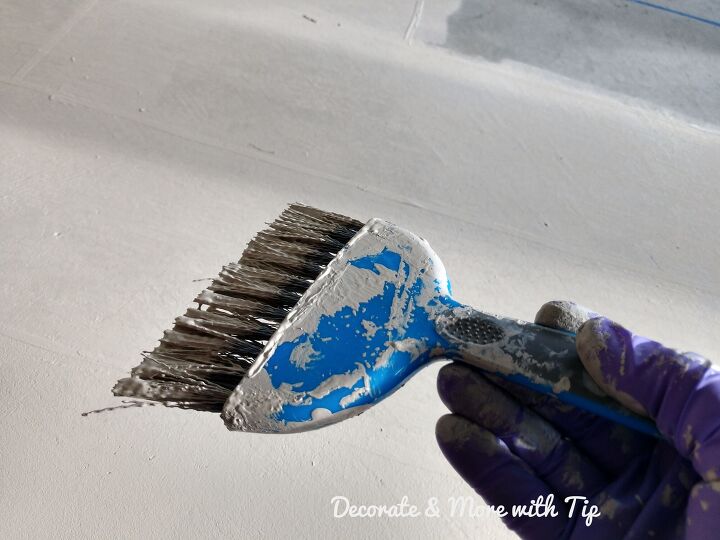
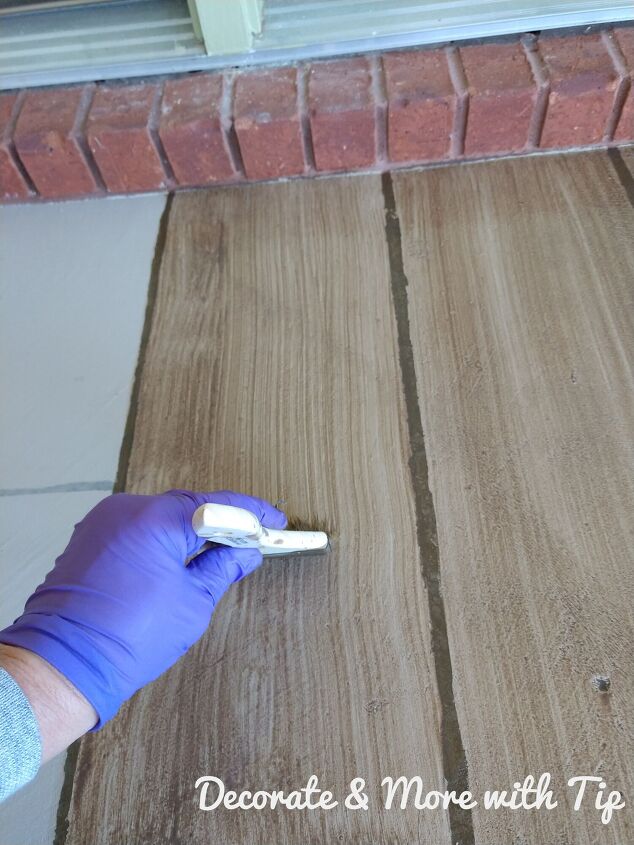
Used another chip brush for the staining process.
Even though I was using the same color on the whole entire floor I did one “board” section at a time.
Let me share a story with you. Back when I was in high school I had to do a map of the United States. My best friend was sitting with me at the table during study hall period when I was getting my color pencils out to color my map. She told me “if you color each state separately it will look nicer than just coloring the whole map.” It did and that advice has stuck with me ever since.
Before I started staining I used my little broom and swept the area to make sure all dust and dirt were removed.
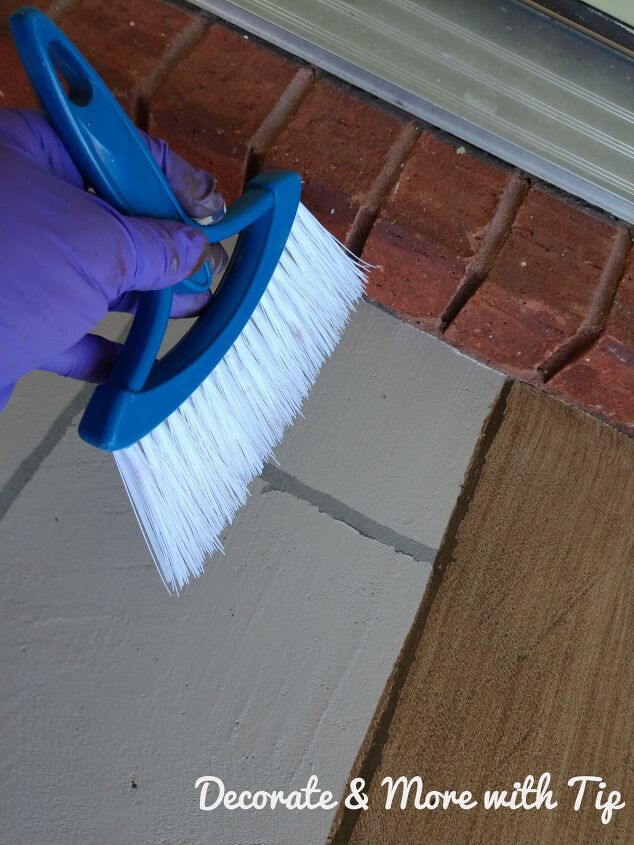
I lined out one section. I wiped off any access off the other sections.
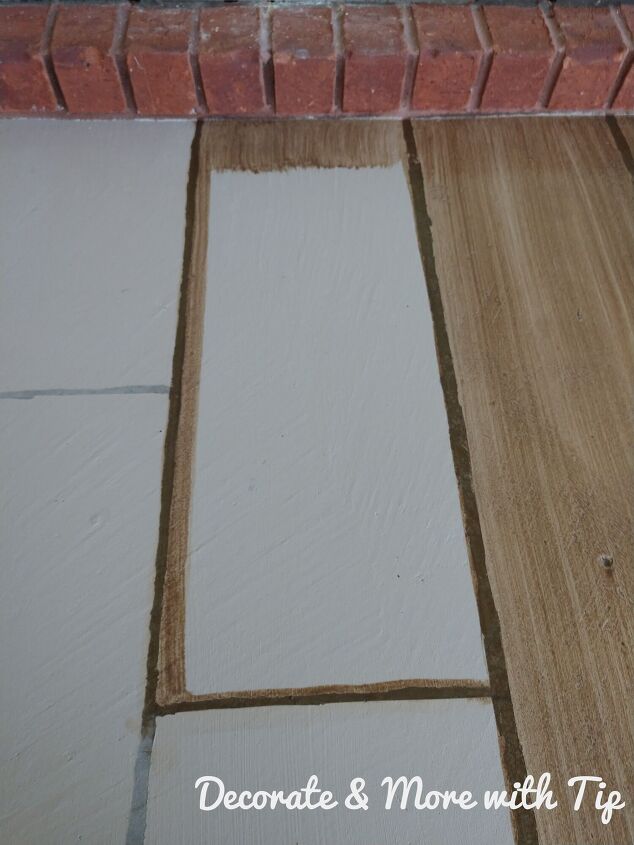
Using the paint brush I filled in the area with stain.
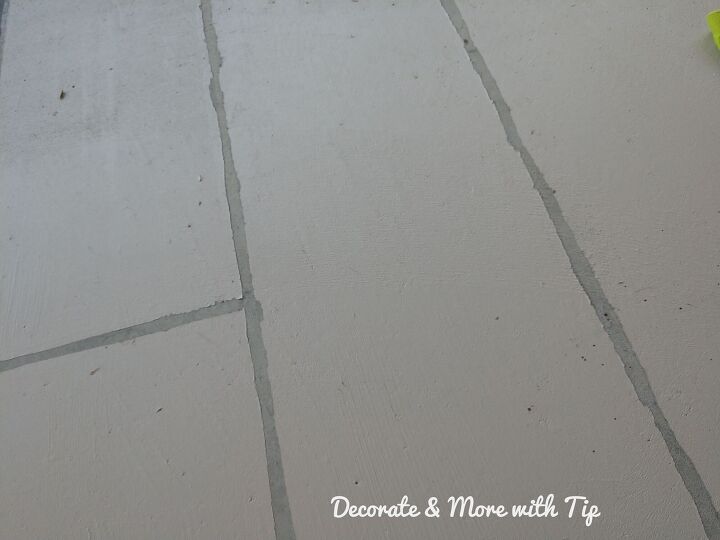
I took my paint brush and dragged the paint neatly down the section. I repeated this step until the whole section was done.
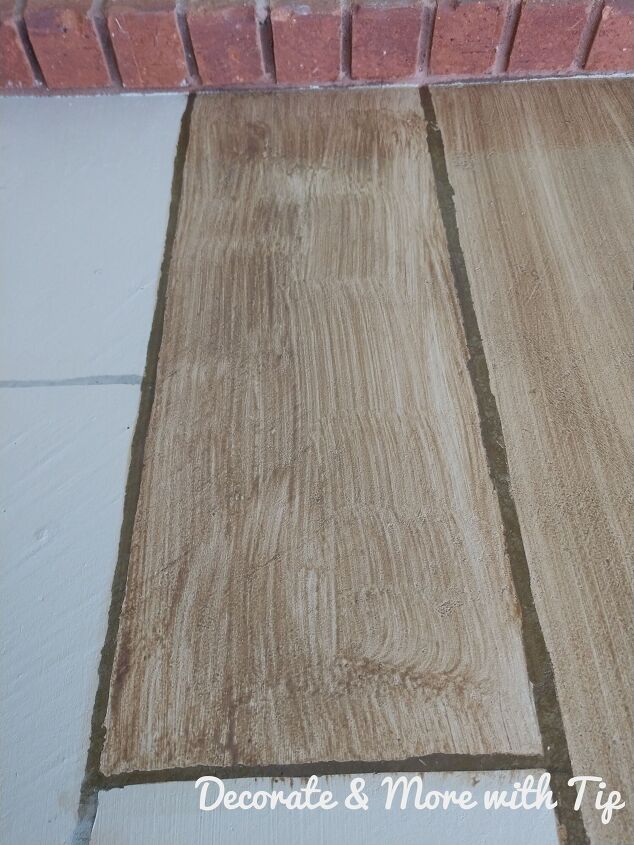
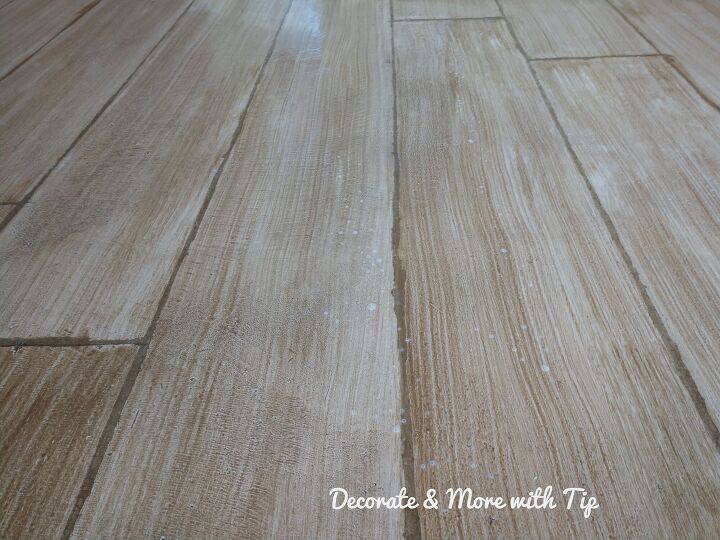
This is how it should look.
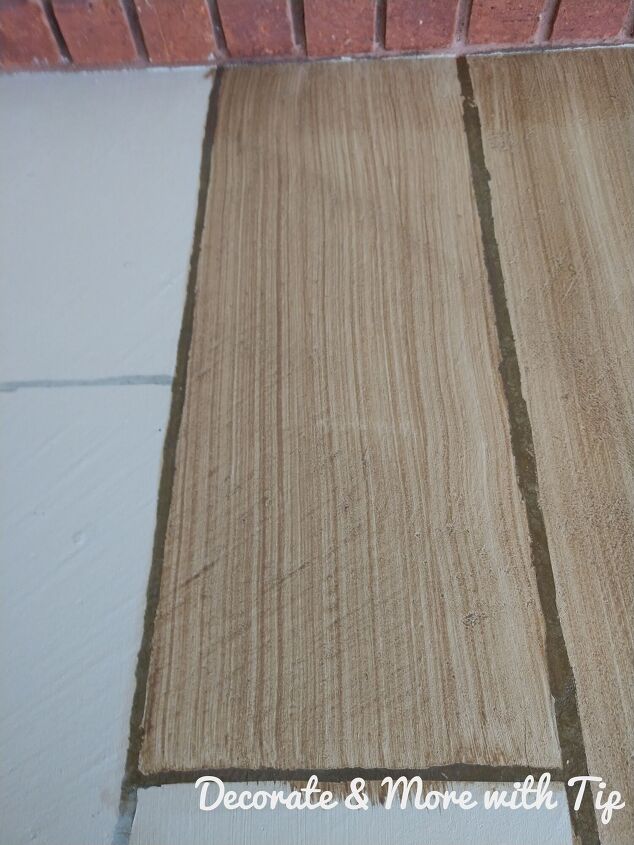
I did that technique to the whole floor. I am so happy with the jagged lines and the chunks of paint that was removed with the tape. Now I wished more would of came off. It looks like an old porch wood floor.
I let that dry for 24 hours.
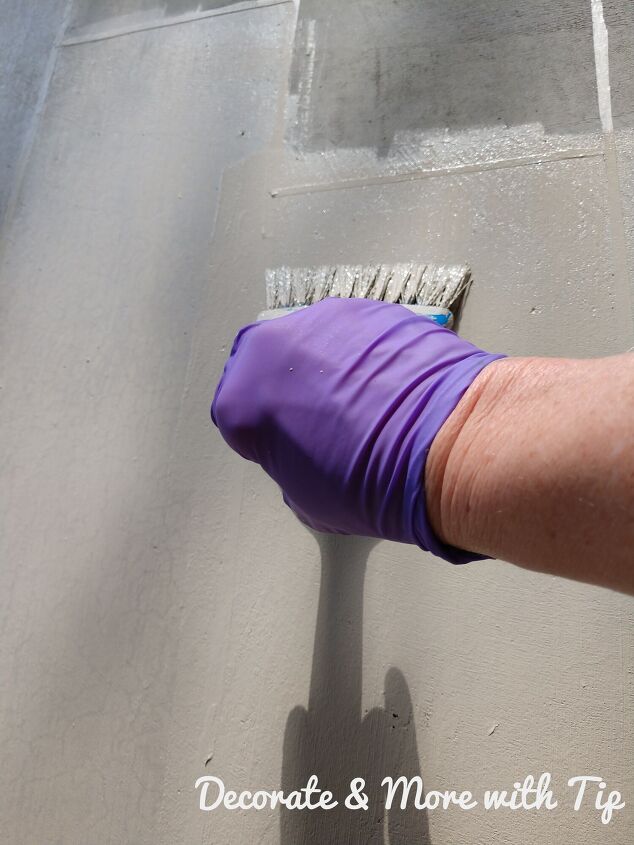
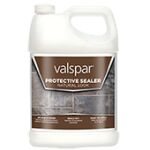
Using Valspar Natural Look Protective Sealer.
SHOP HERE →
I used a sponge roller and a clean dry cloth. (make sure you have several)
Again sweeping the area with my broom.
The sealer is real thin. I poured just a little in the pan at a time. I rolled the sealer in 3ft sections.
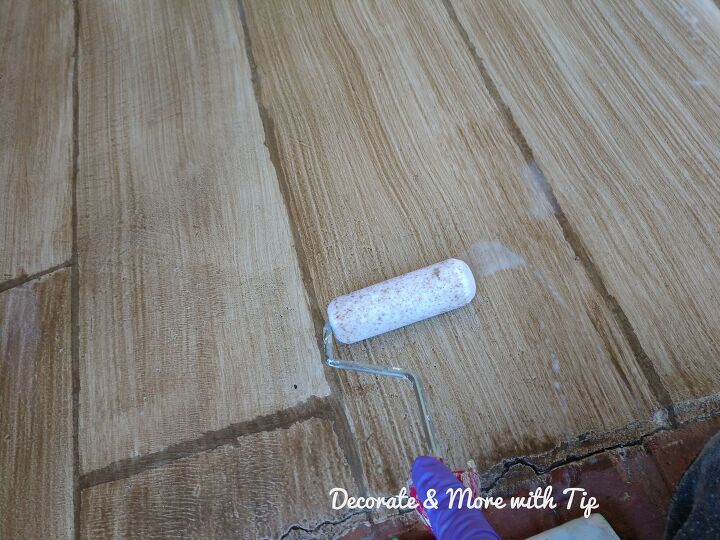
Let the first coat sit for 5 minutes, applied another coat with the roller then wiping the second coat off with the dry clean cloth.
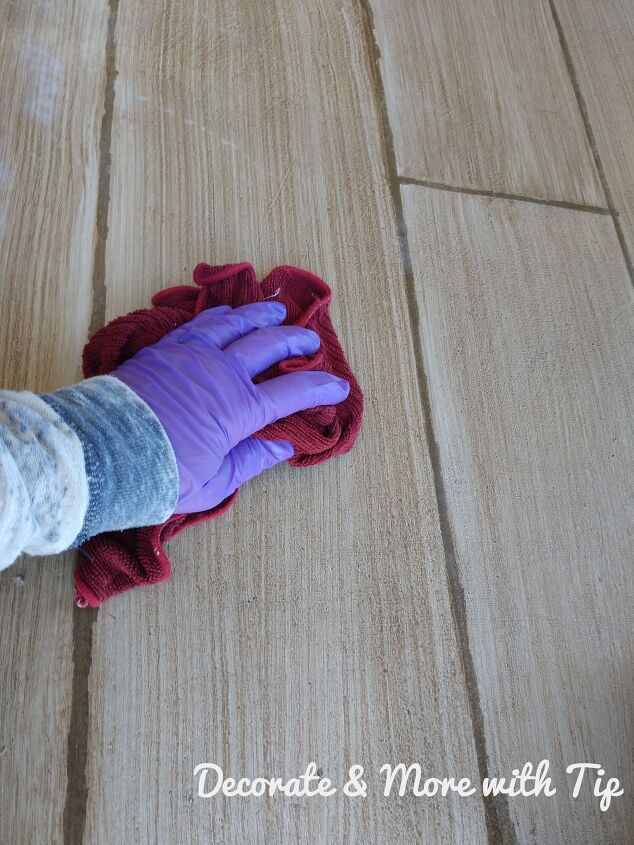
I did that to the whole floor.
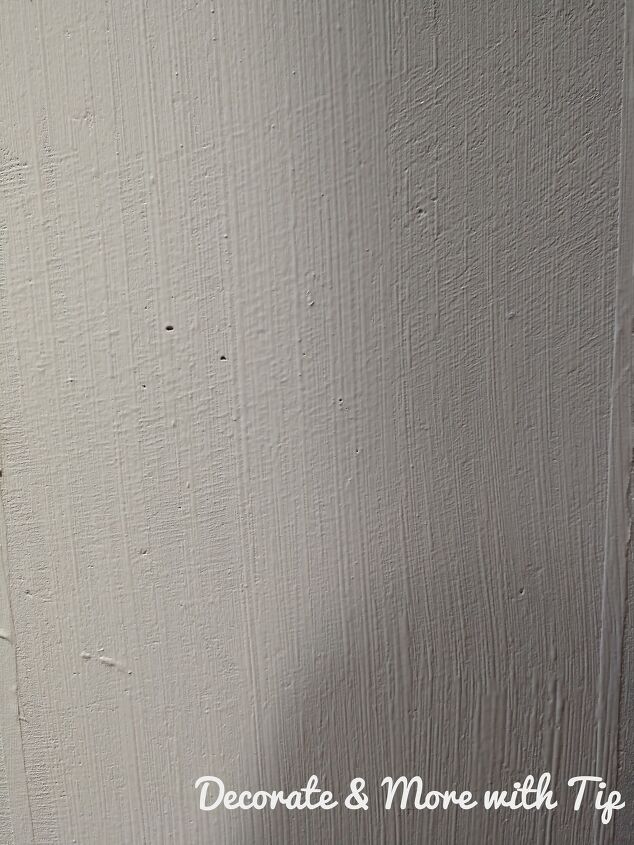
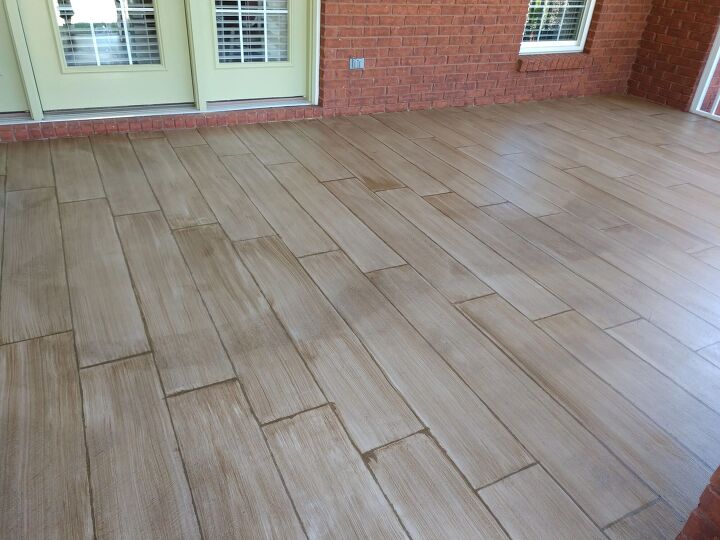
One thing I notice you can tell where the float marks are. I never noticed how poorly they smoothed out our porch floor before. The stain enhanced the marks.
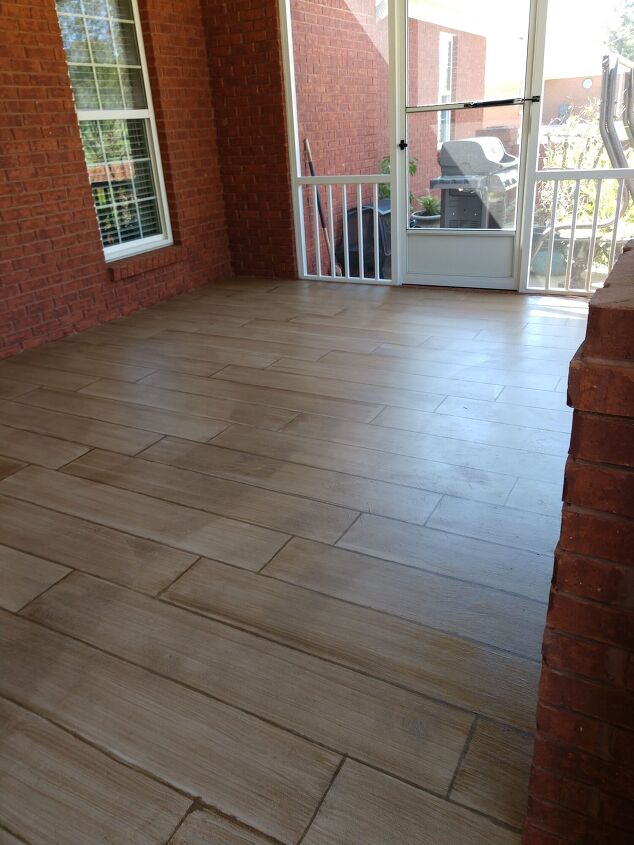
Even with the imperfection I love the look of our concrete floor. It took 5 days to get the floors finished. One day to prep it, one day to mark your lines and tape them out. One day to paint the flooring and remove the tape. One day to stain the floor and one day to seal the floor.
Thanks for stopping by to see how I painted our concrete floors to look like wood floors.
XO Terrie
Resources for this project:
See all materials


Comments
Join the conversation
-
Loved the look and I admire your enthusiasm to see the task complete!
-
This is one of the best ideas I've seen in a long time. Love it.


Frequently asked questions
Have a question about this project?
OMG!!! This is absolutely genius!!! Beautiful job.
What are float marks?
Is the paint a gray color and then the stain a slight brown? I just want to make sure I’m thinking right… I was thinking about using this on a porch column on my side porch or does it look more like brown wood?