


How to Install Peel and Stick Vinyl Tile Over Linoleum

Learn everything you need to know to install peel and stick vinyl tile over your linoleum floors using Floorpops tiles.
For more simple and budget-friendly DIY project ideas, be sure to follow us on HomeTalk and visit our blog!
Have you ever wanted to give your linoleum flooring an updated look?
Me too!
In fact, one of the projects I knew we had to do for my laundry room makeover was new floors.
After 15 years of wear and tear, our old floors were looking pretty tired.
And discolored in places.
When I was planning this room’s new look, I had considered wood-looking vinyl plank flooring.
However, when we started shopping for the flooring, it was really hard choosing something that wouldn’t clash with the wood floors in our hallway.
We considered floating vinyl floors like AnnMarie installed in her laundry room, but I would’ve wanted to do black slate too and didn’t want to do the exact same kind of flooring…
I love the look of painted ceramic tiles, but we were nervous about installing them ourselves.
Plus, they’re not cheap!
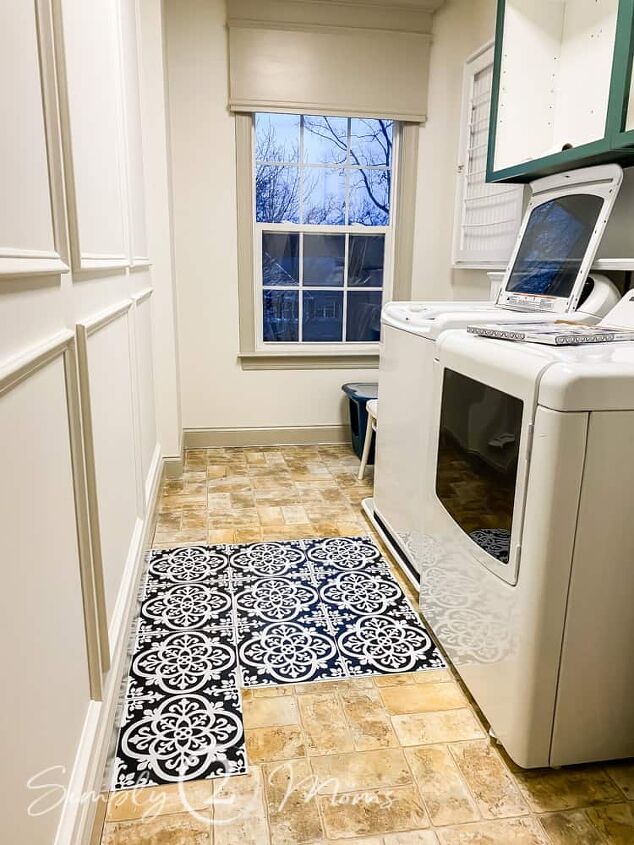
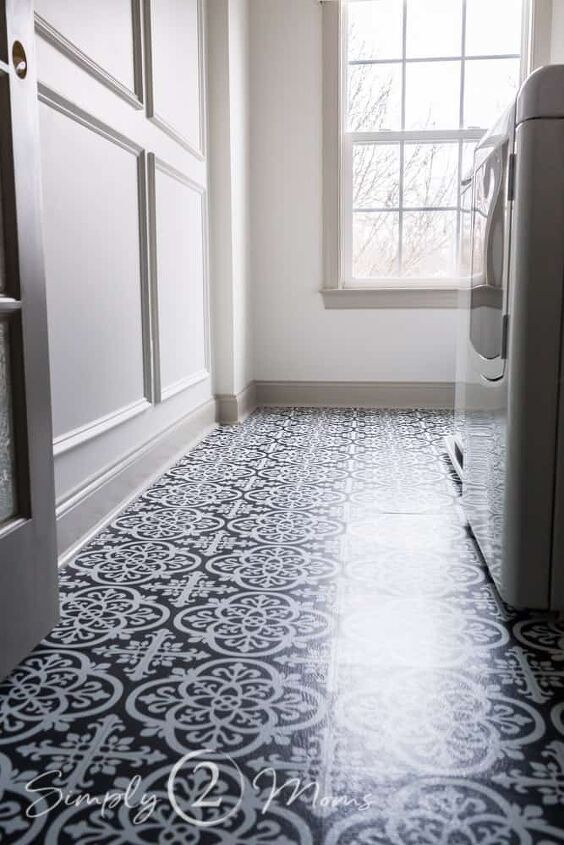
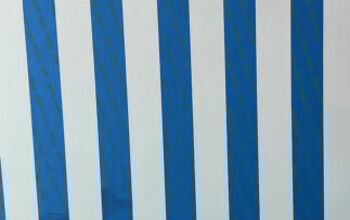
Then, I discovered Floorpops peel and stick vinyl tiles by Wallpops.
Their black and white Gothic tiles are very affordable and would give my laundry room exactly the look I wanted!
We did some research and came up with the best way to install the Floorpops vinyl tile over linoleum.
Then we measured the room and ordered the tiles!
When they arrived, I couldn’t wait to open a box and see how they would look in the room!
By this point, we had already repainted the room and built a custom wood valance for the window.
There was a new shelf over the washer and dryer, and the water hookup was hidden with a custom beadboard box.
We created a feature wall using picture moulding.
The space above the cabinets was enclosed and the laminate cabinets were painted.
We had even built a custom beadboard drying rack!
The only things left to do for the room were to hang and paint the new French door, and install the flooring.
How Do You Prepare a Linoleum Floor for Peel and Stick Tile?
There is some conflicting information about how to install peel and stick vinyl flooring over linoleum floors.
Some resources say you need to remove the linoleum first.
Others say you can install the tiles over top of the linoleum.
And others recommend covering the linoleum floors with primer to improve adhesion.
Our linoleum floors had some texture, but it wasn’t as highly textured as other linoleum floors we looked at in our local box stores.
So we decided to install the peel and stick floor tile over top of the linoleum.
But with a coat of primer.
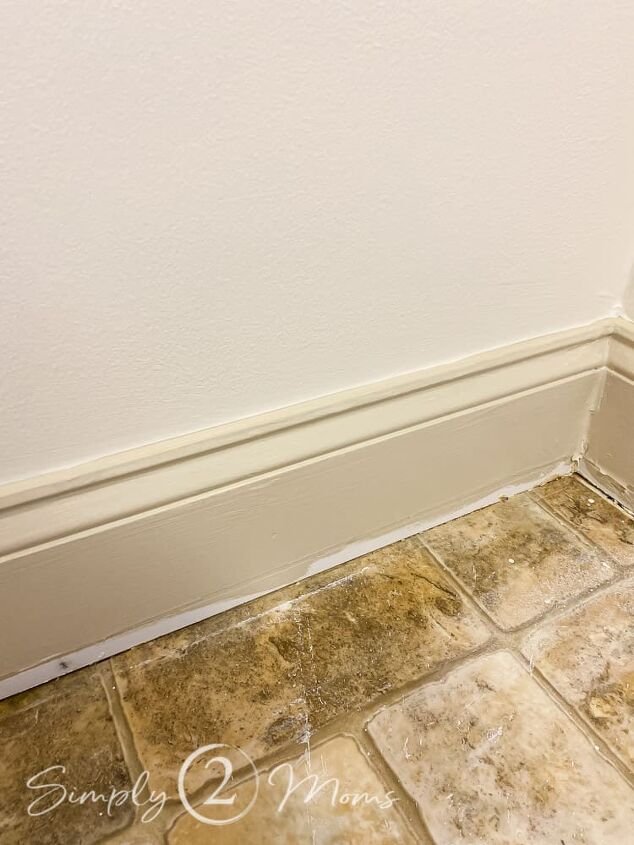
We removed the quarter round moulding before painting the room.
By the way, it was so nice painting the room with the old flooring!
When I dripped on the old linoleum?
No problem.
Plus no worrying about about moving a drop cloth around.
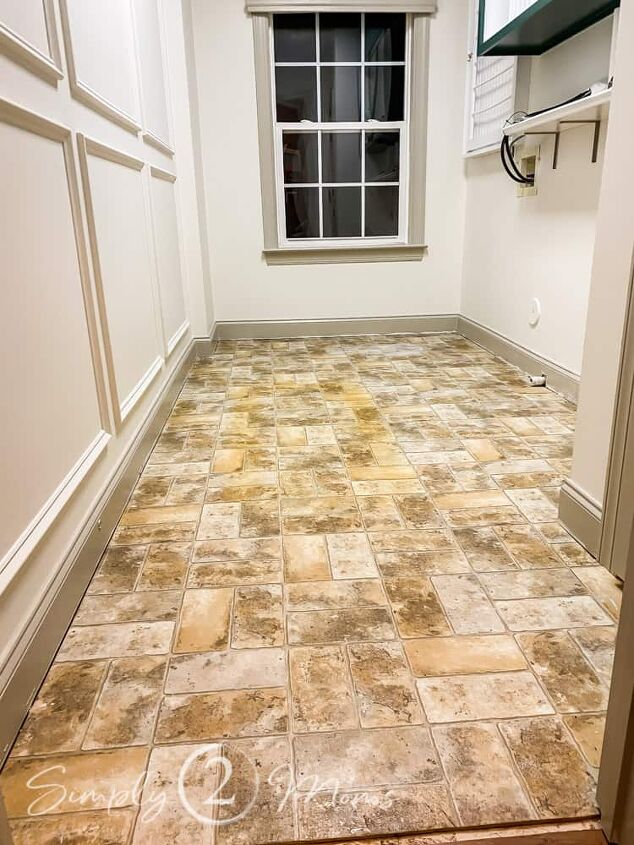
After emptying the room, we vacuumed and mopped the old linoleum floors.
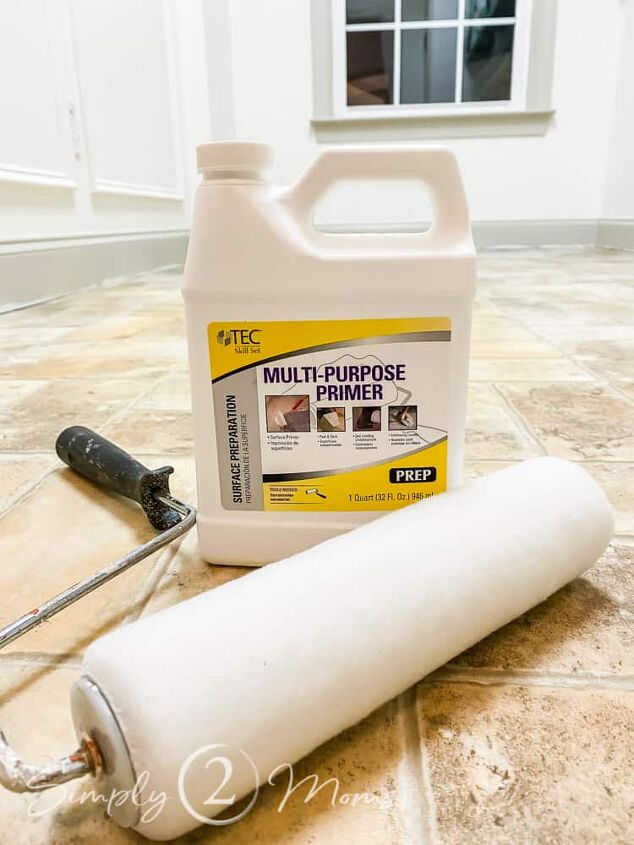
Then it was time to do the primer.
This TEC Multi-purpose Primer is recommended when you install stick on tiles over linoleum.
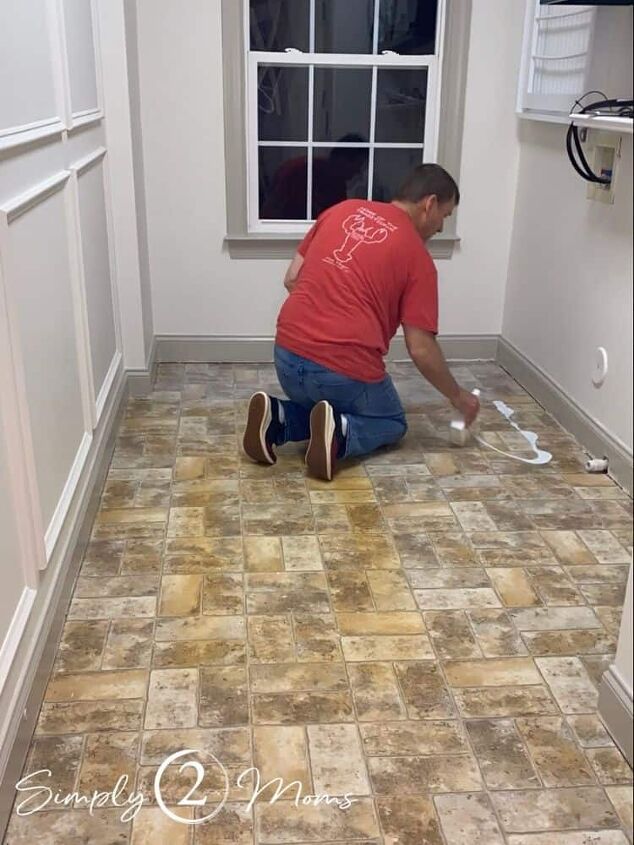
Just pour it on the linoleum, then use a roller to spread it over the surface.
Talk about easy!
It took less than five minutes.
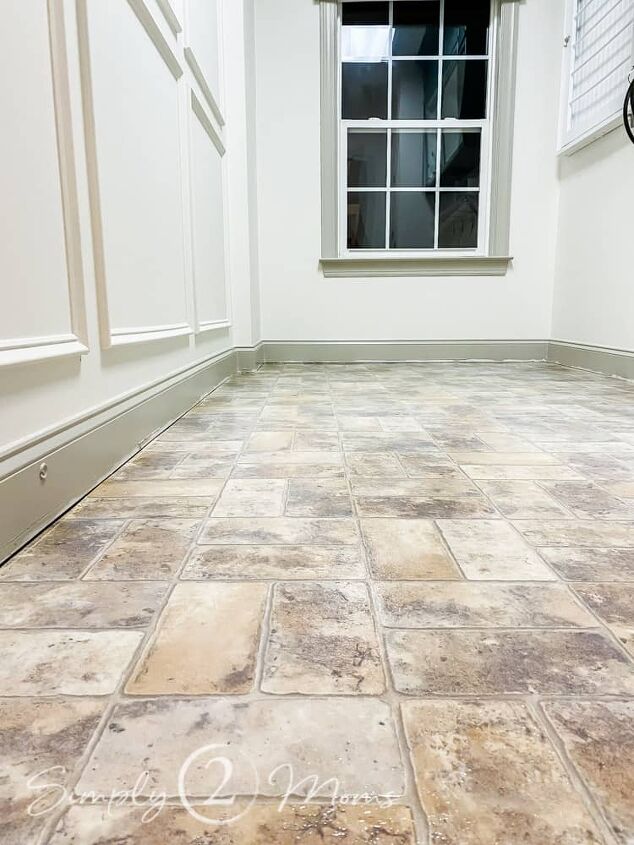
The primer helps fill in the texture of the floor, and also gives the floor a surface that will help the peel and stick tiles to stay stuck.
How Do You Plan The Tile Layout?
We played around with some different configurations for laying the Wallpops floor tiles.
Be sure to keep the backing on the tile while you’re playing around!
See that little bump out at the back end of the room?
That added a little challenge for laying out the tiles for this room!
We quickly decided we wanted the longer section to be full tiles, and then we would only need to cut two tiles a little shorter.
Also, the room is also just a little longer than 12 feet, which meant we would need to cut one row of the 12×12 tiles.
But, if we started with an uncut tile at the doorway, the cut tile along the window wall would only be 3-inches wide.
We were concerned such a short piece wouldn’t stay stuck.
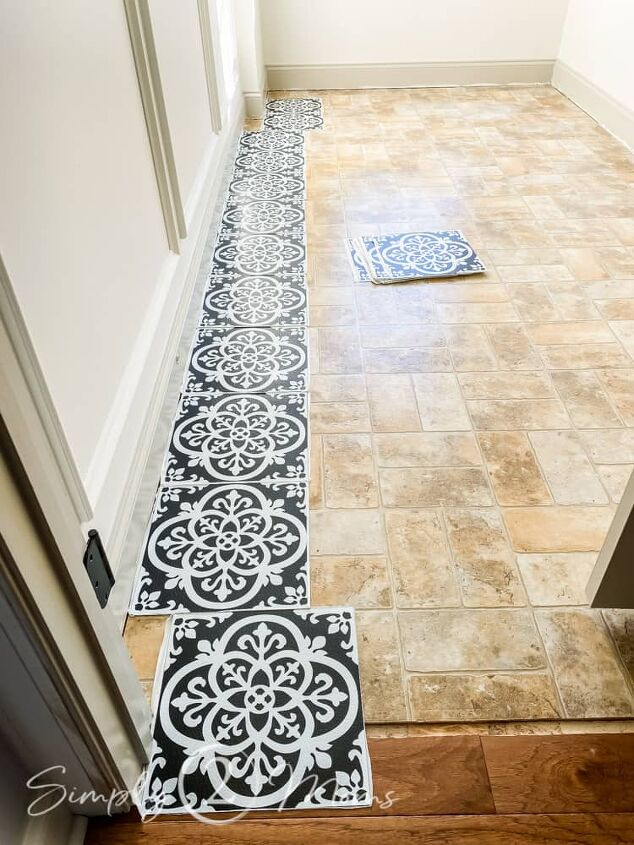
So we ended up cutting the tile at the doorway in half, which meant the tile by the window was longer.
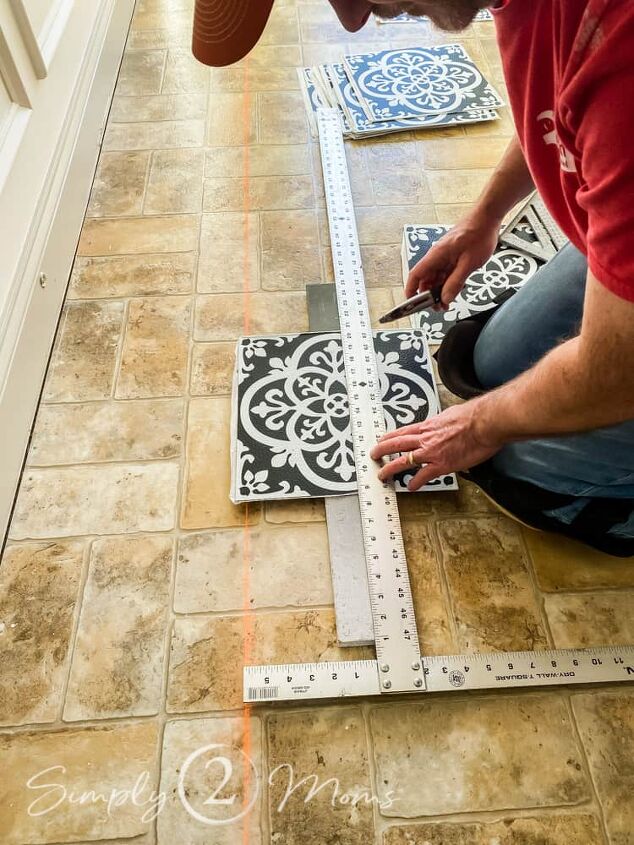
Before you get started installing the stick on tiles, get all your tools together first.
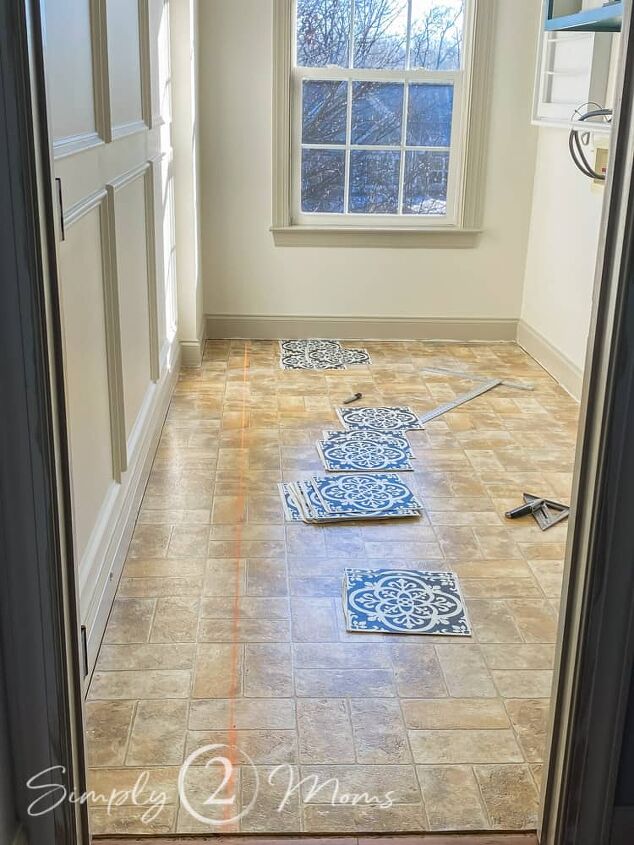
Then snap a level chalk line to be the guide for the first row.
Tools Required to Install Peel and Stick Tiles
- Chalk Line
- T-Square or Metal Straight Edge
- Level
- Utility Knife
- Multi Tool
You should also have a trash can handy to throw away the backings for the tiles.
They pile up quickly and are super slippery!
You should also get a piece of scrap wood that you can use as a cutting surface.
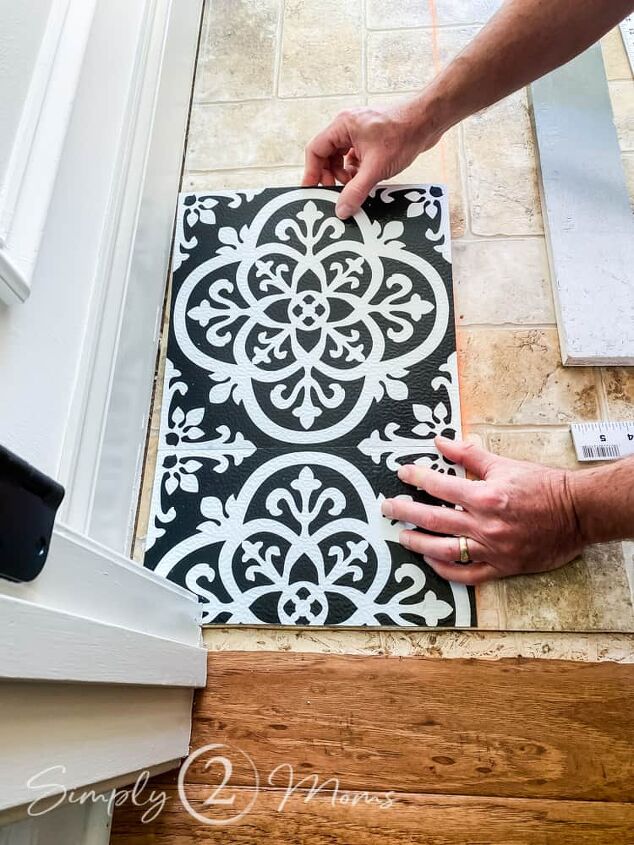
How Do You Apply Peel and Stick Tiles?
Get ready, because installing these peel and stick vinyl floor tiles is fast!
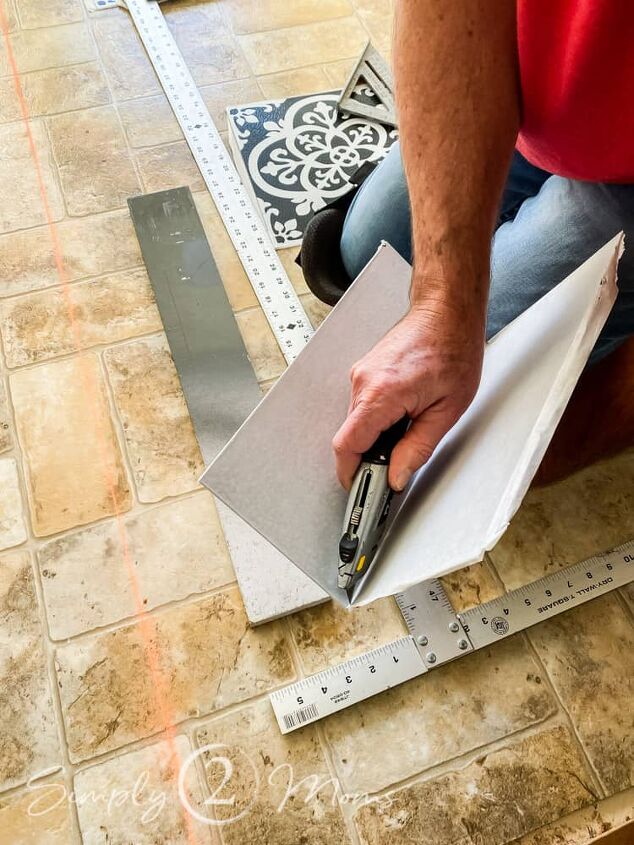
Use a metal T-square as a guide for cutting the vinyl tiles.
All you need to cut the Floor pops is a utility knife!
After you make the cut, simply fold the tile along the cut line to complete the cut.
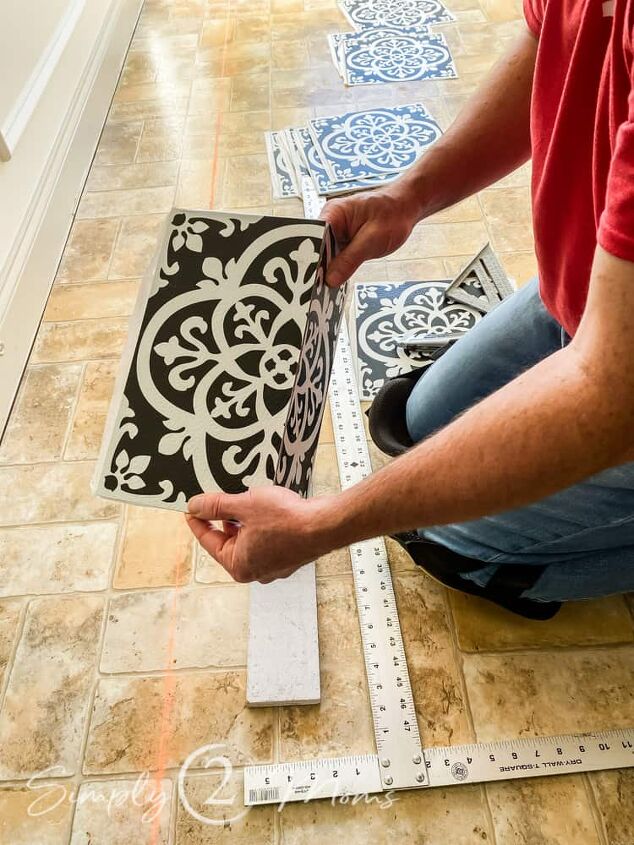
Then flip the tile over and use the utility knife to slice through the paper backing.
Remove the paper backing from the peel and stick tile, and attach it to the floor.
That’s it.
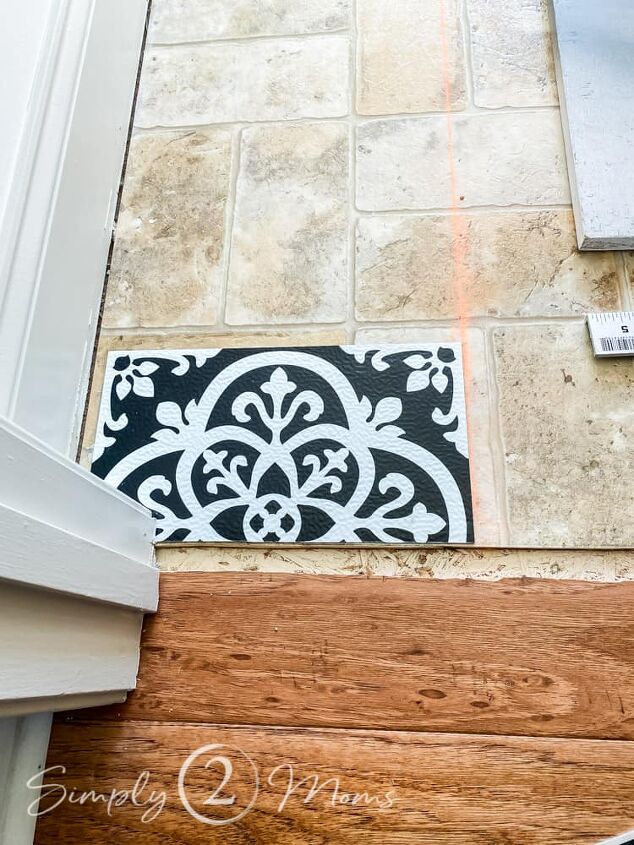
Our first tile needed to slip under the door frame.
The door frame had enough space for the tile to slip underneath without any additional work on our part.
If your door frame doesn’t have enough space, an oscillating multi tool like this one from Dremel, does a great job!
Now, use the level chalk line to line up the edge of stick on tiles.
As you can see, my laundry room isn’t square!
The tiles sat almost a half inch from the baseboard by the door, and end up flush with the wall by the far end.
This is why you use a level chalk line to line up your tiles, not the wall…
The quarter round moulding completely covers up the gap.

Once the first row was installed, the process went so quickly!
I took care of installing all of the whole floor pops tiles, while my husband handled the cuts.
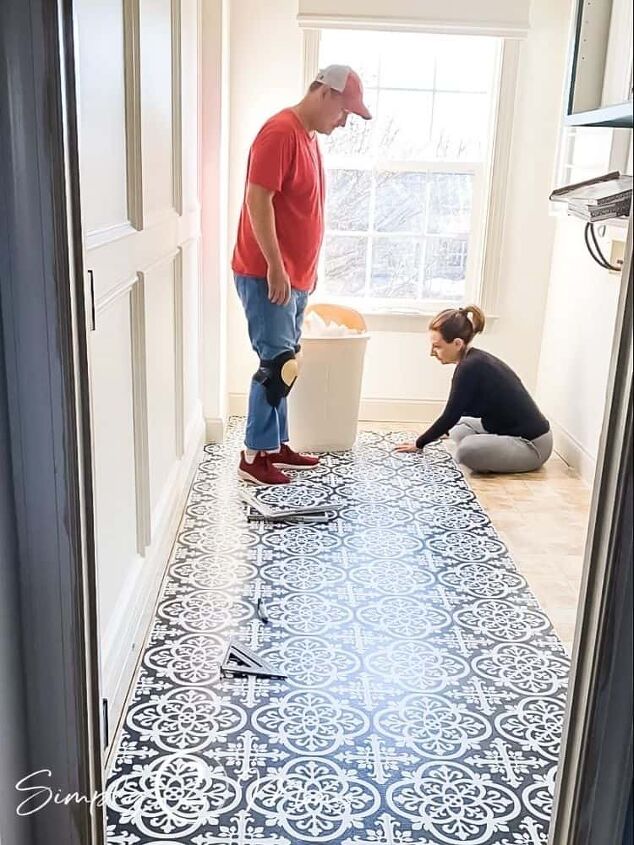
Keeping the trash can handy meant there was virtually no mess during the installation.
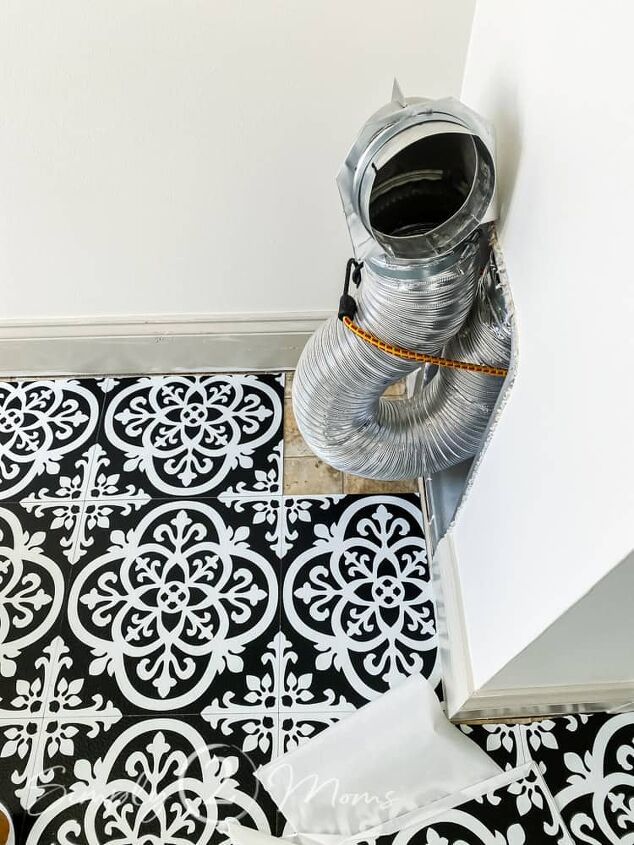
If your dryer vent is dragging on the floor, a bungee cord does a great job of getting it out of the way!
We were able to use some of the cut tiles to fill in the small holes like the one above.
Should You Use Adhesive With Peel and Stick Tile?
Once all the tiles are installed, a weighted vinyl floor roller will help the tile adhesive to hold.
We rented this roller from our local rental shop for $14 for a half day.
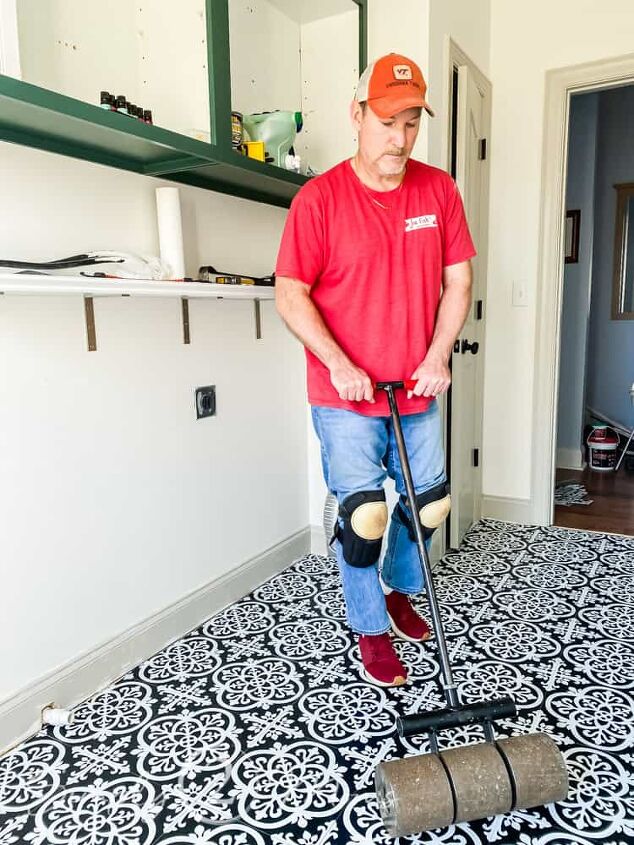
While most of the tiles stuck well, there were a few that needed a little more adhesive, even after rolling.
We used this adhesive for any floorpop tile that wasn’t lying completely flat.
The tiles along the window wall all needed the additional adhesive because there seems to be a slope to the floor!
If you follow my tips, you should have great success with installing vinyl tile over linoleum too.
If you have any questions or suggestions, contact me or leave a comment!
Don’t miss any of our tips, tricks, or stories! We’d love for you to follow us on social media! You can find us on TikTok, Instagram, Pinterest, and Facebook.
Resources for this project:
See all materials


Comments
Join the conversation
-
I love it!!!


Frequently asked questions
Have a question about this project?
I have a boring tile floor in my bathroom. Would this still work? Or do I need to fill in the grout somehow to have it really level?
Will this same process work well on a garage floor?
Love the tiles. The pattern is very pretty! Would love to cover my ceramic 12x12 floor tiles. Don't like the tiles or the grout! Where did you get your tiles and what is the name of the pattern? You did a Fabulous job!!