


How To Stencil a Personalized Tile Floor

7 Materials
$45
5 Hours
Easy
Hello again! We have a great stencil project this week that allows you to customize your own floor. Sounds cool right? The best part is it’s super easy. Let’s get stenciling!
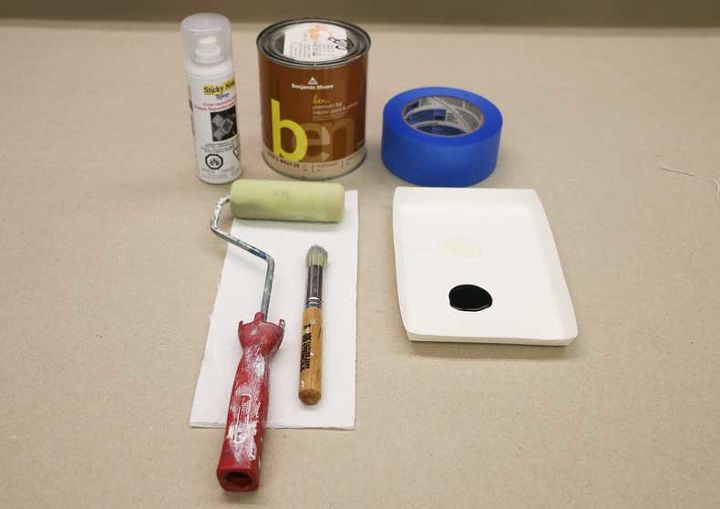
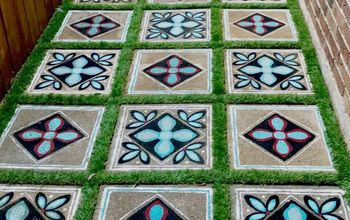
The stencil used for this personalized tile floor is the Metro Hex Tile Stencil. The paints used were Benjamin Moore Navajo White and Black. Spray adhesive is recommended for this project because the bridges of the tile stencil are very small. You can use a 4” stencil roller for the tile stencil and a professional stencil brush for the lettering.
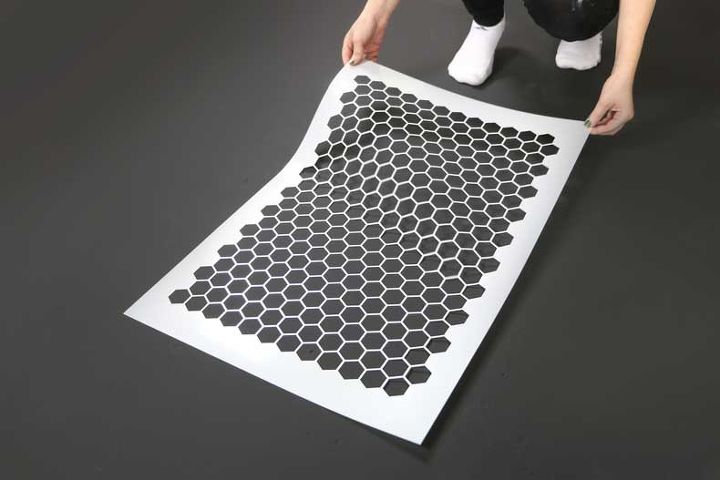
After you’ve cleaned your floor paint it black, or whatever color you desire. This will be the color of the grout lines in between the hexagon tiles. Allow the floor to dry completely. Place your tile stencil on the floor to start.
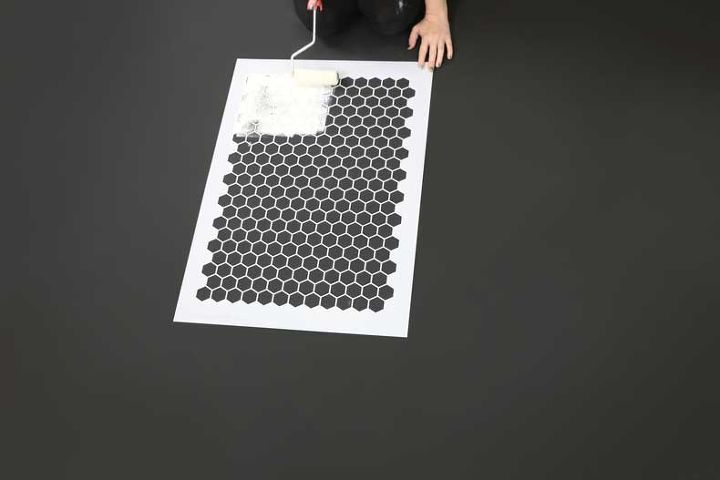
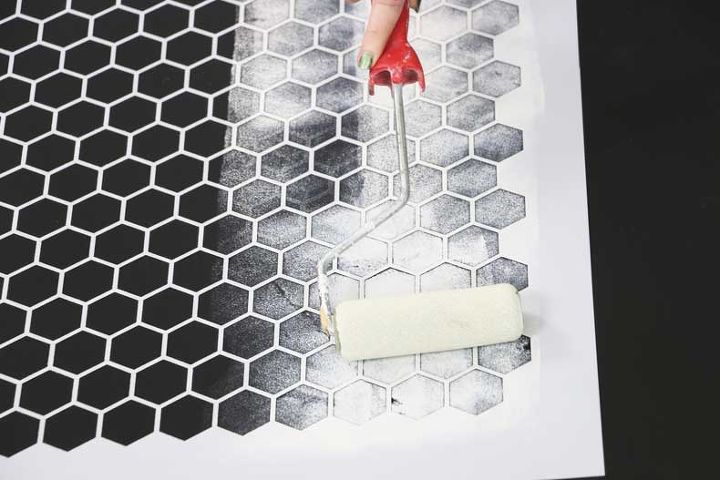
Fill in the stencil by applying light pressure to the stencil roller. Make sure to offload any excess paint from your stencil roller onto a paper towel before stenciling the floor. This helps reduce paint from seeping underneath the stencil. The number one mistake when stenciling is having too much paint on your stencil brush or roller!
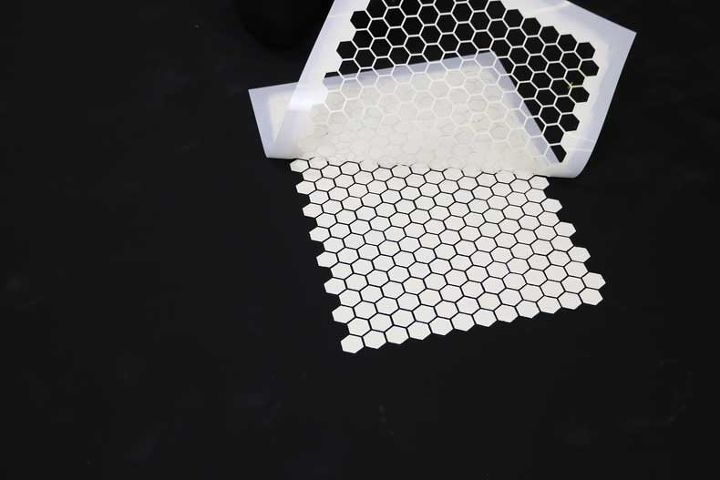
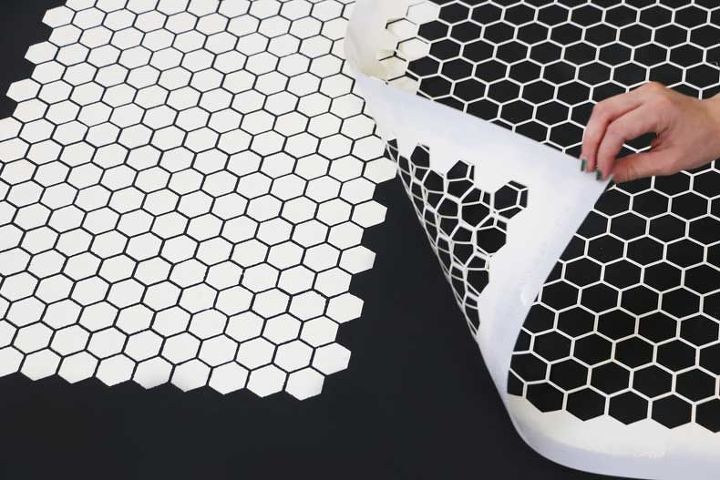
Peel back your stencil to reveal this awesome tile? Doesn’t that pattern just pop?
For the next section, simply align the tile stencil with the previously stenciled portions. This registration system makes stenciling a breeze!
Keep stenciling until your floor is filled with this beautiful hexagon pattern. The design looks so intricate but with a tile stencil, it was no trouble to create at all! Onto the lettering portion of this DIY stencil project.
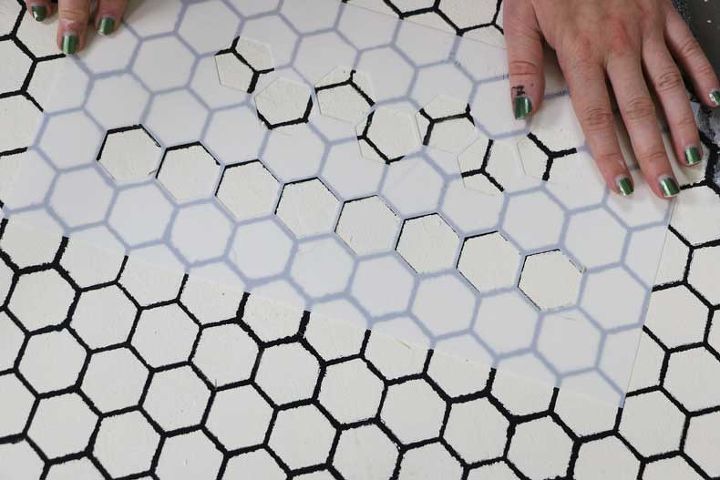
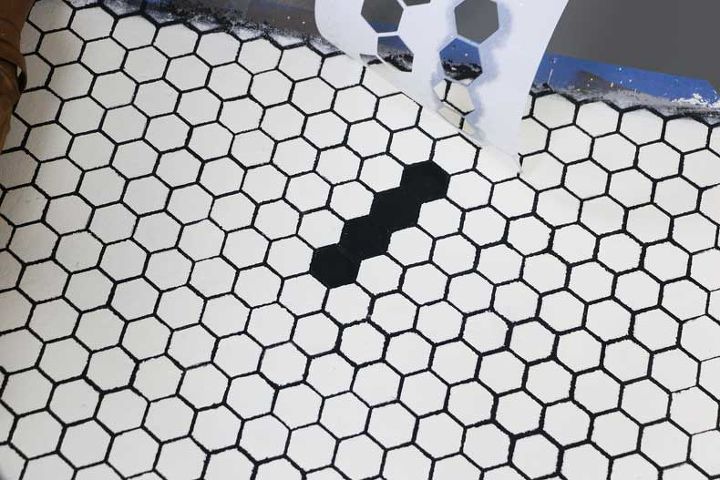
The Metro Hex Tile Stencil comes with a FREE stencil that allows you to create letters on your tile floor! This is the key to personalizing your tile floor. You can spell out whatever you want to say. Feel free to express yourself! To start, we found the center of this tile floor by counting the number of hexagons horizontally and vertically. To make sure the words are centered we decided to work our way from the middle of the stenciled floor outwards. Pro Tip: map out the letters using the stencil and mark the hexagons you want stenciled with a pencil.
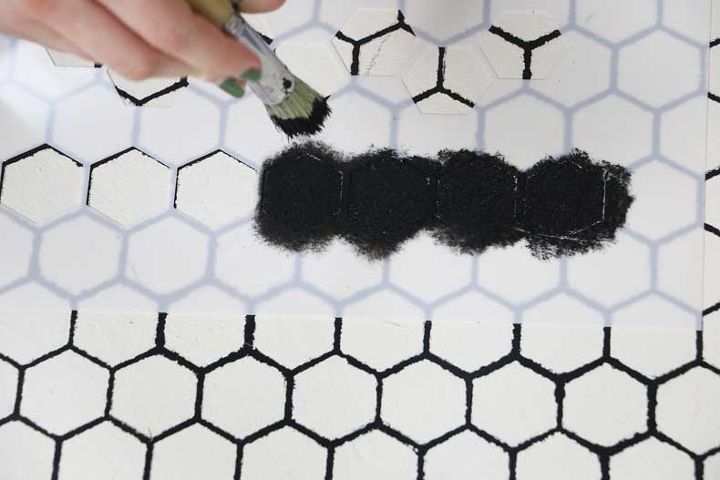
Stencil the letters with a professional stencil brush. These brushes are great for smaller details such as this!
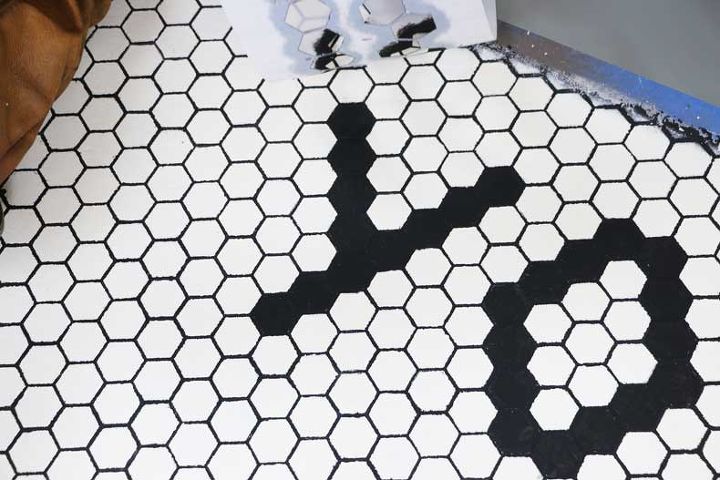
Peel back the stencil to reveal the portion of the letter you just created.
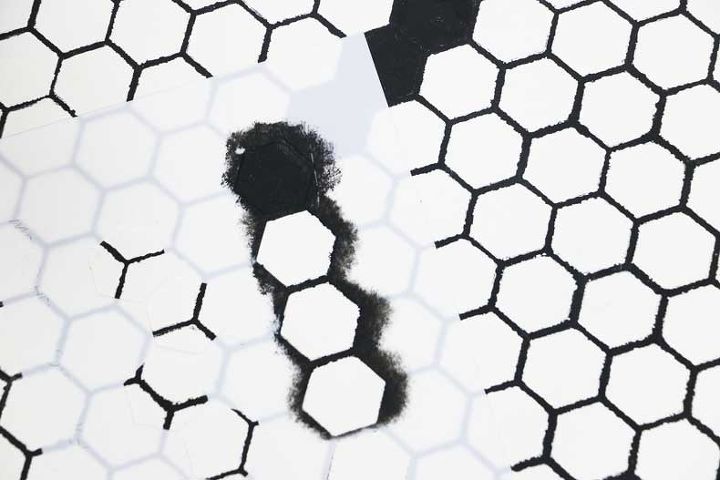
Align the stencil and continue to fill in the hexagons to create your personalized tile floor.

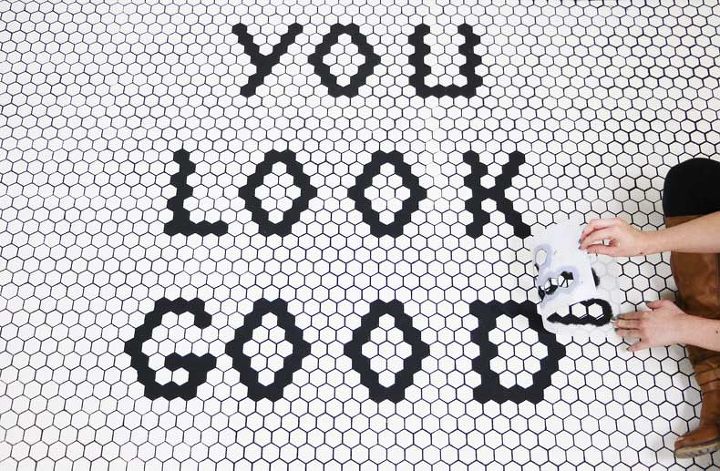
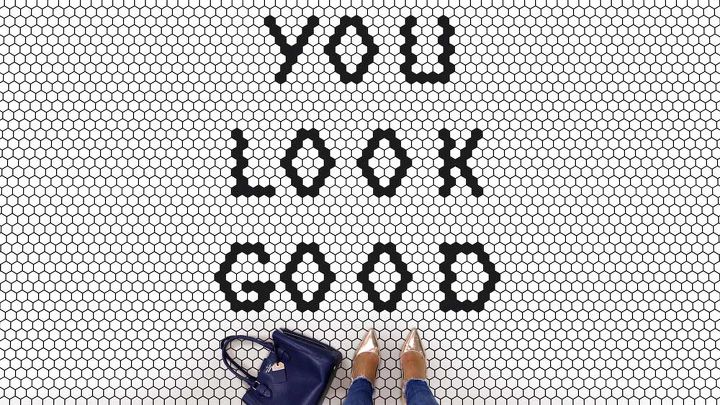
How cool is this personalized tile floor? What looks complicated is actually so easy! What would you spell out on your tile floor? Leave your thoughts in the comments below.
{
"id": "5104601",
"alt": "",
"title": "",
"video_link": "https://www.youtube.com/embed/UhxdI5vv4Q0",
"youtube_video_id": "UhxdI5vv4Q0"
}
{
"width": 634,
"height": 357,
"showRelated": true
}
Resources for this project:
See all materials


Any price and availability information displayed on [relevant Amazon Site(s), as applicable] at the time of purchase will apply to the purchase of this product.
Hometalk may collect a small share of sales from the links on this page.More info
Comments
Join the conversation
2 of 4 comments
-
Great job. I wouldn't have the patience for it.
-
Call me totally crazy, but I'll bet with just a bit of modification, you could do a "counted cross stitch" pattern on a floor OR a wall with this technique! Hmmmmmmmm... ~wanders off to examine walls and floors~


Frequently asked questions
Have a question about this project?
Do you have to wait for each section to dry before beginning the next section? Seems it would smear if you laid the template overlapping the wet section.
Do I need to cover the finished floor with something to protect it?
I see from your step by step pictures that there was some bleeding of the colors. Did you clean up the lines or leave it as is? If you did clean them up, how did you do it?
Thanks!