Can I repaint a ceiling with sprayed on texture?
by
CJ
+31
Hello Hometalkers!
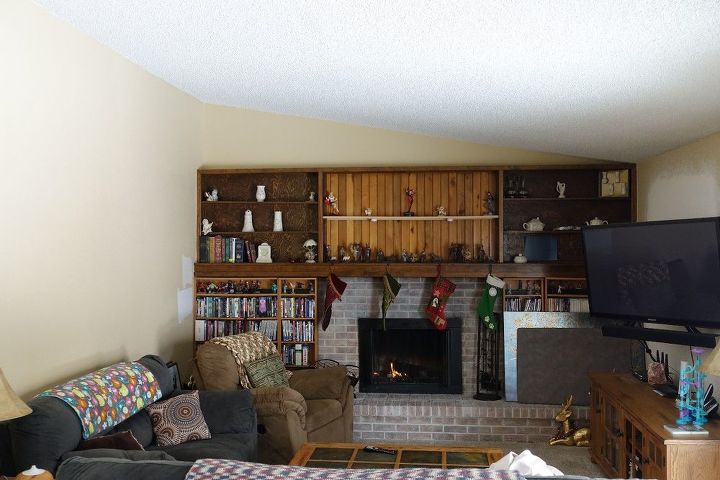
Years ago we hired a man to spray texture on a drywalled ceiling. He mixed a texture material with our paint and sprayed it on. I supposed it's a small popcorn texture. It feels like very course sand and will scratch skin if we brush against it.
We've been told the ceiling cannot be repainted because rolling the paint on will pull off the texture. I've also been told it can be painted but not in the usual back and forth rolling method. It's been at least twenty years and I want to paint it with a standard ceiling white. Currently it is the same off-white as the walls.
Also, how do I safely clean this type of texture?
Related Discussions
Suggested Project Book

Hi Cj, I've painted that rough texture in the past and it is kind of a pain in the butt but totally doable. I used a really thick paint roller (the thickest available) and used A LOT of paint so I didn't have to press very hard. Yes, some of the texture did come off so I made sure to cover my floors really well. But that worked fine!
I've also painted texture ceilings. Just use a 1/2" to 3/4" nap roller. Load the roller with more paint than you would if you were painting a flat surface. Don't apply too much pressure. Let the roller do the job. Some texture may flake off. I really never have had any come off. I move out furniture that i can handle. Larger pieces I move to the center of the room. Cover the furniture and floor with plastic sheeting.
Hi Cj,
Here's how to clean your textured ceiling:
Remove the Dust
The first step is to remove all of the dust particles and spider webs that have been trapped between the texture bumps. Choose the tool that works best for you. Be sure that you have tools with handles long enough to reach the ceiling or a very sturdy step ladder.
Circulate Air to Speed Drying
After cleaning or treating any stains, use circulating fans to dry the ceiling as quickly as possible. Do not go back to treat any stains again until the ceiling is completely dry. Too much moisture can cause the texture to disintegrate.
To paint:
Cut in Ceiling With Brush
With the 2-inch brush, cut in all edges where the ceiling meets the walls. You can also apply painter's tape to the wall adjacent to the ceiling to help maintain clean, straight lines. Paint around ceiling lights and other obstructions
Prepare to Roll Paint
Shine the work light upward. Pour 2 to 3 gallons of paint into the 5-gallon bucket. Hang the roller screen from the side of the bucket on the inside. Screw the roller frame onto the extension pole and add the thick-nap roller cover. Dip the roller in the paint, then squeeze it out by rolling it on the roller screen.
Roll out Paint
Roll the paint onto the popcorn ceiling. Start along one edge and finish a section about 4-foot by 4-foot. Continue to an adjacent section and paint that. Make sure that the ceiling texture is fully covered, but it should not be too thick or dripping with paint.
Add Second Coat
Open windows, if possible, or turn on fans to promote airflow. Allow the paint to dry for at least two hours. Apply a second coat..
ref:
https://www.thespruce.com/how-to-clean-a-popcorn-ceiling-4589263
https://www.thespruce.com/how-to-paint-a-popcorn-ceiling-5195080
I've also painted textured ceilings using the same process as already described by William and Grandma and had very little problem doing so. I've also removed texture but that's another story and much more work!
I repainted a popcorn ceiling years ago. I used a fluffy roller and rolled in one direction. It worked fine.
Hi Cj, you sure can paint it, what you need is a really fluffy roller to apply the paint, or you can spray it on, hope this helps you out
https://www.apartmenttherapy.com/how-to-paint-popcorn-ceiling-36715786
Flat or matte is the traditional sheen for ceilings, since it reduces light bounce. If you need to protect your ceiling from moisture, though, use eggshell, satin, or semi-gloss paint sheens.
Use a 3/4 inch nap since that is Best for textured ceilings, masonry, brick, stucco, and rough wood surfaces.
Also a good idea to double the amount of paint since the uneven texture will require more then a flat ceiling.
here is info
https://www.youtube.com/watch?v=wsQrLTwEjE0
You might try a small section that's hidden using a very puffy roller, or dab some water on a small section to see what happens. Otherwise, you can likely use a paint sprayer to repaint it. Again, test if first.
Yes you can CJ, here a very helpful guide for that https://www.google.com/url?sa=t&source=web&rct=j&url=https://www.youtube.com/watch%3Fv%3D9FcsleXW-RI&ved=2ahUKEwjMtfzO_531AhXEw4sBHXU7DzcQwqsBegQIIxAB&usg=AOvVaw2OPWRdMCGKH0et8pMqewsA
You can brush or spray paint. If you use a roller, it will most likely cause some of the texture to come off on the roller and it's a big mess.
Yes you will need a thick fluffy roller bead to get in the groves
Yes you sure can. Get a thick roller and paint way, I have textured ceilings in my house and they have been painted many times. I do not like ceiling paint too thin, in my opinion. I use either eggshell or semi gloss paint. Used the semi gloss in the kitchen for easy cleaning. You can get the thicker rollers in the dollar store and then toss them when done.
Thank you, Dee!
We painted a popcorn ceiling once but all I can remember is that we spray painted it first to hold it together then did the final coat with a roller. Worked fine.
Thanks, Rymea! I think spraying is the best way to go.
We have repainted our popcorn ceilings ... use a roller with a thick knap... make sure you cover floors/carpets etc. There WILL be drips ! Some popcorn ceilings are applied over a primer and do not flake off as easily... for best results roll only one direction DO NOT WORK THE ROLLER BACK AND FORTH the way you would do on a wall. Start at one wall and roll all the way to the opposite wall... 1st coat roll front to back and let dry completely. 2nd coat ... roll left to right let dry... 3rd coat back to front... let dry... 4th coat right to left