


My Milk Jug Greenhouses

by
Stacie
Year three and I will never use any other method to start seeds!
Check your seeds to know how long before frost you must plant them. Then, when the big day comes:
Step 1: Drill 1/4" holes in the high and low spots of a thoroughly rinsed out milk jug. Recycle the cap - you do not need it.
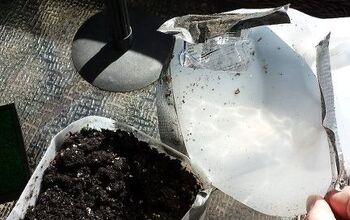
Step 2: Cut around all but 1" (to allow for flap) as seen where tape is below - just below bottom of handle.
Step 3: Place used dryer sheet in the bottom. This will keep in all dirt.
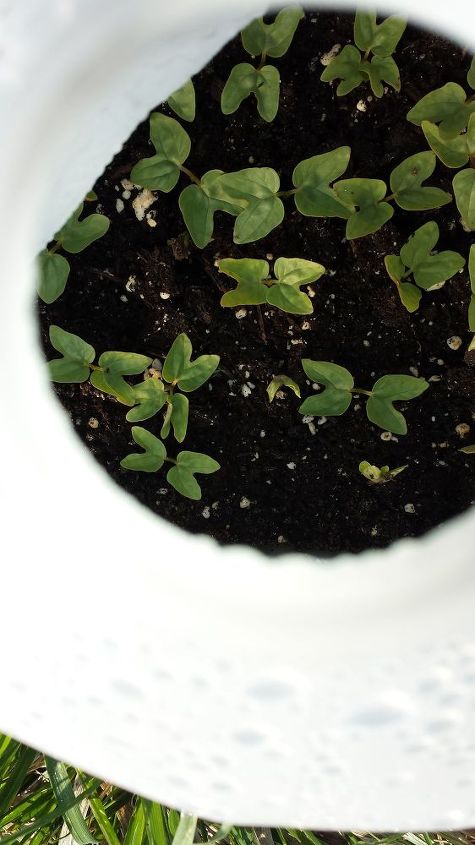
Step 4: Fill with quality potting soil, plant seeds, and water thoroughly so that all dirt is wet.
Step 5: tear pieces of duct tape to hold "lid" down as close to together as possible.
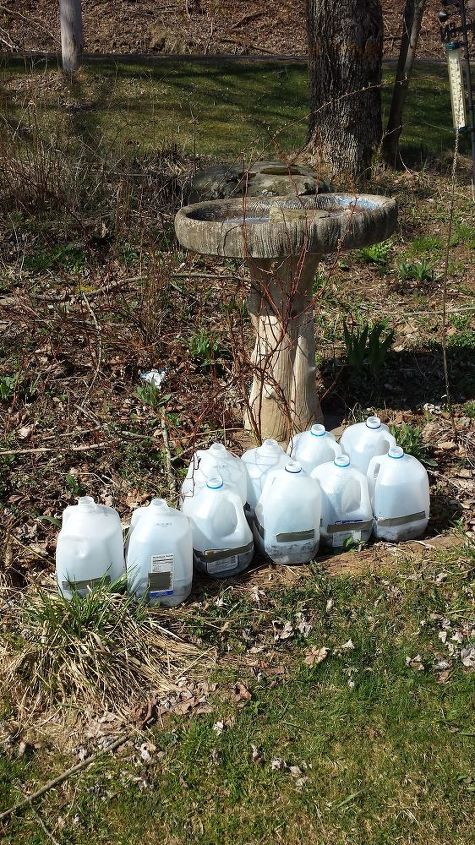
Step 6: Place in a FULL SUN location.
Unless there is a drought, you should not have to water the greenhouses again. Once you have sprouts, be careful not to let them get burned - flip open the lid on hot days and close up at night until seedlings are hardened. If you do this right, you cannot fail!
Check your seeds to know how long before frost you must plant them. Then, when the big day comes:
Step 1: Drill 1/4" holes in the high and low spots of a thoroughly rinsed out milk jug. Recycle the cap - you do not need it.
Step 2: Cut around all but 1" (to allow for flap) as seen where tape is below - just below bottom of handle.
Step 3: Place used dryer sheet in the bottom. This will keep in all dirt.
Step 4: Fill with quality potting soil, plant seeds, and water thoroughly so that all dirt is wet.
Step 5: tear pieces of duct tape to hold "lid" down as close to together as possible.
Step 6: Place in a FULL SUN location.
Unless there is a drought, you should not have to water the greenhouses again. Once you have sprouts, be careful not to let them get burned - flip open the lid on hot days and close up at night until seedlings are hardened. If you do this right, you cannot fail!
Want more details about this and other DIY projects? Check out my blog post!
Comments
Join the conversation
2 of 9 comments
-
I don't understand what you mean in step two. Could you clarify?
-
Hi, Alenardson - of course, I would be glad to. Step 2: Cut around all but 1" (to allow for flap) as seen where tape is below - just below bottom of handle. Here is an image of an opened greenhouse so you can see that inch or so of the top still attached. Leaving the lid attached allows you to flip it open or closed toward the end of needing the greenhouse. On really hot days you might have to flip the lid open as not to scorch the seedlings. Leaving the "hinge" allows you to flip it closed and attach with tape to retain nighttime warmth. Please let me know if this helped clarify. 😊


Frequently asked questions
Have a question about this project?
Could you please clarify Step 1. Location. Is it to allow air in or out?