


Office Overhaul Part II - Painting Black Windows and Doors
1 Material
This is part two of Lisa's office renovation (you can read part one about the plank wood feature wall here). In this phase, Lisa shows how she painted the window trim and doors black to add a wow factor.
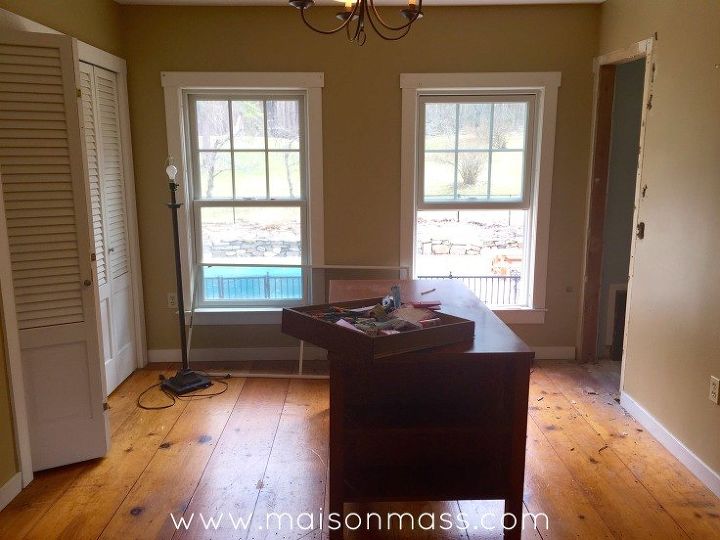
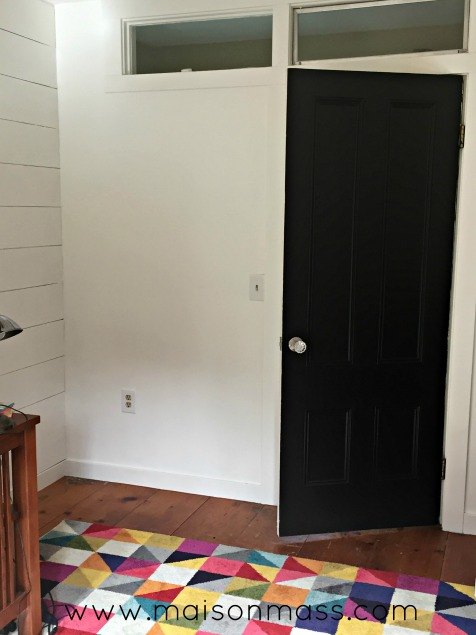
This is the office before the transformation began!
As stated before, I live in a 1865 farmhouse. The decor is more traditional than modern, owing to the trend at the time we purchased our furniture. Those were carefree days: no kids devouring our time or impinging upon our decision making, and two incomes to blow on furniture we foolishly thought we’d be mad about forever. Dark days they were. (Smiley face). The point is we live in a transient world – wanting always to be moving and exploring, discovering the next great thing, or great look. The office, which desperately needed some attention anyway, is an ideal room for that exploration, limited only by the primary piece of furniture we want to keep – the mission desk we bought some 14 years ago.
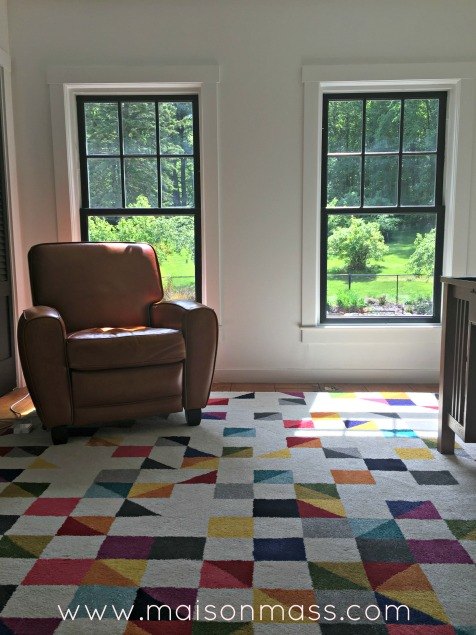
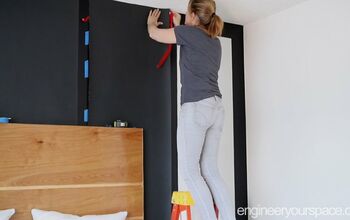
The rooms on our first floor open into each other. You have another in your sightline at all times, thus demanding some design continuity. The office, however, is tucked away on the second floor, giving us more freedom to go crazy. Specifically, we wanted this room to be more contemporary – bolder colors and design. We wanted in on the black window trend and this small, hermetically sealed room was the perfect one in which to experiment. After completing the plank feature wall (on the right side), we set out to paint our white windows and doors black.
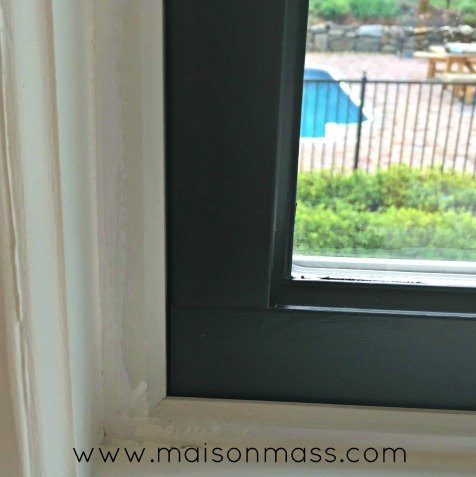
The most labor intensive part of this project is the sanding of the window. In order that the paint adhere well to the surface, take a light grit sandpaper (400 or such) to every part of the window you intend to paint. Otherwise, the paint will surely chip in time. We decided to paint only the interior frame of the window, because though we want a dramatic look, we didn’t want it to be overwhelming. Another reason for our decision was the simplicity. Tackling the whole of the window, including the jambs and jamb liner (the vertical components of the overall frame), would require disassembling the window, to get at all the edges. I saw the frame painting as a win-win.
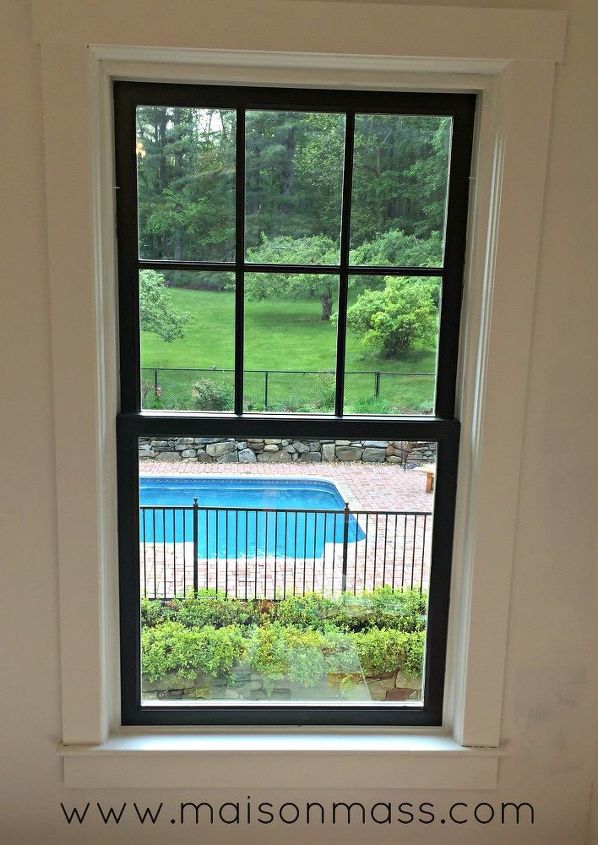
We used Benjamin Moore Black Ink in a pearl finish (like an eggshell). We taped the windows and the frame to keep bleeding to a minimum. I did have to go back and touch up some of the white trim but, all in all, this was fairly painless.
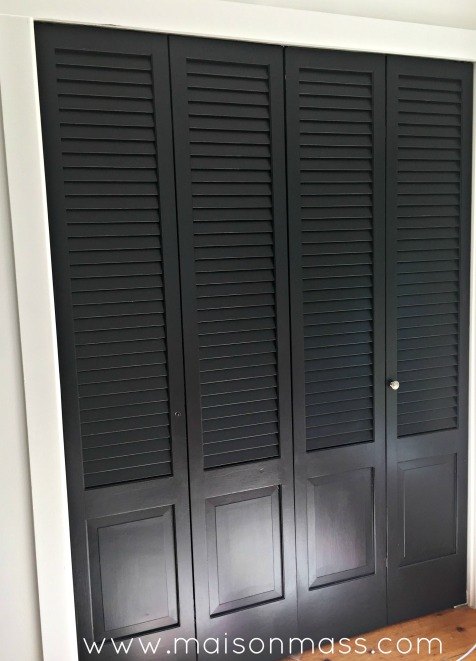
We then moved on to painting the boring, white bi-fold shuttered doors. We only wanted the exterior side black, the inside to remain white. We removed the doors and painted them outside where we could paint them on a flat surface, like saw horses. Its easier to ensure the paint doesn’t run, especially when working with grooves like those presented by shutters. We painted them the same black as the windows, using a couple brushes: smaller to get at the shutters and a wider one for the base of the door.
Unfortunately, the caveat to leaving our newly painted windows unadorned, is that the sun is intense and creates some glare when photographing. We decided to paint all the moulding in the room the same white as the walls, so the black windows and doors would punch that much more.
All that’s left is the door to the hallway. On the exterior, the door will look as it did before, and only from the inside will the black magic unveil itself. This door we painted in place and since it had previously been painted, it required no sanding or priming. We changed out the ugly, brass doorknob for a crystal and brushed chrome knob and the job was done.
Well, this component of the overhaul is done. The light is outdated; my functionality is limited without shelving or bookcases and I’m not clear if the open window look will be as practical as it is pretty. Time will tell if window treatments are needed.
Shelving and lighting are still definitely on the horizon. Stay tuned and be sure not to miss the sequel!

Want more details about this and other DIY projects? Check out my blog post!
Comments
Join the conversation
3 of 61 comments
-
It's like when you are coloring a picture and you outline the images in darker tones to make them stand out. The black edge highlights and frames the exterior views. Excellent idea!

-
Beautiful outcome. Looking forward to see the finished space! :)


Frequently asked questions
Have a question about this project?
Are your windows vinyl, metal or wood? Do you have to use a special paint for metal etc? Love your idea!
No primer? Apparently you didn't sand through existing paint?
Where did you find that rug? I love it !