


How to Strip Furniture With Oven Cleaner: Amazing Before and After
A complete tutorial on how to strip furniture with oven cleaner. A step-by-step process including a bleaching process at the end.
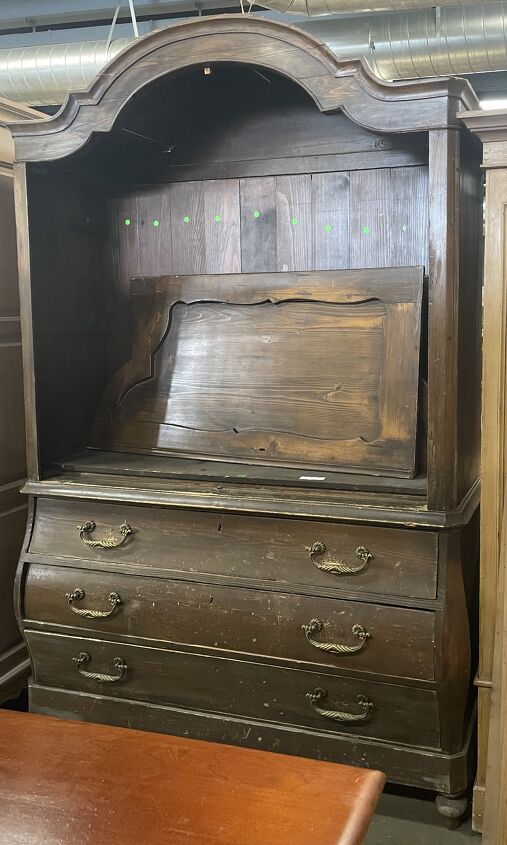
I saw this beauty in a store and walked away from it. I just took a picture. It was large, but I loved it. Honestly, I thought, If I call my hubby to come to pick up another piece of junk, he may divorce me, lol. I also knew it would require a lot of work and wasn’t sure I was up to the manual labor I would have to put in.
The back panel pieces were all numbered, so I knew it would come apart, but I also knew it would take a lot of elbow grease to get it to where I wanted it to be.
About a week went by, and I went through my pictures and showed them to my husband. He said, ” I can’t believe you passed that up.” I laughed. He said, ” I will go back and get it for you.” I told him, you can try, but I doubt it will be there. It was well priced.
Can you already tell where this story is going? He came home, and behold it was in the back of his truck.
How do you strip furniture with oven cleaner?
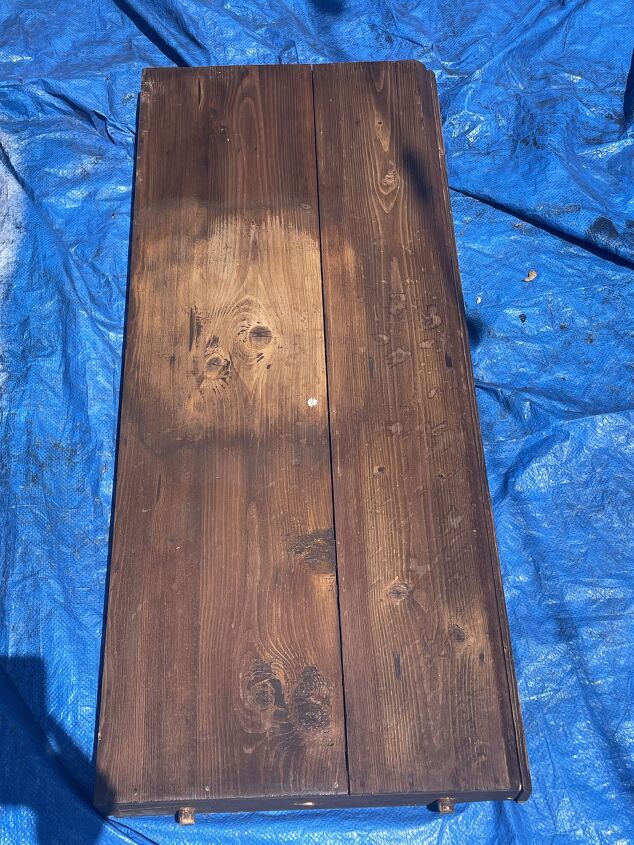
The closer I looked, the more nervous I became. Honestly, it was going to take a miracle to fix this. I did not realize it wasn’t in as good of shape as I had remembered.
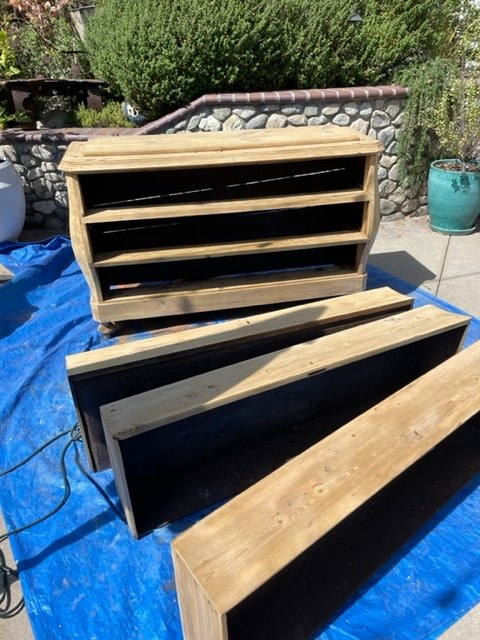
All of the pieces had to be taken apart to transport them. There are a total of 19 articles, it looked like a pile of junk wood, but I could not tell my husband that hehe.
We took it out of the truck one piece at a time, and as I said, I was questioning my judgment, LOL.
You can see I had my hands full! But I am so grateful for my blogger friends Do from @dododsondesigns and Cindy from @reinventeddelaware. They both are master furniture refinishers.
The wood is knotty pine, it would not be my first choice, but I was committed and ready to tackle this piece and see if I could pull off a miracle.
How long do you leave oven cleaner on for stripping furniture?
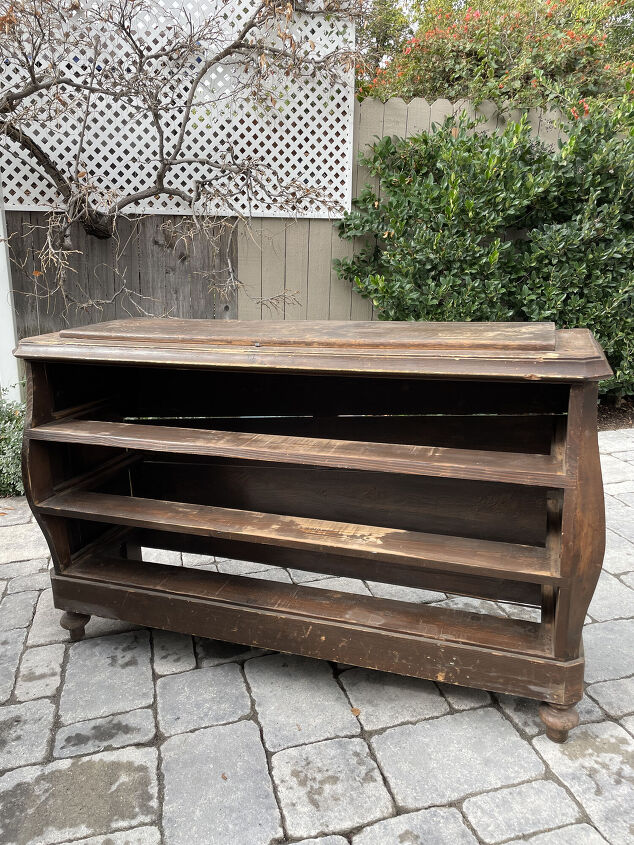
Now the hard work begins. I first decided to tackle this in parts, starting with the bottom piece.
Because there was not a lot of varnish on this piece, it was straightforward to strip with an Easy-off oven cleaner. I will say that I found the blue can, which is fume-free, to work a bit better than the yellow can. Spray a heavy coat of the Easy-Off on and let it sit for approx. Fifteen minutes before scrubbing with water.
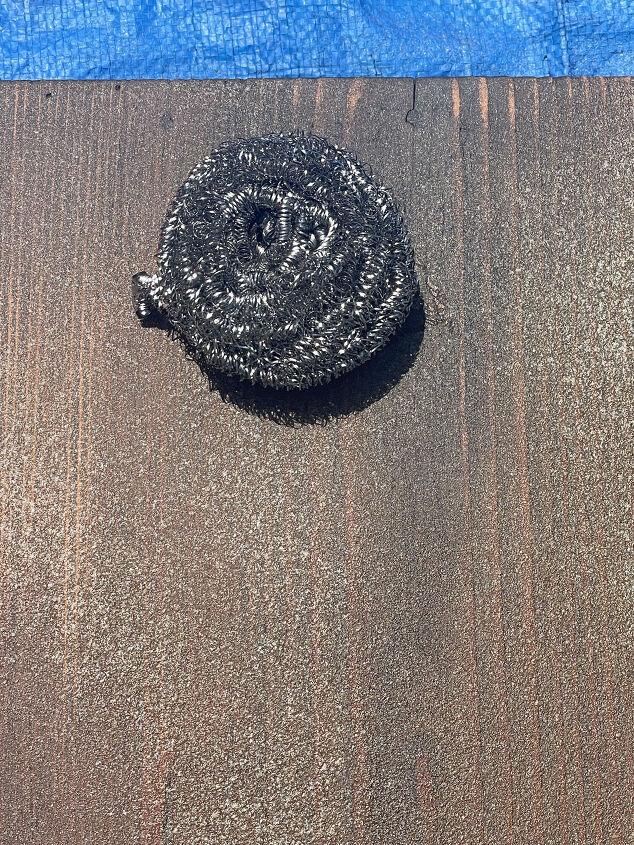
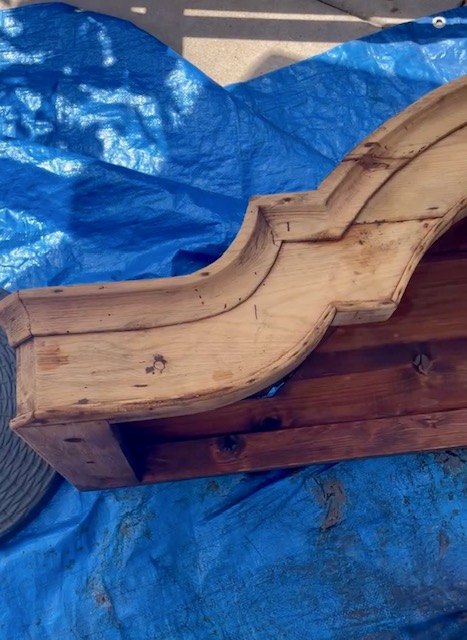
I then used a silver scrubby brush that I purchased at the Dollar Tree to rub off the stain. Next, dip the sponge in a bucket of water to rinse.
Once you have scrubbed all of the stain off, you can rinse the piece with the hose as long as the part is solid wood. Next, let the part sit in the sun to dry.

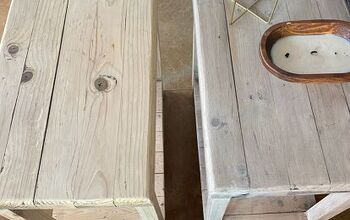
The second process was to bleach the wood to lighten the color
The yellow color was throwing me off slightly, so bleaching was the following process. I used a 50/50 mixture of water and regular bleach. I sprayed each piece five times, allowing it to dry in between coats.
This bottom chest part sat for a few weeks until I had time to tackle the top and sides. I did the same procedure, two coats of the Easy Off to remove the finish and then five coats of bleach and water solution.
Now it was time to sand and get a nice smooth finish. Again, I soaked the hardware in a mixture of vinegar, soap and water overnight, and it cleaned up very nicely.
We had to do some shuffle around in the house to find just the right spot. Then, finally, it was time to give up the piano to my son as nobody at home played it anymore.
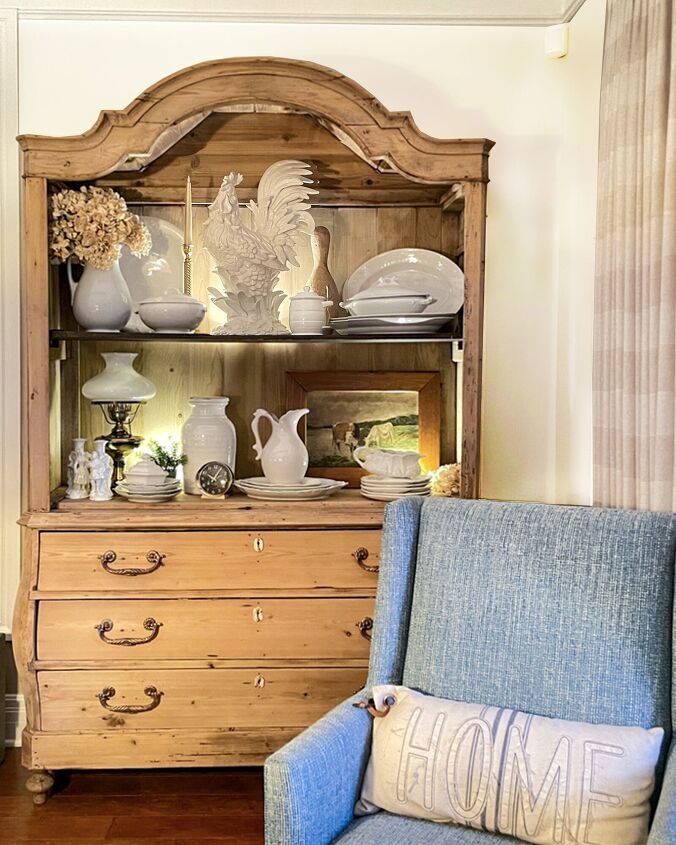
Now, this piece has landed in our family room, and I love it.
I have filled it with part of my white ironstone collection, and a few other vintage treasures that I love. Many of the pieces are from my mother and grandmother.
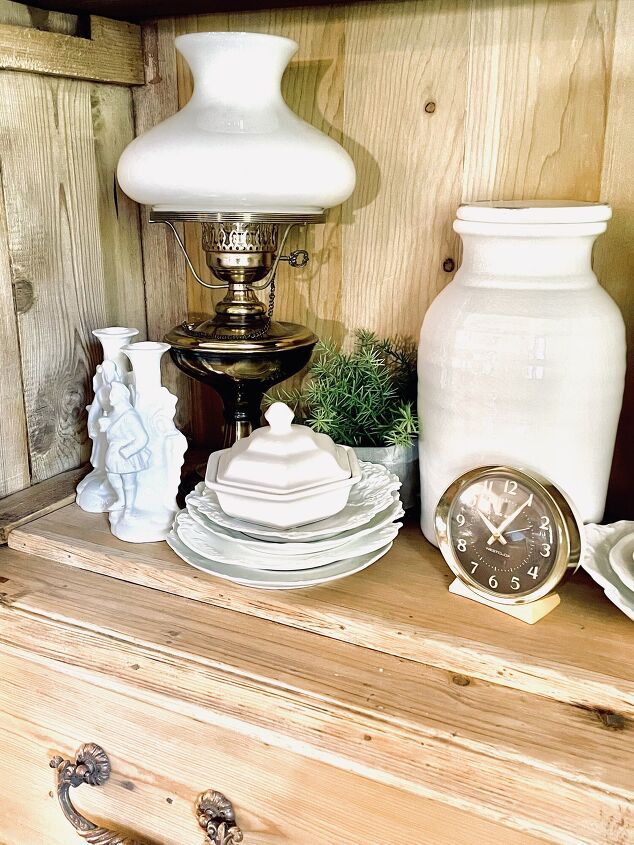
I also adore old vintage clocks. No need for them to work; I love their looks.
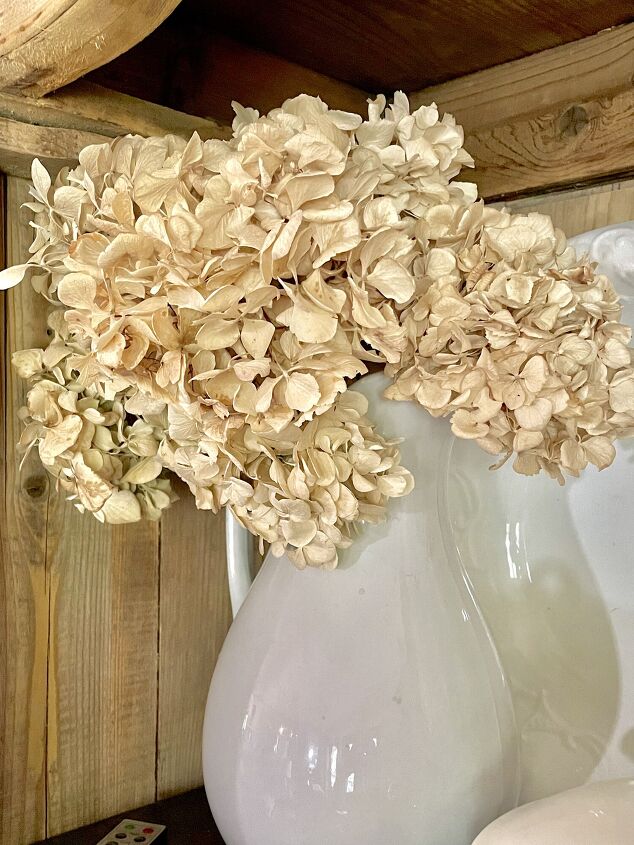
Some dried hydrangeas from the garden tie in perfectly for the look I was trying to accomplish.


Comments
Join the conversation
-
Thank you for sharing. I am ready to tackle the China cabinet and dining room chairs to get a natural wood look. Your piece is gorgeous and I knew to use bleach just not the 50/50 mix so again thank you for this post.
-
You are so welcome, best of luck to you.


Frequently asked questions
Have a question about this project?
How did you seal it?
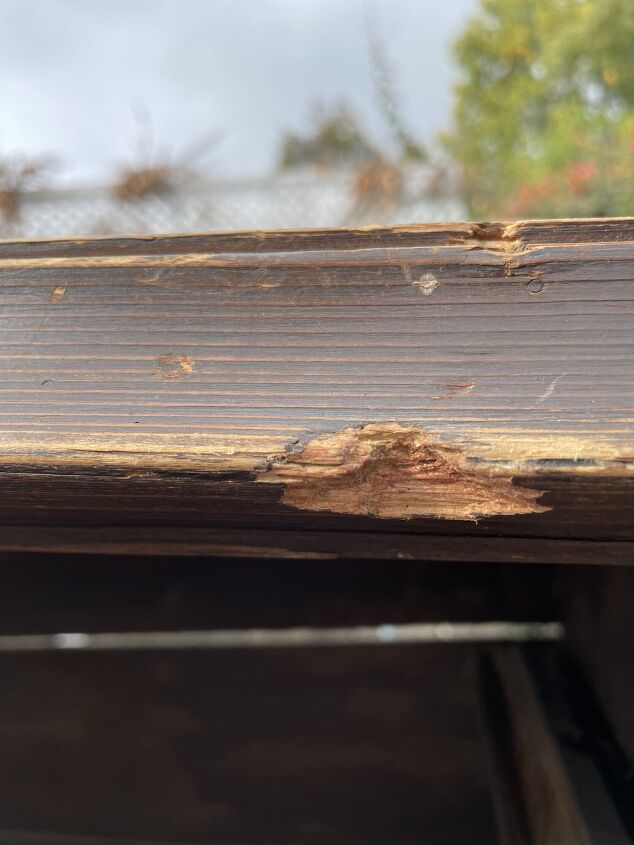
Did you fix that huge missing chunk and the scratches?
Absolutely stunning.
Where is the oven cleaner and bleach....that you rinse off....going? Is it going into your yard? Toxic hazard for animals and people!!