


Redoing Upholstered Chairs Without New Fabric

I had purchased 2 armless chairs last year, they were the items I HAD TO HAVE, but I change my decor so frequently, they slowly started to clash with my room, so after they were moved from room to room around my house, they ended up in the basement.
After Christmas this year, I went on a home purge, and these were the first to go, as I was not going back to the reds in my decor, and I was not going to attempt to reupholster them, as that was a challenge I was not ready for.
I tried to sell them multiple times on different sites, but never had anyone seriously interested, and man am I glad I didnt!
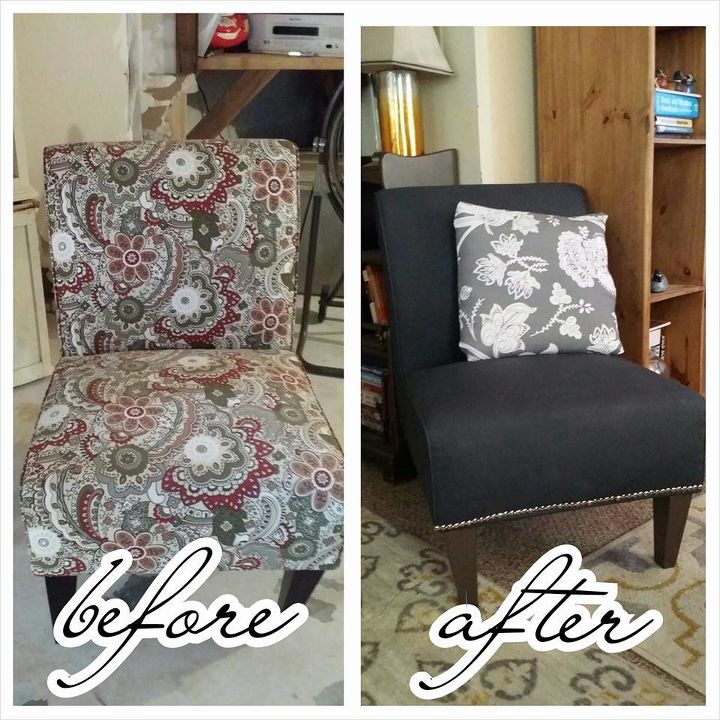
this was my proud before and after picture, days of work, and frustration between the different mediums, but so proud and happy to have them done.
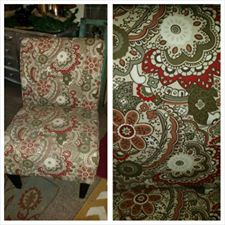
as you can tell, this is such a hard pattern to match, unless you like those colors, and that probably is the reason no one was interested in purchasing them from me.
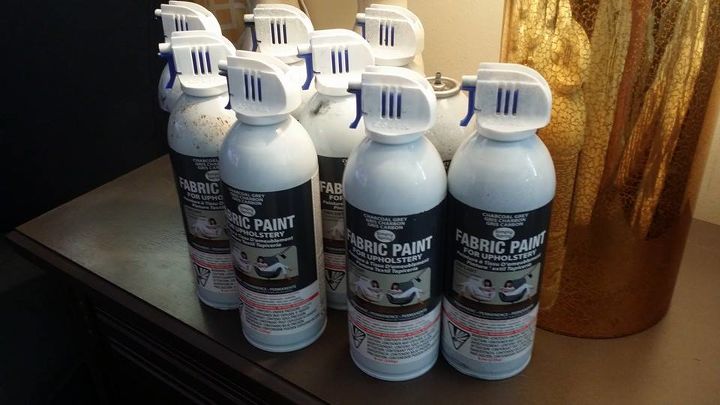
I started out with a martha stewart fabric medium, and a lighter gray acrylic paint, but the coverage, color, and the amount of paint I would of had to use was going to be so much more work for me, that I searched and found this fabric paint. The price per bottle ranged between $10 and $13, but with coupons, I was able to get them at a discount. I started with 3 bottles, but in the end, it took a total of 9 bottles to cover the 2 chairs. And since I started, I could not change mid paint. I was not totally impressed by this brand, but it was the only thing I could find for the color and look I was aiming for. It did keep the fabric semi-soft, but it does seem that the paint covered the pattern, so I kept going.
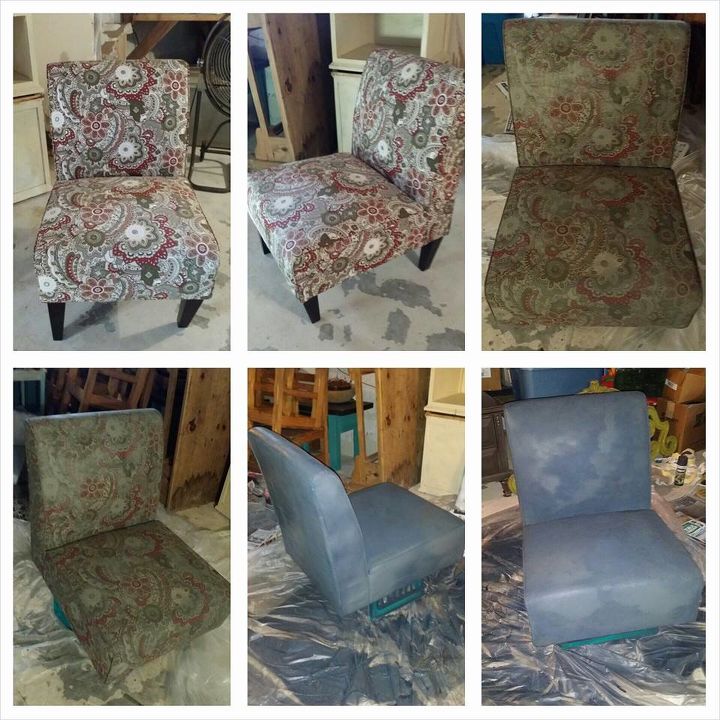
this is my work in progress, I did get frustrated as it just didnt seem to cover as much as I wanted, leading me to multiple trips to the craft stores.
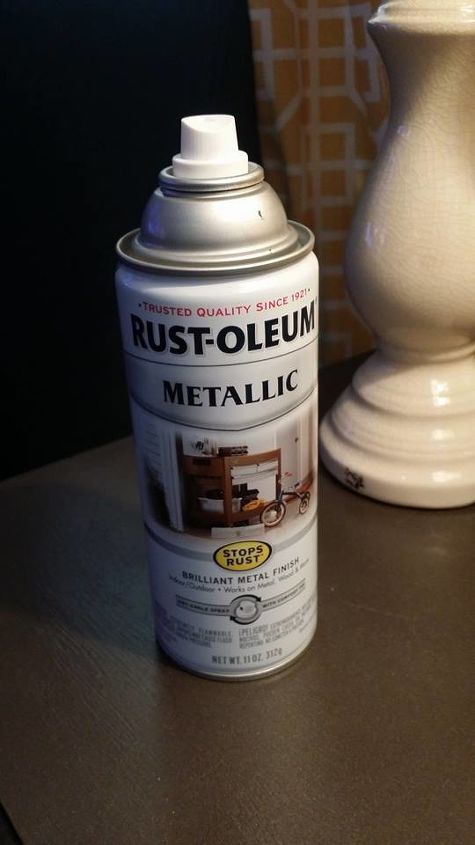
this is the paint I have been using through out the house, for my pieces, and the table shown below is painted in this, so I used this for the legs, its called "metallic dark bronze", by rust-oleum. I absolutely love the finished color as it is someone shimmery, and not flat and dull, and the price per can is reasonable to finish my items in without breaking the bank.
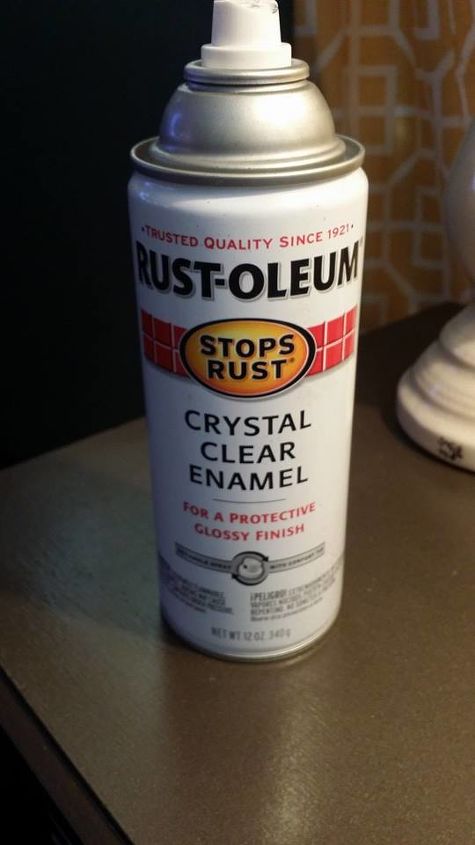
I finish all of my painted items with a protector, this has been my favorite so far as it dries perfectly and doesn't leave streaks.
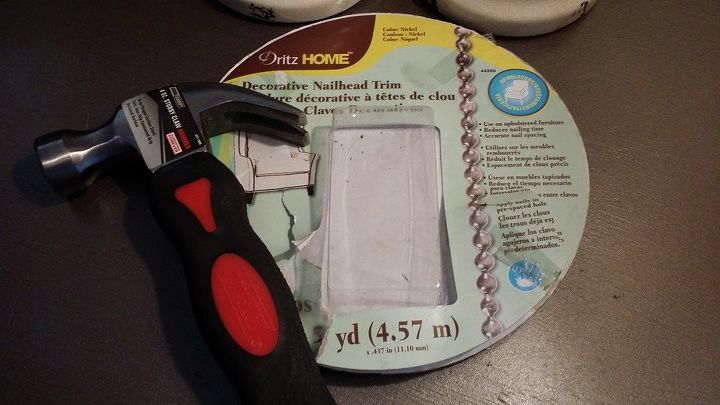
I wanted to finish the chairs with a nail head trim, and since this was my first time, I was able to find a roll. Keeping them straight was the key, and I purchased a small hammer. 1 roll of the trim finished both chairs with some left over.
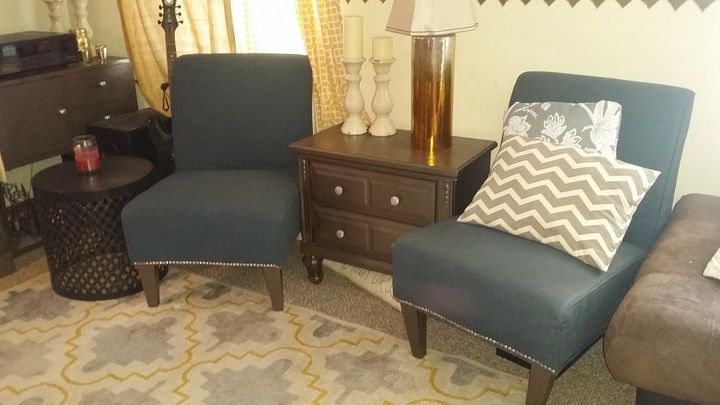
This is my finished product! The table in between was a night stand that I had previously finished in a 2 tone and was over that look, so I finished it in the above metallic bronze, with silver knobs, as to match the legs of the chairs.
Comments
Join the conversation
2 of 3 comments
-
Thanks so much!!! i have actually worked at pier 1 on and off for the last 10+ years, so I have gotten alot of inspiration within those walls! Its just too pricey for my taste, and with kids, i cannot bring in an expensive item into my house, well until their grown!
-
Very nice transformation!! It's a good thing I didn't see them when you tried to sell them, I really like the pattern and colors in the "before"! ha. I could see me changing up the red to a bright turquoise but keeping the design!


Frequently asked questions
Have a question about this project?