


Quick and Easy Farmhouse Cabinet Update

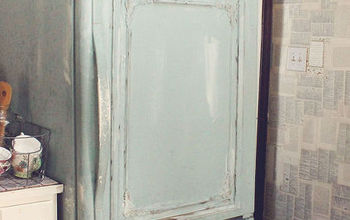
I have redone this cabinet before, but I felt it needed an upgrade and the farmhouse style was calling my name. This is one of the easiest upgrades I think I’ve ever done. It’s quick and takes minimal materials and effort. You don’t even need to remove anything stored in or on your cabinet to make this happen. Even better, it’s super cheap.
Best wood glue!

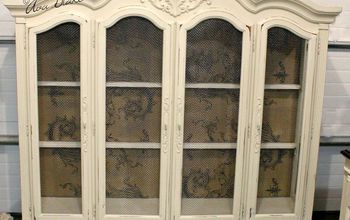
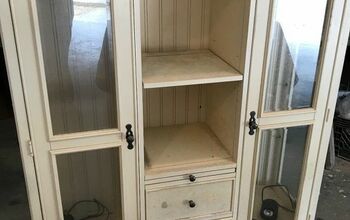
Before:
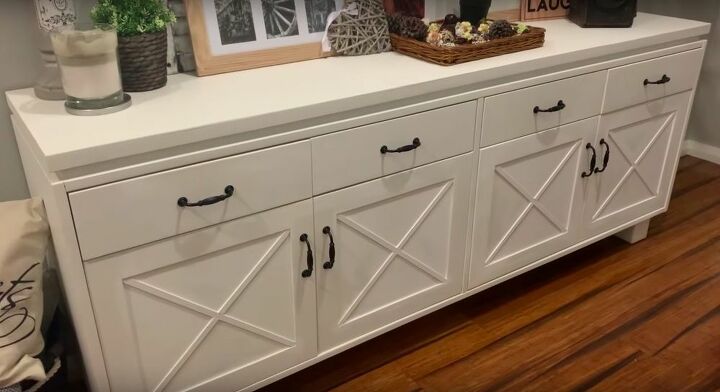
After:
For this project I used:
- Handles
- Screws
- Screwdriver
- Balsa wood
- Pencil
- Craft knife
- Wood glue
- White paint
- Paintbrush
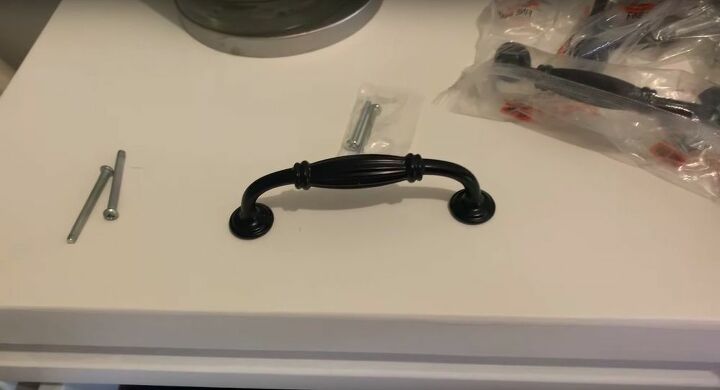
I got these farmhouse handles online for only about a buck a piece! How’s that for value!
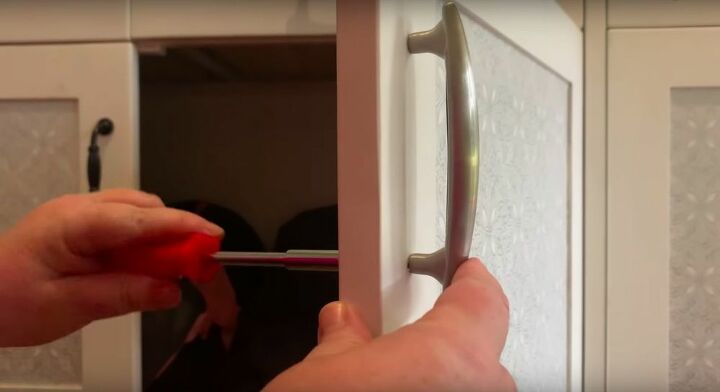
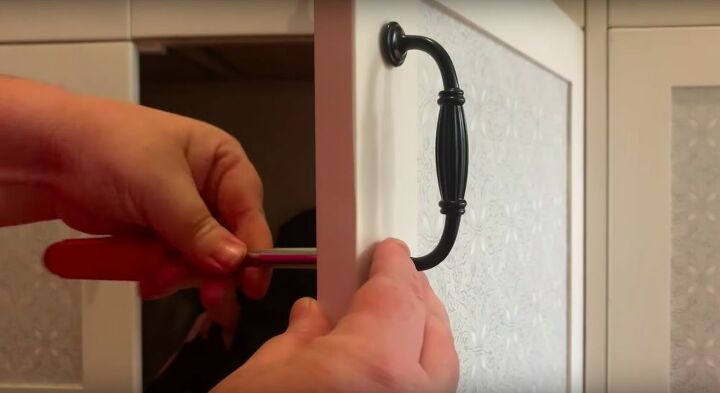
Replace the Handles
Using a screwdriver, I removed the old handles and replaced them with the new farmhouse style handles I had purchased. Black metal over white wood is a classic farmhouse aesthetic, so if you’re looking for a farmhouse feel, make sure to find something similar to what I’ve used here. Installing handles like these ones is pretty easy, just unscrew the old ones and screw on the new ones and you’re good to go.
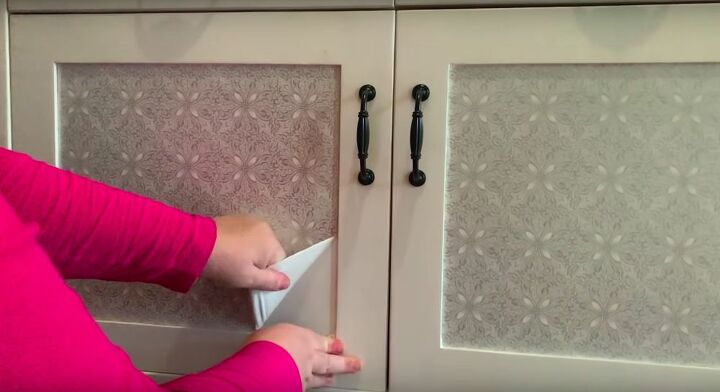
Remove the Contact Paper
I had previously decorated the recessed parts of my cabinets with contact paper. Now that I was going for a farmhouse look, I knew that these patterned panels had to go. Luckily it was an easy fix. I just had to lift the corners of the contact paper and then I was able to simply peel it off. Don’t worry about any of the white paint coming up, as we’ll be painting over anything needed later on.
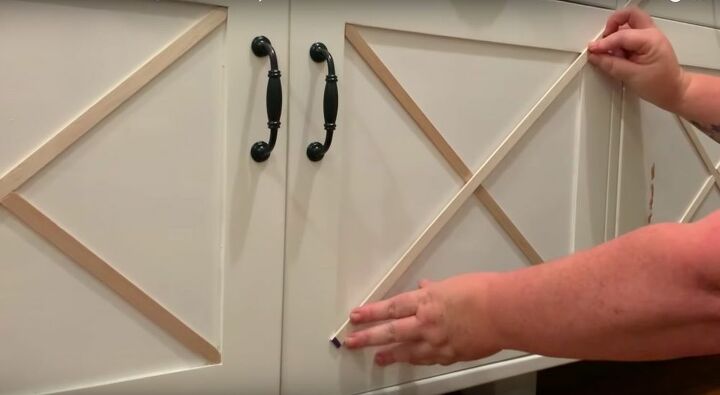
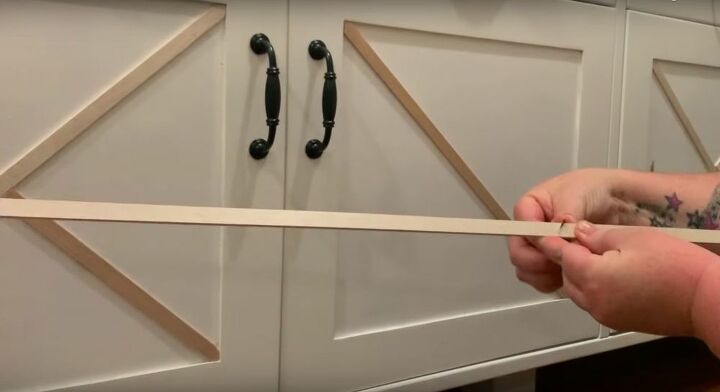
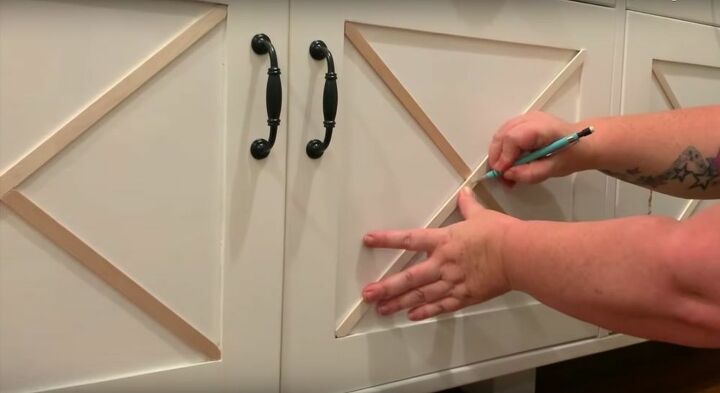
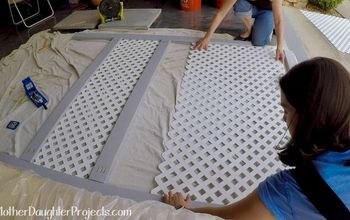
Measure and Cut the Xs
For the Xs I used balsa wood. I chose balsa wood because it’s easy to manipulate, lightweight, and cheap. It also was just the right depth for the recessed panels on my cabinet doors. I held the balsa wood diagonally against the cabinet and marked where I wanted to cut it on each end into a V shape. This allowed it to sit nicely in the corners of the cabinets. Then I cut them using a craft knife. For the other line of the X I knew that I needed to cut it in the middle so that it would sit flush against the cabinet door, and not pop out in the middle. I lay it over the first line and marked two spots to cut so that it would fit right up against it. Then I cut those two lines with my craft knife.
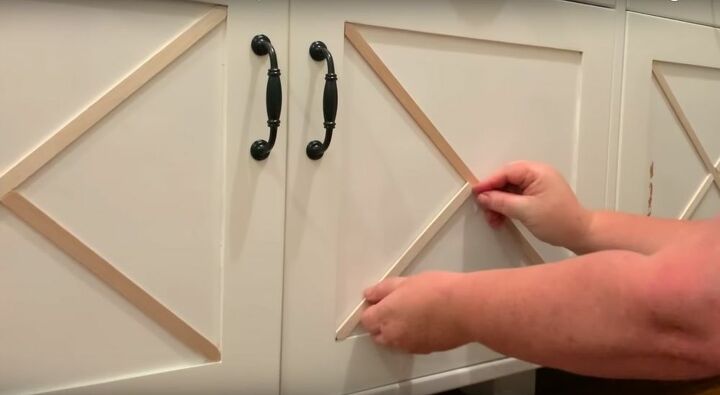
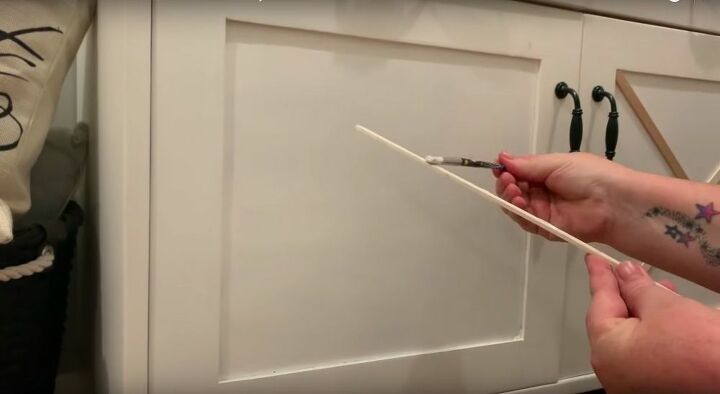
Glue the X on the Cabinets
Using wood glue, I glued the Xs onto the cabinet doors. Use as little glue as possible, because you don’t want it oozing out from underneath your balsa wood. To make sure I used as little as possible, I used a small paintbrush and painted the glue on. To make sure that it sat flush, I used an extra piece of balsa wood that I had to push down and flatten the center of the X.

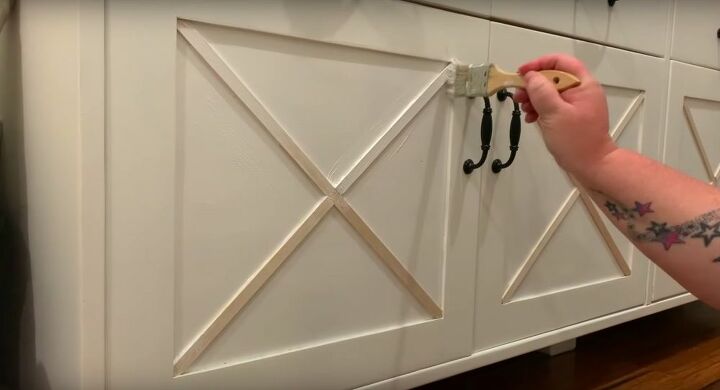
Paint
Once the glue is dry, go ahead and paint. You want to get a really even coat here without having to paint the entire door. I first painted the X that I had created and then touched up any other areas that I felt needed it.
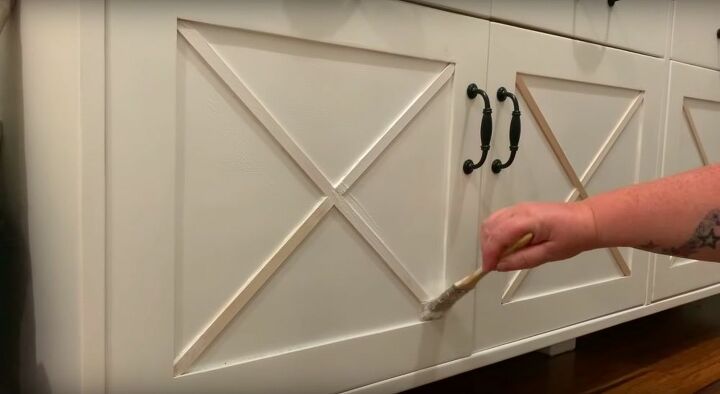

And that’s it! See, I told you it was super easy and super cheap! One of the reasons this cabinet was perfect for a farmhouse makeover was the recessed panels in the doors. If you don’t have doors like mine, you can create faux recessed panels by adding a frame around the outside of each door first, and then inserting the Xs.
Have you updated your furniture in a farmhouse style? Let me know about it in the comments down below!


Comments
Join the conversation
-
Beautiful and you made it look so easy!
-
I did a similar piece several years ago, but the doors had glass. I couldn't find any contact paper I wanted. I had some bamboo runners that I never used and I cut them to size and glued to the glass. I wish I had a picture, it was awesome. The bamboo was just what it needed to pop.


Frequently asked questions
Have a question about this project?
Can you share the link or website for the handles? The link that pops up on resources is to Amazon. Different handles. More expensive.
thanks so much!
wonderful Job!!!!
Balsa wood? That's real smart. I could do that.