Quick Dining Table Upgrade

by
Mihaela Parker
(IC: instagram)
2 Materials
$1
1 Hour
Easy
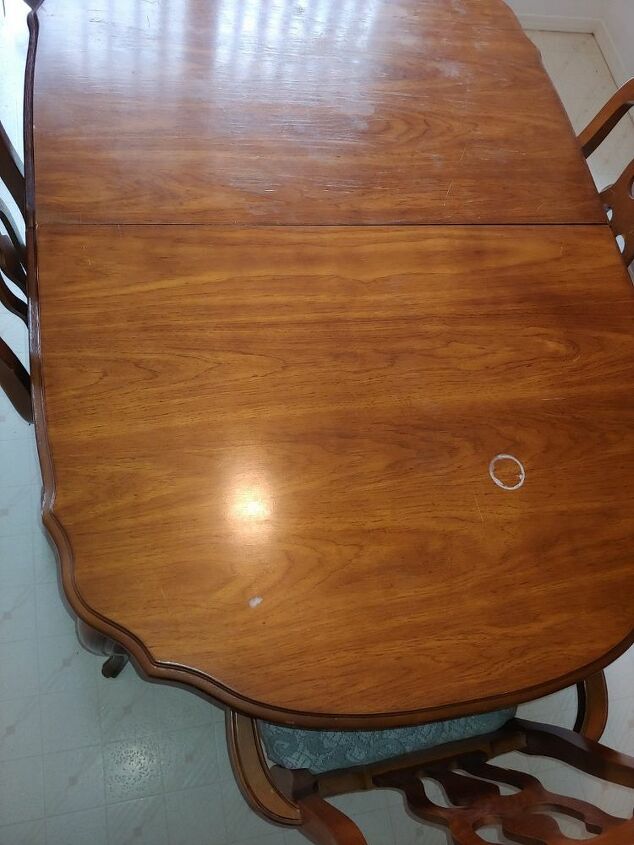
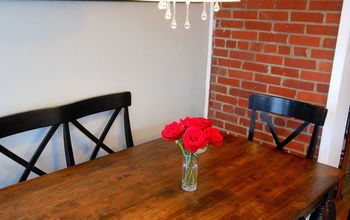
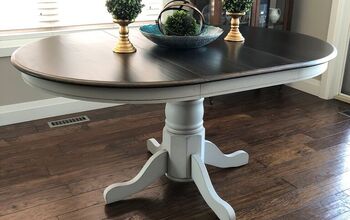
Here I go again with the self adhesive paper! Always to the rescue when I need a quick or temporary fix..Like one of my other projects, I'm still house sitting for my father and I have been resisting this urge to bring his condo into the present. I'm surprised at how being in an area that looks dated and blah has affected my mood so I've been trying to make some temporary changes to lighten this place up! I've painted his living room (he knows about that one, I couldn't handle the peach walls!) and upcycled some treasures I found at thrift stores into décor items to liven it up! Which leads me to this next project. This is his dining table that he will not allow me to paint so I had to get creative.
I wiped the table down a couple of times to make sure I removed anything that may prevent the paper from sticking, and dried it well. I already had the paper from other projects and the only tool I needed was a plastic card. I cut the first piece a bit bigger then the section I was working with incase there were any mistakes. I started on the left and worked my way right, smoothing as I went along.
The table has an opening to extend so I placed the paper a bit past the opening in order to fold it down before pushing it back together so it would stay nice and flat.
There is a little ridge on the table, a decorative trim, so I put the paper past that so I could trim it for a nice finish.
One thing I found hard with this was keeping the paper straight as I was smoothing it out. The plastic card definitely helps smooth it down though and makes it nice and flat. If you see any bubbles, you can go over it again with the card or reposition the paper to get it smoother. Never fully remove the paper backing off the whole piece, because it will stick together and good luck getting that unstuck without damaging the paper. Learnt that the hard way! Just unroll a bit at a time as you go along. Once my first piece was down, I used a utility knife to trim the edges.
I cut the next piece to size and this time started at the top of the seam and worked down instead of left to right. The table is more oval shape so the second piece was smaller and easier to maneuver.
After repositioning a few times, once I felt like it had a tight enough seam, I smoothed out that half with the plastic card working my way towards me.I repeated the process on the other half of the table included with a bit of swearing here and there due to trying to keep the paper straight as I smoothed it on. Basically I have no tips on how to do that so feel free to let me know!I definitely would have preferred to paint the table and reupholster the chairs but I am happy with the outcome, it definitely looks better to me.
It's been quite awhile since I did this and I'm happy to say the paper is holding up quite well. Very easy to clean with no worry about water marks! I still use a coaster for warm things though.
Enjoyed the project?
Any price and availability information displayed on [relevant Amazon Site(s), as applicable] at the time of purchase will apply to the purchase of this product.
Hometalk may collect a small share of sales from the links on this page.More info
Published January 17th, 2020 11:40 AM
Comments
Join the conversation
4 of 43 comments
-
 Kevin
on Nov 24, 2020
Contact Paper a GREAT resource for a million uses on the "cheap"
The table looks GREAT!
A large roll of black contact paper to be used on the 1980s white Formica cabinets in the kitchen.
We hope black contact paper compliments the butcher block Formica counter.
A new vinyl peel and press tile floor.
The cost of a large roll of Contact Paper about $30, the vinyl floor tiles about $70 our low budget will result in the IKEA kitchen we can not afford via a large roll off black Contact Paper, peel and press tiles.
Thanks for the tip on use of the plastic card that looks like a big help.
Contact Paper GREAT for low budget decorating, etc.
Kevin
-
 Mihaela Parker
on Nov 24, 2020
Thank you!
-
-
-
 Eve Darling
on Nov 24, 2020
You did a great job!
-
 Mihaela Parker
on Nov 24, 2020
Thank you so much!
-
-








Frequently asked questions
Have a question about this project?
Did you overlap at the seams? Or position it edge to edge. btw it looks great.
Did you use the vinyl wallpaper? The stuff is amazing! My husband and I put it on a wall in the bathroom. It was easy and fun! I used a small flat side wall paper tool.
I agree you did a great job, but how were you able to trim the curvy edges. I also used a peel and stick for our laminated fireplace. It seems that if you can get the paper plum on one edge you should be able to keep it straight. I was happy with the end result and it really updated the fireplace.