


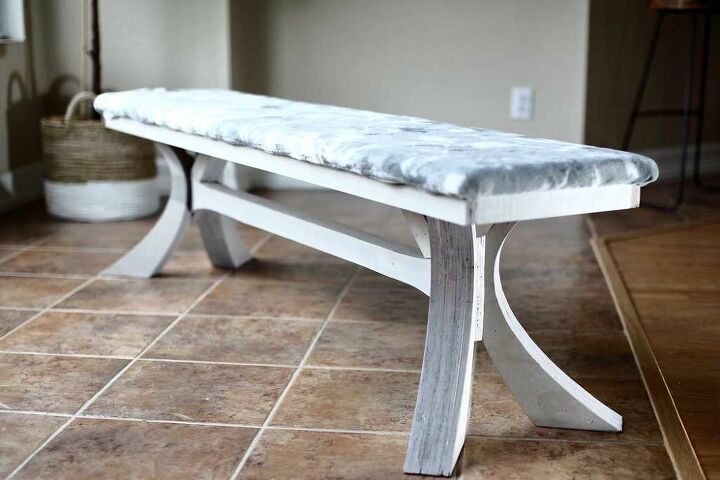
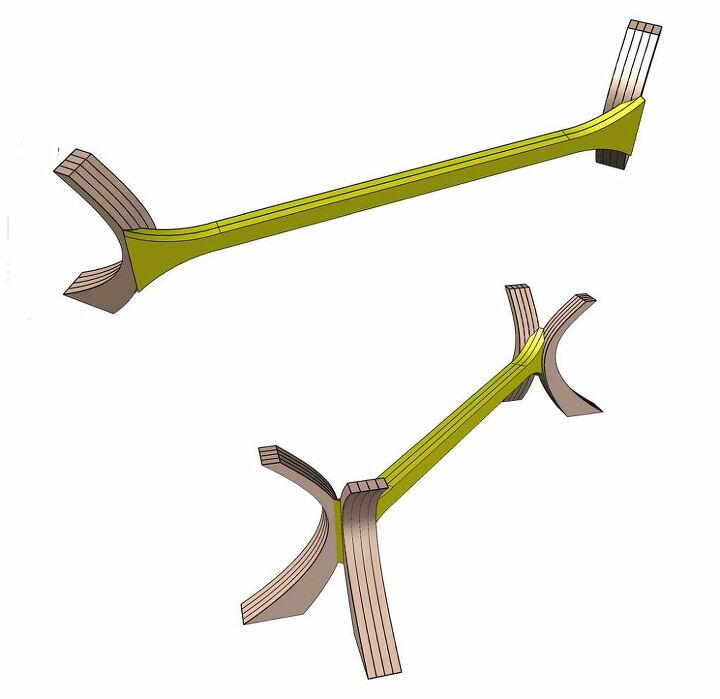
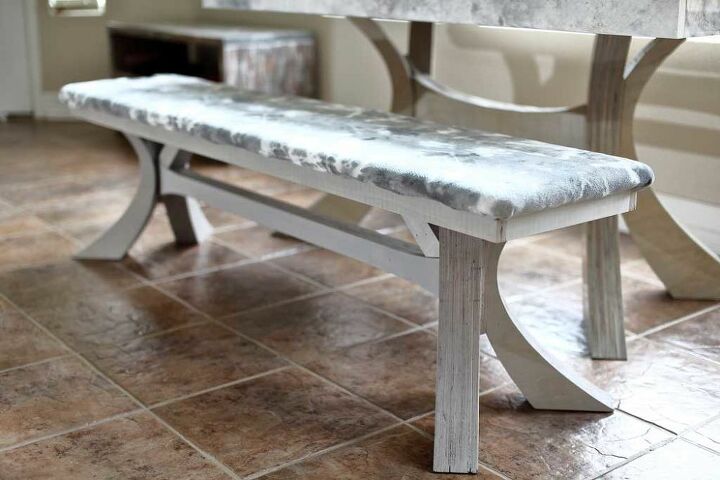
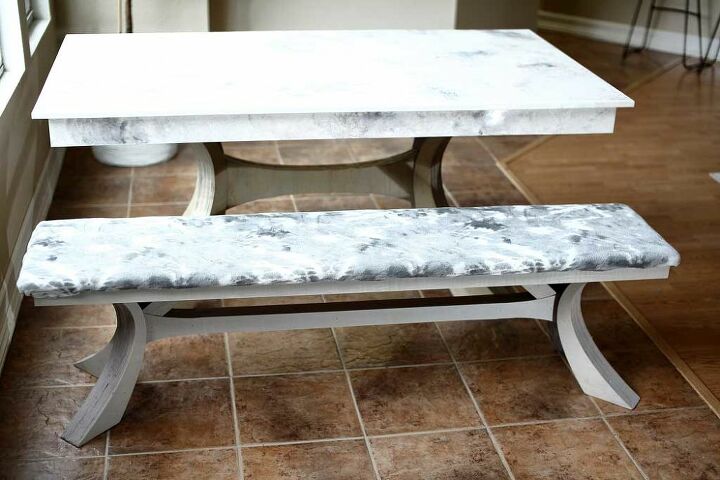
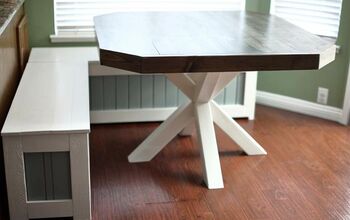
How to Build a DIY Dining Table Bench With Curved Legs

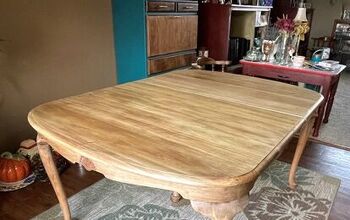
After building a dining table for our breakfast area, I’ve built and created plans for a DIY Dining Table Bench with Curved Legs. I took the same leg design from the table and scaled it down to about 18” in height and designed the bench to match the table. To make the seating more comfortable, I added a cushion on top and wrapped it with fabric.
The entire bench was made from one full sheet of ¾” plywood and a lot of wood glue. This bench could be easily adjusted to different lengths. If you’re interested in matching dining table, you could find the plans here.
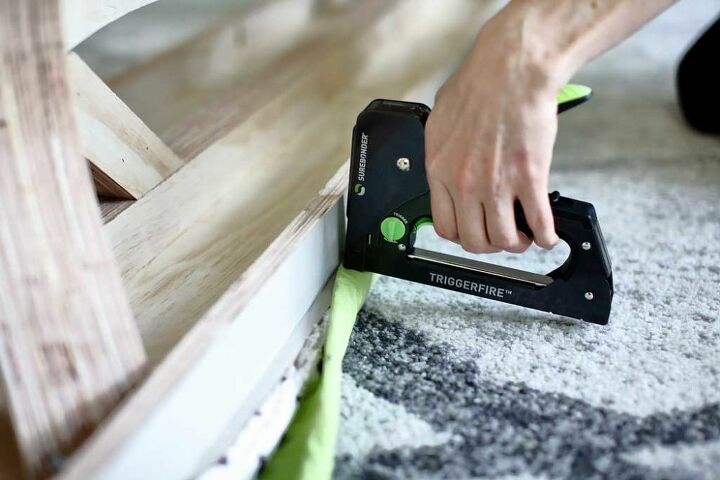
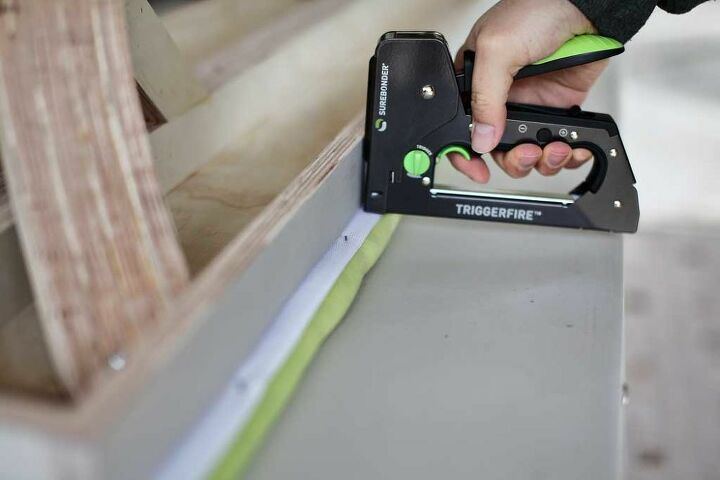
For this DIY dining table bench with curved legs, I used a Surebonder staple gun to attach the fabric to the bench.
Tools for this project
- Tape Measure
- Drill
- Miter Saw
- Table Saw
- Nail Gun
- Wood Router
- Kreg Jig
- Surebonder Staple Gun
- Clamps
- Jig Saw
Material List
- 4'x8' - 3/4" Plywood (x1)
- 1 1/4″ Brad Nails
- Wood Glue
- 1 1/4" Pocket Hole Screws
- 1/2" Staples
- Fabric
- Cushion
- Sunbleached Stain
- Velcro
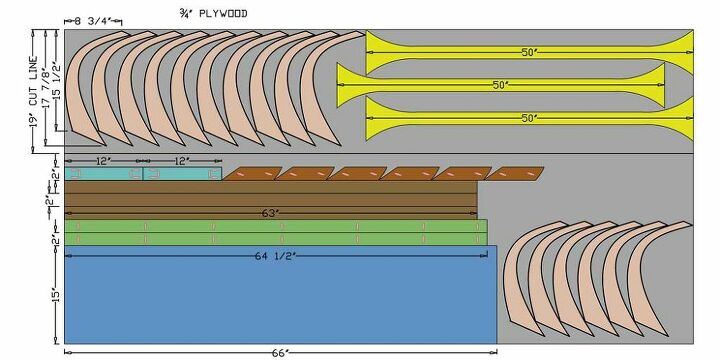
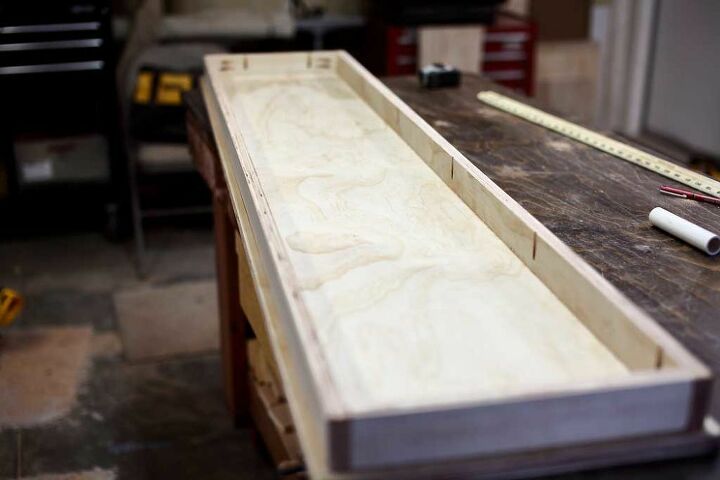
Step 1 – Cut Top and Perimeter Trim Boards
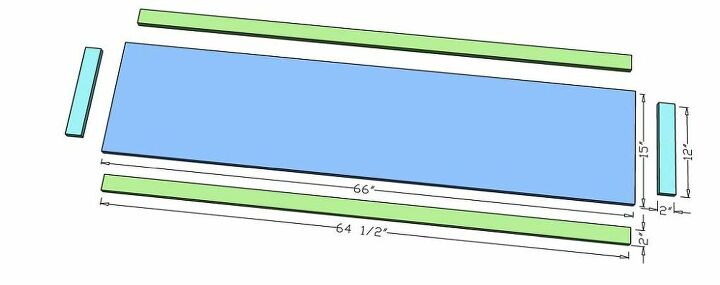
Take one full sheet of ¾” plywood and using a skill saw cut it into two pieces at 19” dimension line as shown on the cut list. Working with smaller size plywood makes the job easier and gets the job done quicker. Using a combination of skill saw and table saw to cut the benchtop to 66” x 15”. Then cut two 2” x 64 ½” pieces and two 2” x 12” pieces that go under the bench as a perimeter trim.
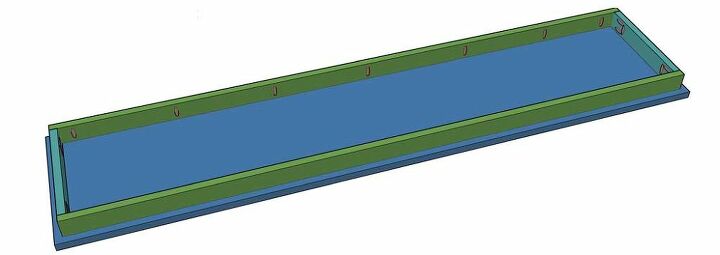
Step 2 – Attach Perimeter Trim to Bench Top
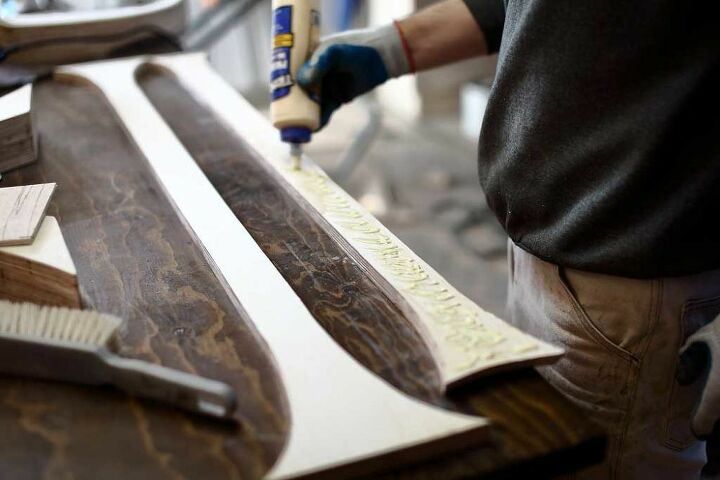
Using Kreg Jig set the settings for ¾” wood thickness and drill pocket holes in the perimeter trim boards as shown in the picture. Attach these pieces to the benchtop with wood glue and 1 ¼ pocket hole screws. The benchtop piece will be ¾” larger on all sides then the perimeter trim. This ¾” space will be used for stapling Velcro and fabric.
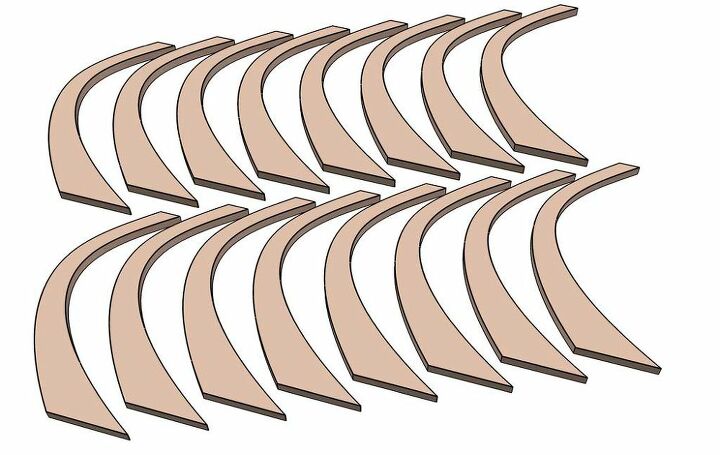
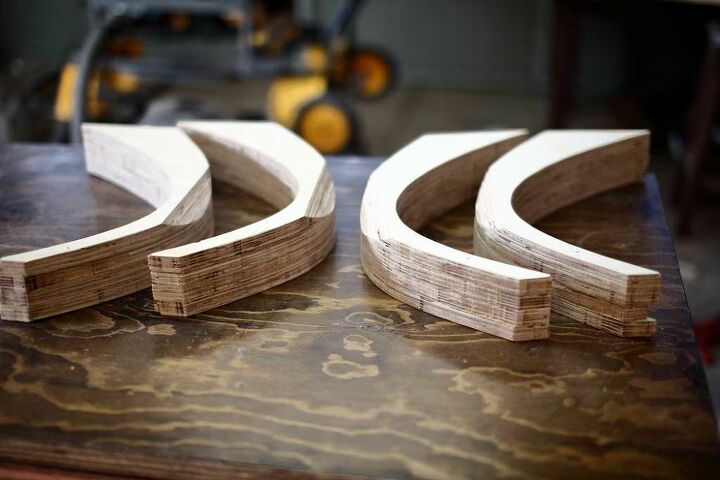
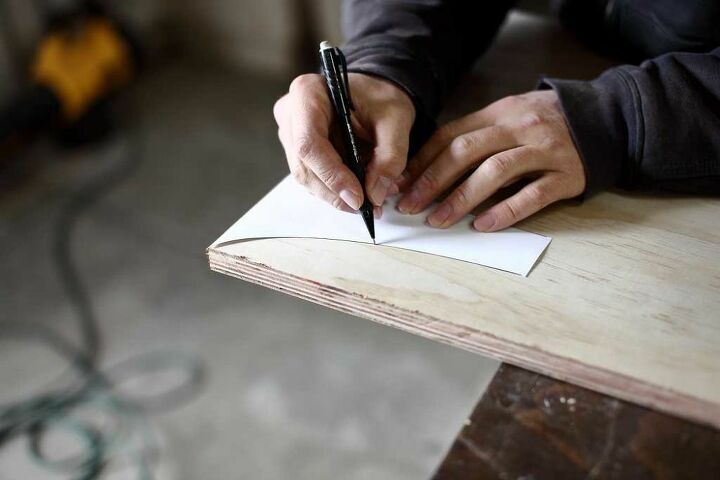
Step 3 – Use Template to Trace and Cut the Legs
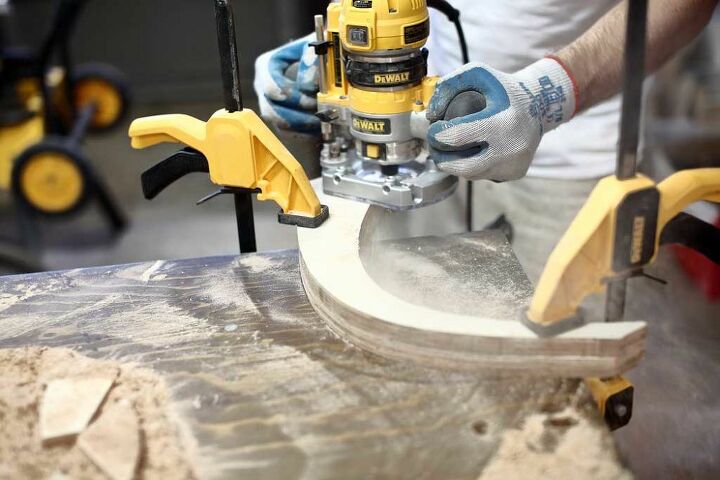
Next, print out the template on 11×17 paper and cut out all the pieces with scissors. Place the leg template in the corner of the plywood and trace it with a pencil. Then using a jig saw cut out the leg. Use a random orbital sander to sand any rough edges and use this leg as a template to trace all other legs.
Draw the legs on the plywood as close to each other as you can (see cut sheet layout). Use a combination of a jig saw and skill saw to roughly cut out the legs. All of these legs need to be trimmed to match the original leg using a wood router with a flush-trim router bit. Take the first original leg place it under the rough cut leg. Clamp both of the legs to the workbench and with a wood router and flush-trim router bit go around the entire leg. The flush-trim router bit basically makes an exact copy of the original leg. Do that for all of the legs.

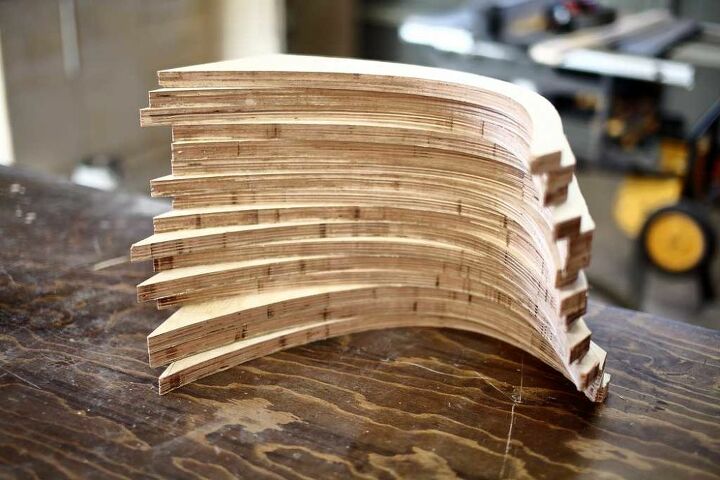
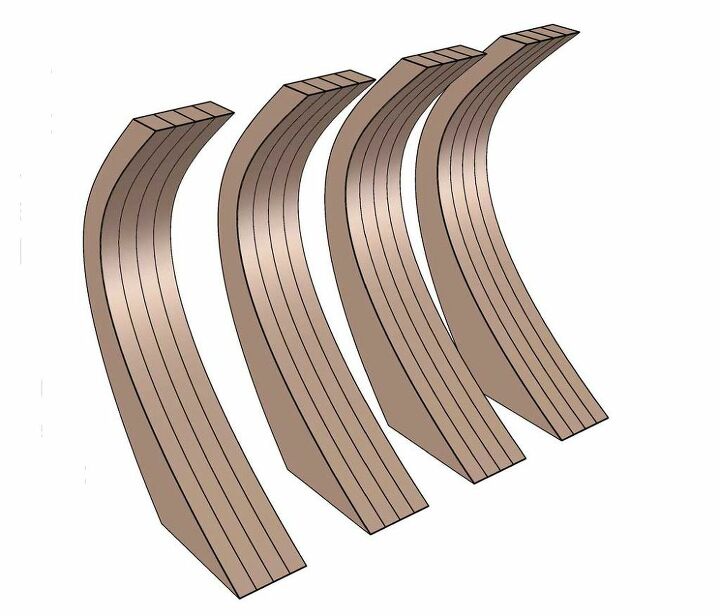
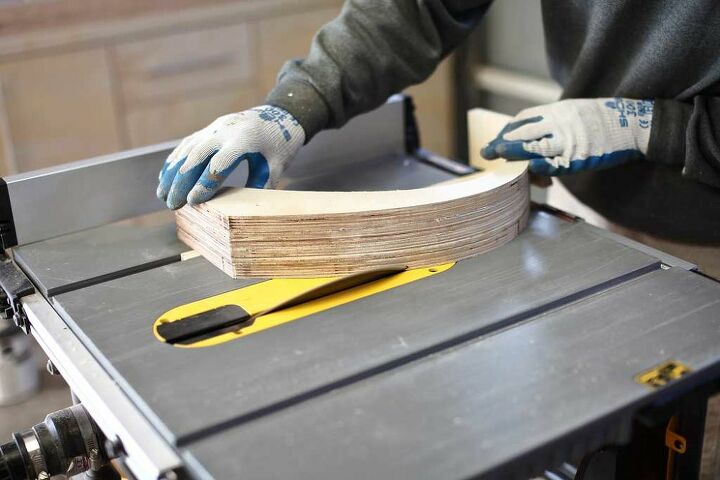
Step 4 – Glue Legs Together by Sets of Four
Once you’re done cutting out the legs, you should have a total of sixteen ¾” thick legs. Next, using wood glue and nail gun, attach the legs together by sets of four. So now you should have a set of four legs that are 3” thick. Clamp them together and let the wood glue dry overnight.
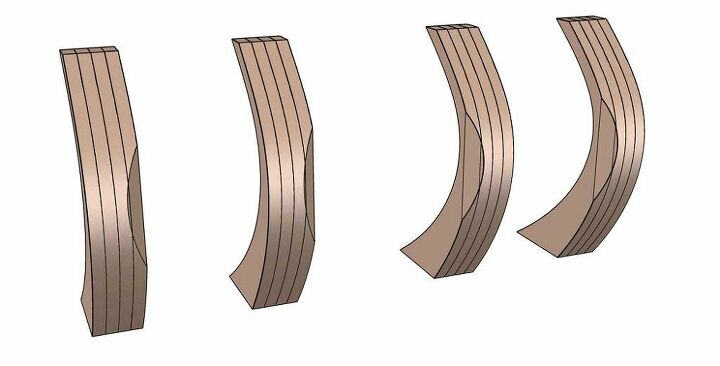
Step 5 – Trim Back of Leg at 45 Degree
The legs need to be attached to each other at a 45-degree angle. To do that, set the blade of a table saw to 45 degrees. Then nail the leg to a wooden table saw sled (this will prevent the leg from shifting or rotating when cutting) and cut back side of the leg at 45 degrees. Do the same thing for all the legs.

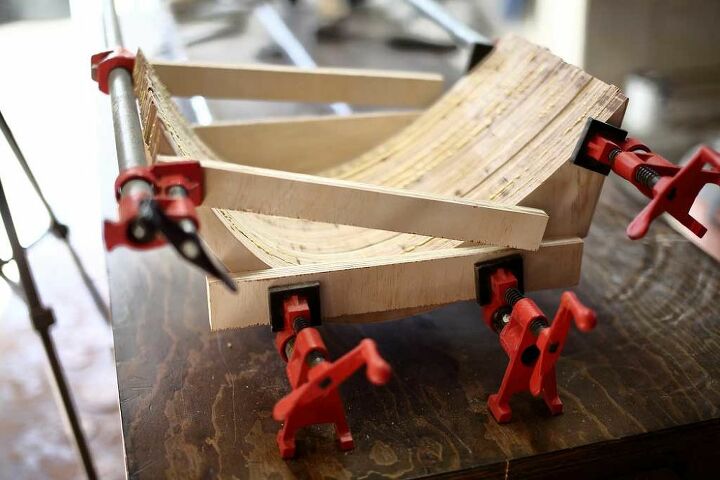
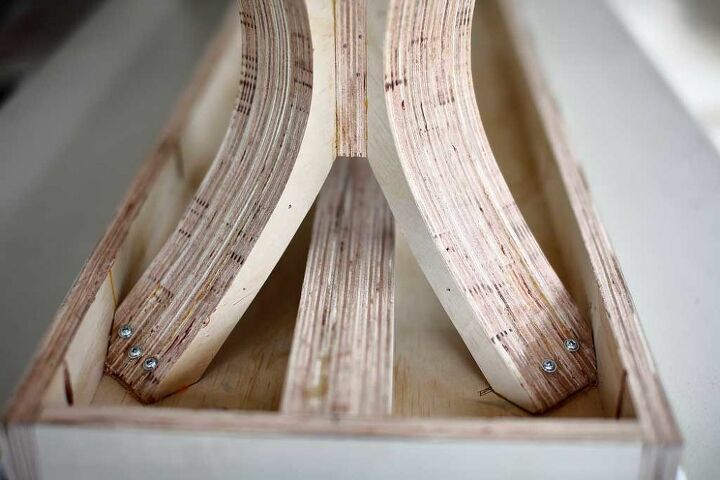
Step 6 – Trace and Cut Three Stretcher Pieces
To hold the legs together so that they don’t slide apart, you’ll need a stretcher piece that connects the legs. Take the stretcher template and place it on the corner of the plywood and trace it. Then measure and mark 50” for the total length of the stretcher. Rotate and trace the same template at the 50” mark. Now connect the lines together in the center of the stretcher. See the picture below. Repeat the process to get three stretcher pieces and then cut them out with a jig saw.
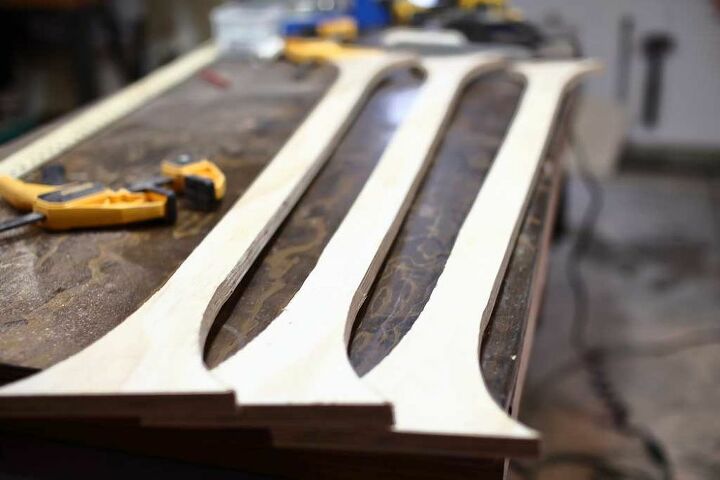
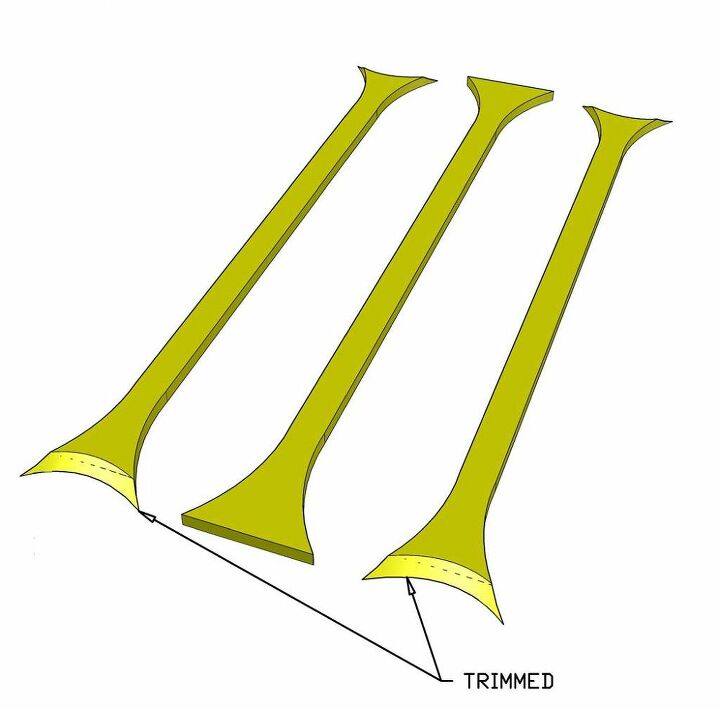
Step 7 – Trim Two of the Stretcher Boards
You should have three stretcher boards that will be glued together. The centerboard will stay its full length, but the outer two boards will need to be trimmed at each end. Place the 45 degree trimmed side of the leg on the edge of the stretcher and trace the arch of the leg (see picture). Then with a jig saw cut out the arch on both sides. Leave the center stretcher not cut.
Step 8 – Attach the Legs to Stretcher
For this step, it’s important to follow the correct sequence. First, attach the center stretcher to one of the outer trimmed stretchers with wood glue and 1 ¼” brad nails. Then attach the legs on the side where you have the outer stretcher with wood glue and a nail gun. After that, glue the third stretcher and finish by attaching the other two legs. Clamp the legs and stretcher and let the glue dry.
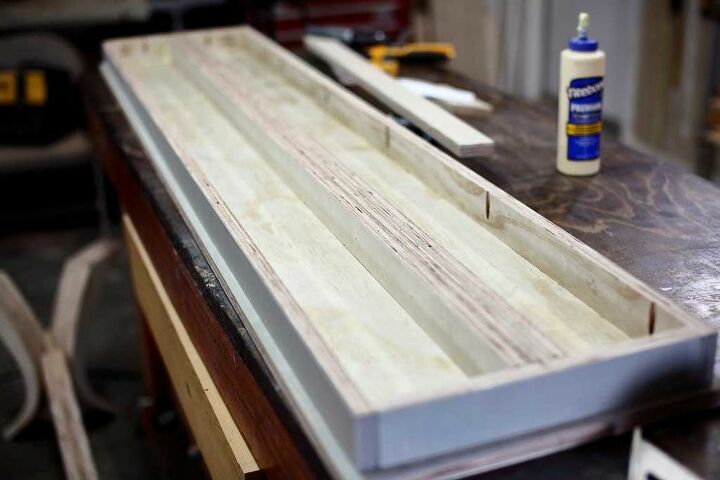
Step 9 – Insert Center Rail Underneath the Seat for Support
To prevent the bench seat from sagging over time, install a 3” wide rail underneath the bench in the center. First, cut three pieces to 2” x 65” and attach them together with wood glue and brad nails. Then apply wood glue on the backside of the rail and insert it in the center of the bench seat. Nail the rail from the top of the bench (top will be covered with fabric).
Step 10 – Attach Bench Seat to Legs
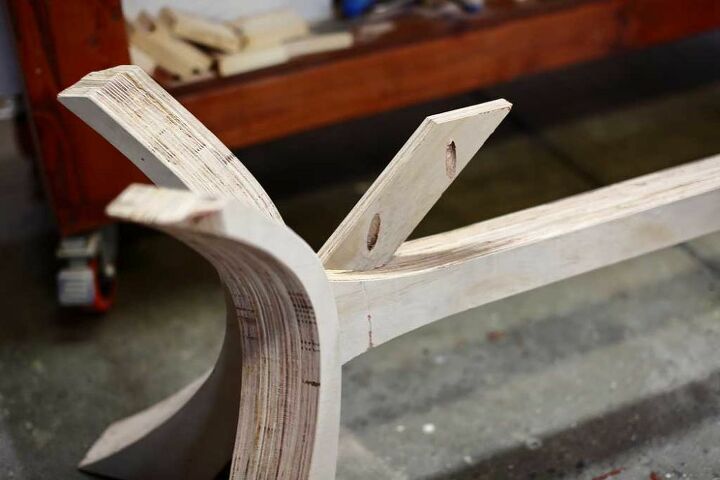
Before attaching the seat to the legs, install a diagonal brace that goes from stretcher to the seat rail. Take the third template and cut out six pieces. Again, these diagonal braces will be glued together to make it thicker. First, drill two pocket holes on both ends of the middle braces. Then attach the center brace to the stretcher with wood glue and 1 ¼” pocket hole screws. Place the seat upside down on the workbench and apply wood glue inside the seat where the legs connect. Insert the legs inside the seat and attach the diagonal brace to the seat rail with 1 ¼” pocket how screws. The top of the legs needs to be pre-drilled before screwing-in the screws to prevent the plywood from splitting.
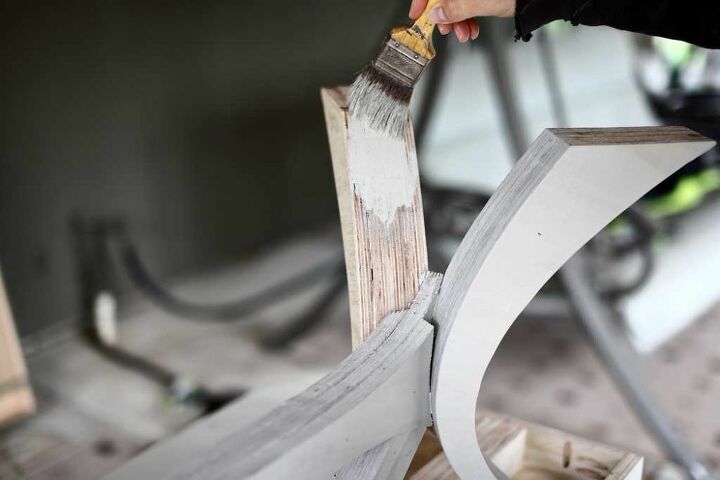
Step 11 – Stain the Legs and the Perimeter Trim
For this step, you could either stain or paint the bench. I used the Sunbleach stain to match the kitchen table. After the stain dries apply Polyurethane to seal the wood.
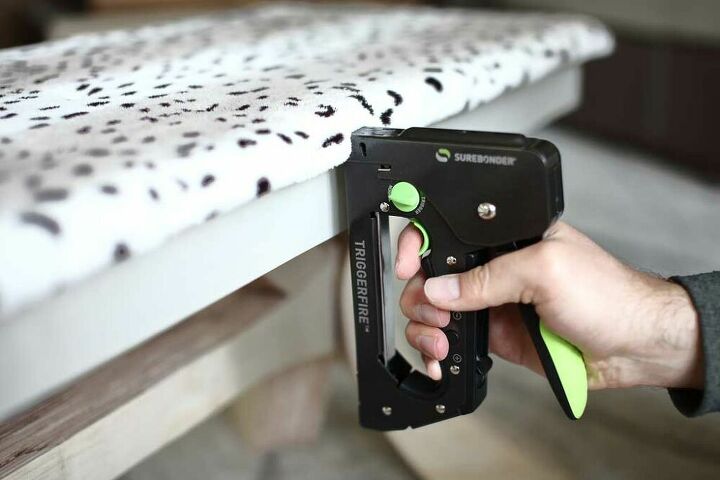
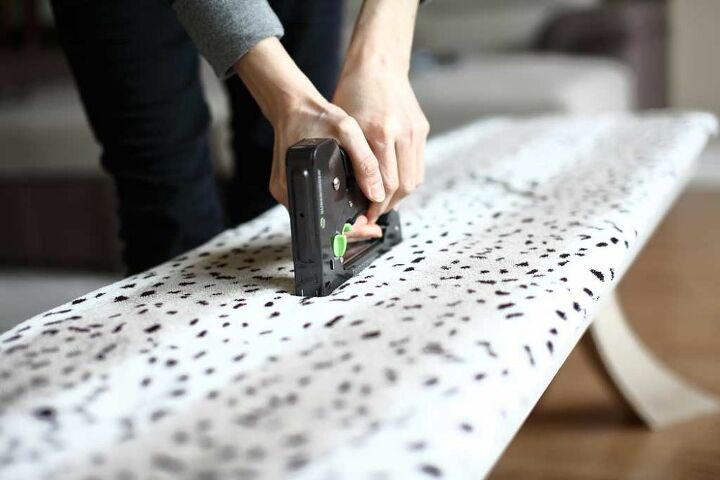
Step 12 – Cover the Seat with Cushion and Fabric
First, cover the seating with a cushion or a soft fabric. This cushion could be made as low or as high as you want. I used an old soft blanket that we didn’t need anymore. The blanket was cut to cover the top and the sides of the benchtop.
I used Surebonder Triggerfire staple gun with ½” staples to secure the blanket to the seat. On top of the cushion/blanket place a thin fabric and staple it under the seat. Then staple the hook side of Velcro around the seat in the ¾” space between the edge of the seat and the perimeter trim. After the Velcro is stapled to the seat, cut the top fabric to fit the seat and stitch the loop side of Velcro around the perimeter. Then stretch and cover the seat fabric attaching it to Velcro. This top fabric could be easily removed and washes if it gets dirty. You’re all done with a DIY dining table bench with curved legs!
Disclaimer: This post was sponsored by Surebonder. All opinions are my own.
Resources for this project:
See all materials


Comments
Join the conversation
-
Not only fantastic looking but a great set of instructions! Yes, you should enter some furniture design competitions. Your work is terrific


Frequently asked questions
Have a question about this project?
You should enter this in a furniture design contest! It's magnificient.
One thing though, why staple the seat cover? Cannot get cleaned/washed as it will be needing to be.