


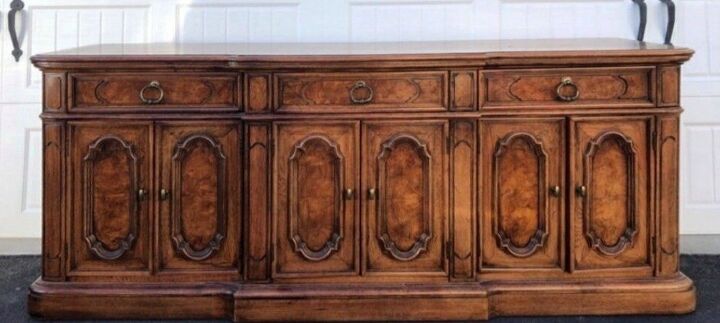
Vintage Sideboard Makeover

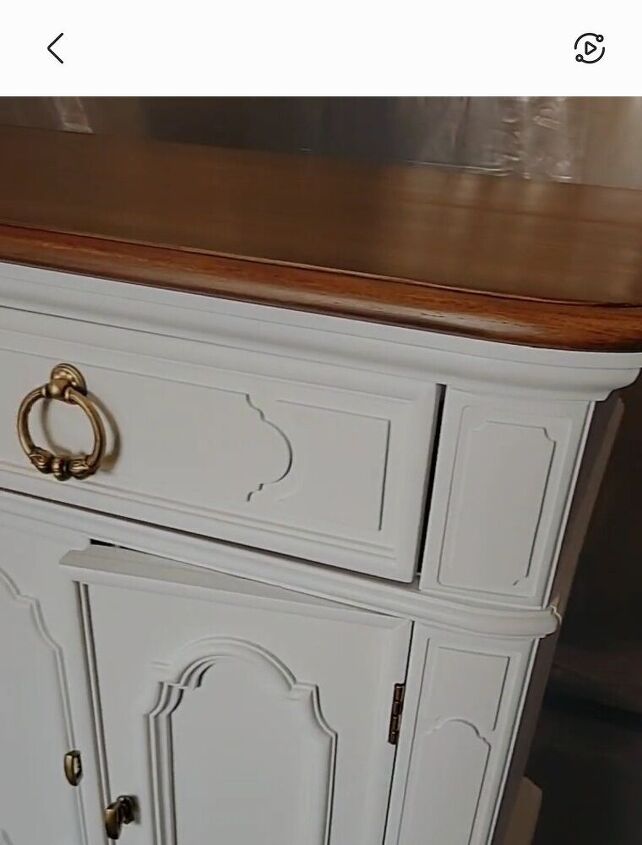
This gorgeous sideboard was the perfect piece for our client's new home. She chose a classic white with a walnut stained top to fit in with her decor and we have to admit, it turned out beautifully.
This piece was in good shape to begin with but over time the seams where the moldings are had become filled with dust, dirt and the like. They were also starting to pull away from the door and drawer fronts. These minor issues were fixable so with the client's wishes in mind, we got started on giving this piece a makeover. We started by cleaning and sanding as we do all of our pieces.
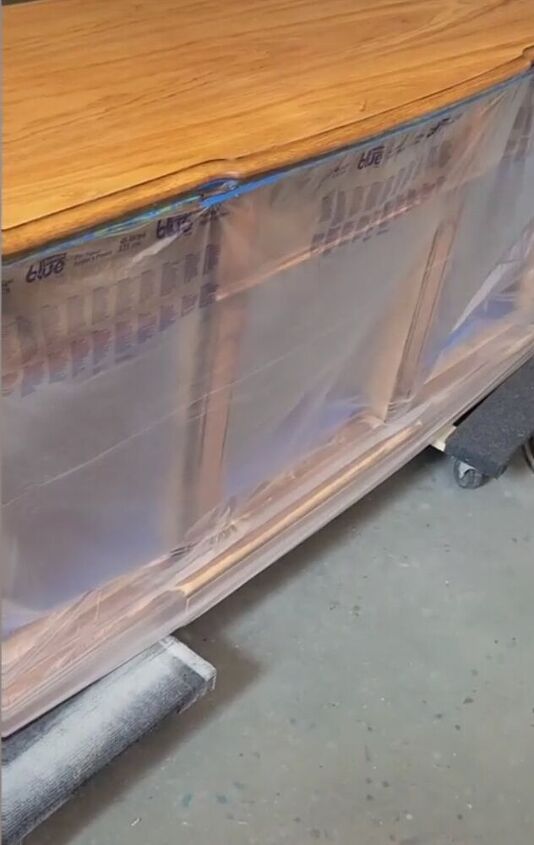
Once we sanded the entire piece making sure to end of 220 grit we used 3m painters plastic to seal off the bottom. Since the bottom was going white and the top was getting stained in walnut we decided to work on the top first. We stained it using Antique Walnut from General Finishes using a staining pad, applying two coats and allowing them plenty of time to dry in between. Then we switched and taped off the top so we could work on the bottom. For freshly painted surfaces we always use yellow frog tape - not the green or blue for fresh paint because it will take it right off.
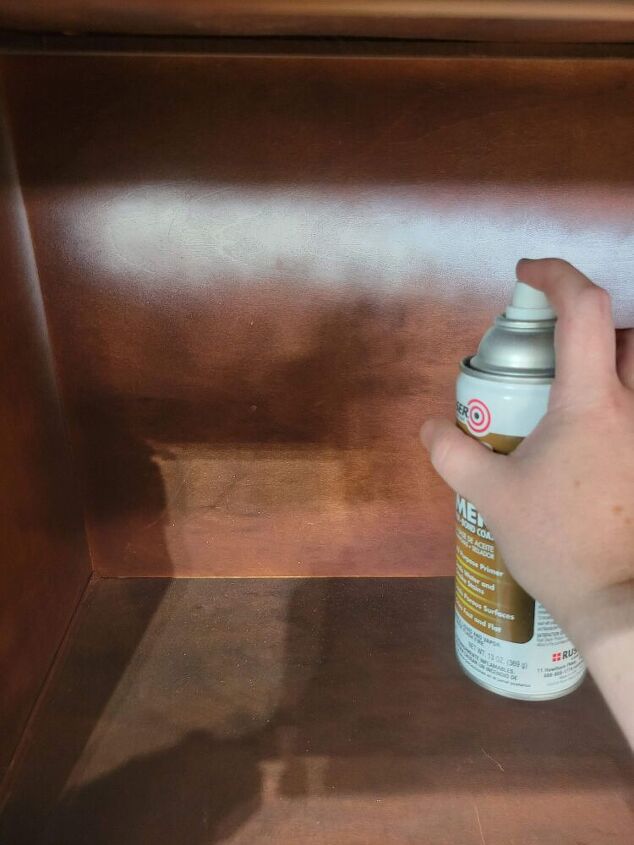
We used Alex fast dry caulk to fill those gaps in between the molding and door and drawer fronts as well as using a Brad nailer to reinforce the placement of the moldings. We then used an adhesion primer that also blocks stains and tannins. Two coats with sanding in between worked perfectly.
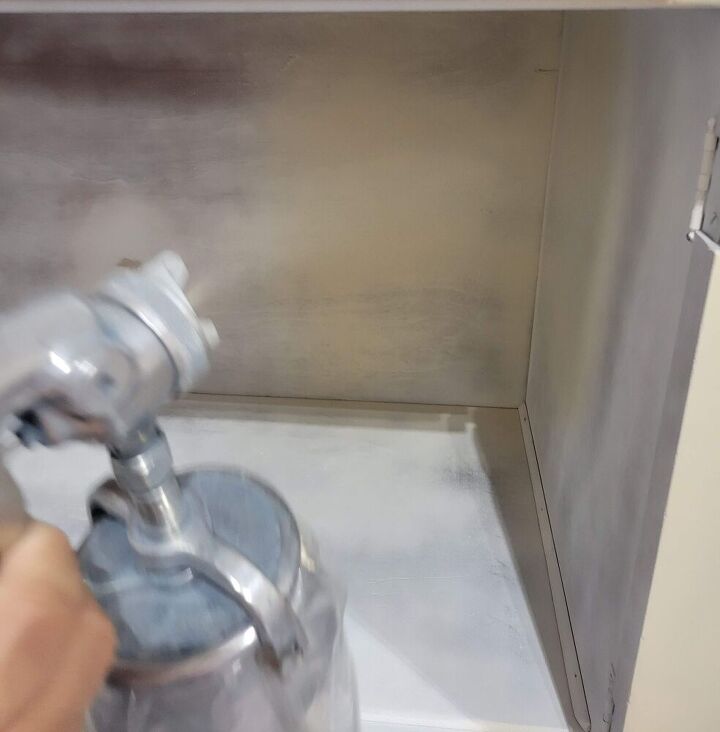
Once the primer and caulk were dry we used our favorite spray gun, the Fuji Semi Pro 2 to paint the body. We did three coats to make sure the coverage was solid.
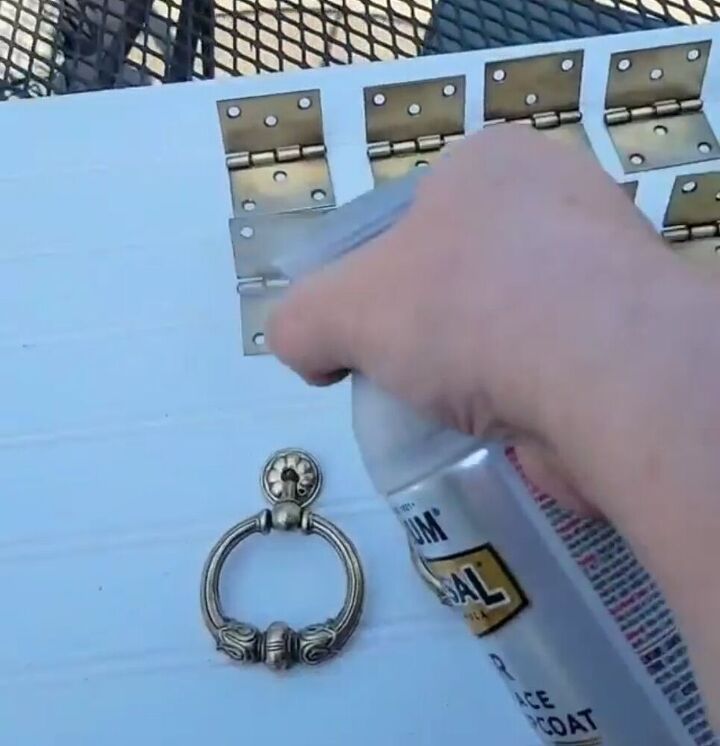
After cleaning and scrubbing the hardware with barkeepers friend, the original brass pulls were back to looking amazing. The only thing left to do was top coat it to make sure it did not tarnish and get darker as brass does naturally.
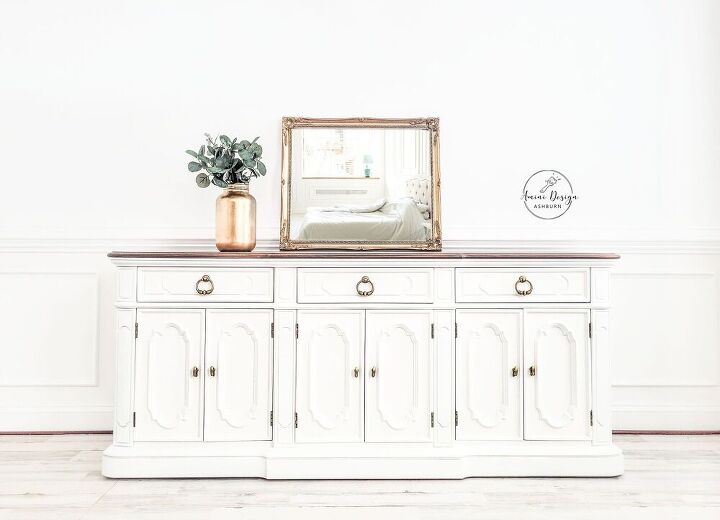
Lastly we used a water based top coat to seal the entire piece. Our favorite is General Finishes High Performance. We used our spray gun for this as well, applying two coats and sanding with 1500 paper in between each one. Here is the final result. Our client loves it!
Resources for this project:
See all materials


Comments
Join the conversation
-
WOW!!!
-
Wonderful. I will try to make it


Frequently asked questions
Have a question about this project?