


No Sew Curtain Clips
Searching for ideas on how to make no sew curtains for your kitchen? We made the easiest no sew curtains with clips.
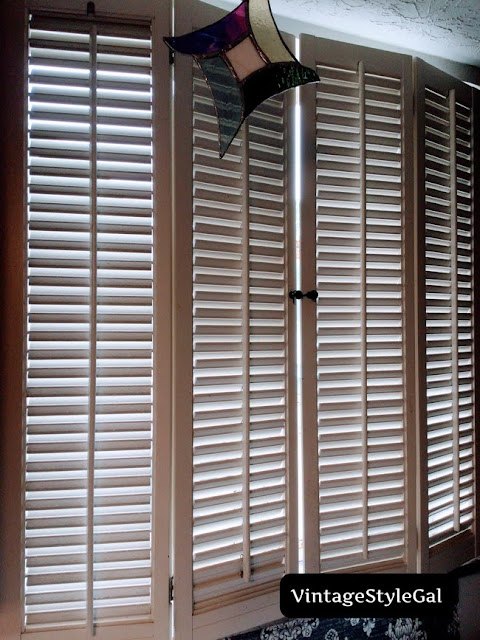
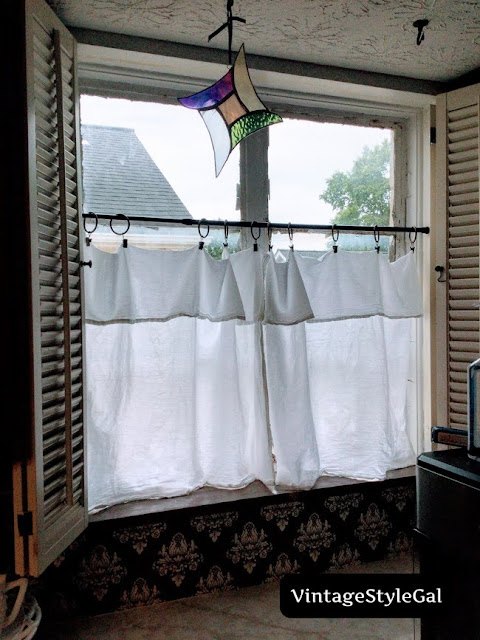
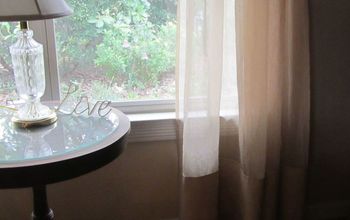
I have been wanting to make curtains for this kitchen window for a while. The shutters that are in place do not allow much light to filter into the kitchen and they really need painted too. With no sewing skills, I decided to try a different approach to curtains for this cottage kitchen window.
Do you recall the custom towel I made for our kitchen with the flour sack towels? I went to my stash and decided to make curtains from them. Did you know the flour sack towels are on sale right now? At $1.25 per towel, that is just a mere $2.50 for curtains for the kitchen! WOW! Did I tell you, or did I tell you I love projects where I am spending as little as money as possible! I paid a little more when I purchased these towels, but I still only paid a total of $3.23 for curtains for this window! Talk about a steal!
Did you see how little light the shutters let in? Kind of dark and dreary in the kitchen. Our kitchen needs a make over, and I do believe I finally have a game plan, but it will be a while like all of my projects around here. I am hunting and gathering pieces so the cost will not be as high once we are ready to do it.
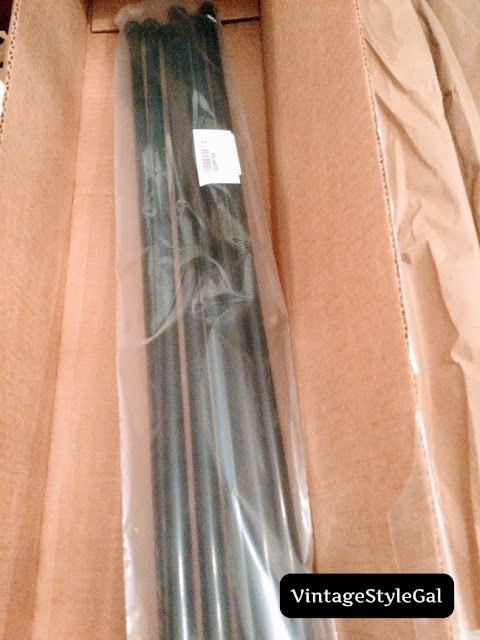
Tension rods were the easiest and most economical way to hang the curtains in our kitchen. I decided to purchase a set of 6 since I have a few other ideas for projects around here.
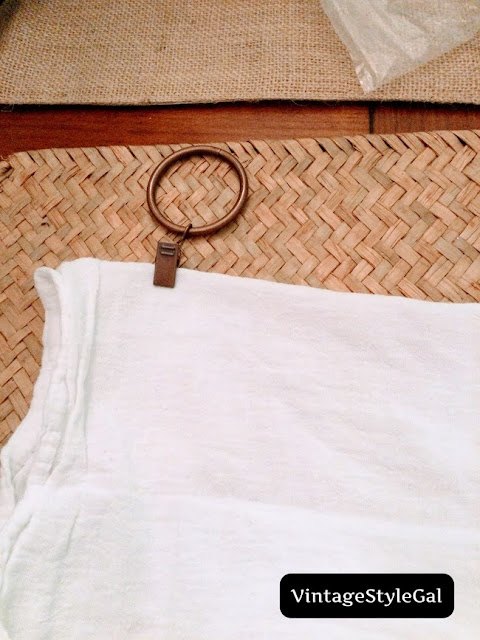
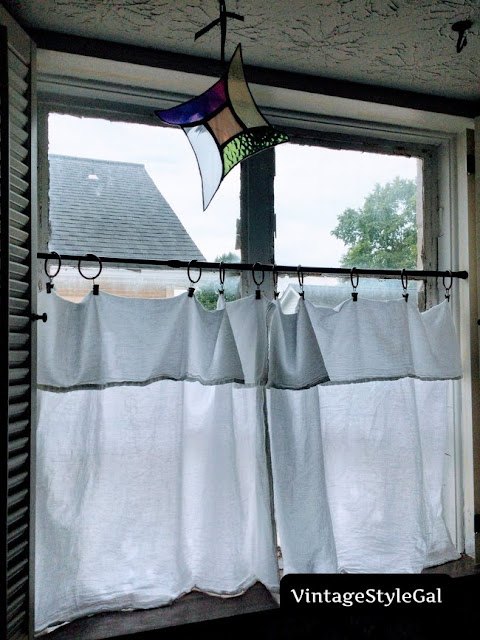
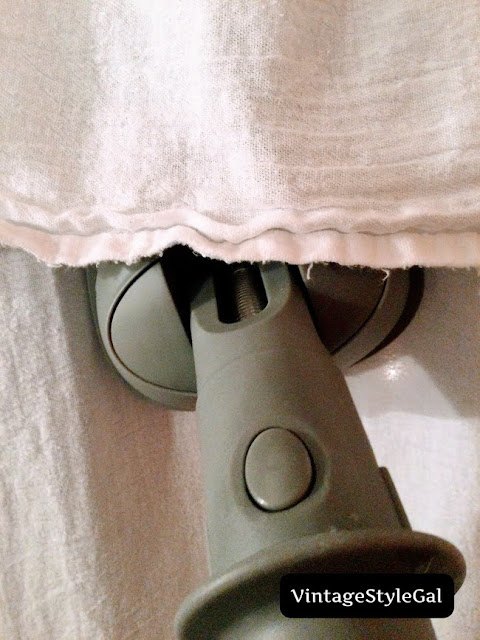
This no-sew curtain project is really the easiest to make. All I did was fold over the top to create a bit more interest and use my no sew curtain clips. You simply press the clip and slide it over the fabric. Viola, instant curtains! You could even create a double valance with these no sew curtain clips. If you are someone like me who cannot sew to save your life, then this is the ticket!
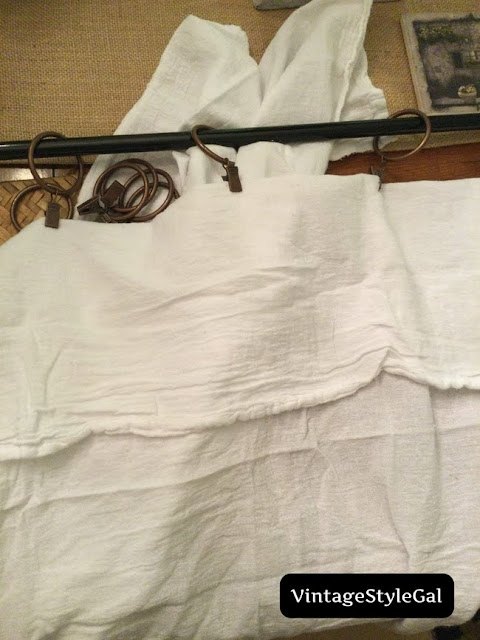
I continued until I had 5 rings attached to each towel. Then I put the rings on the rod. You can throw this together in about 30 minutes if you count the time it took me to steam them too.
A little behind the scenes here at VSG... yep, I put the tension rod in the bathroom entry and used my steamer to steam out some of the wrinkles in the towels.
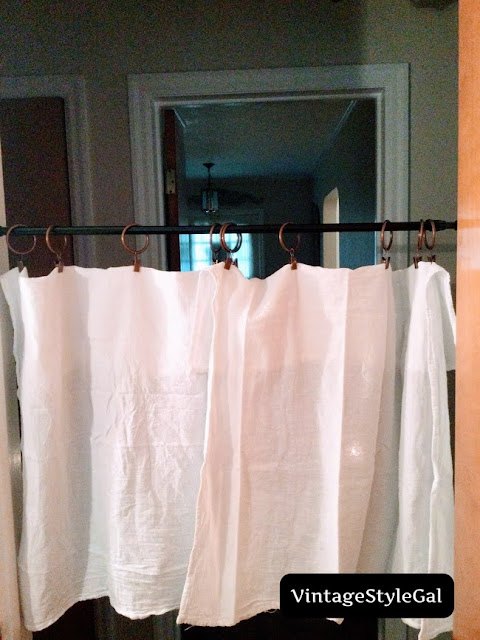
Once I had the no-sew cottage curtains steamed, I needed Mr. Vintage's assistance in getting them hung in the window.
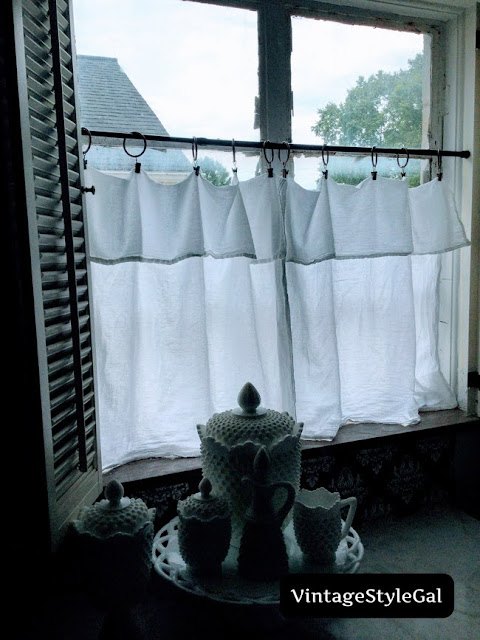
You can see so much light is now filtering through our kitchen, at least more than we did have. The kitchen for some reason is dark, there are only two windows in the kitchen, and the largest of the two has a roof over it. Our patio has a roof that goes over head to keep you out of the elements from the garage to the back door. We would love to enclose it and make it a mud room, but that is down the road...
As you can see our windows are in rough shape, we have 5 more to replace and unluckily, 2 of the 5 that are left are in the kitchen. We do not like debt so we save and pay as we go. Do not let a window company pressure you to have them all done at one time if you do not want to. We started with a large well known company out of the Columbus, Ohio area whose advertisements are well known, and I have to say I have been so disappointed in those two windows. I can hear everything outside and Mr. Vintage can hear me cough when he is in the backyard and I am upstairs in our bedroom.
Disgusted would describe how I feel about those two windows. Do you also know they charge you $500.00 to process your order? Who does this? We paid cash, there should be NO processing charges. I'd like to think I have learned a thing or two since we started working on our home and that will never happen again.
After we knew we would not be making a return purchase with them, we found a local window company. I cannot tell you how happy I have been with them. The owner is down to earth and actually comes to your home and does all of the measuring himself. We went with casement windows when we purchased windows from his company. You may pay more for them, but our window real estate? Perfect! The view out of our window is only disturbed by the grid pattern we had installed in each window.
The crew was very mindful of walking on carpet and put down drop cloths everywhere. We had a window crank that was scratched, the owner said no problem and replaced it. We also had some screens that did not fit snuggly into the frames and he was sure to take care of this issue as well. He is on top of it and has been a pleasure to work with, they have replaced 11 of our windows now. We are planning to call him for the last five here soon.
I love the casements so much better than the other two upstairs which are double hung. I am just glad I did not have an entire home of those windows installed. If you have questions about windows, I would be happy to answer any questions you have if you are local to the Central Ohio area about my experience with the two companies we have worked with.

I am still loving our backsplash... and I like to think these cottage curtains really compliment the backsplash. Do you see off to the left Mr. Vintage's Opal ice maker? Yep, on the counter, in the way... I am not a fan of it on the counter, but where else am I going to stash the thing? It makes the Sonic ice and is heavy so I could not move it out of my way... but it is not something I care to look at that is for sure.
The funny thing is, I want everything to look pretty, and keep the techie stuff hidden... men? Why are they not on the same page as us ladies? I will never understand it, but I guess we make it work.

Do you see my stain glass piece hanging from the ceiling? I signed my mom and I up years ago for a class and I made it with my own two hands. The class was so much fun and it was a nice way to spend the afternoon with her. She, of course made hers with pink and white pieces of glass so it looked well put together. Mine? I used a different color for each piece of glass.
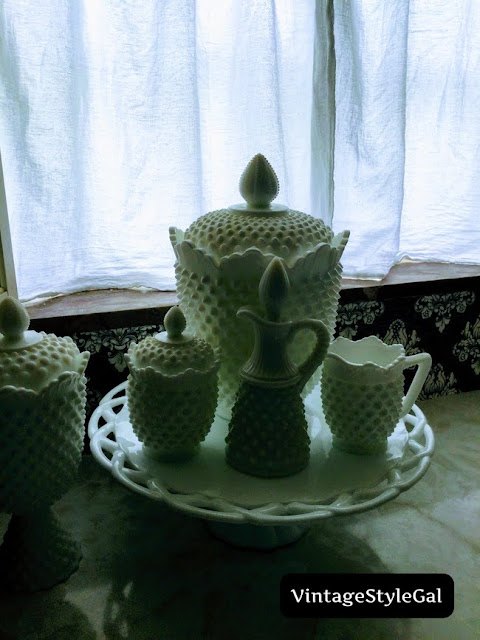
I still have a small collection of my milk glass hobnail pieces on the counter. I have not found anything else to put in it's place, so they are staying for now.
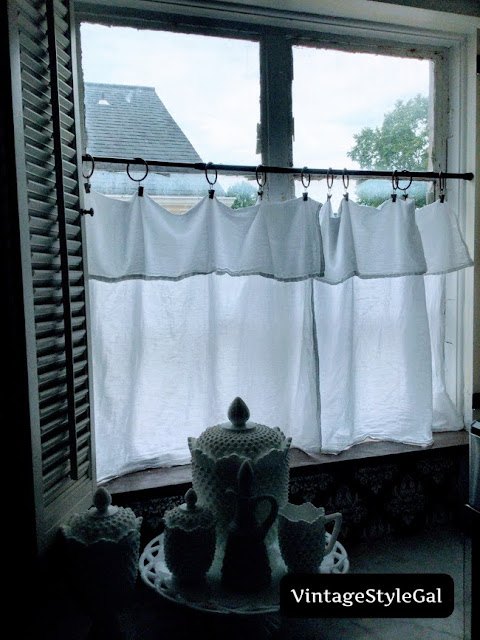
One more look at our curtains that were $3.23 total for the window! The rest of the materials I used have links included below for your convenience. I do love it when a plan comes together while using the smallest budget possible!
Resources for this project:


Comments
Join the conversation
-
I love your stained glass piece!
-
I think you could have easily taken this look to true cottage charm had you ironed them. Even Ma Ingals pressed her little calico window coverings


![How to Make Curtains With Grommets [and Lining]](https://cdn-fastly.hometalk.com/media/2021/03/02/6965263/how-to-make-curtains-with-grommets-and-lining.jpg?size=350x220)


Frequently asked questions
Have a question about this project?
I love your cute, no fuss curtains!! Where would I find those ring clips that you used to attach them to rods? And I wonder if the rings might come in a larger size? I have an adorable shower curtain that I purchased not realizing there were no grommet holes at top🥴 hoping I can borrow from your idea! Thank you😊
Why 7 pictures of the curtains hung up?