


Chimney Makeover – Painting Faux Stone, My Living Room & Stairwell
4 Materials
$200
13 Hours
Easy
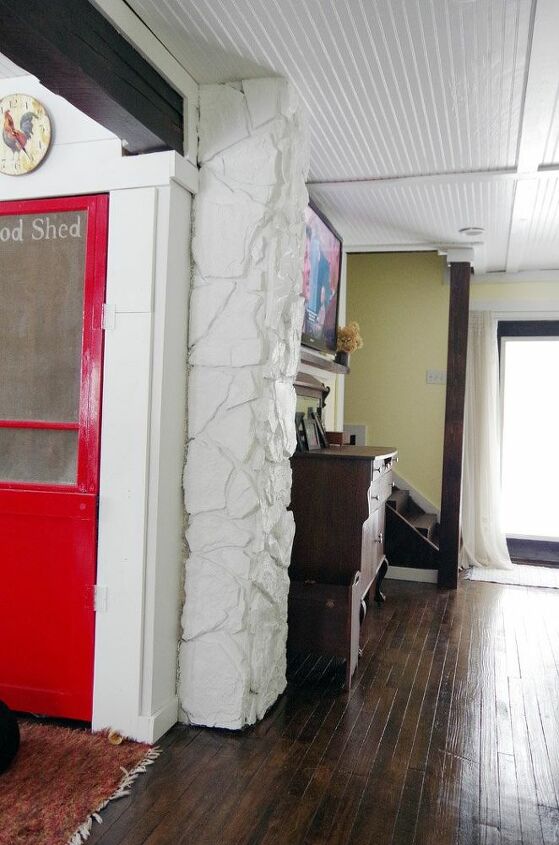
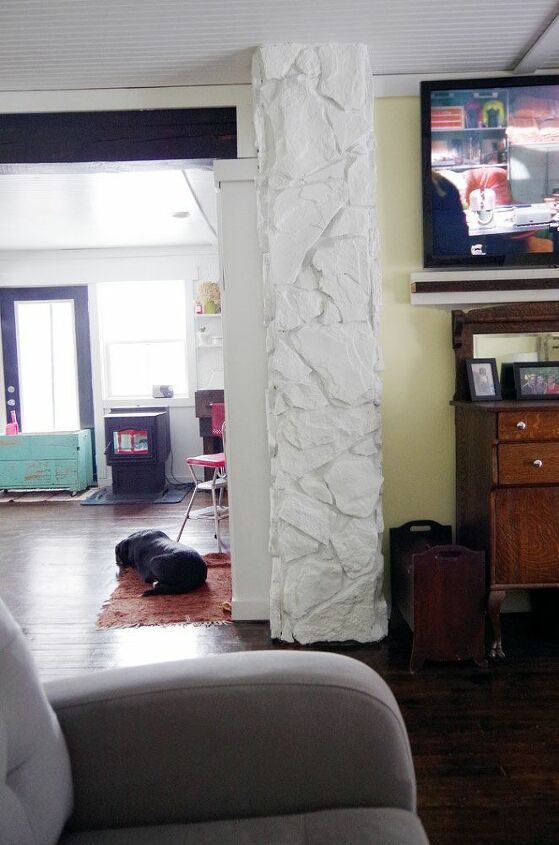
Making fake stone look better with paint! So begins my entire living room redesign! There are about a million things I hate about this fake rock that my ex slapped on my chimney in my living room. (Not the least of which is the fact that my ex slapped it on my chimney in my living room.) I had planned to either cover my block chimney with sheet rock or just paint it but he had this stone so I let him have this one.(For those of you who have been following along YES that is the same fake rock he put up incorrectly on the outside of my house that I removed and replaced earlier this year because it was falling off.)I really like the look of stone in the right applications.Here in northern MN stone is a big deal and almost every new business in my home town has stone on it somewhere. My brother was a stone mason for YEARS and my cousin is still a stone mason.But there was only one kind of stone I would have approved for this home and it would have had to have been dug out of a field close to here and been REAL. This is not real stone. I hate that I don’t have real stone in my 100 year old farmhouse.It is an absolute travesty.
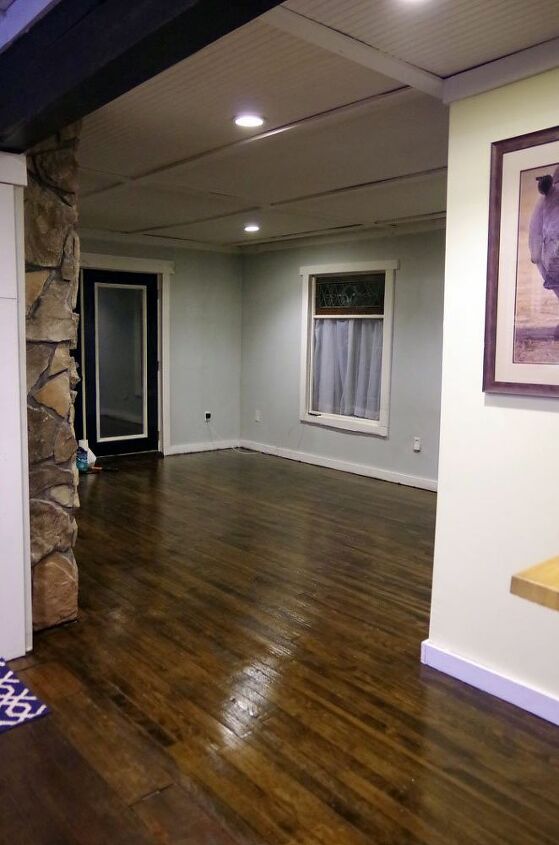
After removing the ridiculous amount of this stuff from the outside of my house I just could not yet bare the idea of removing it from the inside of my house too. Just the MESS I would create… just NO, I’m not ready yet… So, paint it is!I’ve been planning this living room remodel since this spring!I sent my old sofa, coffee table and one of my end tables to my garage in June and then proceeded to live without a sofa for four months… I don’t spend much time using my couch (or doing anything inside really) in the summers but I will say that it was kind of miserable – I had two chairs parked here and they were barely a step up from sitting on the floor.With Lodi and doggo Annie joining my life I broke down and ended up buying a new sofa before I refinished the floors and painted the room out.I was planning on suffering so I had one less thing in the room to move out for the remodel but I just couldn’t do it anymore. The three of us deserved a place to cuddle and watch tv!So Lodi helped me empty the room (new sofa and my entire living room chilling in my kitchen and entryway) and stain the floors. After that I spent the next few days covering everything in a lot of Minwax polycrylic.(NOTE: Polycrylic is not the top choice of anyone for sealing hardwood floors but dammit I LIVE HERE. The urethanes and the shalacs are just so toxic, stinky and take so long to dry. So far polycrylic has done just fine for me on my floors. We all have to make our own informed decisions on what to use (or not use) in our homes.)
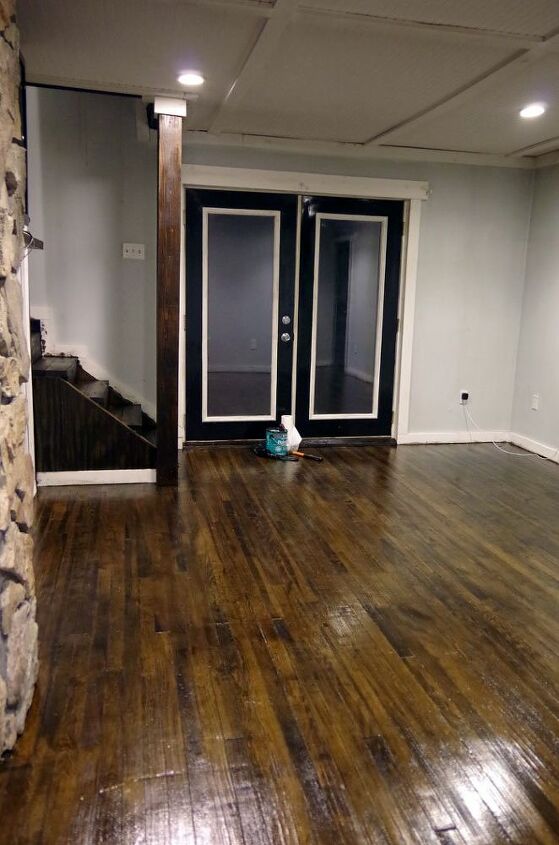
After covering those lovely, ancient hardwood floors (seriously they’re a ton of work but gosh how they make my heart skip a beat) I tackled the big painting job one Monday after work.Just like my Entryway and my Kitchen this room was hit hard with smoke damage so, just like those rooms, I was astounded by just how serious the YUCKINESS was.This room and the kitchen you can see in comparison in the following photos have the SAME light bulbs. This is not a difference in yellow bulbs or white. The icky of this poor living room, is all due to that awful wood stove I got rid of. WOW. I am so glad to paint it away!
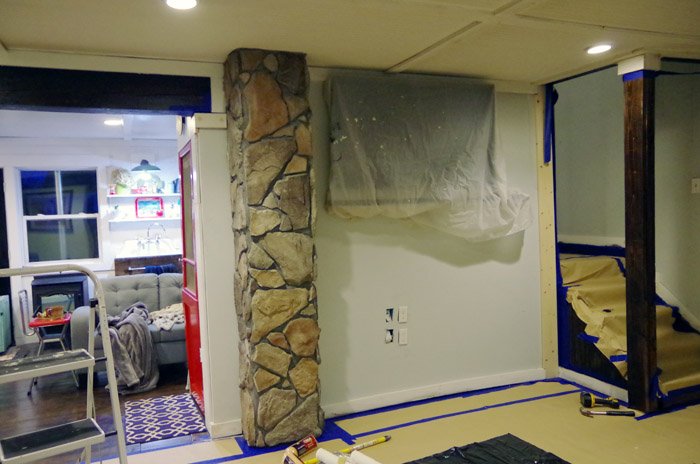
With the chimney first thing was first – it needed a SERIOUS cleaning. I hit it with straight white vinegar, a wire brush and lots of determination. (All that soot and smoke that stained everything just settled here into every single groove and crevice.)I considered leaving the grout a different color but the more I painted the more it just made sense to paint the whole thing out.
I used Ace’s acrylic primer first using a big bristle brush (my arm got quite the workout and I totally destroyed the brush) and then I moved on to using the same semi gloss white paint I was using on all of the trim and the ceilings.Several coats now in semi gloss is going to make it much easier to keep clean too!Side Note: I have already abandoned my chimney by getting rid of my wood stove in 2018. So, if I ever get really really really bored some day… I may just remove the entire chimney on all three floors…(Perk if I do that: It will open up a larger entryway and better flow in my Master bedroom and that gets me really excited!)
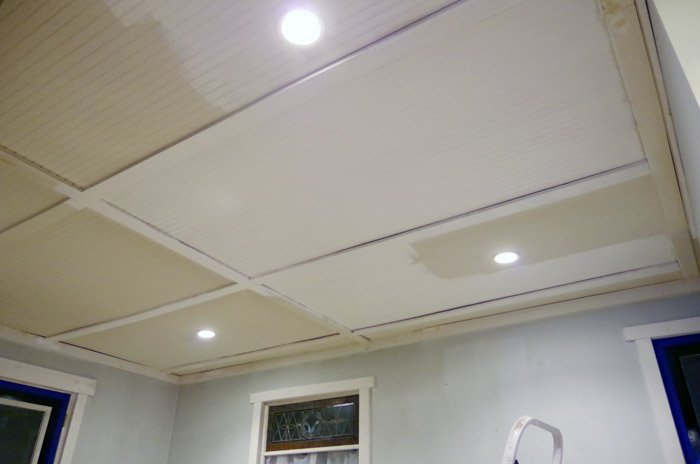
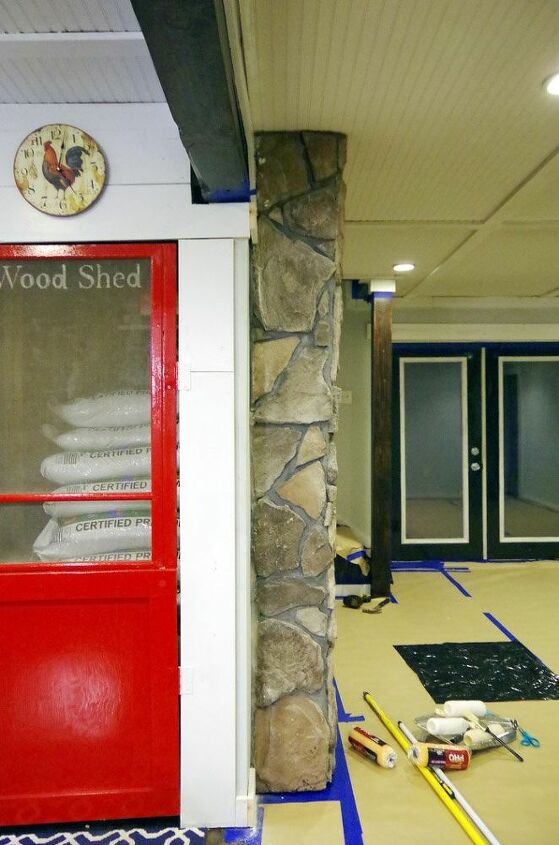
But in the meantime…I hate it A LOT less now! I can’t believe how much it brightened the room up!Painting stone like this (or brick or really anything that’s this rough) is a PAIN IN THE BUTT. But worth it! I also painted the stone that’s covering the chimney in the stairwell and also painted the trim and ceilings in the stairwell too.All in two gallons and six hours was barely enough to get it all done one evening after my day job but I rallied! (My house is a painting nightmare, so much of it has to be done by hand and can’t be rolled on.)Next I painted the room and the stairwell out in the same light yellowy butter color I chose for my breakfast nook called Rise and Shine by Clark and Kensington.
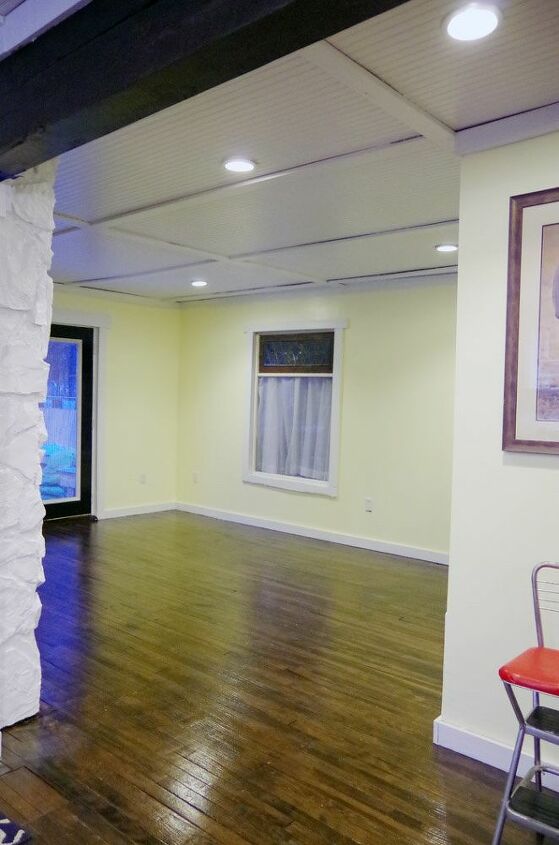
I’m totally thrilled with just how much painting the stone in both places along with the trim and ceilings brightened it all up. But where as I was a bit worried about the yellow (I’m really NOT a yellow person) I think it was a good choice here.With no windows in my narrow stairwell I think the yellow lifted the space and made it feel far less claustrophobic and in the living room I think the color fits the age of the home. (Of course getting rid of the dirty nasty caused by the wood stove was a huge step in the right direction – I could have painted it out in any color and it would have been a huge improvement regardless.)
I made a total mess and went through three gallons of rise and shine. I tackled it right after my day job one night and used every single drop of paint over another six hours.Twelve hours of painting over two nights after my day job meant that I then proceeded to just lay down.Lodi called me there, laying in the middle of my living room, and encouraged his very crabby and very tired girlfriend to get her ass to bed. (It was a work night and I was already hours passed my bed time.)But I just could not get up.I needed to be still, I needed to not move, not work, just BE for a while.That’s a lesson I’ve learned before. Sometimes an hour of chill time is more needed for the soul than an hour of sleep. So I gave myself that hour, two glasses of wine and a sit in the middle of my newly painted living room.
There’s still A LOT of touch up to do, three coats of Rise and Shine was BARELY enough so I’ll be picking up another gallon of it but that can be done when I am not quite so sick of painting. All in it was about twelve hours for me over two days.I can touch up AFTER putting the room back together though. It was kinda fun having my sofa in the kitchen but I’m ready to have my house back!
Resources for this project:
See all materials


Any price and availability information displayed on [relevant Amazon Site(s), as applicable] at the time of purchase will apply to the purchase of this product.
Hometalk may collect a small share of sales from the links on this page.More info

Want more details about this and other DIY projects? Check out my blog post!
Comments
Join the conversation
2 comments
-
Looks fantastic, it really brightens things up!


Frequently asked questions
Have a question about this project?