


DIY Upholstered Chair Cushion

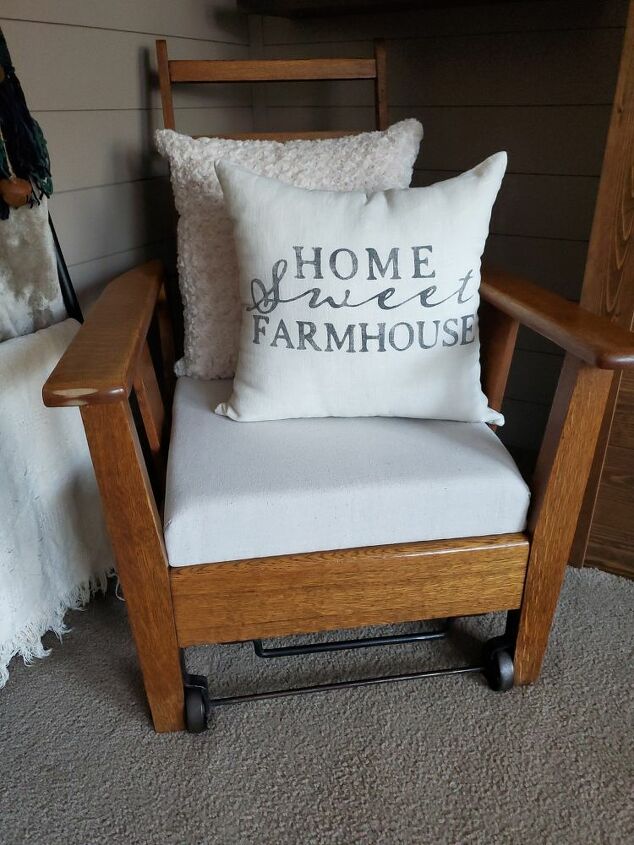
I have a vintage Morris chair that belonged to my Grandparents & the cushions needed to be replaced. I was scared to try making my own, so I found an outdoor cushion that fit the back and bottom of the chair. I used that for a couple of years but always dreamt of just going for it and trying my hand at upholstery.
DISCLAIMER...This is my first time ever doing upholstery. The way I made my cushion may not be the professional way but it was doable for a first timer and saved me a ton of money. All of my materials were easily found and bought at Joann Fabrics and Home Depot.
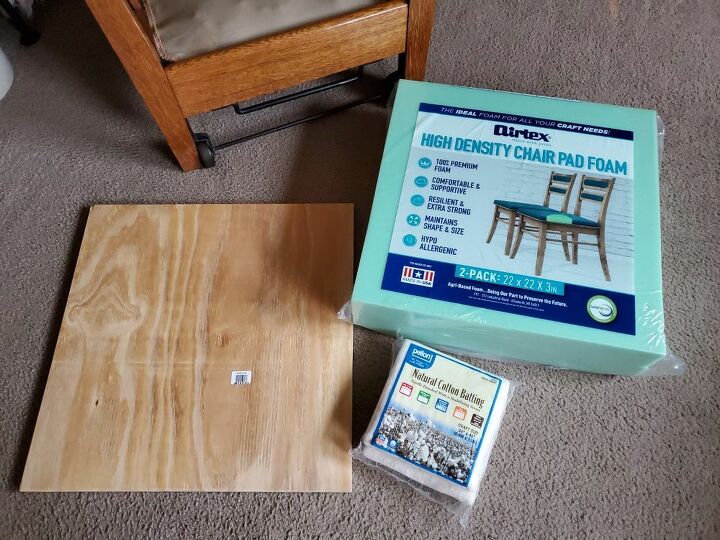
Material List:
- 3/4" 2'x2' Sanded plywood
- High Density Foam 3" thick
- Natural Cotton Batting (1pkg)
- Hammer
- Heavy Duty Stapler
- 3/8" staples
- Fabric scissors
- Drop Cloth (or material of your choice)
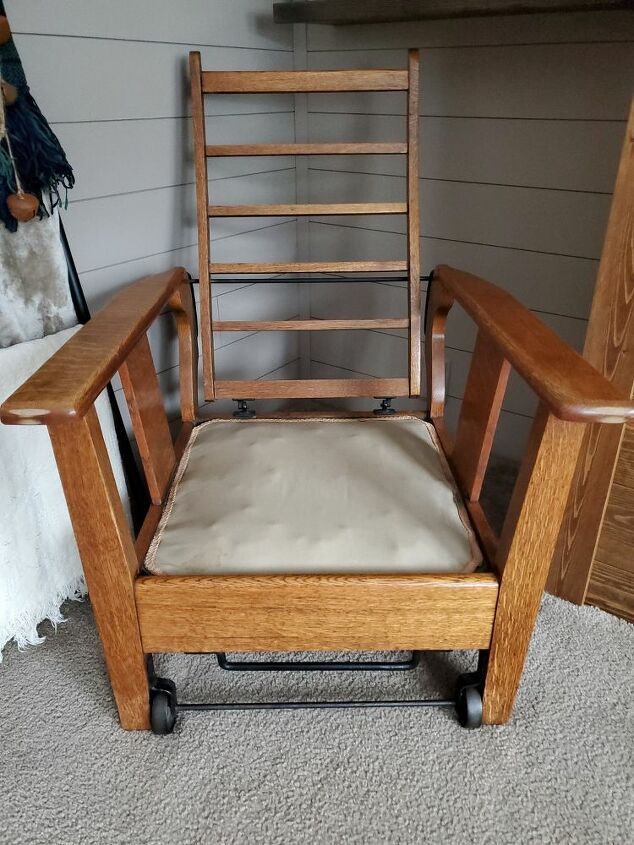
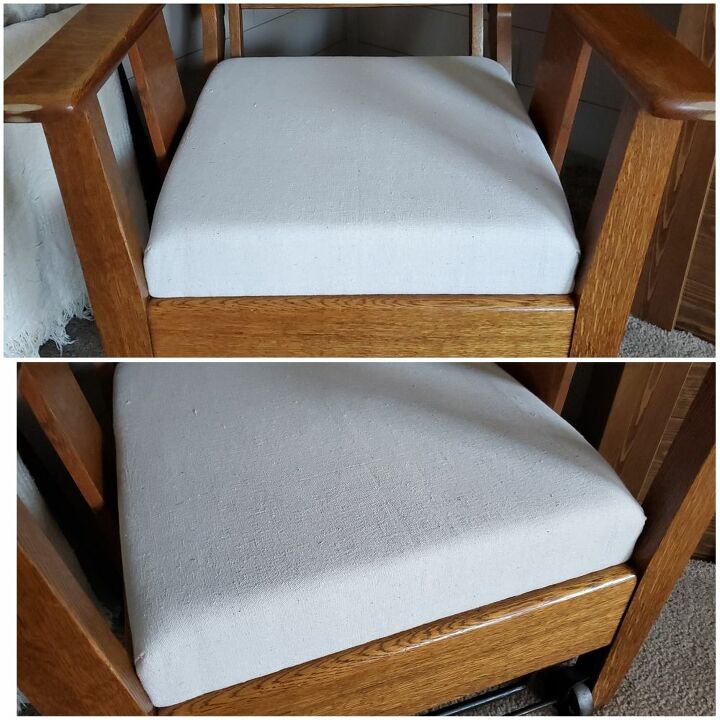
This is the chair, naked. I decided to keep the old stuff in the bottom of the chair. I wanted to make sure I had a firmer seat than the outdoor cushion provided so I wanted my cushion to have a wood (plywood) base.
First I started by measuring the inside of the chairs frame and then had my husband cut the plywood a little smaller than the opening because I will be wrapping the batting and chair fabric around the board.
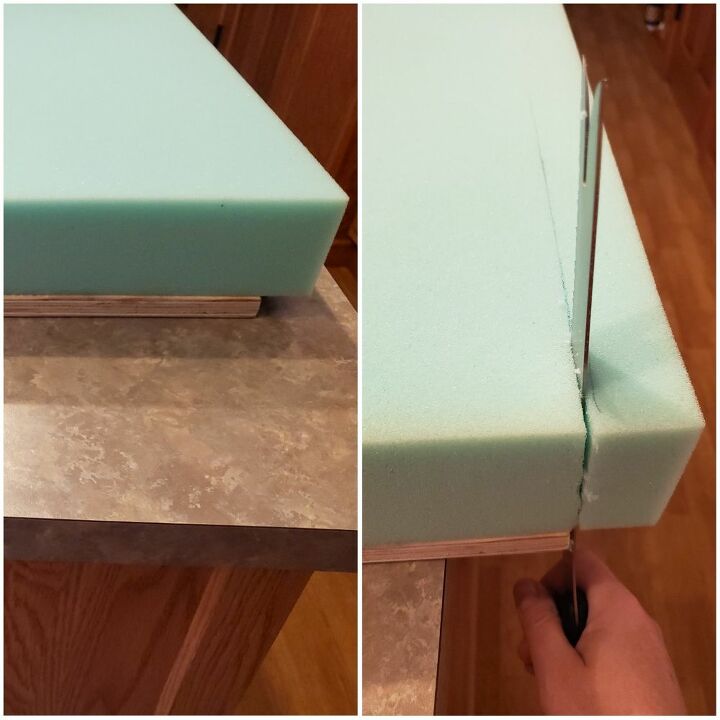
My board was cut to 20 1/2" x 22" and since the high density foam was 22" x 22" I had to do a little trimming. I used a bread knife but if you had an electric knife that would be a great option too.
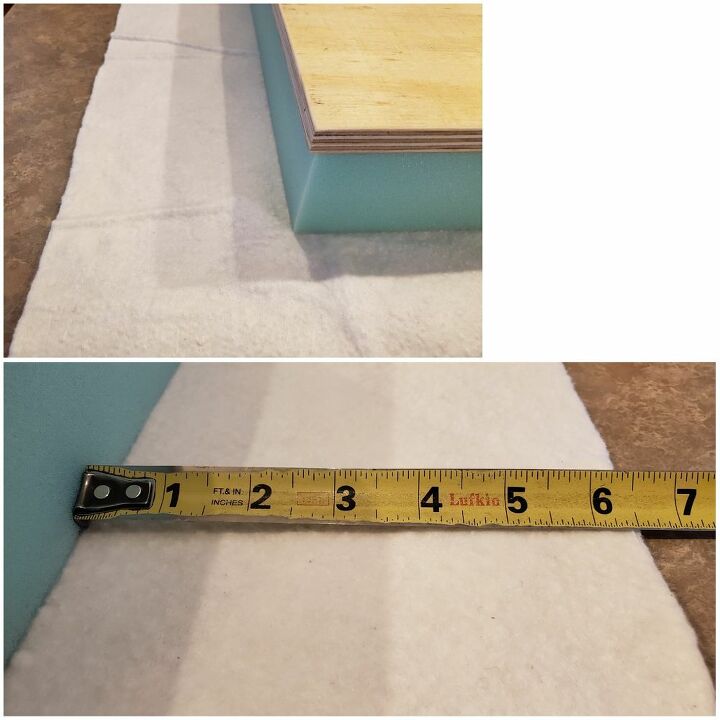
With my board and foam cut to the right size, it was time to wrap the batting around the high density foam and plywood board. I laid the batting out on my table and made sure it was smooth and wrinkle free. I left 6.5 inches of material on each side so I could easily wrap them.
TIP: Dry fit your board before you start to make sure you have room to wrap the batting and fabric before you start stapling.
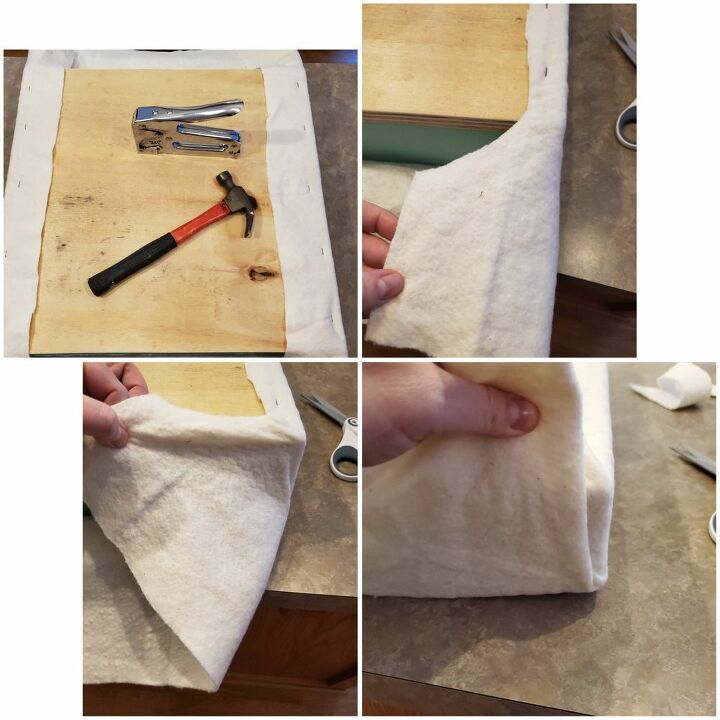
When wrapping the batting, I started on one side and then did the opposite side making sure the batting was pulled snug. Place staples at least 1/2 inch from the edge of the board.
On the corners I removed as much if the unnecessary batting as possible so it wouldn't be too bulky.
I also made sure I knew which sides were the front and back and marked them on my plywood. I did this because I knew I didn't want the fold to be on the front of my chair cushion.

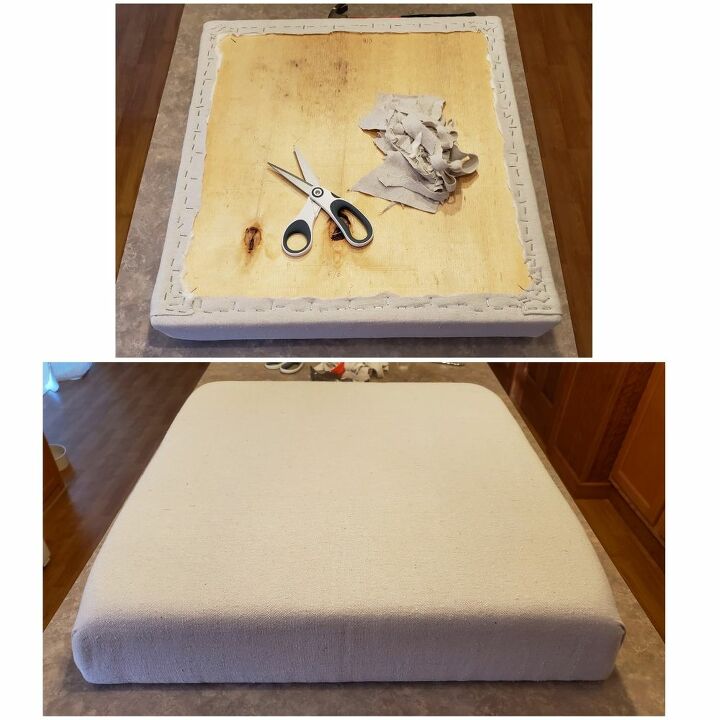
Once the batting was wrapped around the cushion I trimmed the excess before adding my fabric. I added more staples after taking this photo to make sure it didn't loosen up.
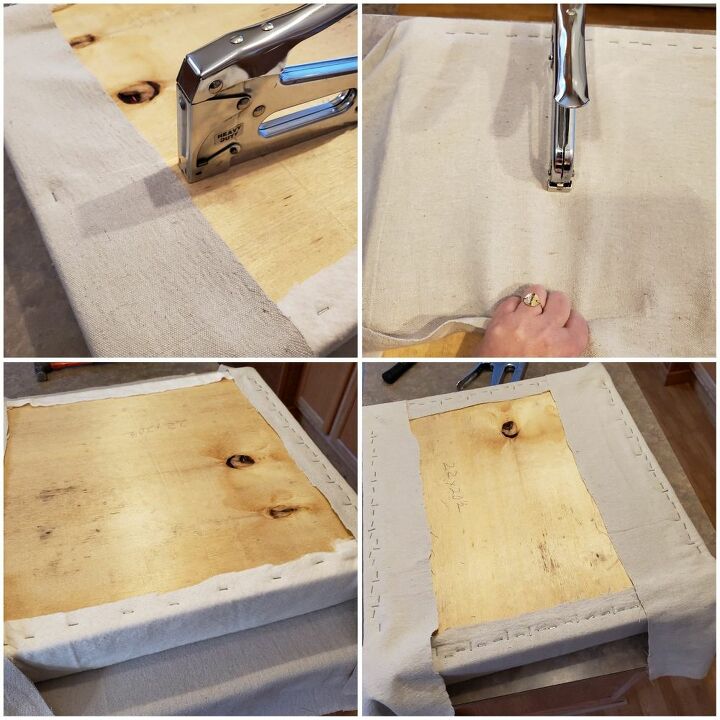
For my seat cushion fabric, I decided to use some leftover drop cloth I had from my curtian DIY (as seen on my profile).
I used the same technique as I did with the batting. Laying the material out and stapling the material one side and then moving to the opposite side. Remember when stapling, you need to make sure you pull your material tight. You don't want it to be loose and bunch when it is sat on. Remember if you mess up you can pull out your staple(s) with a flat screwdriver.
TIP: Iron your material before starting this project.
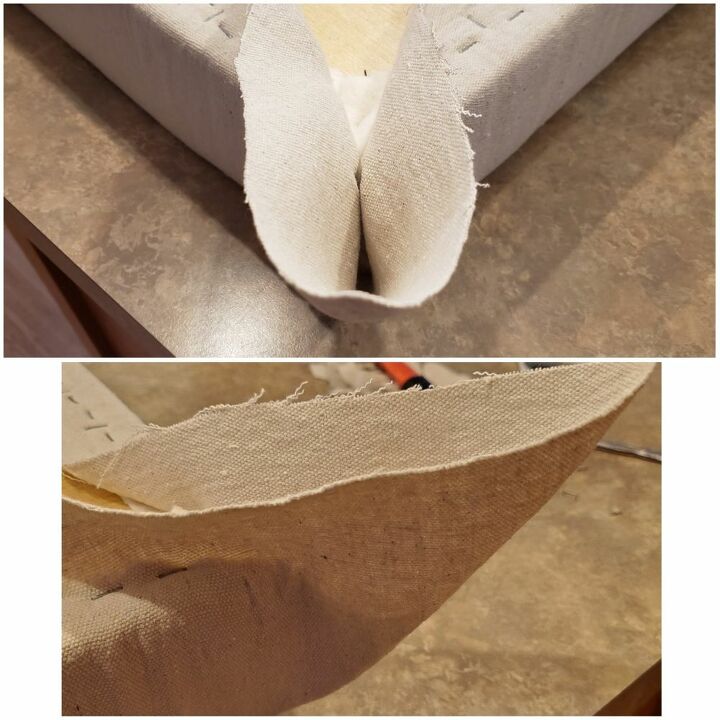
Ahhhhhh, the corners. This is the portion of the project that took the most time for me.
This is what my corners looked like before starting to fold them.
First I cut straight down toward the table a 1/2 inch from the corner of the cushion.
Then I tucked the short cut portion of the fabric around the corner.
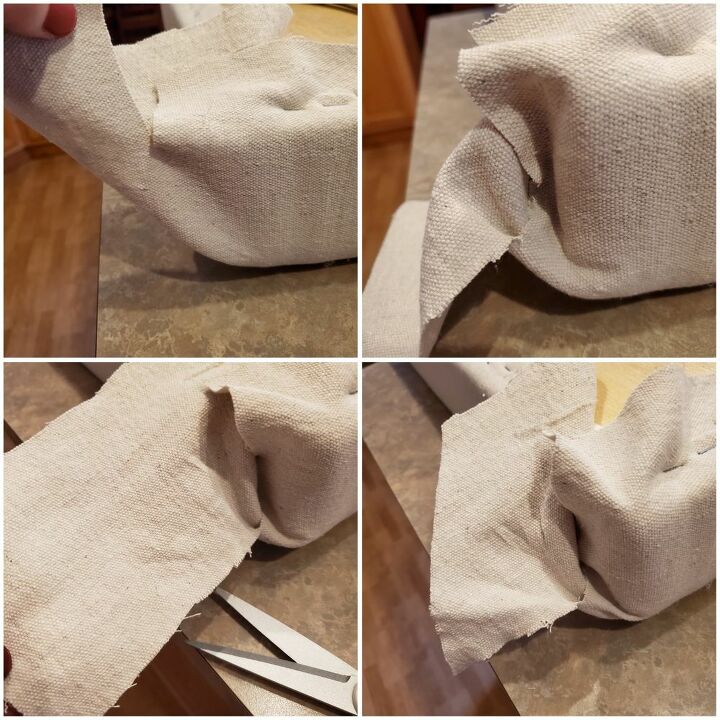
After playing with folds and seeing how exactly I wanted it to lay I cut the long piece to make it more manageable to fold.
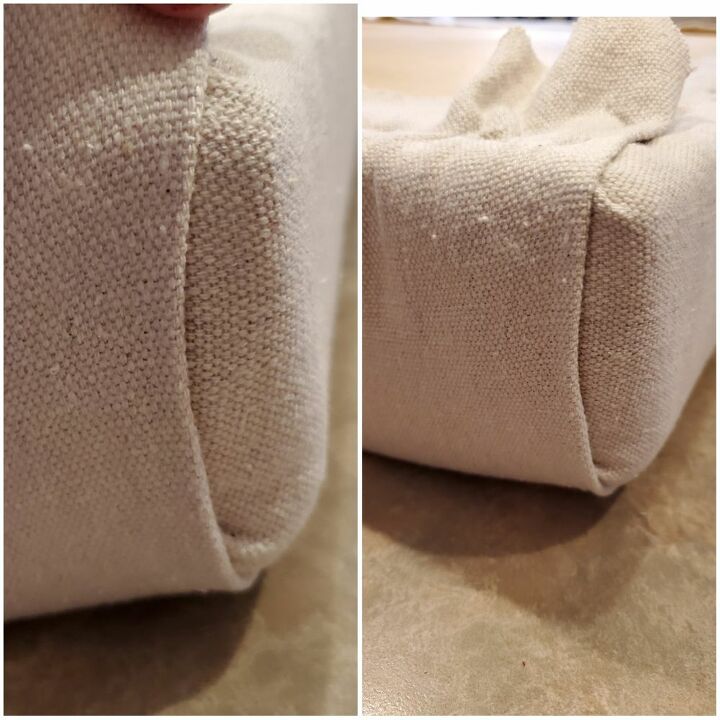
After cutting the long piece I tucked in the first cut side (right hand side in photo) and then pulled the material (left hand side in photo) straight up toward the ceiling to make sure the corner was tight.
Then I pulled it down to the board, still holding tight, and started stapling. I placed a lot of staples in my fabric and on the corners.
I did the same technique on all 4 corners.
As you can see, I alternated my staples and used a lot of them. After I felt it was secure I cut off the extra fabric.
Then I turned it over and made sure I liked how the corners turned out.
As you can see I wanted a clean looking front, so my folds are on the sides of the cushion where they can't be seen easily.
This is how the finished bottom cushion turned out. I am really proud of it and happy I took a chance on this DIY.
Now to find a back cushion pillow and finish this chair makeover.


Frequently asked questions
Have a question about this project?