


Renovating Living Room Built-ins
My living room built-ins and I have had a love-hate relationship since I first laid eyes on them.
At first glance, they were pretty, and the only thing wrong with them was that they weren’t designed the way I would have designed them.
To begin with, they were stained the same reddish-brown ALL the other wood in this house were stained when we moved in.
The first change made to the living room built-insJust before Christmas 2020, I painted the living room built-ins white. They always bug me most when I start decorating for Christmas! Painting them white was a huge step in the right direction! Everything looks better against the white where the dark wood created “blank holes” into which decor disappeared.
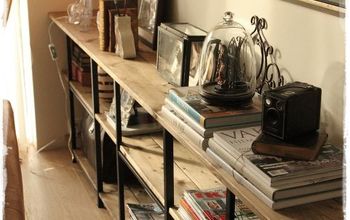
This photo from Christmas 2020 shows how I used decor to divide the top area into three and create the illusion of a traditional mantel. It looked cute but didn’t quite hit the spot I had hoped for. It really takes a lot of decor to make the 2 feet deep and almost 15 feet long top look less bare. But… then it starts to look like a display in a shop.
I built the faux window pane to hang above the fireplace, and it was a solution that worked for a while. Until a few months later, when I realized that I’m in love with all things cottage looking and that farmhouse style frame just didn’t fit the look I was working towards.
A few months ago, in one of our weekend talks, I excitedly told you about the massive mirror I found for this space! Also, how disappointed I was when I realized it was a mere three inches too tall!
It is such a perfect piece for this space that I was totally willing to rebuild the built-ins to make it fit. The ONLY problem was time because we all know my to-do list is longer than my arm!
I finished painting the kitchen cabinets (post on that coming soon), painted most of the walls on the main floor white (because the grey did not go well with the new kitchen color), and I was finally ready to dive into decorating for Christmas.
And here I find myself again faces with my nemesis, the living room built-ins that are anything but the traditional mantel I wish to decorate.
A moment of madness or bravery?
I decided enough was enough, I needed to fix this problem once and for all.
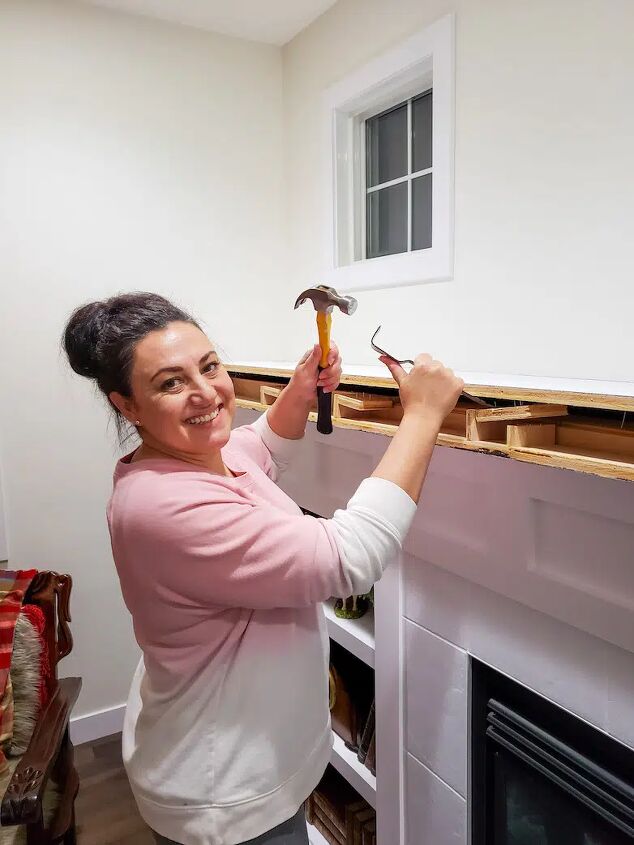
By removing just the front piece of the top, I could peek in to see if there was drywall behind the built-ins or if that would have to be fixed. Things were looking good!
I started this project before decorating for the holidays, BUT it needed to be done quickly. Why the big rush, you ask? Well, I haven’t mentioned that I was already a few weeks behind with my holiday decorating AND our family visiting for the holidays, were due to arrive in less than a week!!!
I dived in head first! Adamant to get this done or at least get the living area not looking like a building site when our guests arrive.
Step 1
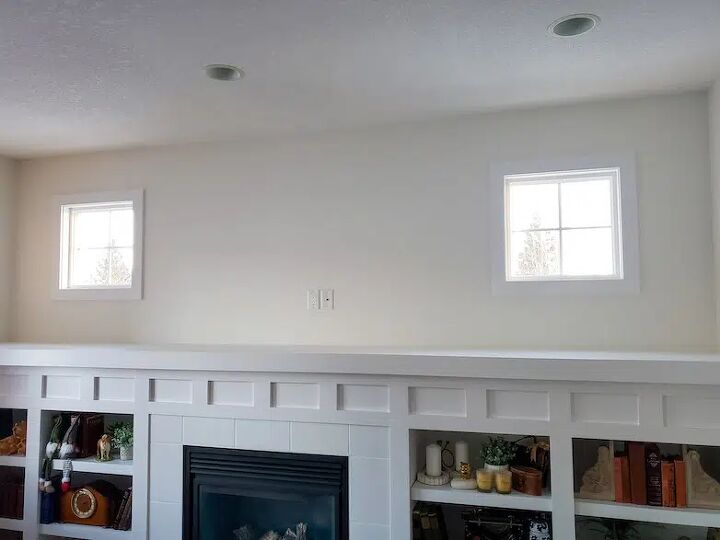
My biggest issue with the living room built-ins, as they were initially built, was the long, continuous top which I found visually unappealing. It had to be removed, and it had to be lowered for my mirror to fit above the fireplace.
Step 2
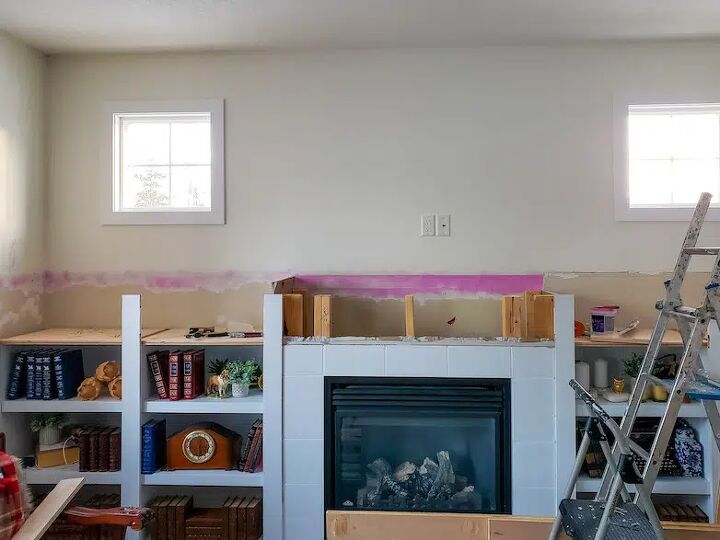
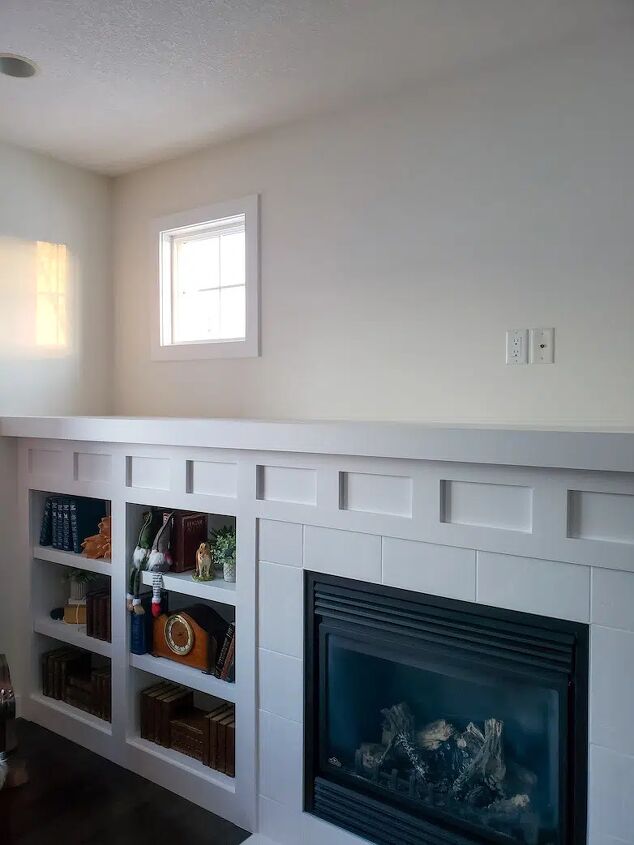
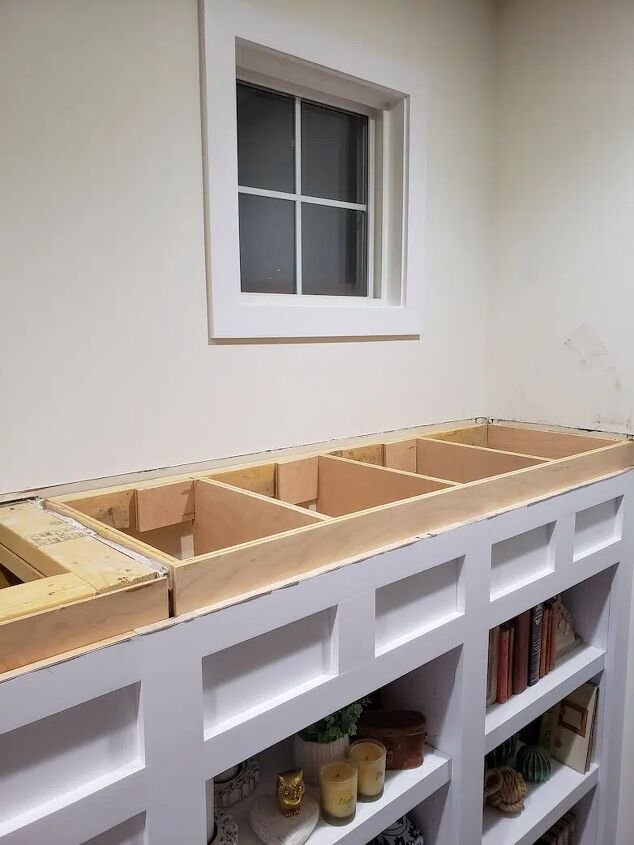
I tried to keep things as simple as possible. The bookshelves on the sides were built as four separate units. It made sense to remove everything from the top-down, up to where these began. Thankfully the drywall at the back was in excellent shape and needed minor repair to blend in with the existing painted area.
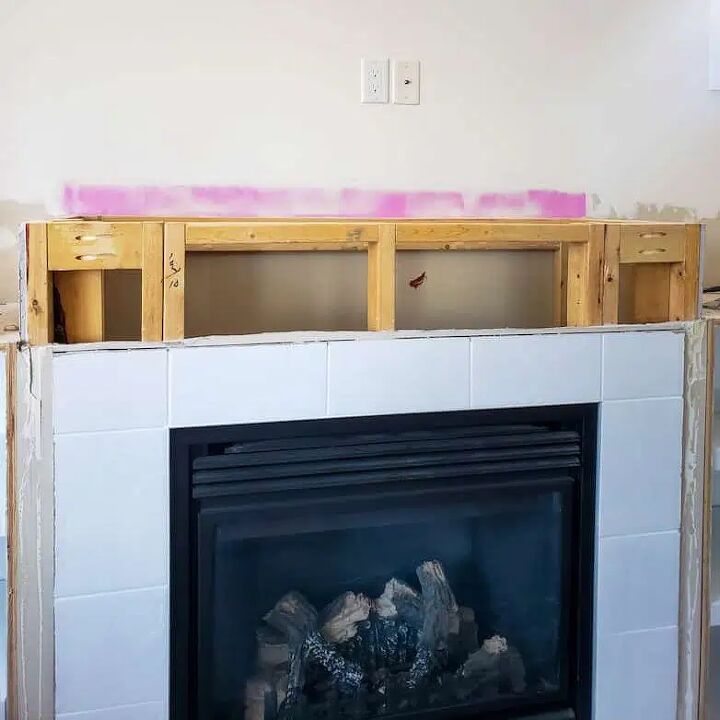
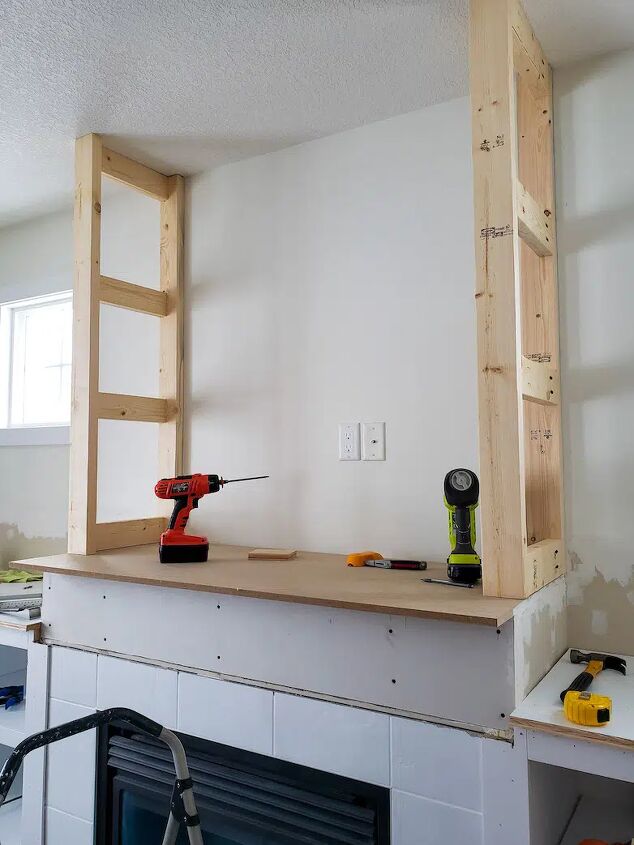
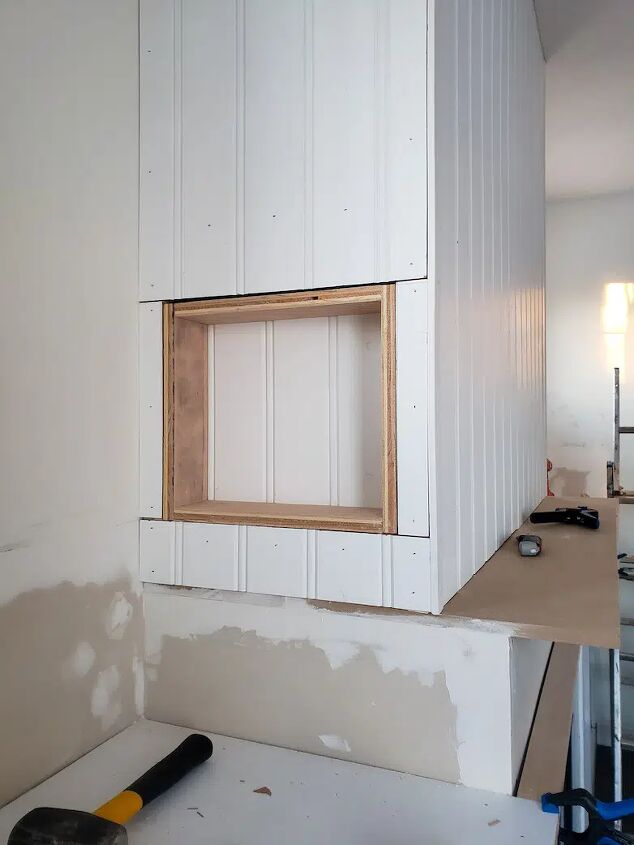
The framework built around the fireplace had to be lowered by one layer of wood. It may sound like it made the structure weaker, but I’m pretty sure it’s even stronger now with all the reinforcement I built back in.
I once again put my Kreg pocket jig to good use. It is one of my favorite tools! I got it when I built my daughter’s desk last year.
Step 3
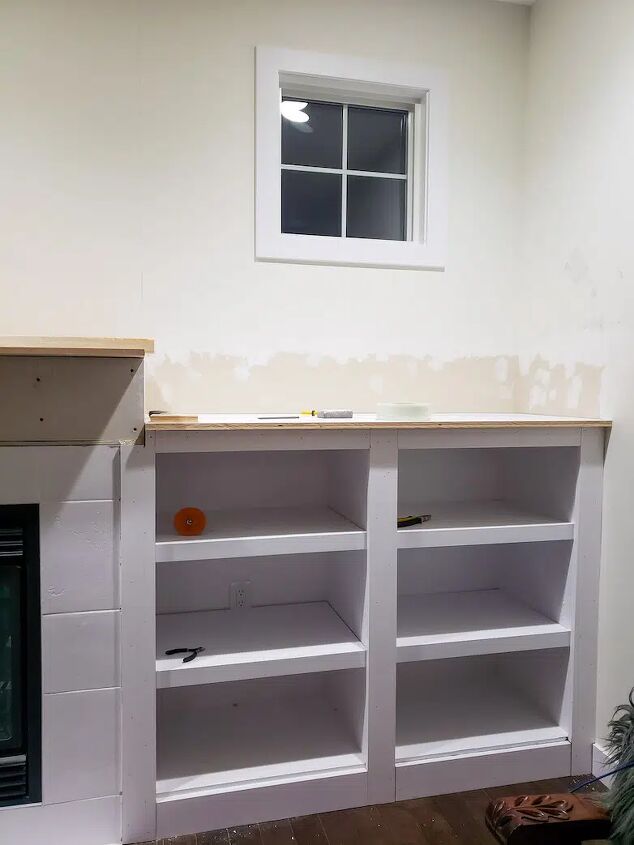
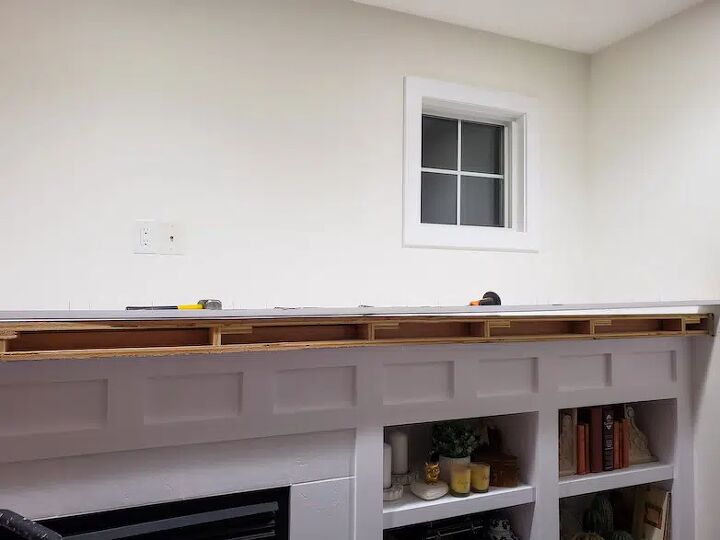
I could now put the top on. This time, in three separate pieces. I reused portions of the original top for the side pieces—just one layer, very different from the bulky layers it used to have.
Step 4
This was where things got really exciting, and I could see my vision come alive.
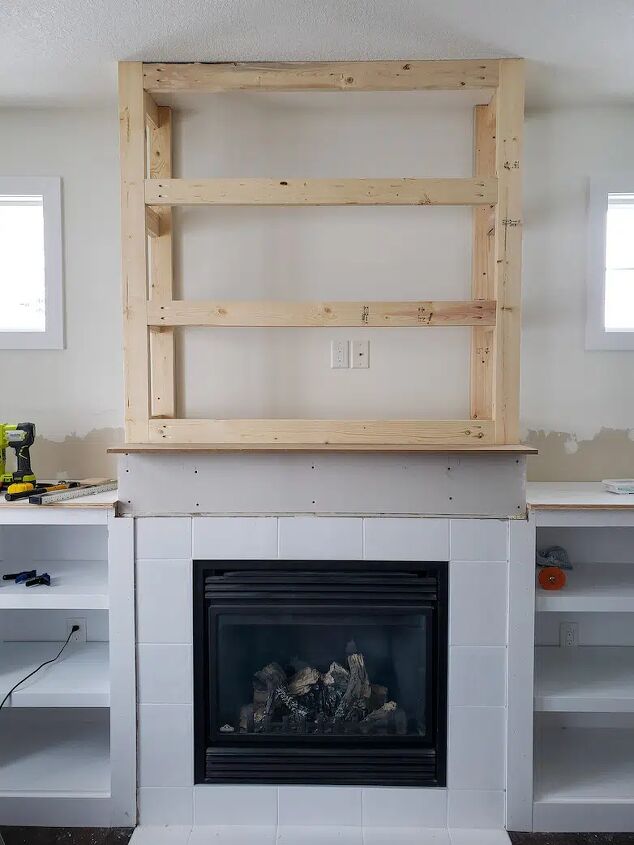
I built a new structure on top of the fireplace, all the way to the ceiling – creating a chimney effect.
Step 5
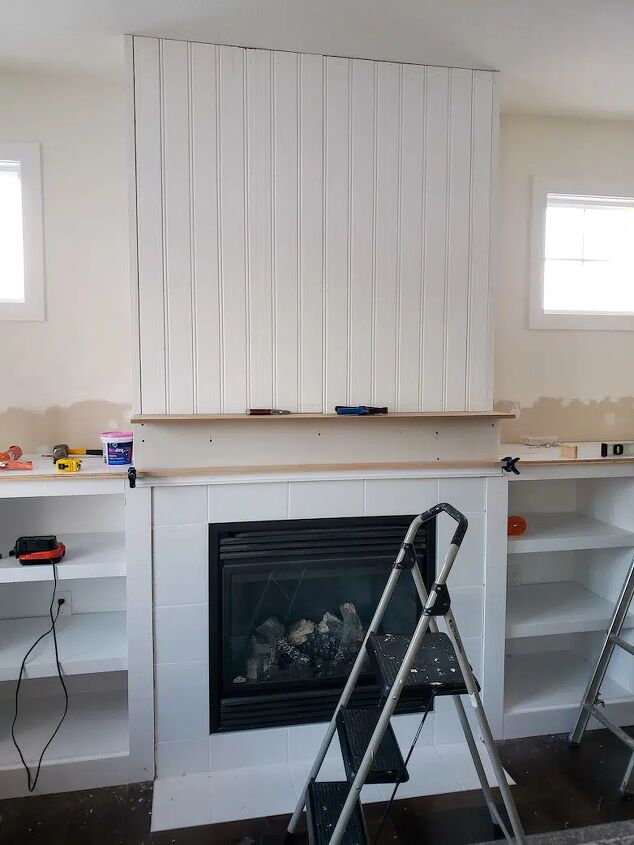
I wrapped the new structure in beadboard, which to me, represents all things cottage.
However, I could not close it up entirely. To keep my project up to code, I had to work around still having access to the electrical outlet above the fireplace. No problem, I had a great plan!
Step 6
I built two boxes, one for each side, to create niches that can simply be lifted out and leave a space big enough for your arm to reach the outlet. Not to blow my own horn or anything, but it is a brilliant idea!
I know things are still looking rough here, but this is where I kept repeating my favorite saying: “Caulk and paint, make the carpenter what he ain’t” No truer word has ever been spoken!
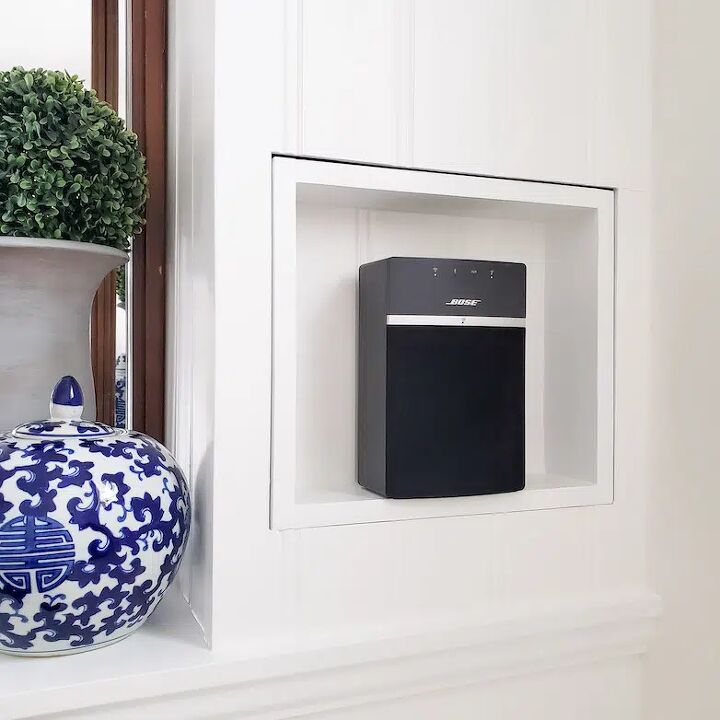
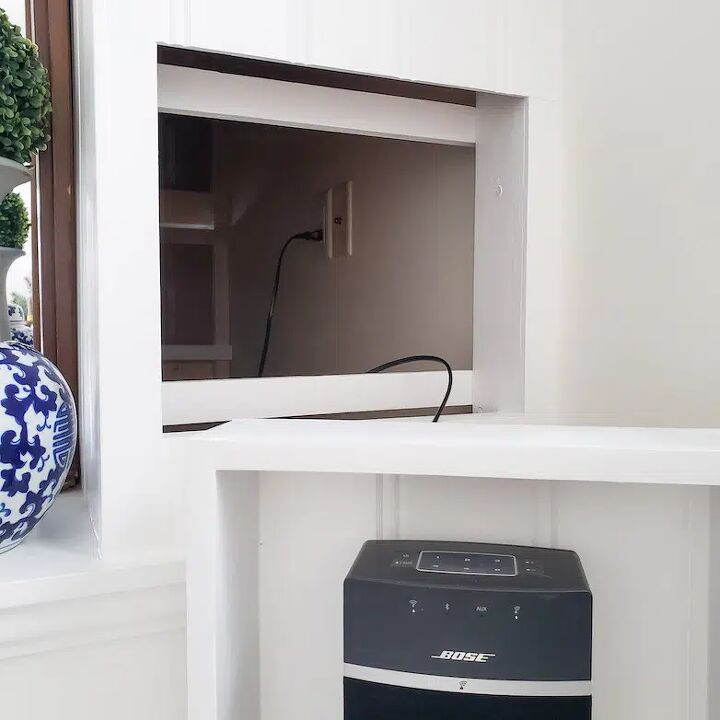
By drilling a half-inch hole in the back of one of the boxes, it now serves as a shelf for my Bluetooth speaker!
Step 7
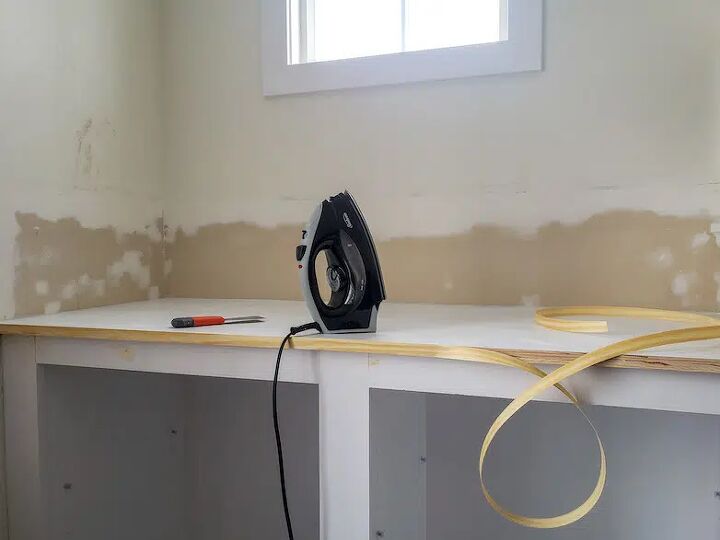
Ironing on pine veneer finished off the slim edge of the top.
Step 8
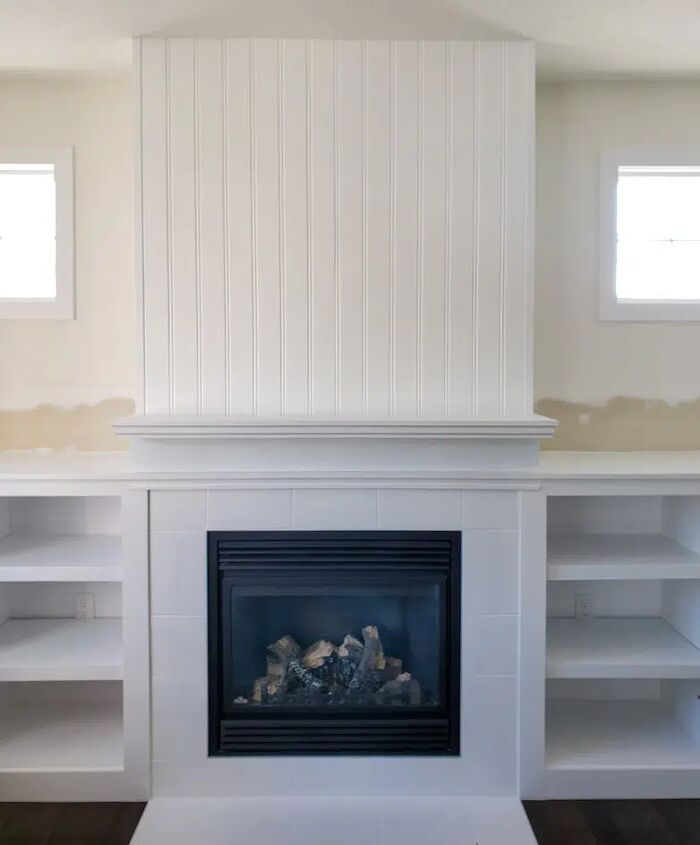
Now, this was the really fun part of the project. I added different trim pieces to create a design for the mantel, totally winging it as I went along!
The mantel could be as wide or narrow as I wanted or needed it to be. I planned this carefully, ensuring there’s enough space for the mirror to stand and enough space for Christmas decor!
Remember the vintage clock in my post on decorating with vintage finds? I even made sure that guy could stand in front of the mirror, should I ever decide to do that.
Now, if you are still on the edge of your seat to know if I managed to finish it all before the family arrived…
I almost made it!
I managed to finish everything up to this point, tidy up and clean the space – with a lot of last-minute help from my girls!
Step 9
Caulking seams, filling nail holes, and painting were the only things left to do.
I am over the moon!
It is everything I wanted and worth every bit of stress and hard work.
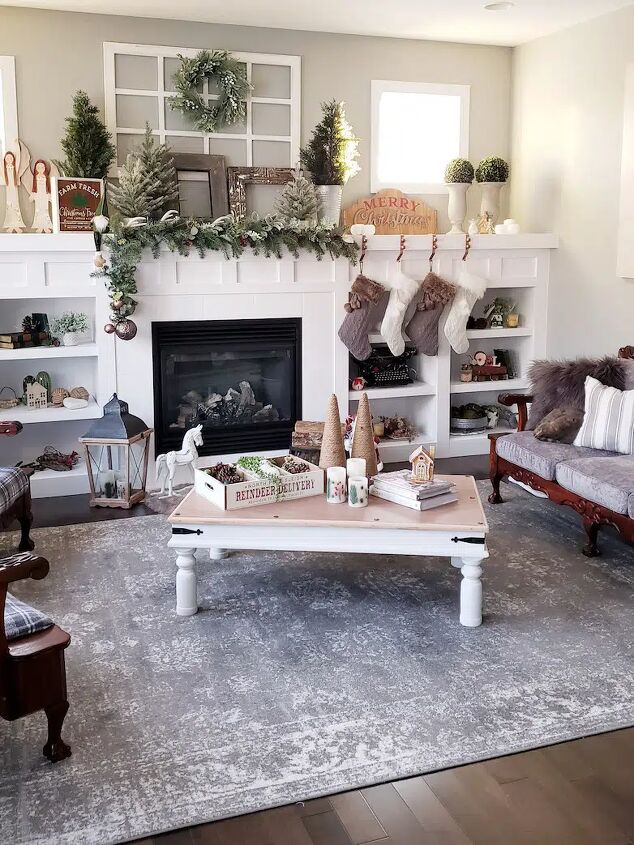
Adding Christmas decor to the renovated living room built-ins!
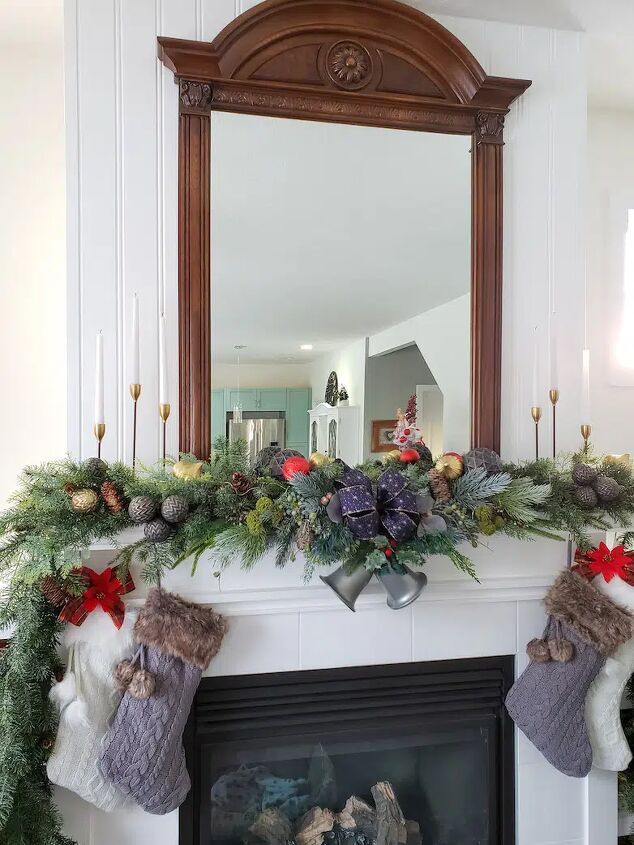
You can bet that I decorated this mantel the moment the paint was dry! It felt like a dream come true. THIS. This is how I wanted to decorate my mantel.
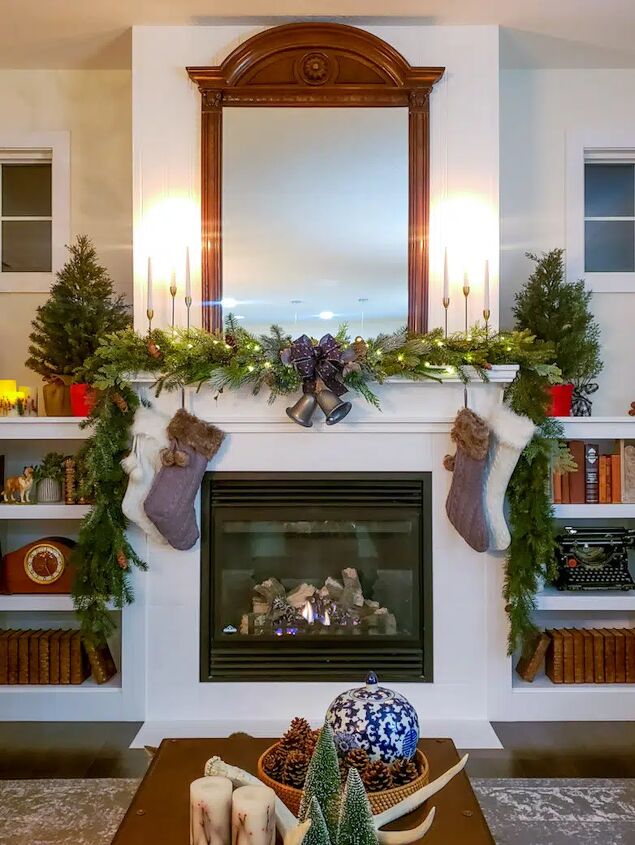
I am embarrassed to admit that I stared at this space for about three days straight! It finally looks appealing, interesting, and well designed.

Now, I get that this traditional look is not for everyone. Many people might prefer the original look of the living room built-ins.
My aim is not to convince you that traditional is better than modern. I want to show you that changing things to what works for you is possible! Renovating and decorating your dream home – DIY style.
I would love to hear what you think about the new built-ins! Leave a comment below or send me a message through my contact page.
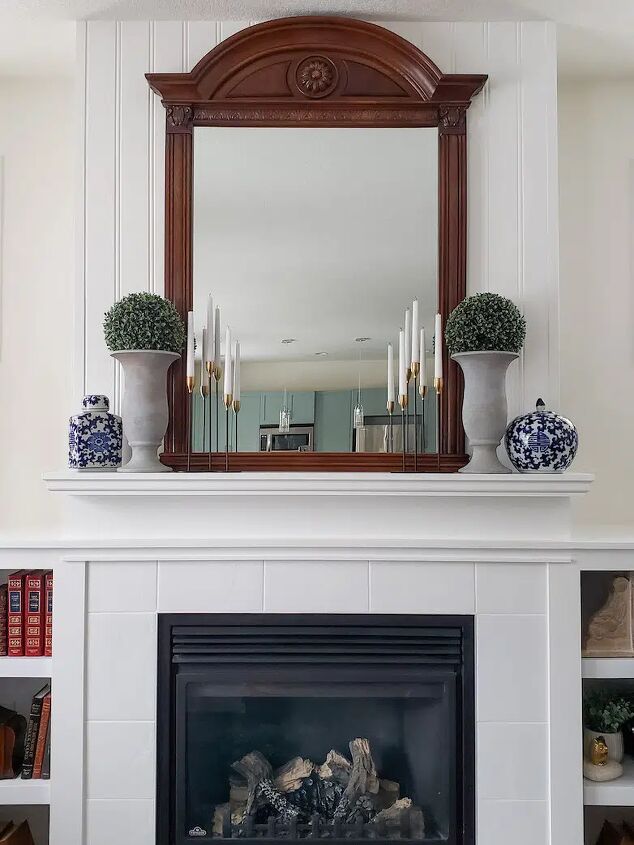
And now that Christmas is over? Now I can play around with my new mantel again, figuring out how to decorate it for all the different seasons.
Pin it for later!

You may like these similar posts
Resources for this project:
See all materials


Comments
Join the conversation
-
Truthfully, I like both looks! I know the joy of acquiring a perfect piece like your mirror and making a place for it
-
Beautiful mirror, it came out very pretty.


Frequently asked questions
Have a question about this project?