


3 Easy Steps to Turning a Ho-Hum Bulletin Board Into a Functional Work
Turn an old-school bulletin board into a functional work of art in 3 easy steps by adding just a few important (and pretty) details.The phrase “Pin it” has a very different meaning than it did years ago. When Pinterest opened its door to endless photos of home decorating inspiration, my world turned upside down in the most glorious way!
Creating boards and boards of photos that inspired me kept me busy for hours.
Unfortunately, in the beginning, I was so busy pinning that, often, I did not go back to actually use what I had pinned! (I have learned since then to go back and use those pins. Furthermore, once I created my Sonata Home Design Pinterest Boards, I use them all the time!
This spring I designed and created a new craft/project room out of an upstairs bonus room. My laptop is always with me and my Pinterest boards are always hovering in an open tab. However, I wanted (and needed) something tangible in my craft room that can allow me to plan, design, and be inspired in real time. And, something that can be changed as often as I change my mind. An actual, physical bulletin board!
Time to go “old school” with a basic cork bulletin board!
By the way, if you haven’t seen it already, check out the “Dot Room!”
Creating a Craft Space: The Dot Room
***This post contains affiliate links that help to buy me coffee in my retirement. (Have a cup with me!) Sonata Home Design is a participant in the Amazon Services LLC Associates Program, an affiliate advertising program designed to provide a means for us to earn fees by linking to Amazon.com and affiliated sites. Additional affiliates links also may be included for your convenience.
I found my bulletin board at Hobby Lobby but you can see a very similar black framed bulletin board HERE.

The black frame of the board is perfect for the room but, since this board is supposed to inspire me, I think a little upgrade is in order!
1. Prepare Your Bulletin Board Backdrop
The beauty of a cork bulletin board is that you can attach pretty much any type of material to create a personalized background. Plus, you can change it out as your mood and/or taste dictates.
Here are a few backdrop materials to consider:
- Wrapping paper – Keep in mind that this can tear easily but the colors and patterns available are limitless!
- Tissue Paper – Very delicate and might be hard to work with but the effect could be glorious!
- Fabric – You can create a very upholstered look with beautiful fabric.
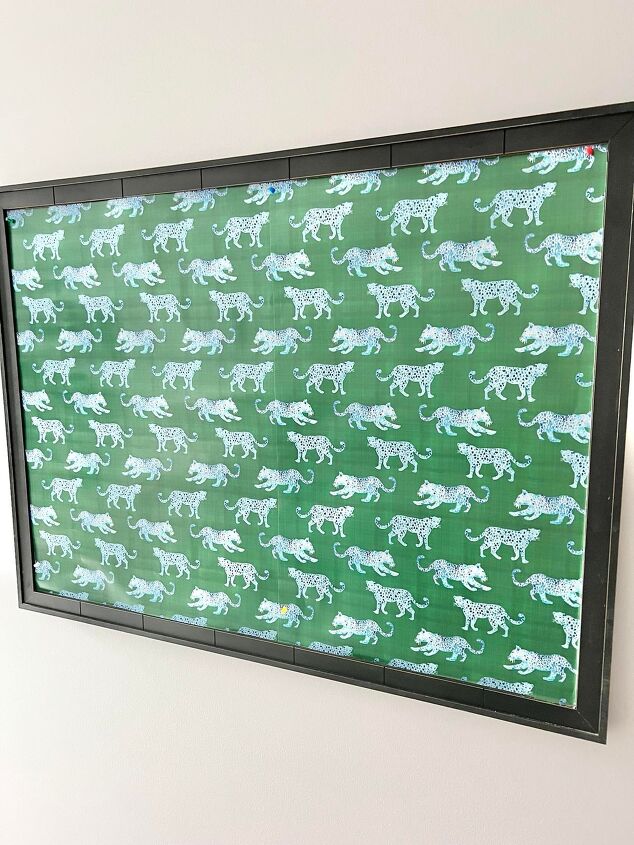
- Wallpaper – This is my choice! Sturdy, easy to work with, and so many patterns to choose from!
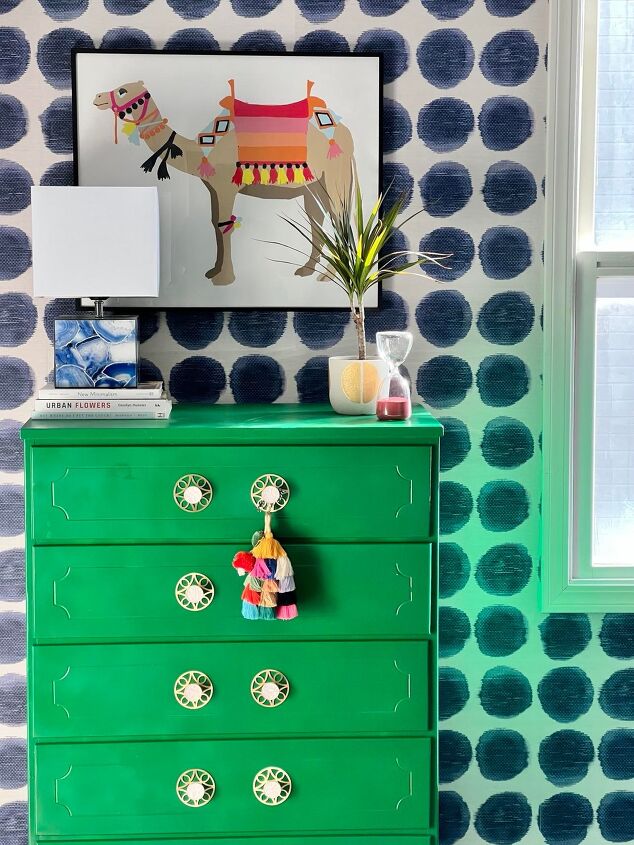
I was pretty specific in the color palette I was looking for as I wanted it to tie in with the emerald green dresser that recently got a spray paint makeover. It is a bold color and I need to use that green elsewhere in the room to balance it out.
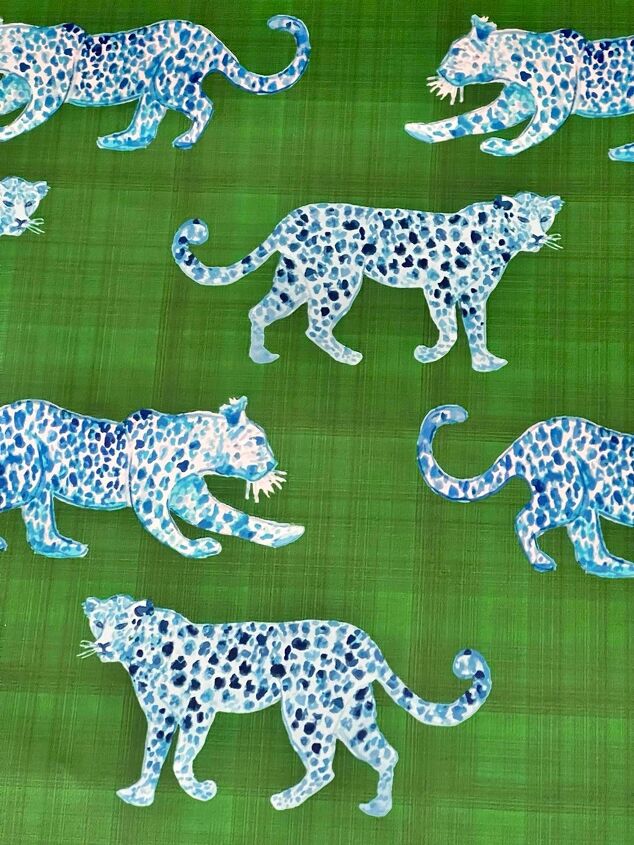
Spoonflower is one of my favorite sources for wallpaper. In fact, their website is almost like another version of Pinterest because there are so many designs and patterns to fit any home decorating style.
I yelped with glee when I found Leopard on Parade Blue on Green Wallpaper on the Spoonflower site!
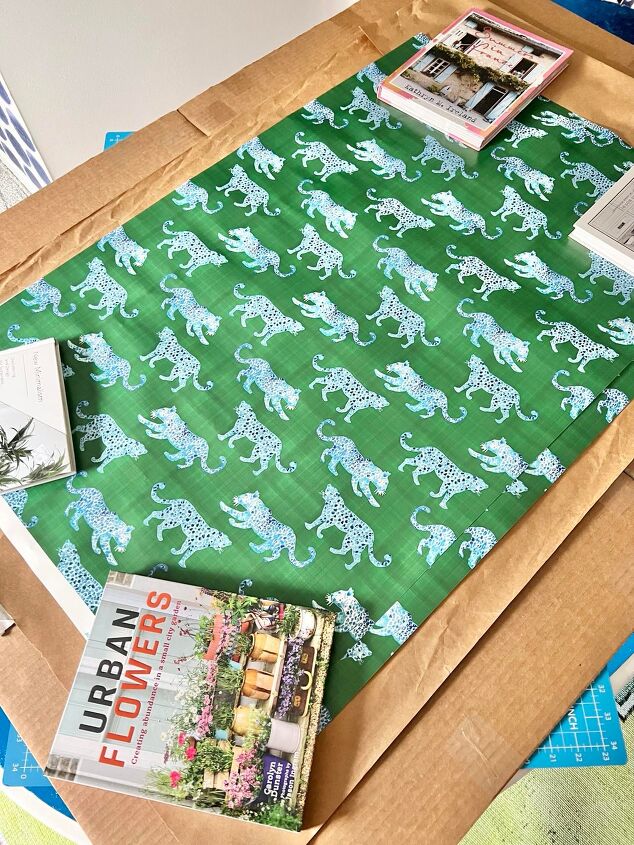
And here is the best part! I didn’t need very much because I was only covering a bulletin board. In addition to the option of ordering just a swatch, Spoonflower offers their papers in a 2′ x 3′ size! I ordered two of this smaller size and it was just enough to cover the board.
Now, this costs a little more than your average wrapping paper or wallpaper. But, Spoonflower wallpaper is such high quality and I know that I need something strong for the board. Additionally, I want this bulletin board to be a focal point in the room. It has to “carry” a very large wall!
Whatever your material, make sure that you lay it out flat so that it relaxes and you don’t have annoying bends, curves, and wrinkles. A few books placed on the corners helps to speed up the flattening time.
2. Hang Your Backdrop
To hang your backgrop on you bulletin board, tuck the corner of your paper in the upper corner and secure with a board pin.
I’m not getting fancy with my board pins but I did try to color coordinate them. Green on green!

Smooth the paper with your hand down the side of the board and anchor at the bottom with another pin.
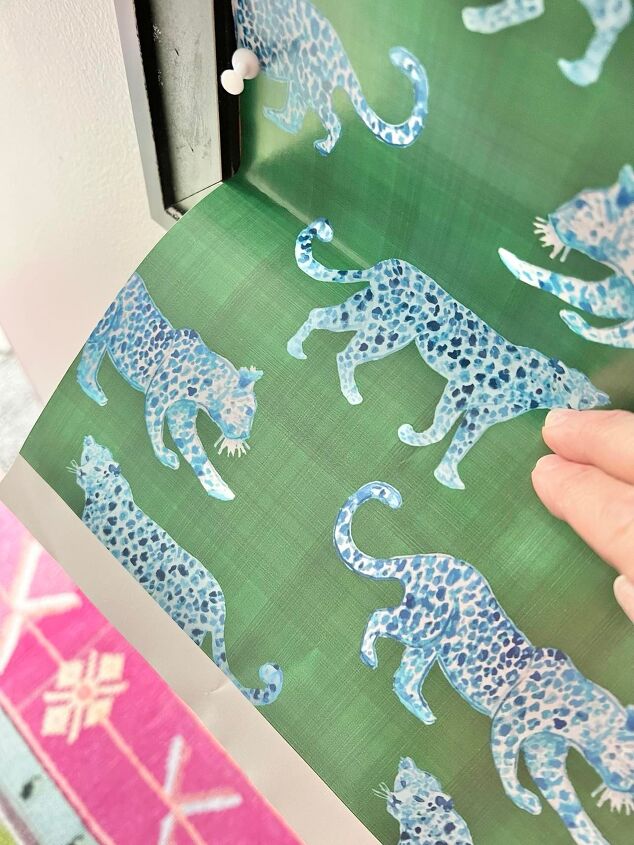
Create a crease at the bottom of the board with a ruler or a straight edge. Then, use a utility knife or blade to make a clean cut on the paper.

Repeat the process on the other side of the board, lining the paper up to the top edge.
Since I was using two smaller pieces of wallpaper, I simply lined up the leopard print in the middle…Just like hanging wallpaper!
3. Start Pinning!
Now that your backdrop is up, you can start filling it with what inspires you!
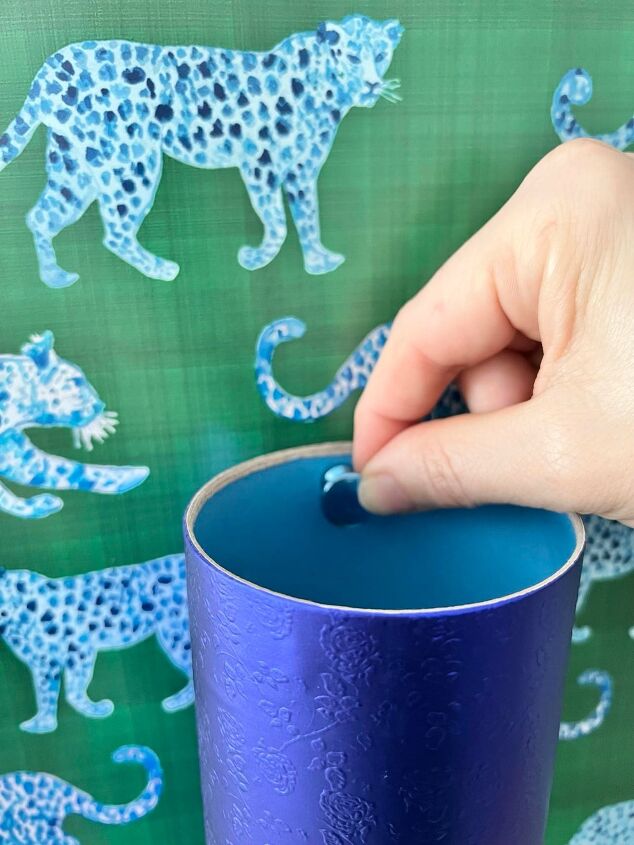
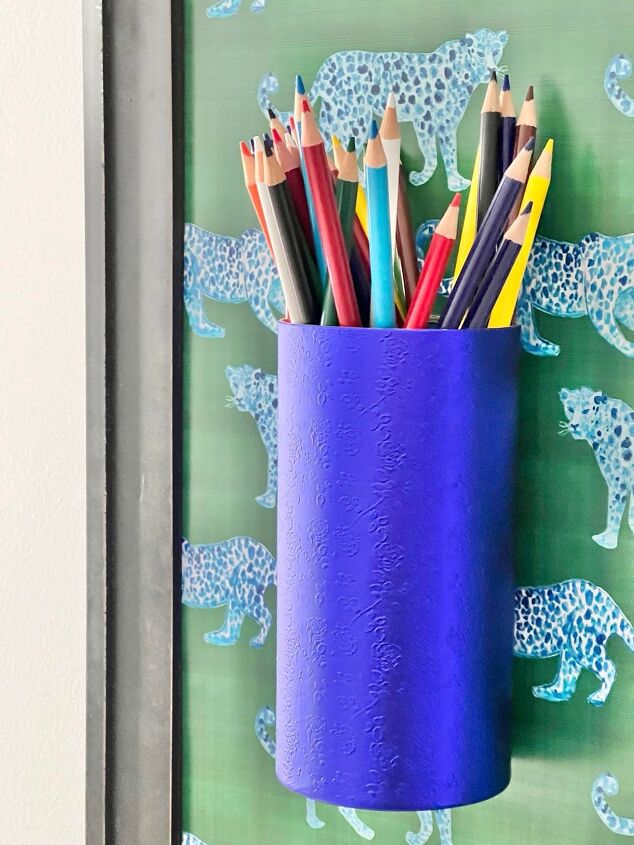
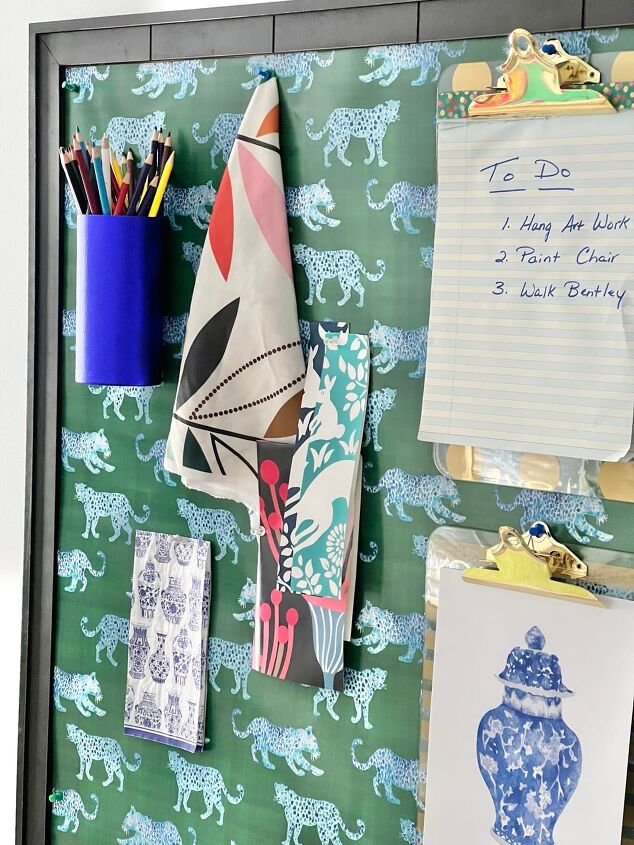
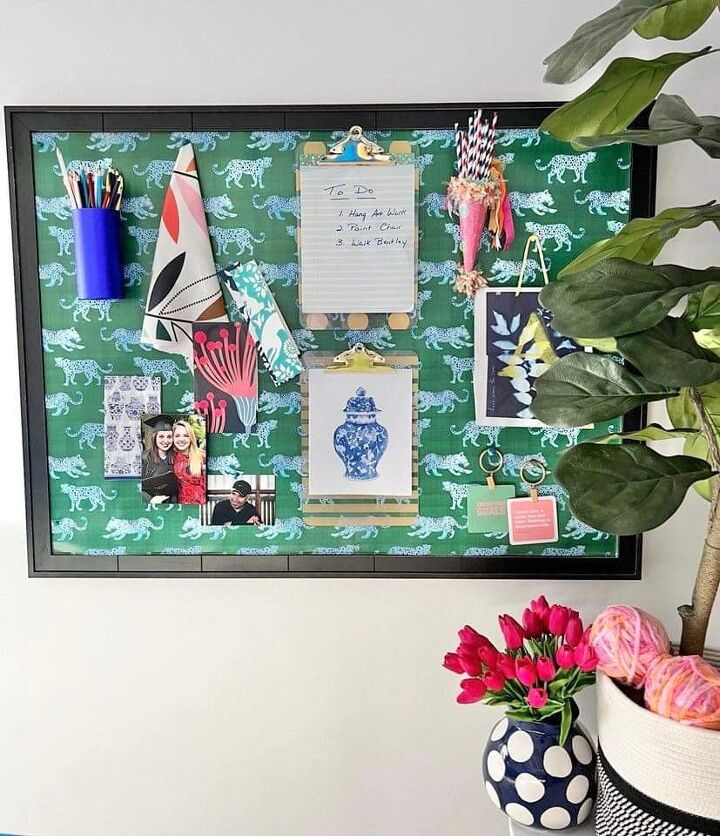
I love to add function to any project and this cardboard cylinder from a dollar store is going to be a perfect pencil holder.
For something heavier (and 3D), use a heavier push pin.
Ooo La La! Colored pencils at the ready and so pretty! (And I just saved some space on a counter!)
Craft Room Storage Solutions in a Small Space
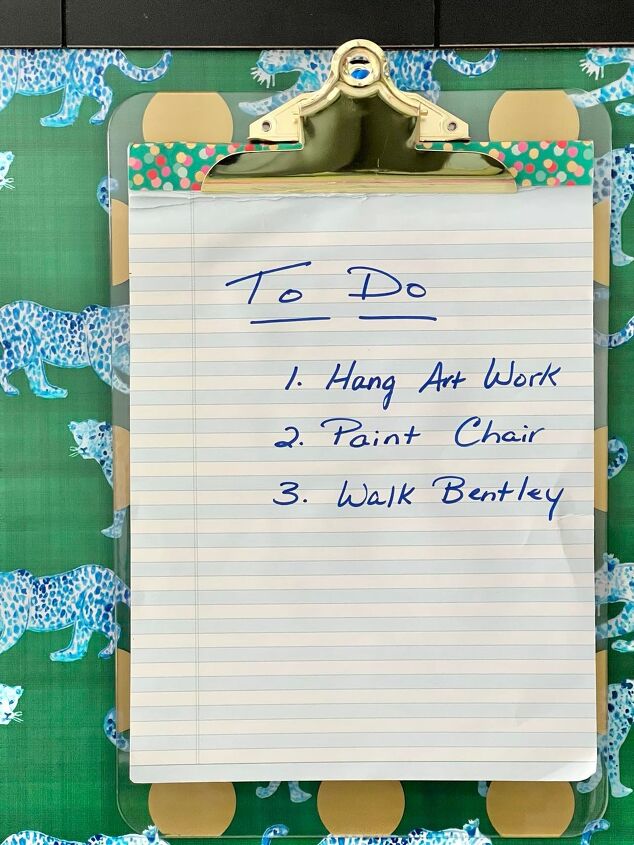
I am a list maker and seeing this list right in front of me every day helps me to stay focused. Pinning an actual clipboard with the list makes changing out the list so much easier!
As different decorating and craft projects occur, it is so helpful to be able to mix and match fabrics, wallpapers, paint swatches, etc. The bulletin board doubles as a mood board/vision board/and creative space to experiement.
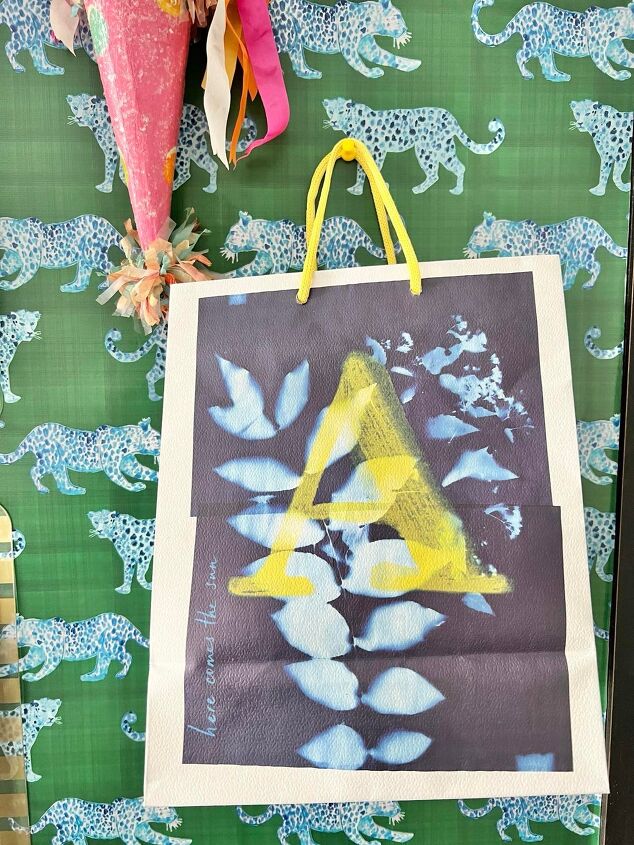
Have a favorite shopping bag? Hang it on the board!
Hanging one of my favorite shopping bags from Anthropologie serves several purposes:
- I can tuck light items inside (like pom pom balls, wool felted balls, fabric scraps, etc.),
- The color combination and layered graphic on the bag is inspiring to me.
- It reminds me shop there! (This is a better inspiration on payday!)
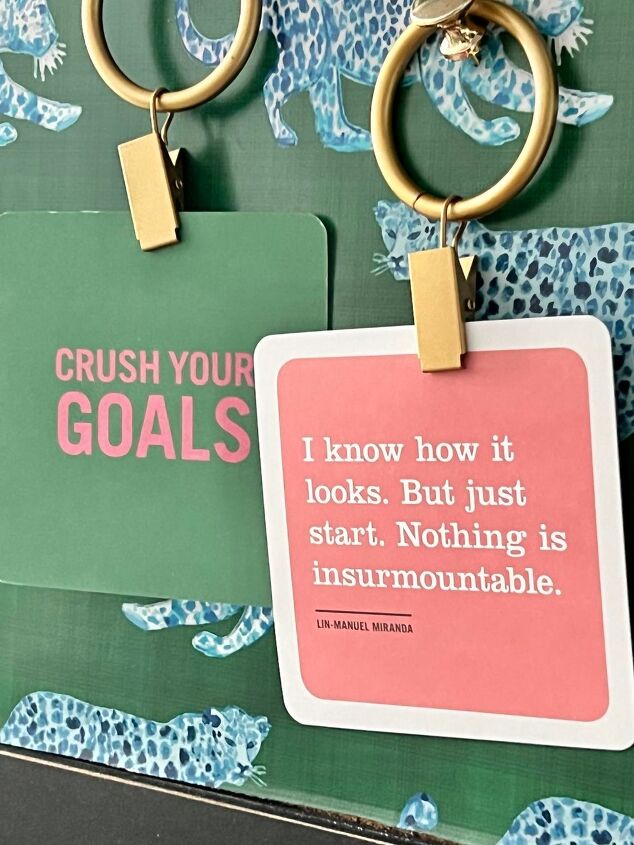
I love inspiring quotes and like to include them on any type of inspiration board.
These “Crush Your Goals” Inspiring Quote Cards come in a box of 40 cards with truly inspiring words. I try to change them out on the board every week or when the quote moves me!
Rather than just pin them on the board, it is fun to clip them to these Drapery Rings with Clips. I love to use these for all sorts of things….but that is probably another blog post!
Always inspiring to me are my husband and twin daughters! Photos of them on the bulletin board are a requirement!
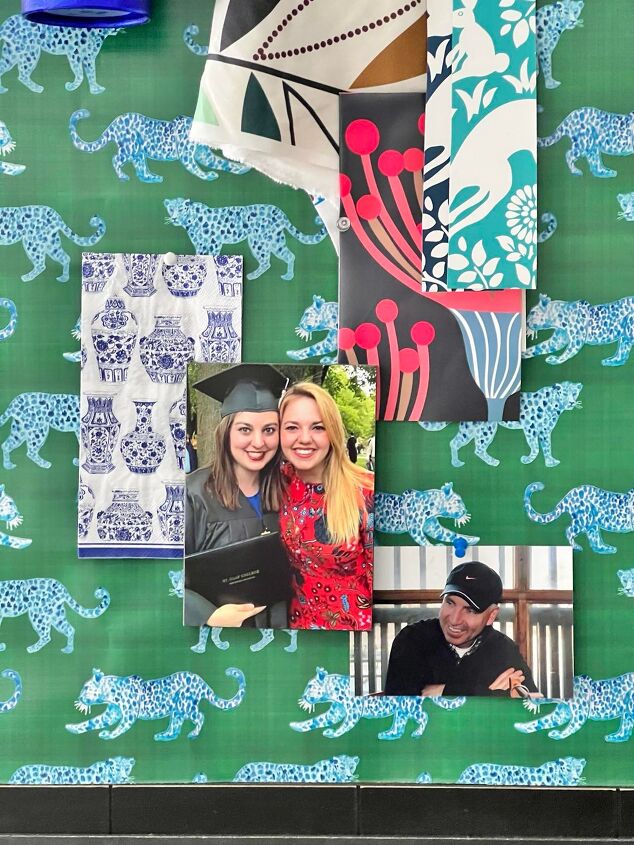
I loved the spotted leopards in a room with wallpaper dots!
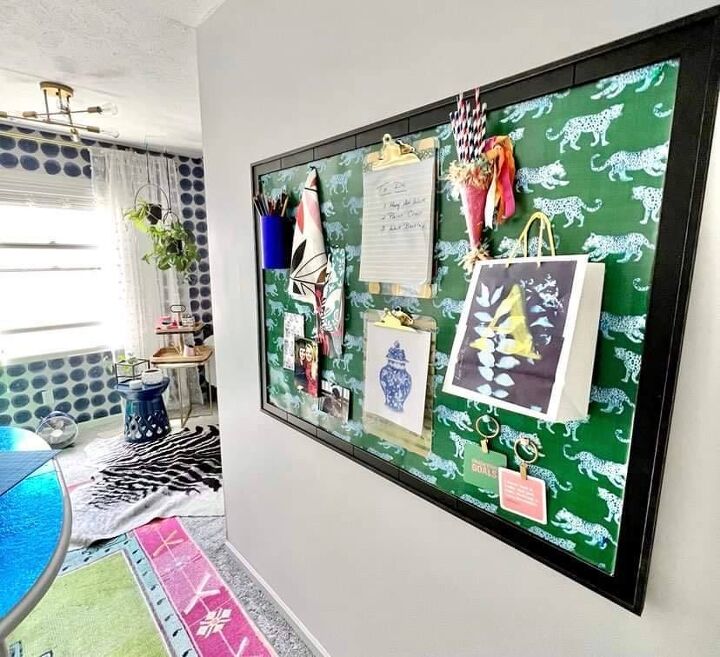
This is probably the most sparse the board will look as I will start to fill it up even more as I work on projects…and I love that fact! The possibilities are endless!
Time to start create your own inspiring bulletin board! Happy Pinning!
Cheers!


Frequently asked questions
Have a question about this project?