


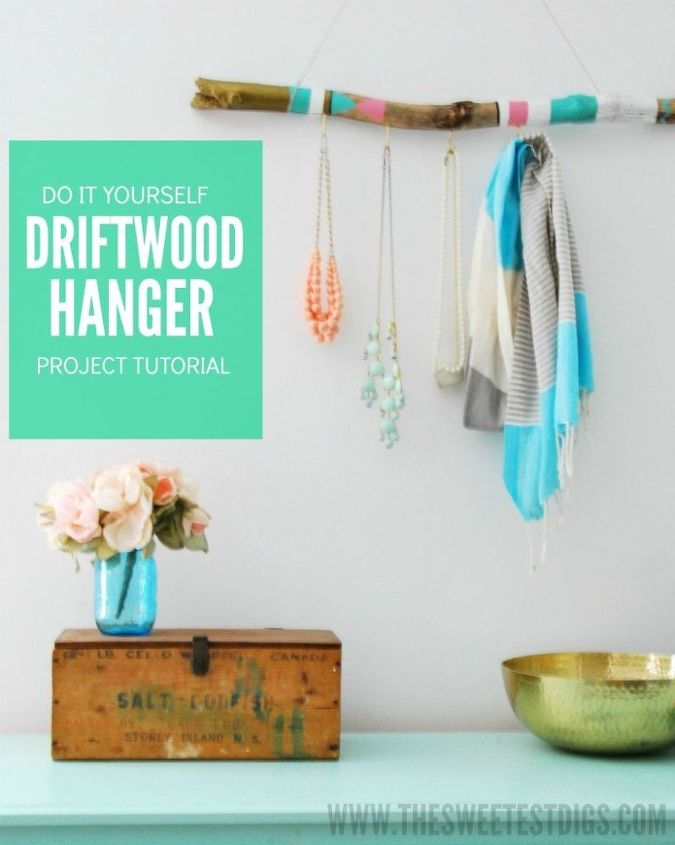
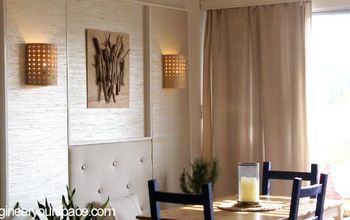
DIY Painted Driftwood Hanger
2 Materials
$20
1 Hour
Easy
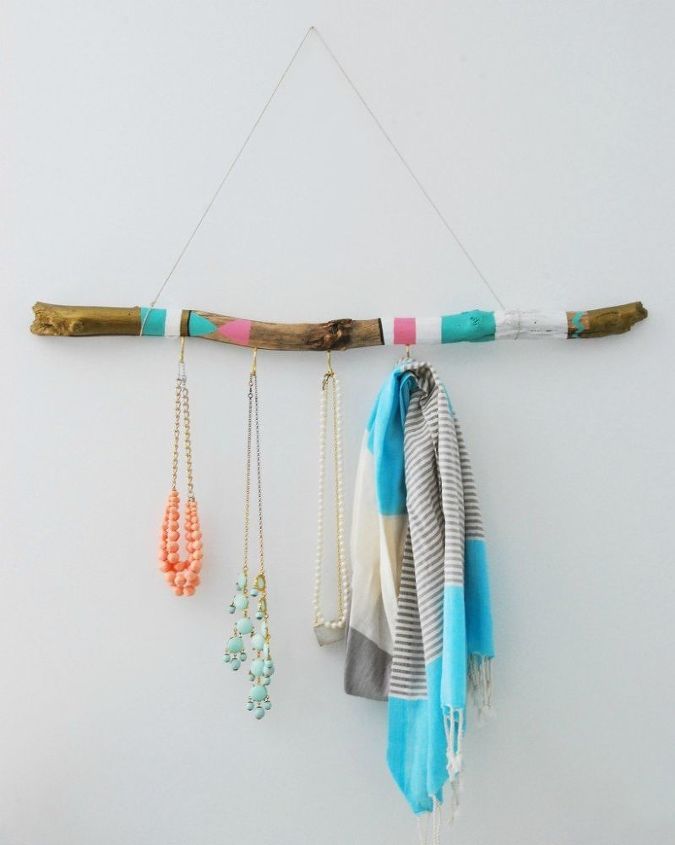
I’m always on the look-out for eye-catching ways of hanging necklaces, scarves, and other favourite things. So much nicer than stuffing them in a drawer, right? I had a piece of driftwood laying around from a previous project, that I was dyyyying to do something with, so I put together a DIY painted driftwood hanger.
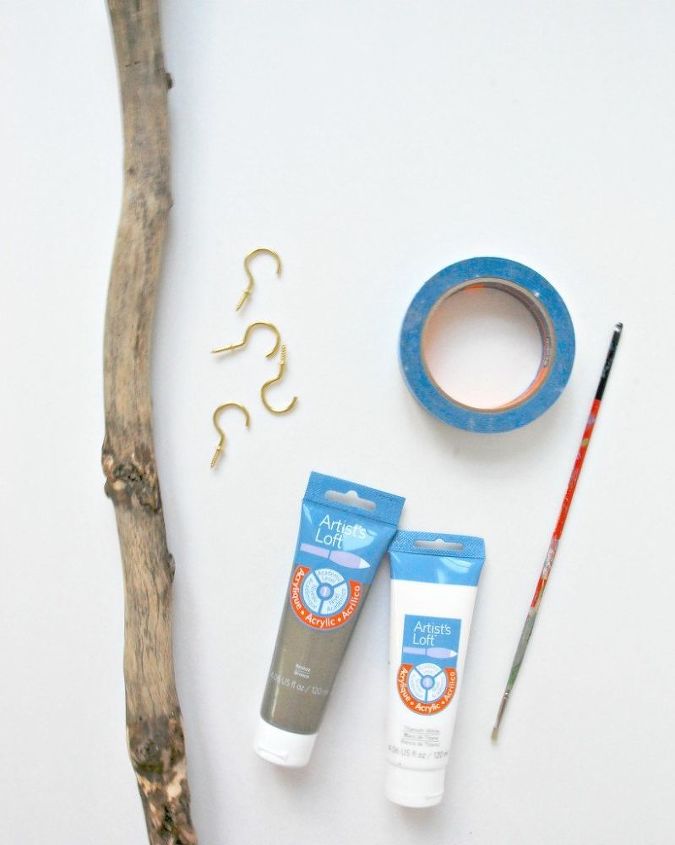
First step is to find your piece of driftwood. Got kids? Make it an activity on your next walk in the woods! “Who can find mummy the best piece of driftwood?” Ha! Once found, next up is to smooth out your piece with some sandpaper, if necessary. Mine had a few gnarly, flaky spots, but turned into a lovely soft piece after some sanding.
Then you want to use some painter’s tape to tape off some stripes. I did different widths and wasn’t too careful about where I was placing them. It’s nice if it looks a bit random. I started out with white and gold paint, but you can totally customize to whatever colours suit you.
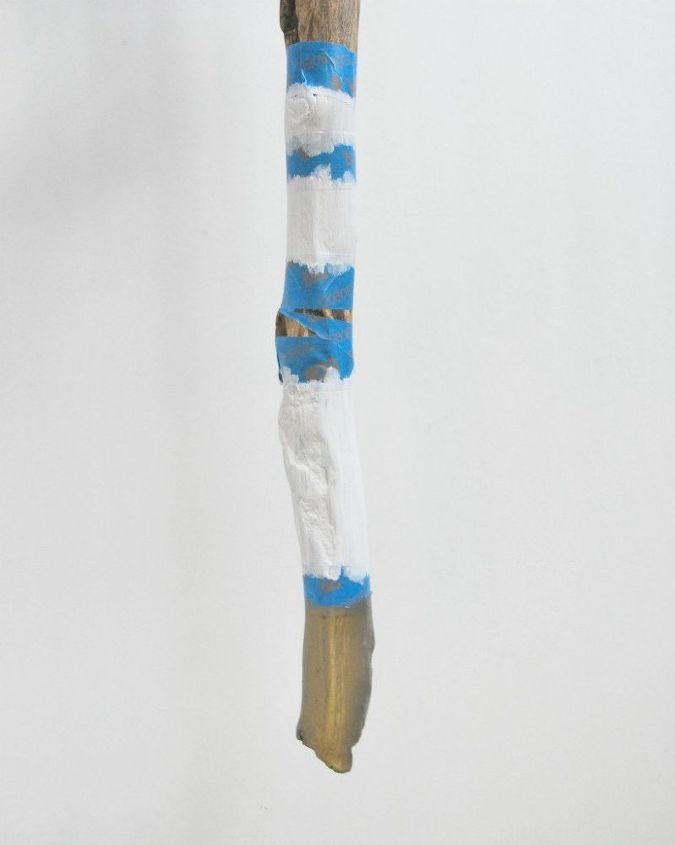
Once you remove the tape, you’ll be left with some stripes. Then you can free-hand a few more stripes (in between two painter’s tape ones is good so that you have straight lines to conform to), and then add some triangles and/or a zig zag. You don’t need to be too perfect…. just have fun.

To see how I then attached hooks and screwed it to the wall, click through to read the full post!

Want more details about this and other DIY projects? Check out my blog post!
Comments
Join the conversation
2 of 10 comments
-
So cute!
-
Add some seashells or drape a small piece of fishnet to the driftwood for a beach effect.


Frequently asked questions
Have a question about this project?