


DIY Remote Control Holder / Armchair Caddy Out of Fabric
One thing that frustrates people all over the world equally is losing the TV remote. Somehow, it always finds a way to slip between the fabrics of space and time and disappear into the void just when you’re about to sit and watch your favorite show.
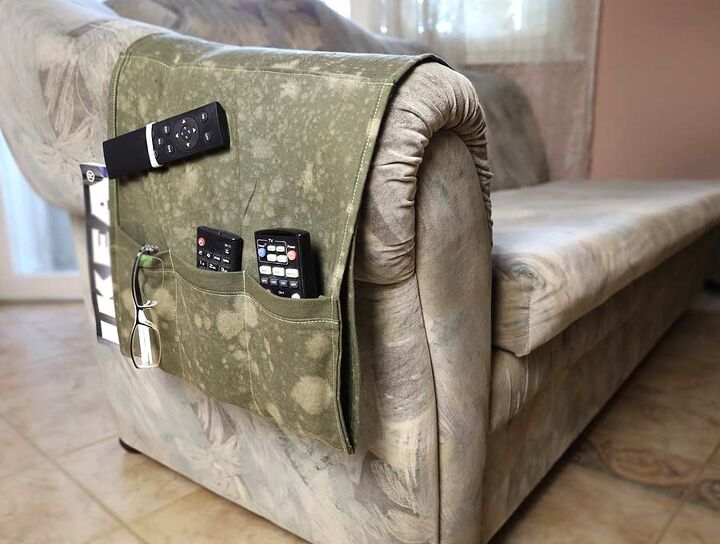
Say no to remote control wormholes with this God-given remote control holder. It’s easy to make, doesn’t take long to finish, and will keep all your remotes safe and sound and within your reach whenever you need them.
--> Click HERE for the step by step video tutorial 
It also isn’t only for your couch, you can set it up on your armchair too if you prefer watching TV from there. This brief tutorial from HelloSewing will show you how to sew one for yourself.
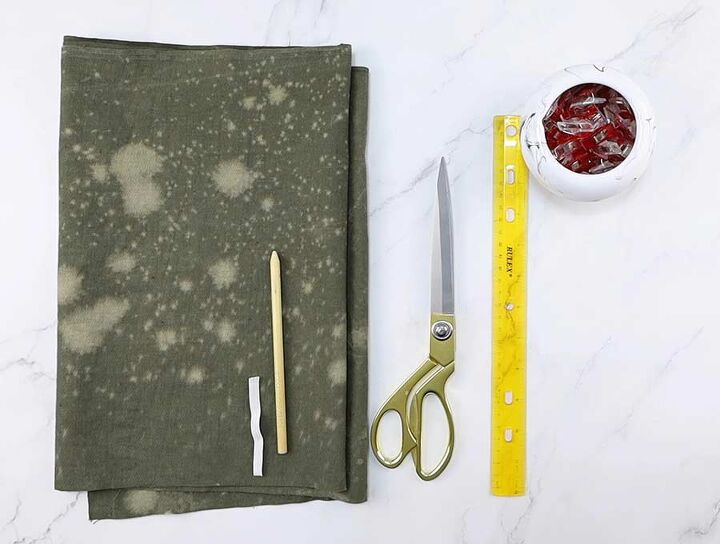
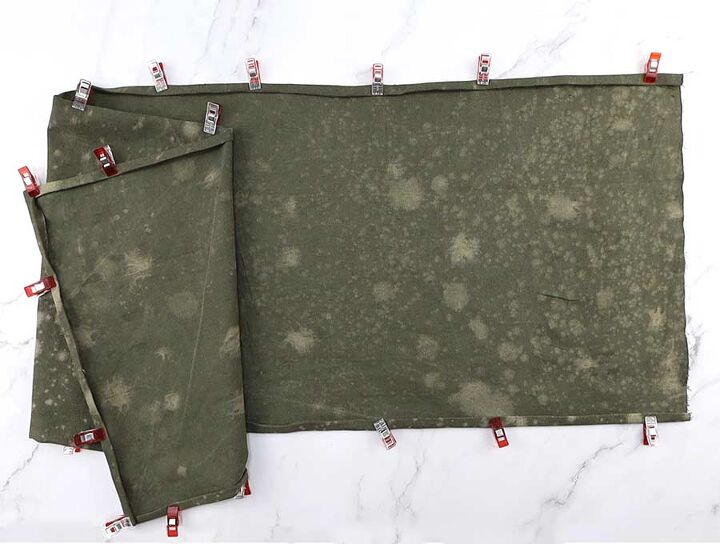
Cut the fabric
Wash the fabric and iron it before you cut it.
You will need three pieces of fabric for this holder. One should measure 50 x 14 inches, the other 14 x 6 inches, and the last 14 x 2 inches in size.
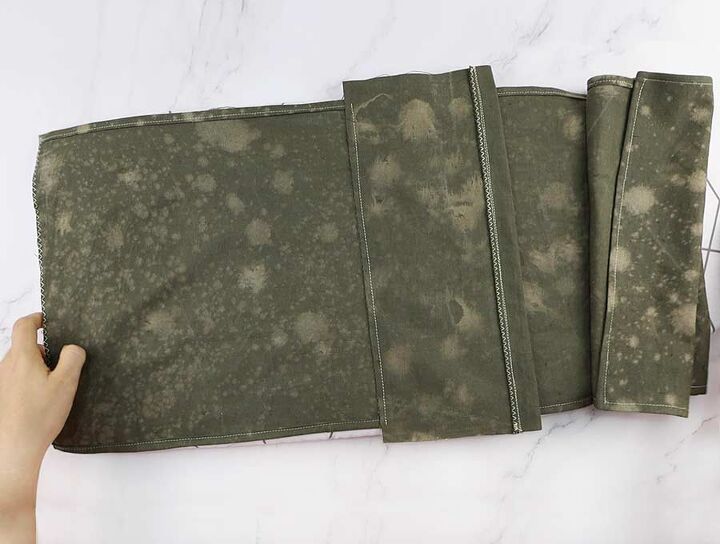
Start sewing the holder
Fold the smallest piece in half so that the long edges meet and the wrong sides are in.
Set it onto the medium fabric piece's long edge. Align the raw edges of the short piece with the raw edge of the medium one. Pin them together.
Sew the pinned section with a quarter-inch seam allowance. Press the seam and topstitch it.
Keep sewing the holder
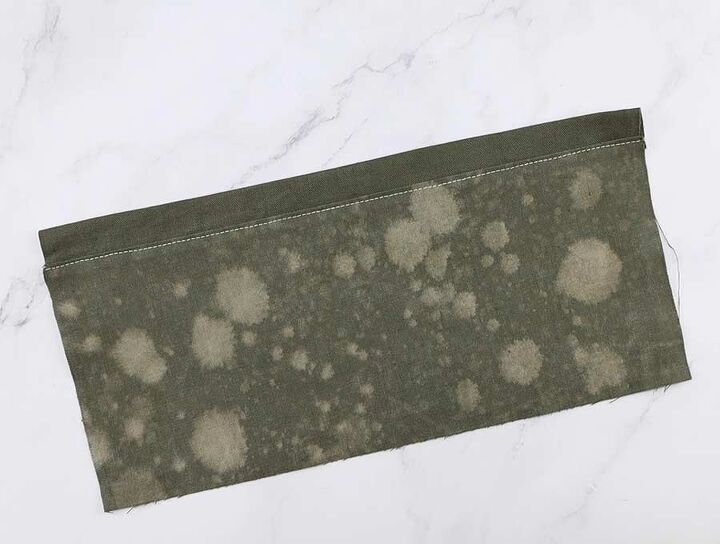
Time to hem all around the large fabric piece, except for one of the short sides. Flip the fabric so that the wrong side is up.
Fold the three edges twice for a quarter-inch and iron them. Pin the folded sections and sew them.
Sew the short side without the fold using a zig-zag stitch.
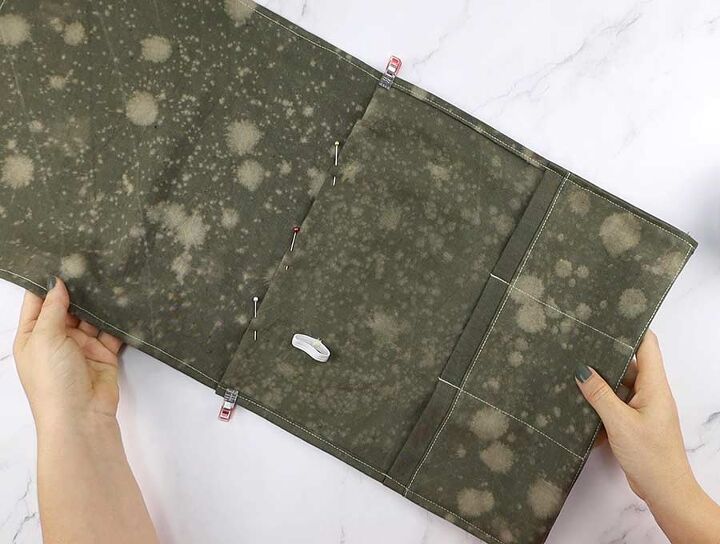
Attach the pocket
Measure out 13 inches from the short edge without the fold. Draw a line there, parallel to the short edge.
Set the pocket's long raw edge onto the line and stitch. Fold at the seam and fold the short edges in a bit. Press everything and sew all folded edges to the main fabric.
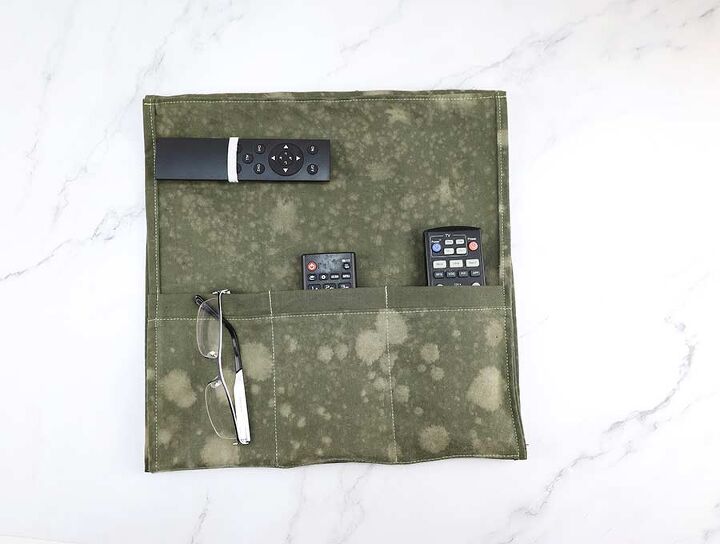
Divide the large pocket into multiple smaller ones with stitches. Sew the elastic above the pockets so that it can hold a remote.
Finish the holder
Fold the holder in half at the pocket's bottom line so that the pocket faces outward. Fold the edge above the pocket a bit and topstitch it. The holder is ready for action!
Enjoy your new remote control caddy! We'll post more articles like this soon so remember to stop by often. Feel free to leave your thoughts and suggestions in the comments section below, we love hearing your feedback.
Resources for this project:


Comments
Join the conversation
-
I used this idea for my grandsons’ bunk beds when they were elementary aged, tucking the excess fabric under the mattress, so the oldest (in the top bunk) had a place for his glasses and a book.
-
I've done something similar with the arm and top pieces that come with Lazy-Boy recliners. I folded the top piece and sewed it to the arm pieces, making 3 pockets for the remotes. I use upholstery pins to hold them in place.


Frequently asked questions
Have a question about this project?
I like it. I've been trying to find one I liked for my recliner but how does it stay put? I can't lift my recliner cushion off so maybe a small piece of PVC tubing or a fat dowel rod to keep it tucked between the arm and the non-removable cushion? I may have missed it if you answered that already.